Automotive Forensic Photography Class Topics (SAE C1729) – Part Two
Photography may be the most important and most often used tool in the inspection and analysis of any accident reconstruction, product liability, or testing project. As professionals, our photographs need to be accurate, good quality, consistent, and useful. The key to all four is not usually new gear, but to improve the photographer. New gear won’t help much if you haven’t mastered the gear you already have.
This class is designed to help you consistently make good, accurate, and useful photos—every day in all kinds of light. We don’t always get to choose the locations, conditions, and light, but we must come back with usable photos in all conditions.
My next SAE C1729 Photography for Accident Reconstruction, Product Liability, and Testing class: https://www.sae.org/learn/content/c1729/ will be in Orlando, FL, from May 5 through 7, 2026. Here is the second of two posts showing some examples from the topics we’ll be discussing during the class.
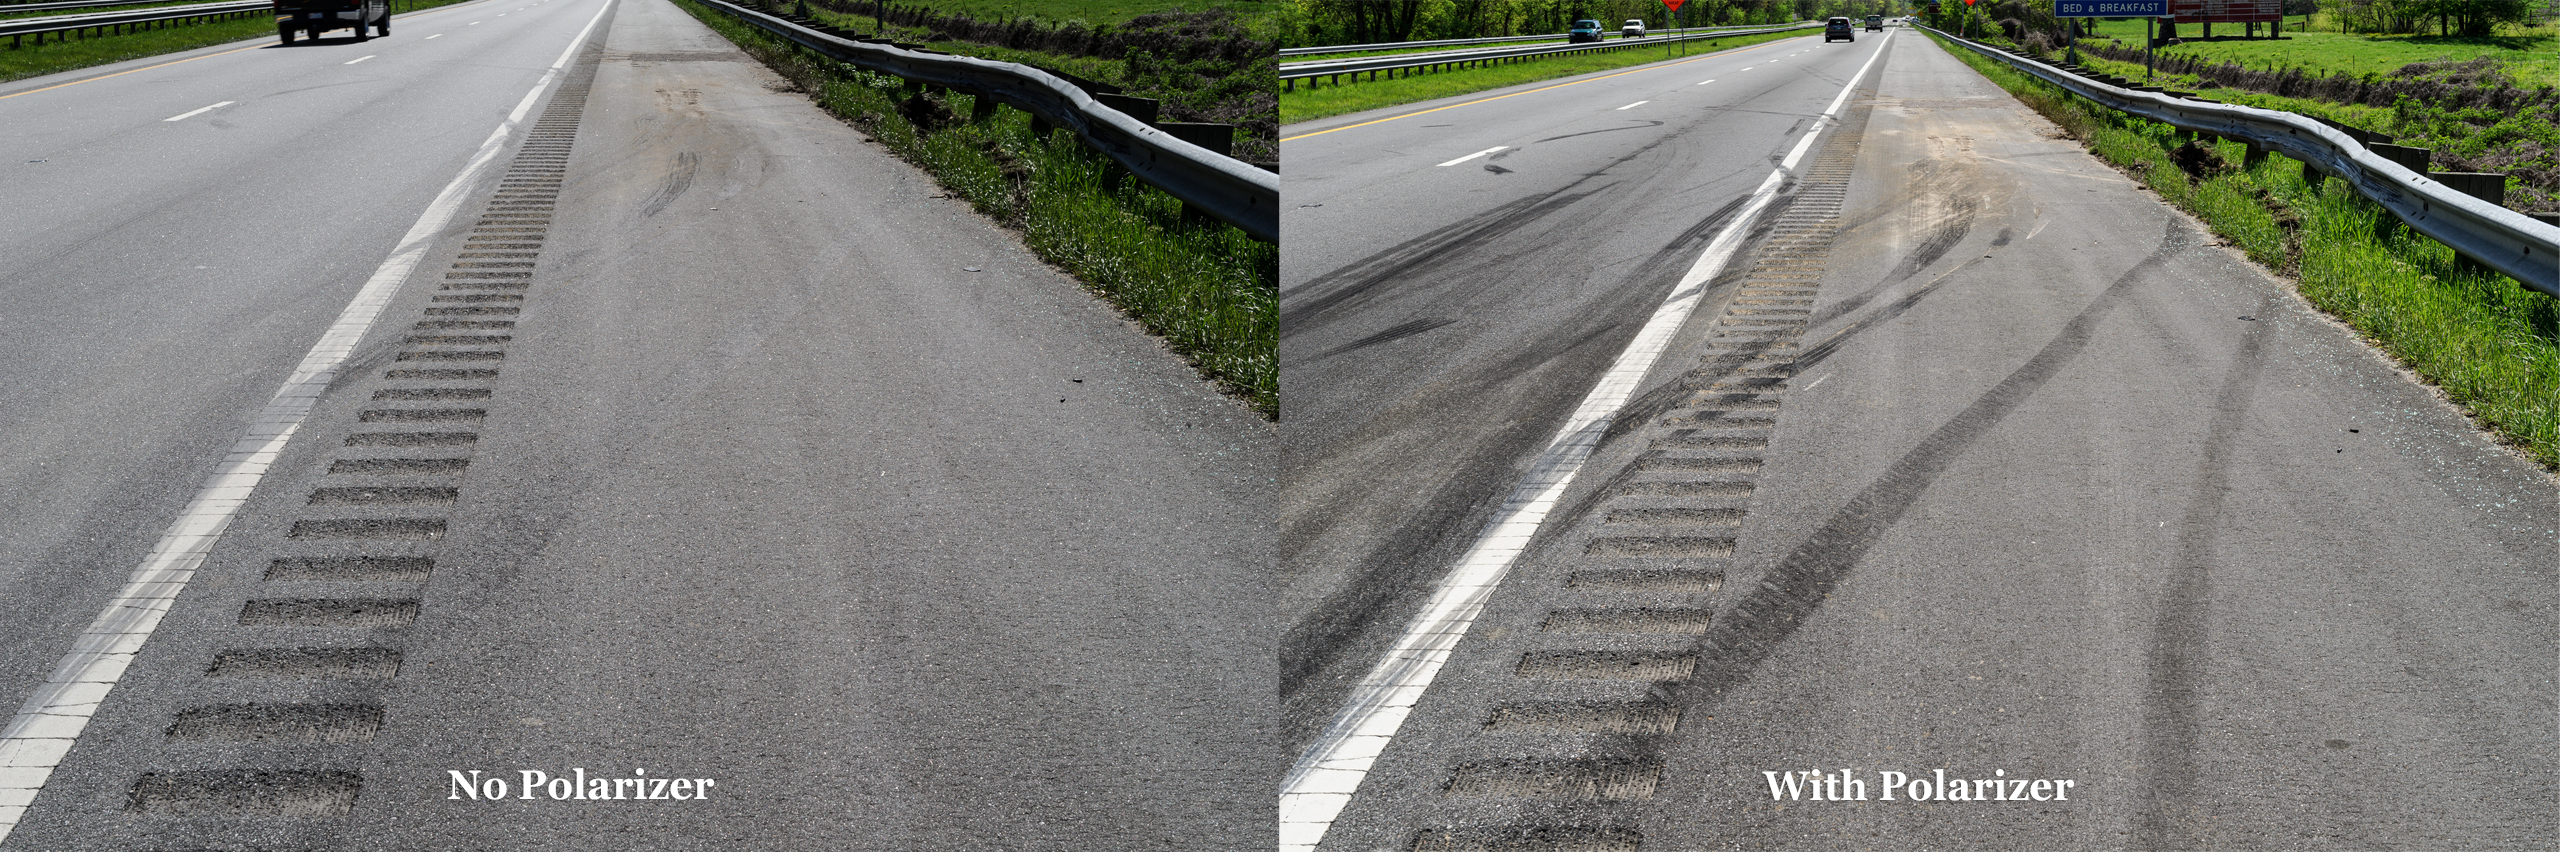
Tire Marks at Wreck Site with and without Polarizer
Both 1/80 sec, ISO 200 made using Nikon D3s with Nikon 24-70 mm f/2.8 lens at 50 mm. Left without polarizer f/14, 1/80, ISO 200. Right with polarizer f/11, 1/80, ISO 200. [Click on image to enlarge, then click on back arrow to return to this post.]Polarizer plus Fill Flash Bring Out Details in Car
Left image without flash or polarizer. Right image with both. Both images were made with Nikon D810 with 24-70 mm lens at 40 mm with exposure 1/60 sec, ISO 160, and f/13 (w/o) and f/10 (w/). [Click on image to enlarge, then click on back arrow to return to this post.]Polarizer plus Fill Flash Reveals Critical Detail
Left image with no flash or polarizer. Right image with flash & polarizer. Note white scrapes on LR fender of right image that are obscured by glare on left image. Both made with ZEISS 50 mm f/2 macro lens on Nikon D850 at f/11, 1/25, ISO 64. [Click on image to enlarge, then click on back arrow to return to this post.]Side Lighting from Sun Illuminates Textures Hidden by Shade
Sun brought out texture and detail at White Sands, NM. Made with Nikon Z 8 and 24-70 mm f/2.8 lens at 33 mm with exposure f/11, 1/125/ ISO 64. [Click on image to enlarge, then click on back arrow to return to this post.]Scaling and Matching Photos Each Made Exactly Square to Camera
By ensuring scales were perpendicular when photographing both the car & the truck (three months later), allowed matching of lug nuts and scratch patterns. Both car & truck photos made with Nikon Z 7ii with Nikon Z 50 mm macro lens at f/13, 1/15 sec, ISO 64. [Click on image to enlarge, then click on back arrow to return to this post.]Faded Police Paint Marks Enhanced in Photoshop
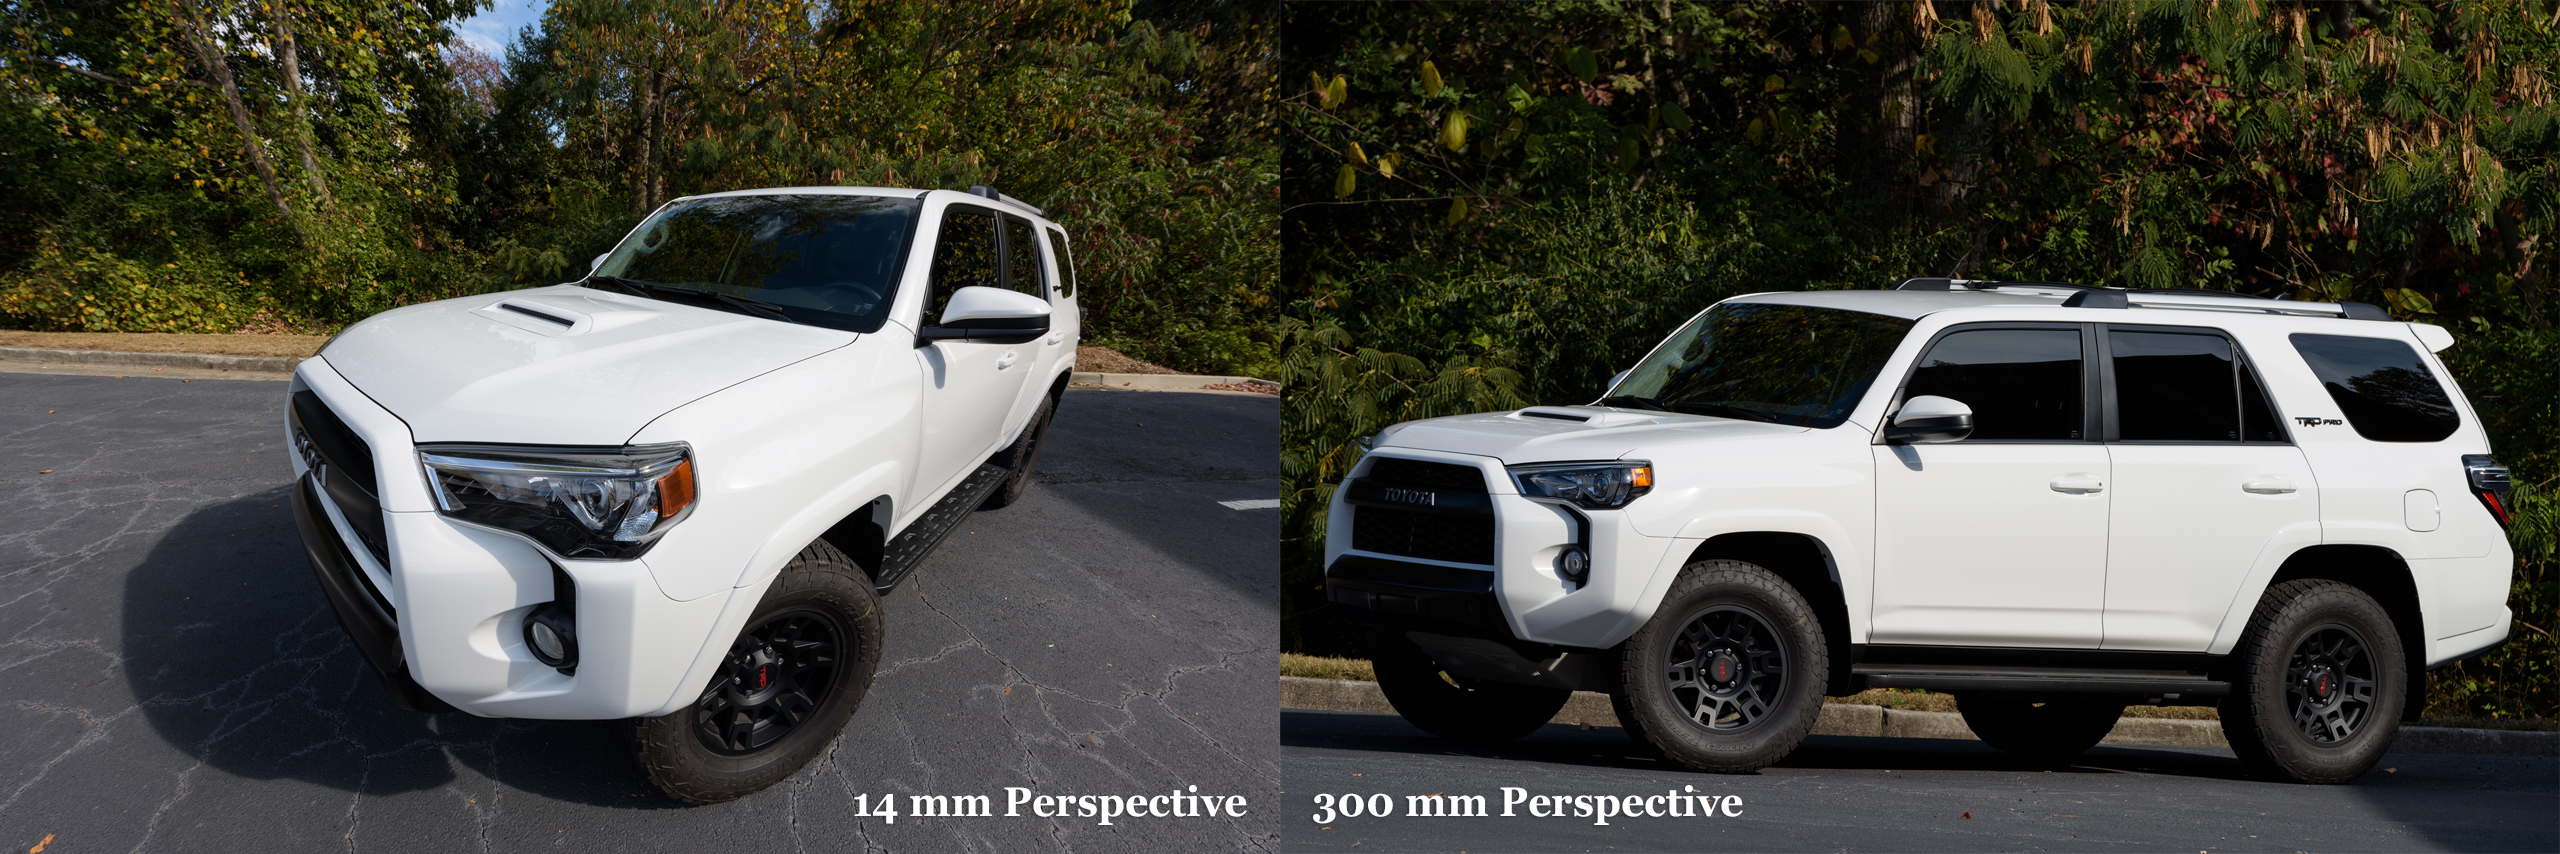
Police paint marks that had faded & were coated in road salt were enhanced in Photoshop. Made with Nikon D3 and Nikon 24-70 mm f/2.8 lens at 50 mm with exposure f/9m 1/80 sec, ISO 200. [Click on image to enlarge, then click on back arrow to return to this post.]Effects of Image Size and Viewing Distance on Perspective
A photo made with a super wide and another one made with a telephoto lens viewed from the same position shows distortion in each. But viewed from the proper viewing distance, they can both look “normal”. Both made with a Nikon D810 with exposure f/10, 1/80 sec, ISO 64.
Setup for Ensuring Measuring Gauge is Perpendicular to Camera
Using Wimberley The Plamp II to hold Alcoa rim wear gauge in proper position & perpendicular to camera for photograph. Both made with Nikon D850 & ZEISS 50 mm f/2 macro lens with exposure f/14, 1/60 sec, ISO 64. [Click on image to enlarge, then click on back arrow to return to this post.]Setting Custom White Balance with Flash for Proper Color
Screen shots of menu of Nikon Z 8 with Godox TT685Nii flash with Flash WB on left, then with custom (Preset) WB—with flash!—on right. [Click on image to enlarge, then click on back arrow to return to this post.]In the class, we will explore all of these—and more!—including demonstrations and hands-on photo sessions so these techniques become useful tools for your investigations and analyses. Please make sure to check out Part One of this post for some of the other topics we’ll cover: https://vadnaisengineering.com/2025/08/28/examples-from-my-sae-automotive-forensic-photography-class-c1729/
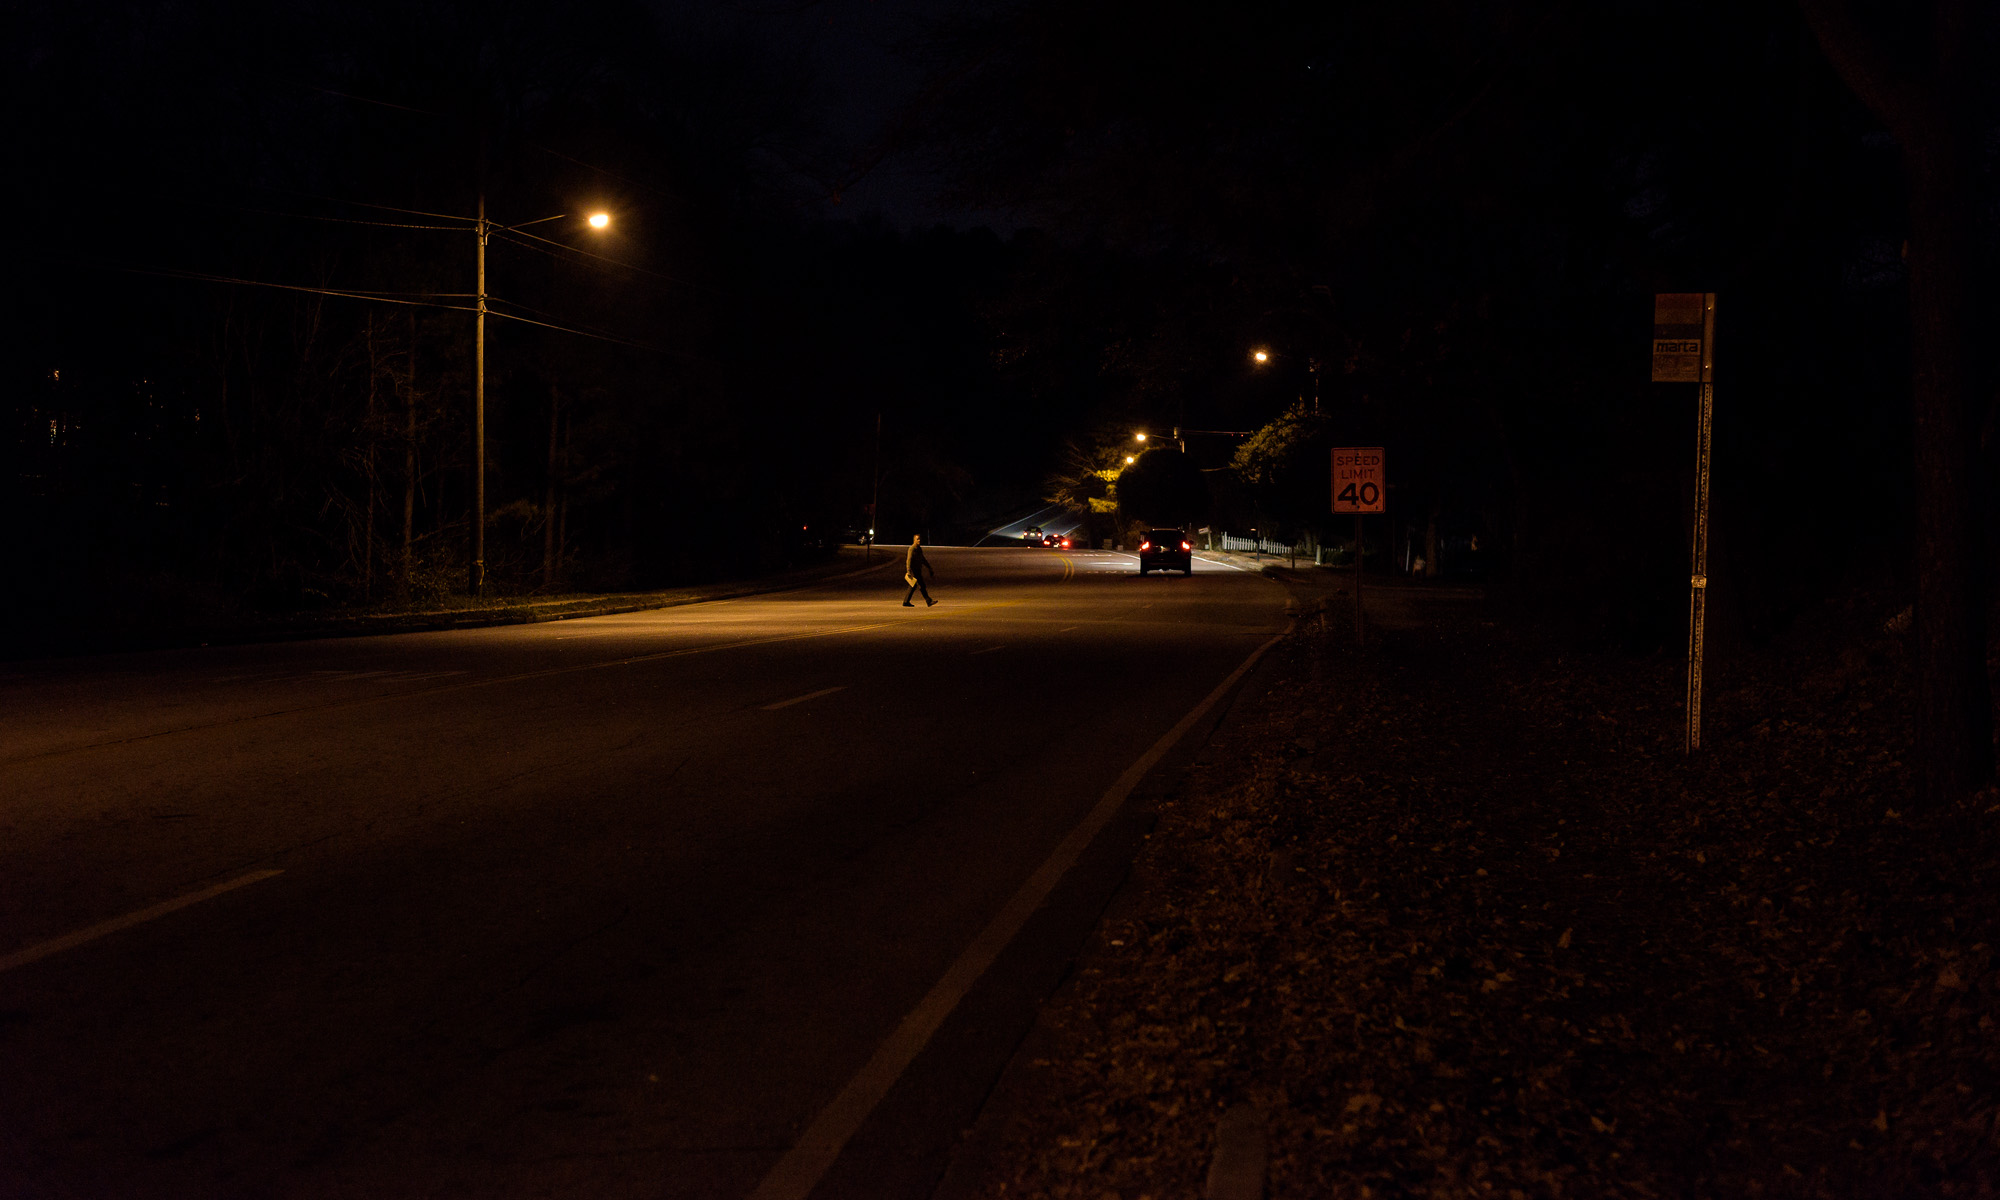
Most importantly, we’ll build a good foundation of exposure, focusing, and composition. All along we’ll emphasize the importance of proper tripod, polarizer, and flash (including multiple flash) use. Additionally, we’ll learn about both kinds of night photography (documenting evidence at night vs accurately recording ambient light). We’ll also see how to properly size an image and to determine the proper viewing distance for the proper perspective.
This first class offering of 2026 is conveniently offered in Orlando, which is easy to get to from anywhere in the country. Please let me know if you have any questions. I hope to see you there.