To Flash or Not To Flash

That is the question you’ll have to answer before making each vehicle, product, or component photograph.

To minimize noise and maximize dynamic range for any image, use the camera’s minimum ISO (it’s ISO 64 on my Nikon D850). For most tire, product, and vehicle component photos, you’ll also want to optimize depth of field (DOF). That requires stopping down the aperture to somewhere between f/11 and f/16. (Stopping down to f/22 or smaller will give you more DOF, but may result in softening due to diffraction.)

Exposure consists of aperture, shutter speed, and ISO. With minimum ISO and a small aperture already chosen, that leaves only shutter speed. The shutter speed will depend on how much light is available. To get enough light for a proper exposure, you can use all ambient light, flash only, or a combination of ambient and flash (often called fill flash).

Flash allows you to add the light you need to get a proper exposure, while maintaining a reasonable shutter speed. This is particularly important if you are handholding the camera. Way too many photographs are blurry because the shutter speed was too low. This can be true even with the image stabilization built into many cameras or lenses. Image stabilization helps some, but many times, component or even vehicle photos have to be made where light is insufficient for handholding.

For tires and other vehicle components, getting enough light to handhold a camera usually requires the use of flash. The alternative is putting the camera on a tripod to keep it steady during a long shutter speed.

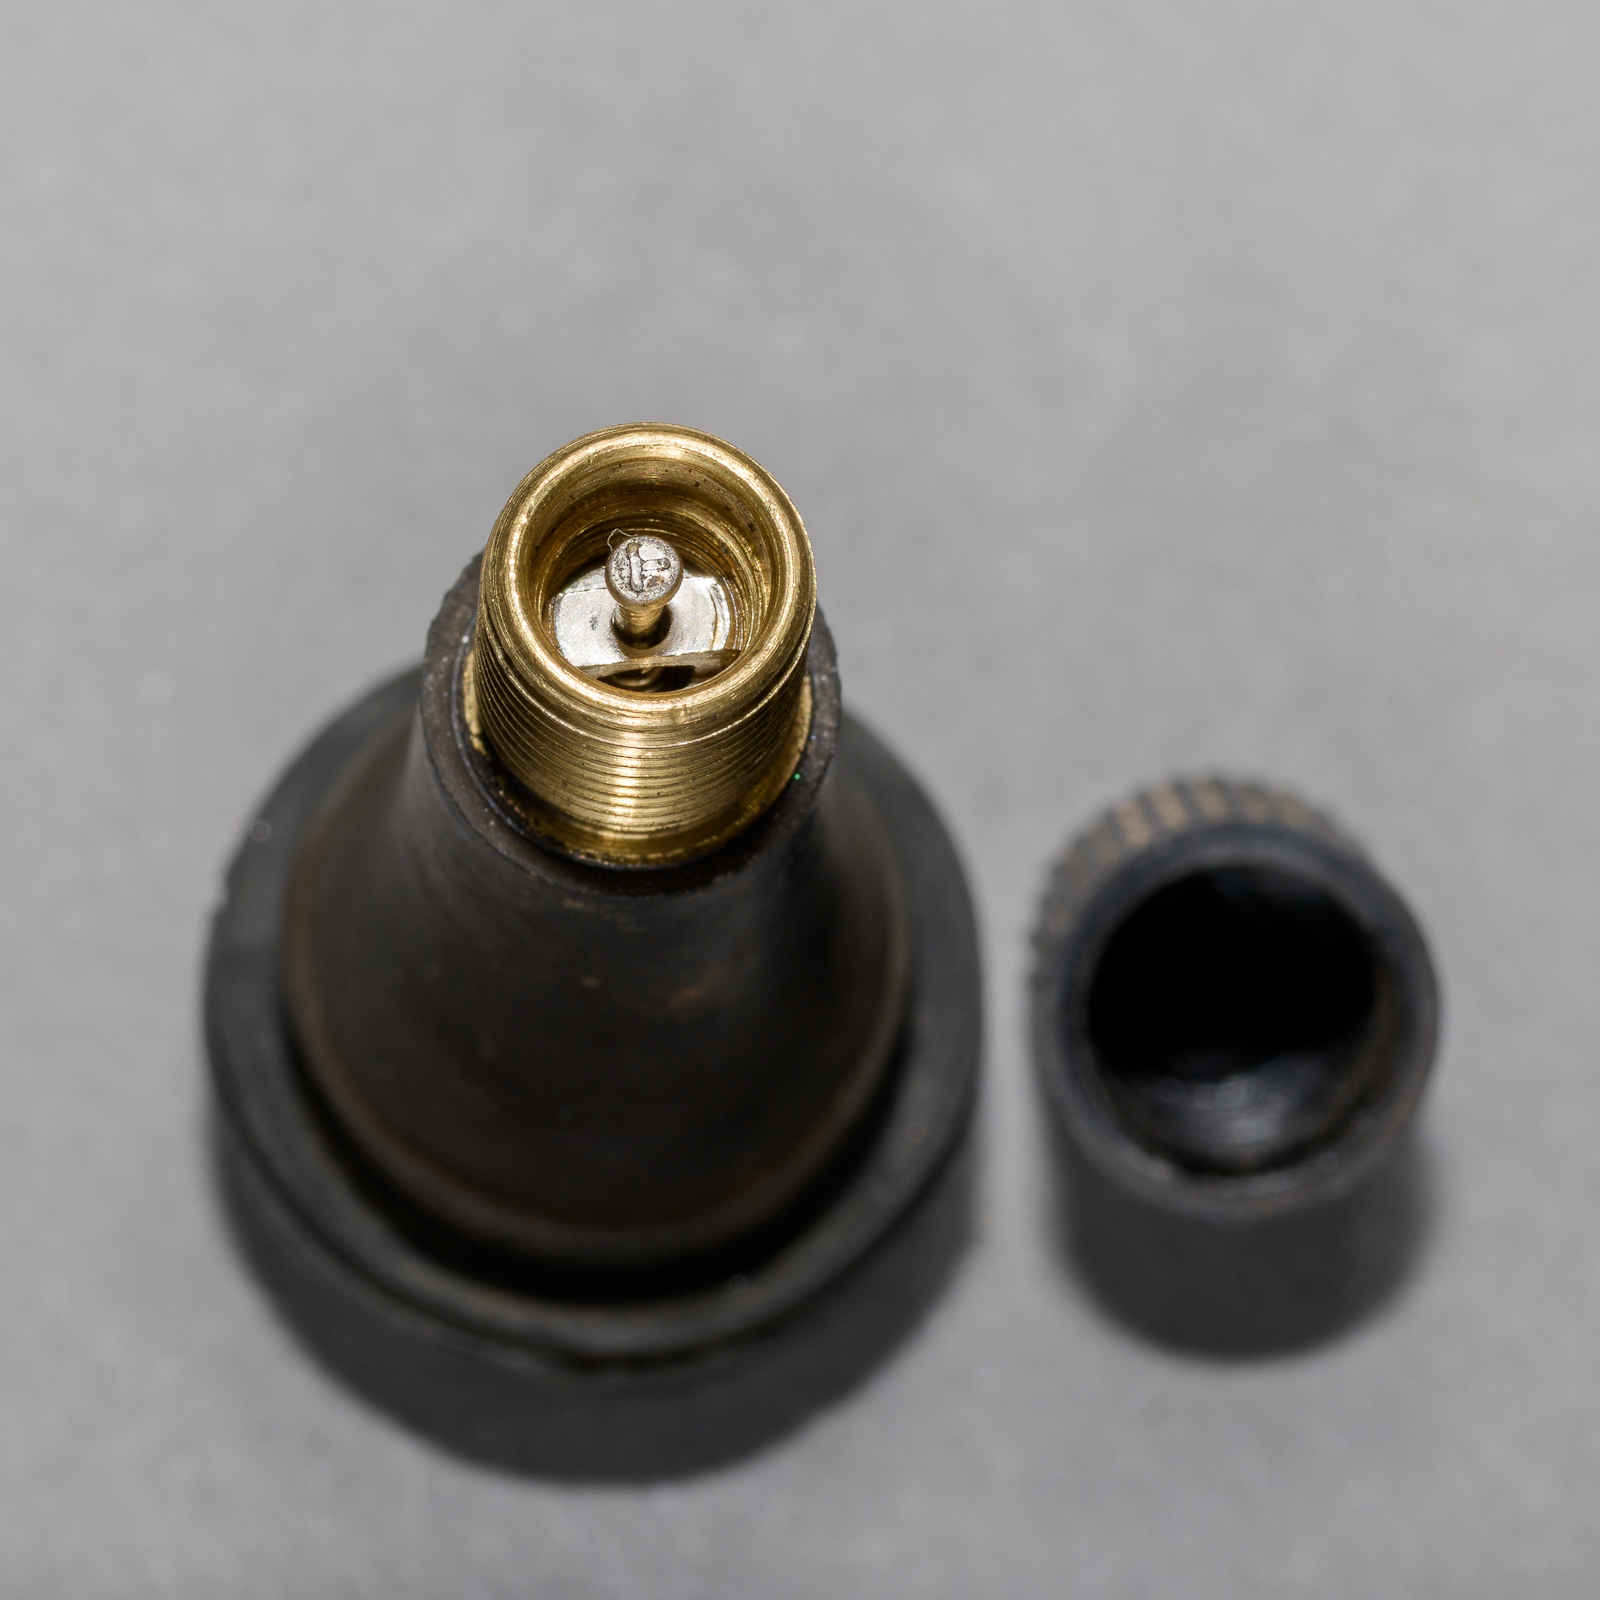
You can get the same overall exposure using a long shutter speed with ambient light only, using a combination of ambient light and flash, or using 100 percent flash. But the resulting image will look different. (Click on image to enlarge, then click on back arrow to return.)
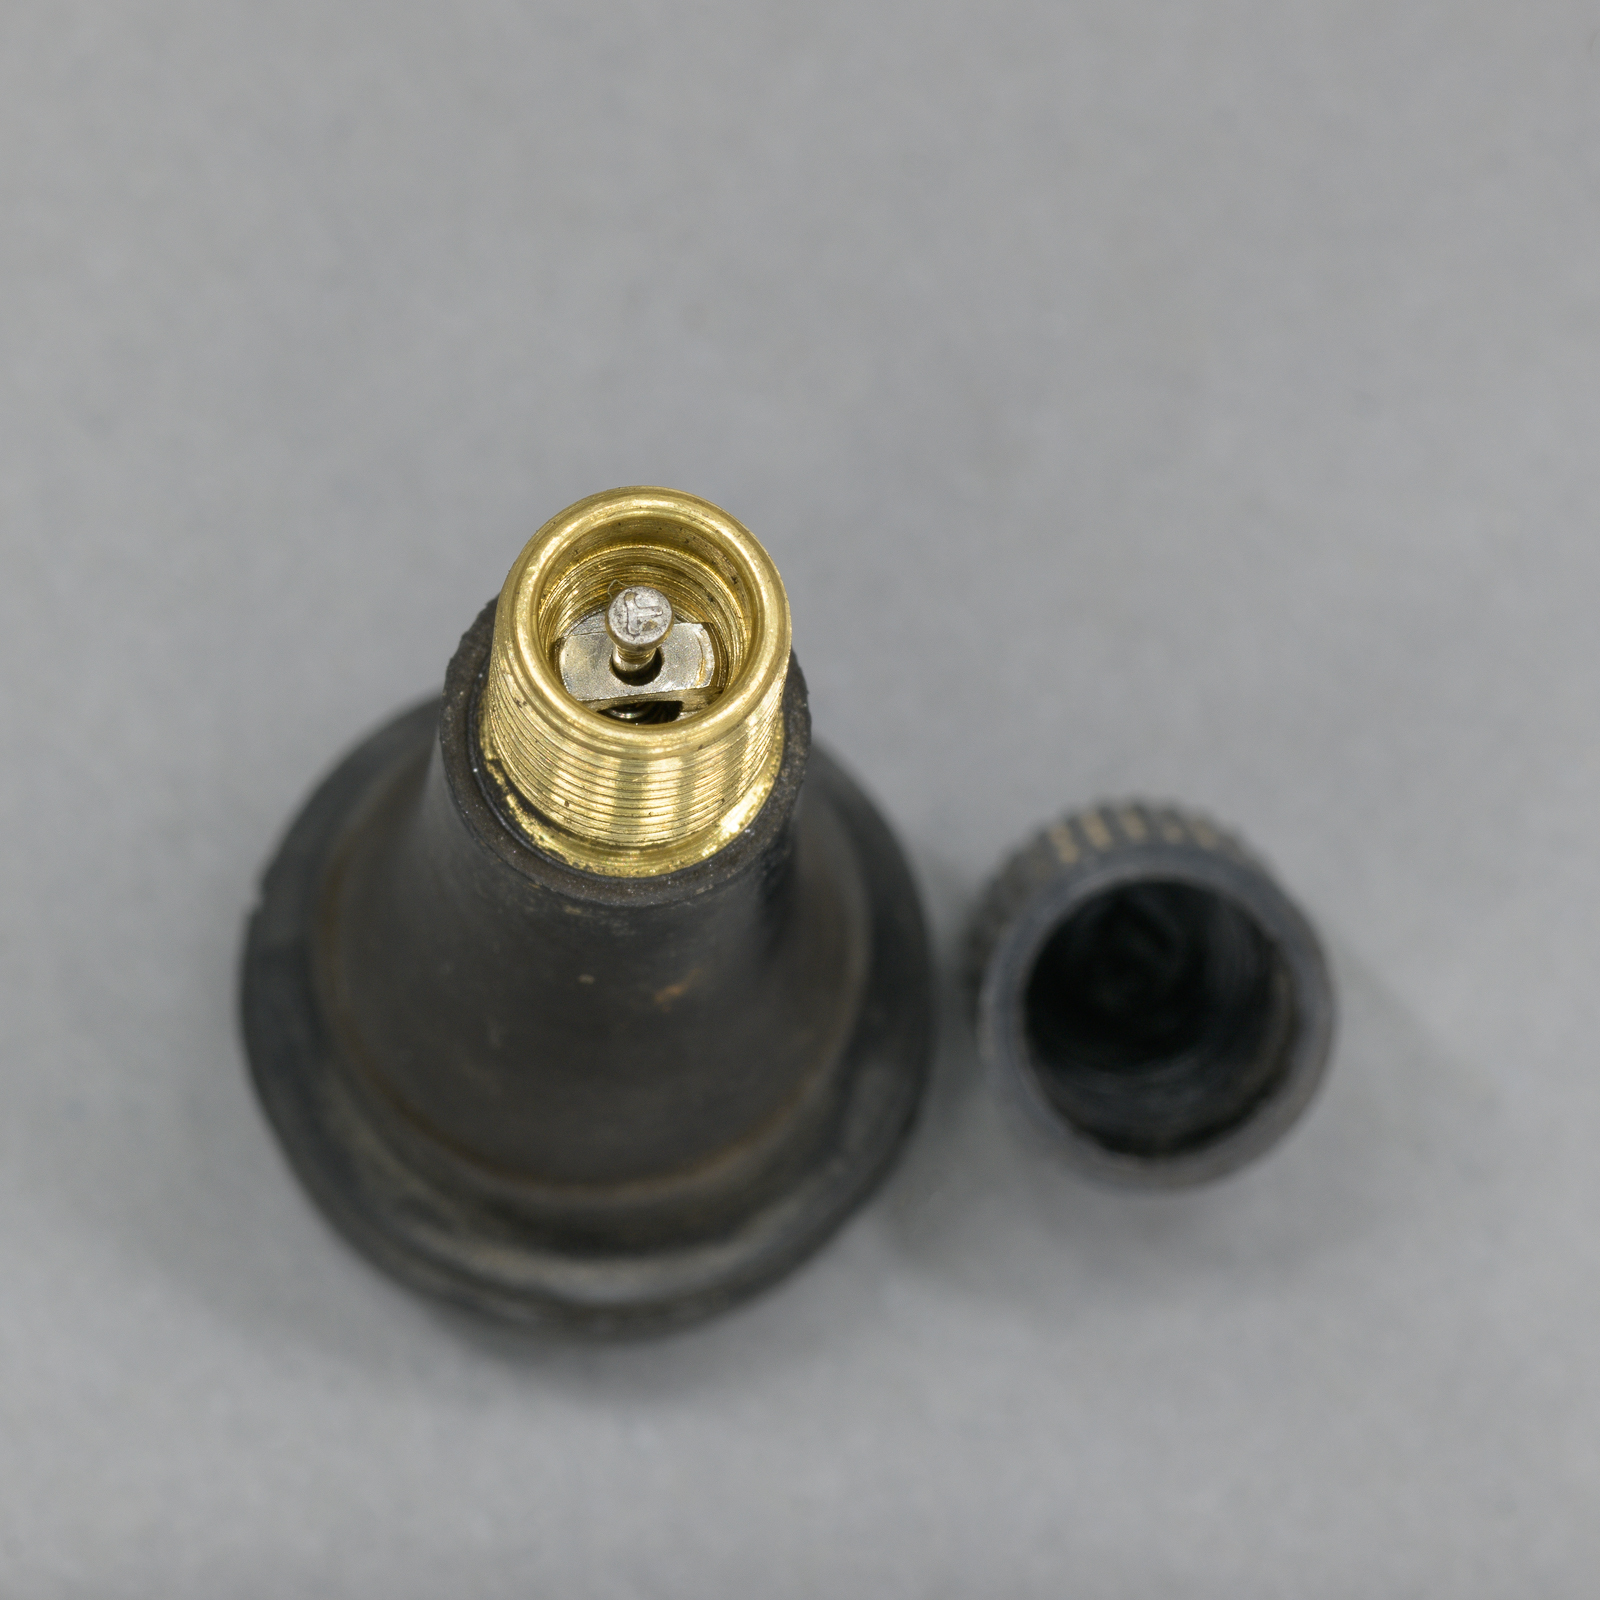
Valve Stem Ambient Light (No Flash). Exposure: f/16, 2.5 sec, ISO 64. (ZEISS 100 mm f/2 macro lens on Nikon D850.)
Valve Stem with Flash. Exposure: f/16, 1/60 sec, ISO 64. (ZEISS 100 mm f/2 macro lens on Nikon D850.)
In my studio lab, I have so many bright white LED shop lights some have said it looks like an operating room. Even with all that apparent light, I still either have to use flash or a very long shutter speed to properly expose an image.

Above are two images of a rubber valve stem. They were both made using my incredibly sharp ZEISS Milvus 100mm macro lens mounted on my Nikon D850, which was mounted on my rolling studio stand. I focused the ZEISS manual focus lens using Live View at 100 percent.

Both images were made at ISO 64 at an aperture of f/16. The image without the flash required a shutter speed of 2.5 seconds, which was obviously not handholdable. With an image completely illuminated by flash, the shutter speed doesn’t contribute to the exposure. (Shutter speed does contribute if the image is a combination of ambient and flash.) In the flash image below, the shutter speed was 1/60 second.

Both images are properly exposed, but they look very different. The image with flash has more contrast, which gives more of a three-dimensional appearance, where the ambient (no flash) image has more even light. When sharp and properly exposed, there’s no right or wrong to flash versus ambient light, but be aware there can be a profound difference between them.
 

Truck Acceleration SAE Technical Papers

In March 2016, friends and colleagues Wes Grimes (http://cea-az.com/), Greg Wilcoxson (http://www.wilcoxsonconsulting-llc.com/), and I conducted a series of heavy truck acceleration tests using tractors with automated manual transmissions (AMTs) in full auto mode. In auto mode, the transmission chose all shift points without input from the driver.

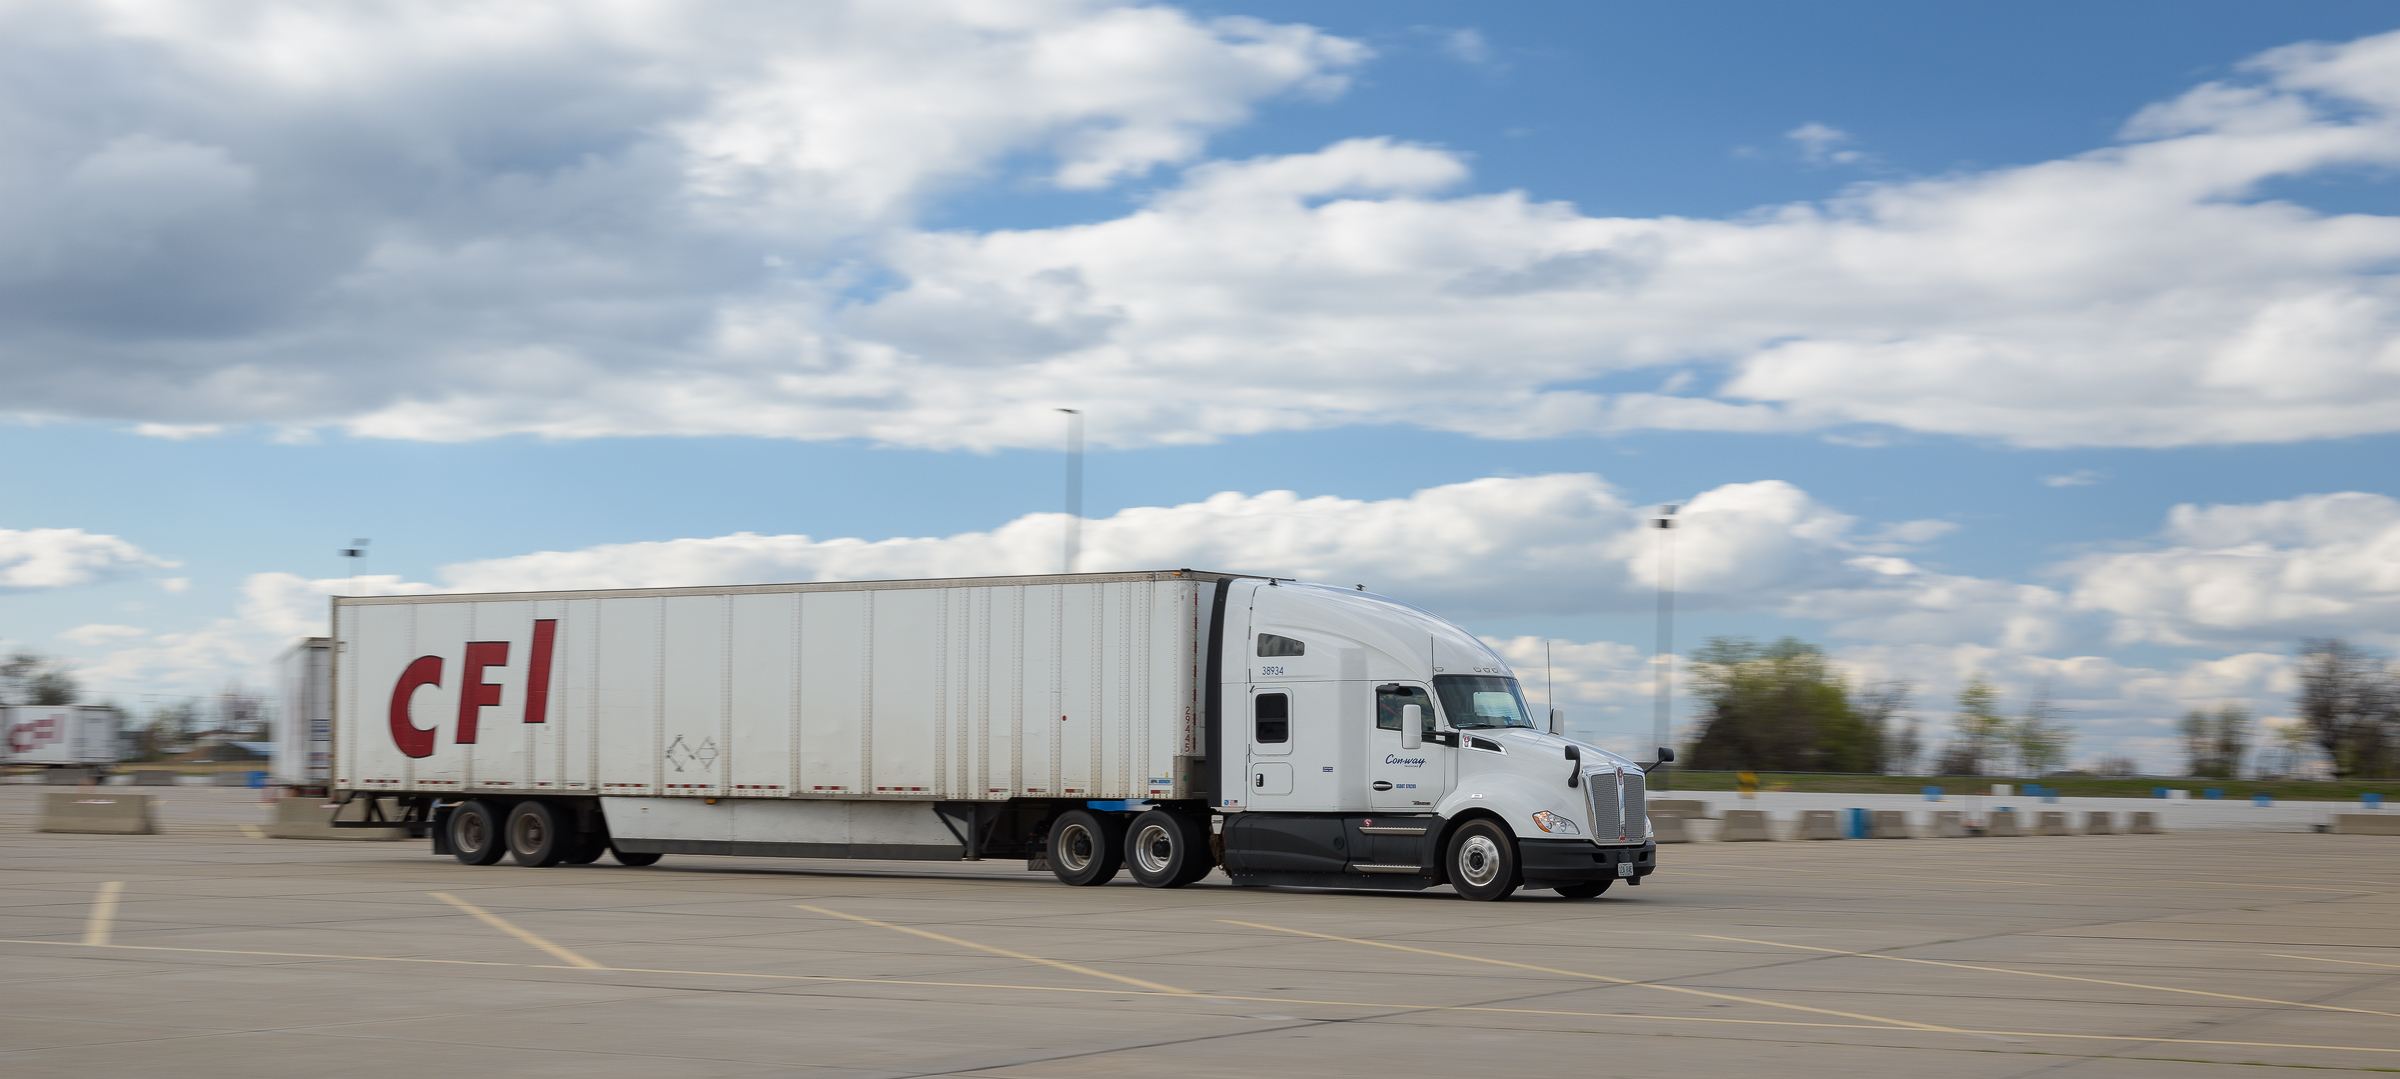
These were straight-line acceleration tests from a stop using two different truck tractors and two different test drivers. For each truck and driver combination, we ran tests with empty, partially loaded, and fully loaded van semitrailers. The drivers were asked to do half of the runs at what they felt was a “normal” acceleration. The other half of the test runs were at full throttle acceleration. There was a slight slope along the 300-foot test distance, so runs were made in both upslope and downslope directions. Our tests showed the slope, load, and throttle position all influenced when the transmission chose to shift. (Click on image to enlarge, then click on back arrow to return.)

Panning during Kenworth Acceleration Test (ZEISS 50 mm f/2 macro lens on Nikon D810.)
Technical papers describing the results of both test series have now completed the peer review process and have been published by SAE. We presented these papers at SAE’s World Congress Experience WCX 17 in Detroit on Wednesday, April 5, 2017. SAE has these paper available through these links:

2016 Kenworth T680: http://papers.sae.org/2017-01-1418/

2016 Freightliner Cascadia: http://papers.sae.org/2017-01-1426/

Special thanks to Contract Freighters, Inc. (CFI) and XPO Logistics for the generous use of their tractors, trailers, loads, scales, facilities, and test drivers at their facility in Joplin, MO.

Effects of Wide Angle Lens on Vehicle Photo

Often, a vehicle we need to photograph will be crammed in between other vehicles or in a small garage or storage area. I’ve encountered the same problem when trying to photograph a whole tire in a small conference room. A wide angle lens then becomes necessary to capture an overall photo in a single frame. But doing so will inevitably cause the vehicle or tire to appear distorted. (Click on image to enlarge, then click on back arrow to return.)

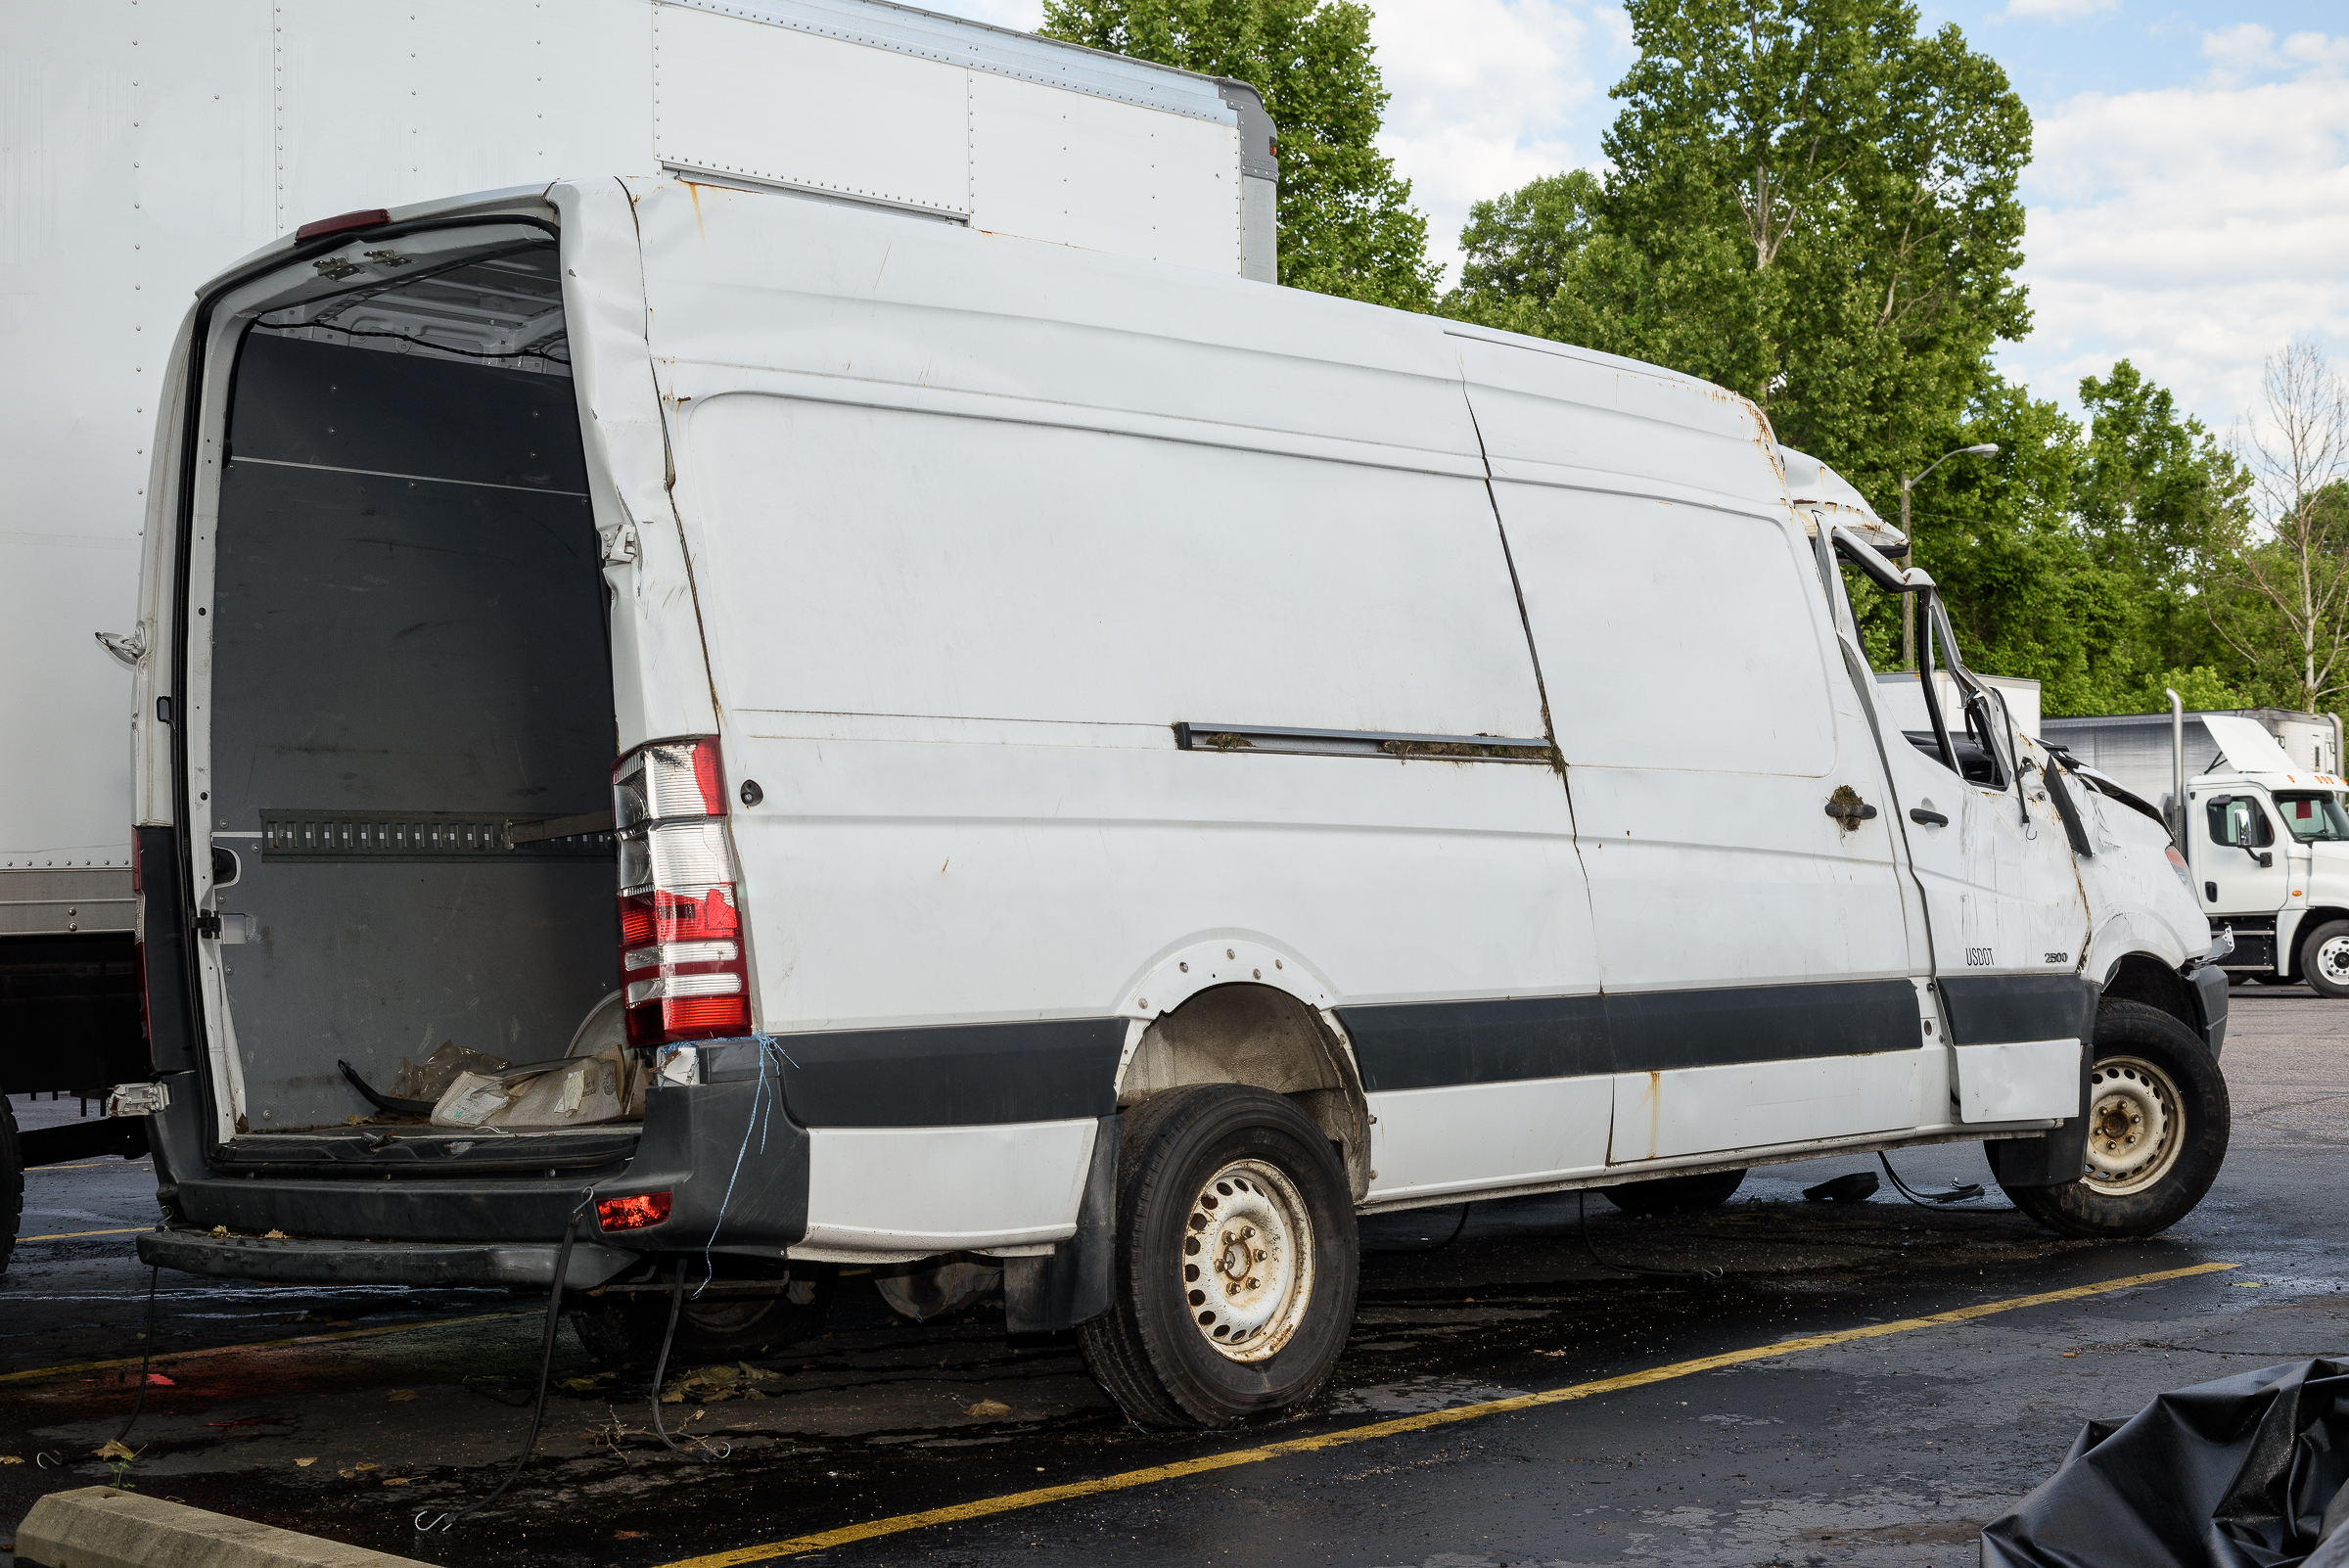
Van with Normal 50 mm Lens. (ZEISS 50 mm f/2 macro lens on Nikon D810.)
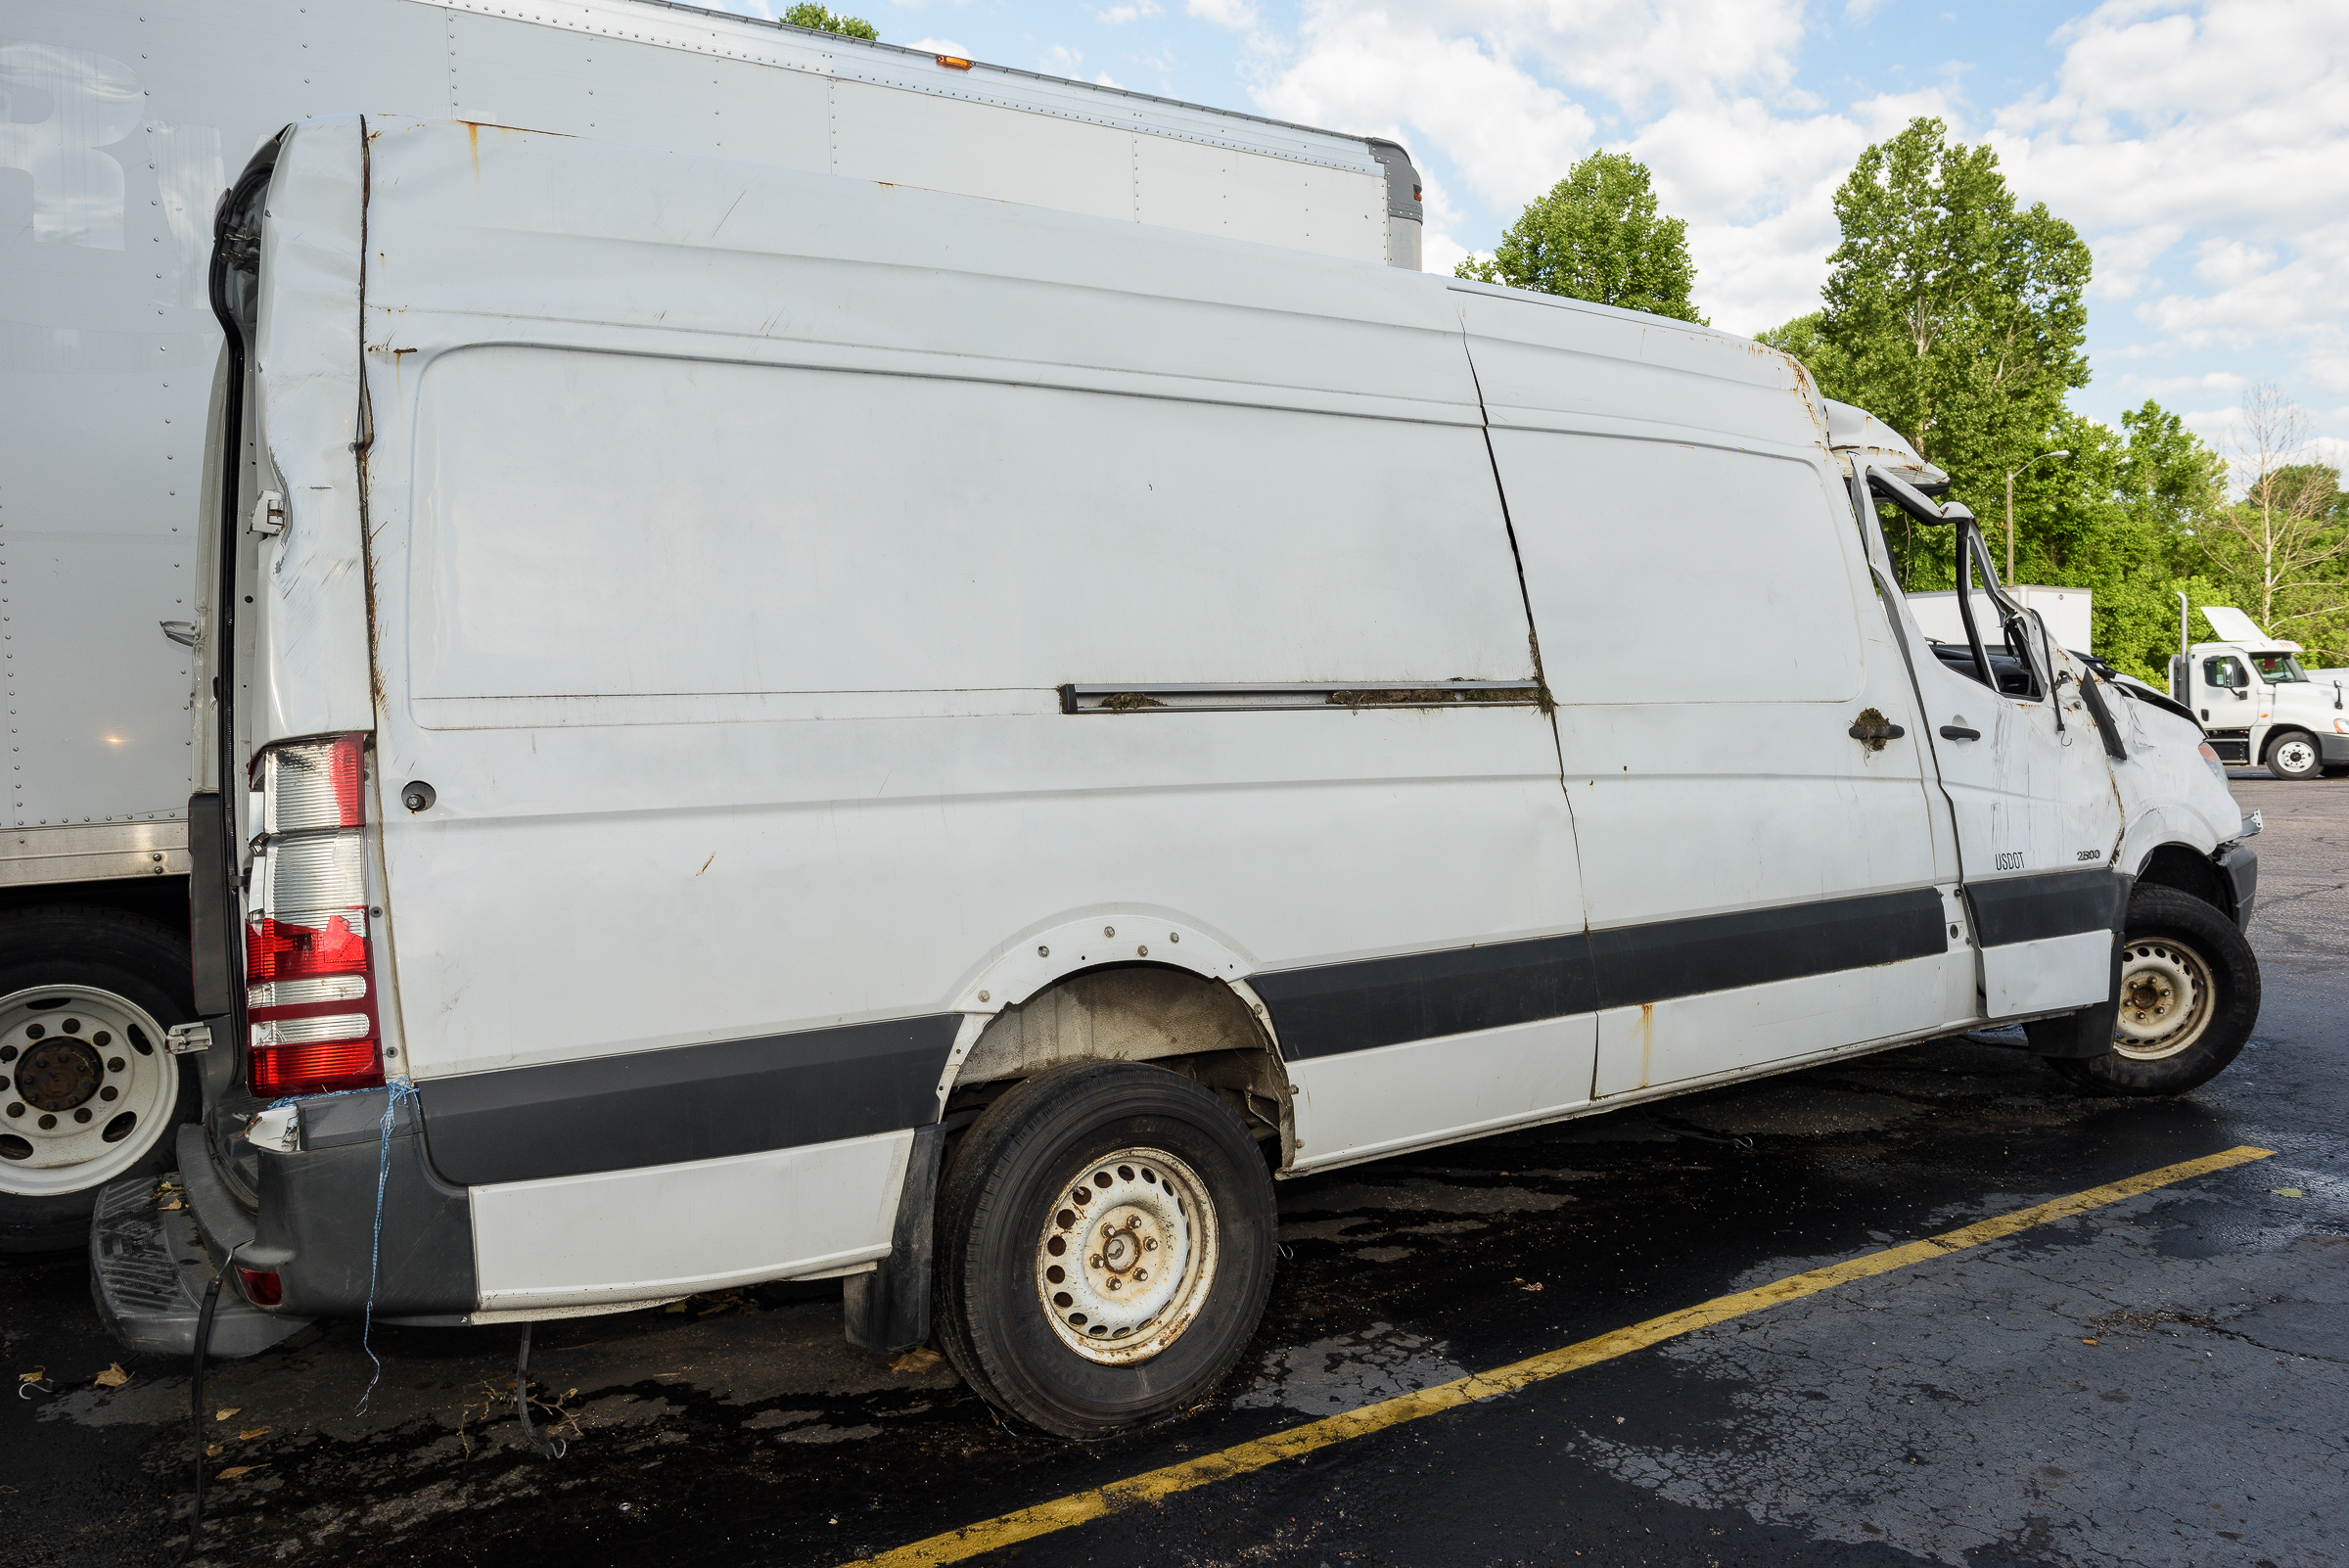
Van with Wide Angle Lens. (ZEISS 25 mm f/2 lens on Nikon D810.)
These two images show the same van, but the top one was made with a ZEISS 50 mm lens, while the bottom one was with a ZEISS 25 mm lens. To fill the frame with the van, I made the photo with the 25 mm lens much closer to the van than with the 50 mm lens. The photograph made with the 25 mm lens looks like the van was the long wheelbase version while the 50 mm photo looks like it had the short wheelbase. This closer distance to the subject caused the wide angle lens to stretch the appearance of the van.

The best solution is to try to capture as much of the subject as possible with a lens as close to a 50 mm “normal” lens as possible. This might entail getting a higher vantage point, or shooting between obstacles. When that’s not possible, take the wide angle shot, then normal lens shots of parts of your subject.

Other effects of using wide, telephoto, and normal focal lengths for vehicles, accident sites, and for tires will be discussed in future posts.

The Importance of Quality Photographs

How many times have you looked at a series of photographs but have been unable to find a single one that is clear enough to provide the evidence you need to address a specific issue? 

Unfortunately, regardless of the source, many of the photographs you encounter during the investigation of an accident or a product failure are likely mediocre at best, and completely useless at worst. Taking care to make decent photographs applies equally to consulting experts, police agencies, insurance adjusters, and law firm investigators. You don’t have to become a professional photographer (although many of you are getting paid for making photos during your work!), but there are fairly simple things you can do to make your photographs more useful.

At more than one inspection, the subject of making photographs has come up. Quite a few times I’ve heard, “Well, my photos aren’t great, but they’ll be good enough.” Do you treat your measurements, analysis, or reports the same way: “They’re not exactly right, but close enough”?

Some of the all-to-common problems are: blur from camera shake; poor focusing; inappropriate lens focal lengths; bad composition; bad camera menu settings; bad lighting; and incorrect exposure. Close-up photographs are often essential, but have their own additional potential issues.

Fortunately, almost every one of these photo faults is easy to correct with a little care and a little knowledge. Even used on automatic, most cameras and flashes today are incredibly accurate for 95% of the photographic situations you’re likely to face–if you are careful handling your camera. But even the most advanced technology can’t overcome carelessness.

Rather than making this into one giant post, I will be posting a number of separate articles addressing the problems I’ve mentioned above, plus some other photographic issues. In the meantime, remember it’s worth taking the time to make the best photos you can. After all, if you’re not going to try to take good, usable photographs, why bother taking them at all?


Don’t Move That Truck!

After a truck has been involved in a wreck, driving it even a couple feet at the crash scene without first disconnecting the vehicle speed sensor (VSS) will almost certainly destroy any last stop data recorded by the Heavy Vehicle Event Data Recorder (HVEDR), whether it is an Engine Control Module (ECM), an Electronic Control Unit (ECU), or some combination. This loss of digital evidence has often been cited as evidence spoliation, which can have serious repercussions.

This situation is easy to avoid by locating the speed sensor near the transmission output shaft, and disconnecting the electrical plug from the speed sensor. Let the plug hang free. The truck many then be driven or towed without danger of overwriting and losing important data.

It is important to make this common knowledge for truck drivers, wrecker drivers, investigating police officers, and truck service and maintenance personnel. This information can be disseminated through training classes and service bulletins. Labels on trucks near the VIN, near the toll-free number decal for the trucking or adjusting company, and on the accident packet can also help at the crash scene. Here’s a suggested label:

After a crash, do not drive or move vehicle at all without disconnecting vehicle speed sensor.


Out of Service (OOS) Brake Defects and Brake Force Calculations

Various CVSA (Commercial Vehicle Safety Alliance) Out of Service (OOS) violations may be found when inspecting heavy trucks. These can be maintenance or safety items that fail to meet the criteria in Appendix G of Subchapter B of the FMCSR (Federal Motor Carrier Safety Regulations) (40 CFR §396.17). This post will focus on brake issues only.

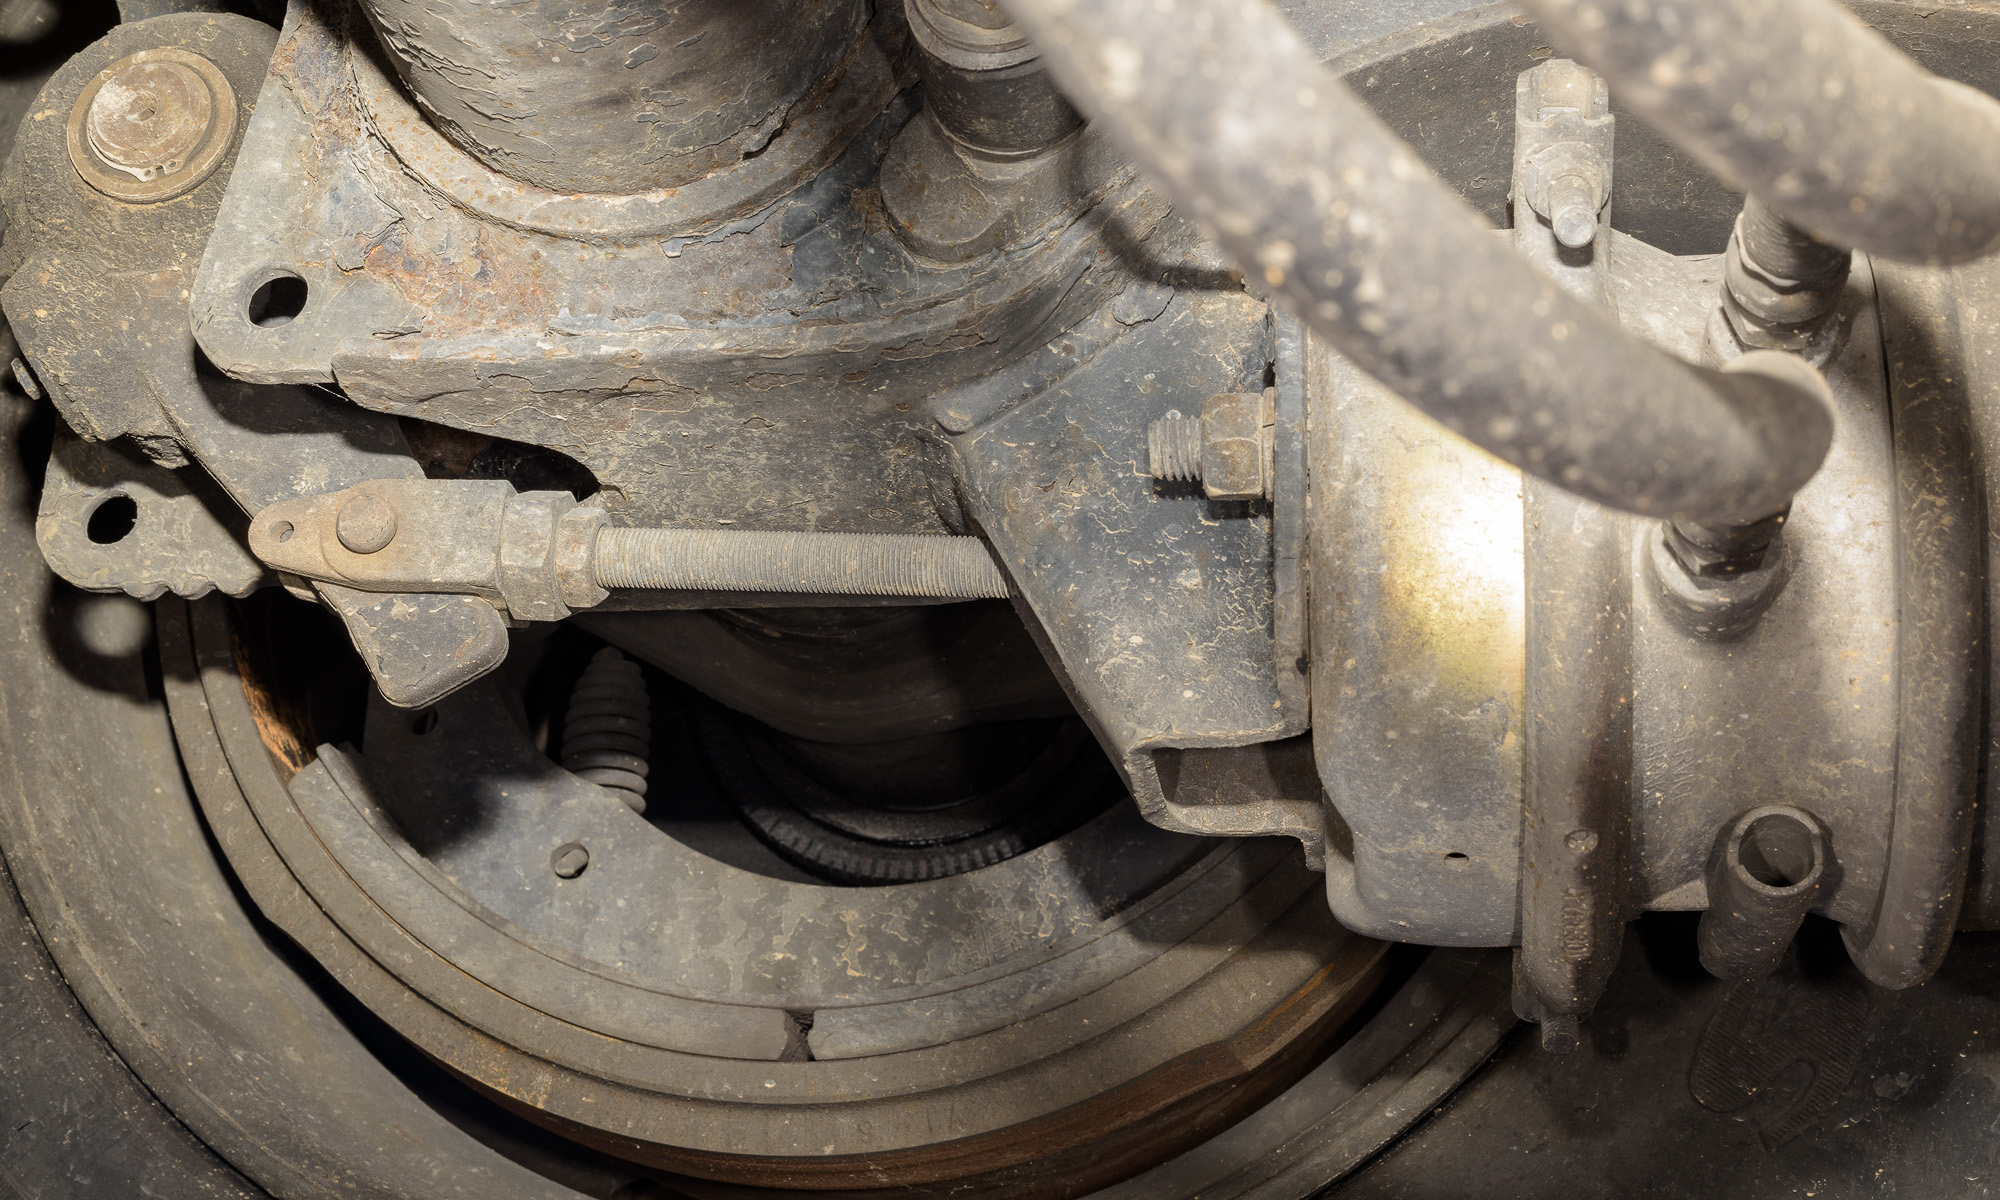
CVSA uses the term “defective” to denote a brake condition that does not meet specific criteria. CVSA declares a vehicle OOS if twenty percent of the brakes are defective. A common three axle tractor with a two axle semi-trailer will have ten brakes total. Twenty percent of ten brakes means the truck would be put OOS if two brake defects were found. (Click on image to enlarge, then click on back arrow to return.)


CVSA brake defects often result from inadequate maintenance. One important purpose of a CVSA inspection is to catch maintenance issues before they adversely affect the stopping ability of the truck. While it is essential to properly maintain vehicles for safe operation, the presence of one or more OOS brake defects does not necessarily mean the braking ability of the truck was compromised at the time of the accident. So there are two separate, but related issues: -1- Were there any problems with the truck? -2- Did any of those problems affect the truck’s ability to stop during this particular incident? Continue reading “Out of Service (OOS) Brake Defects and Brake Force Calculations”