Deprecated: Function WP_Dependencies->add_data() was called with an argument that is deprecated since version 6.9.0! IE conditional comments are ignored by all supported browsers. in /home/vadnaise/public_html/wp-includes/functions.php on line 6131
Deprecated: Function WP_Dependencies->add_data() was called with an argument that is deprecated since version 6.9.0! IE conditional comments are ignored by all supported browsers. in /home/vadnaise/public_html/wp-includes/functions.php on line 6131
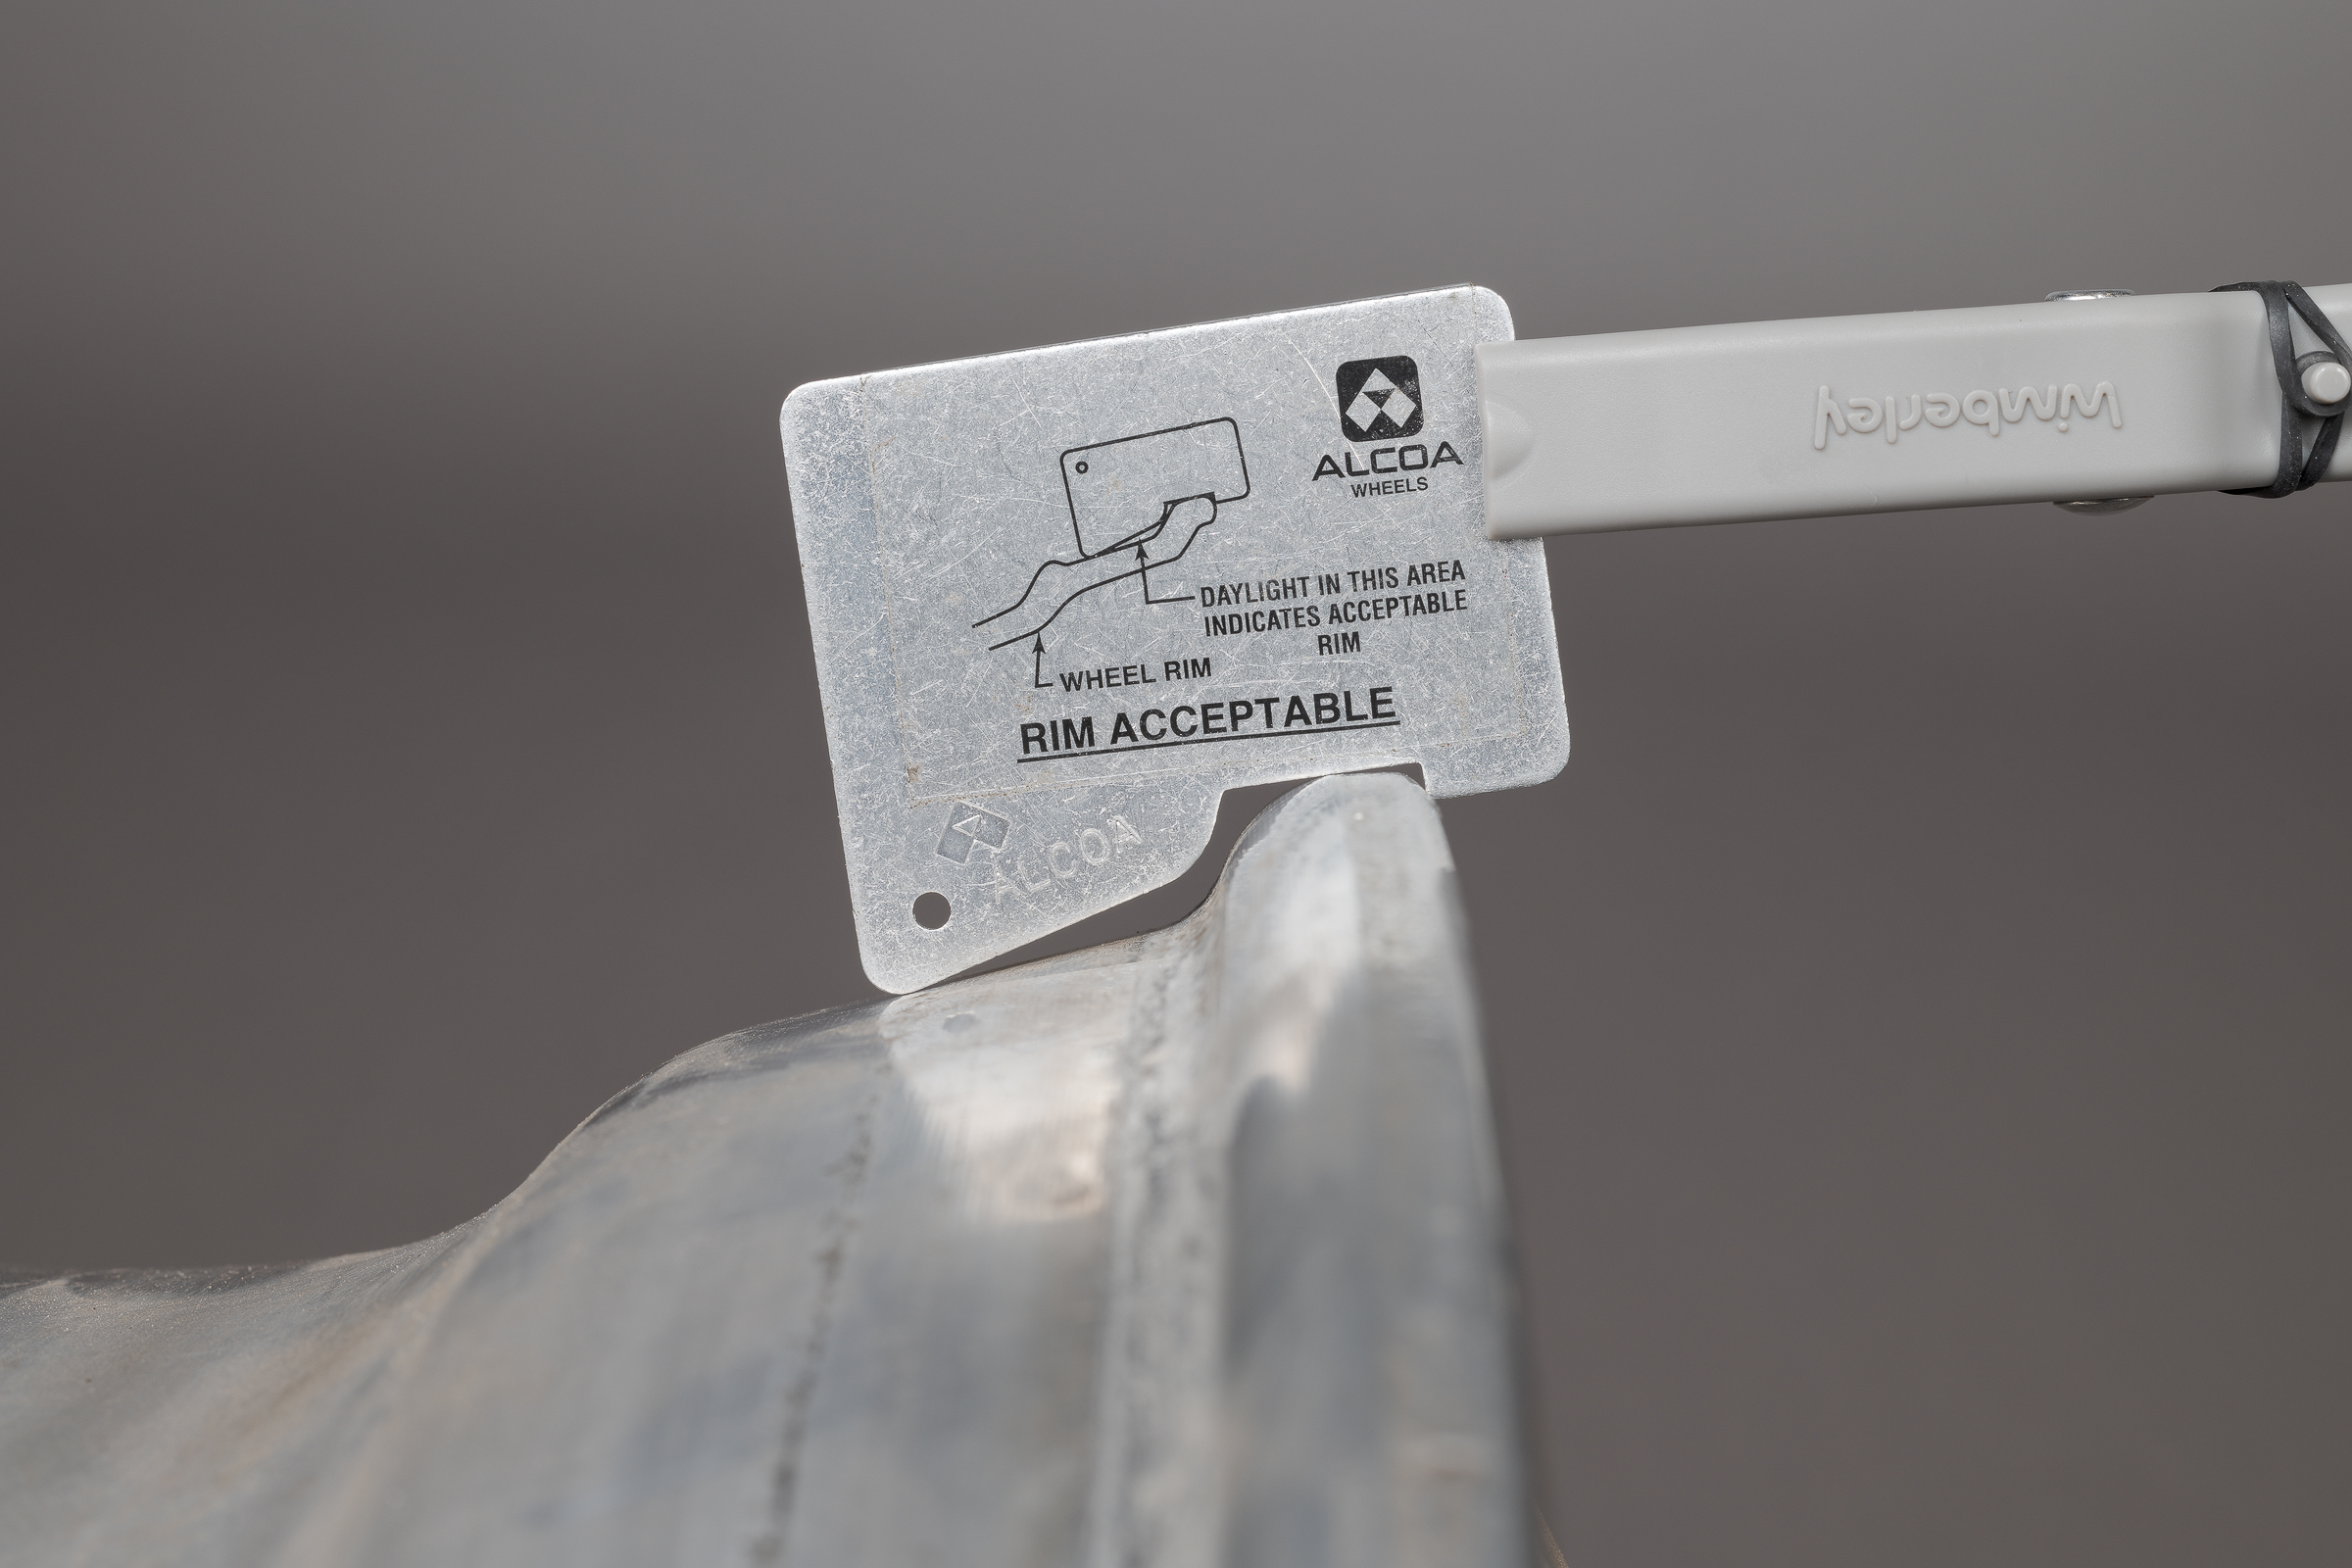
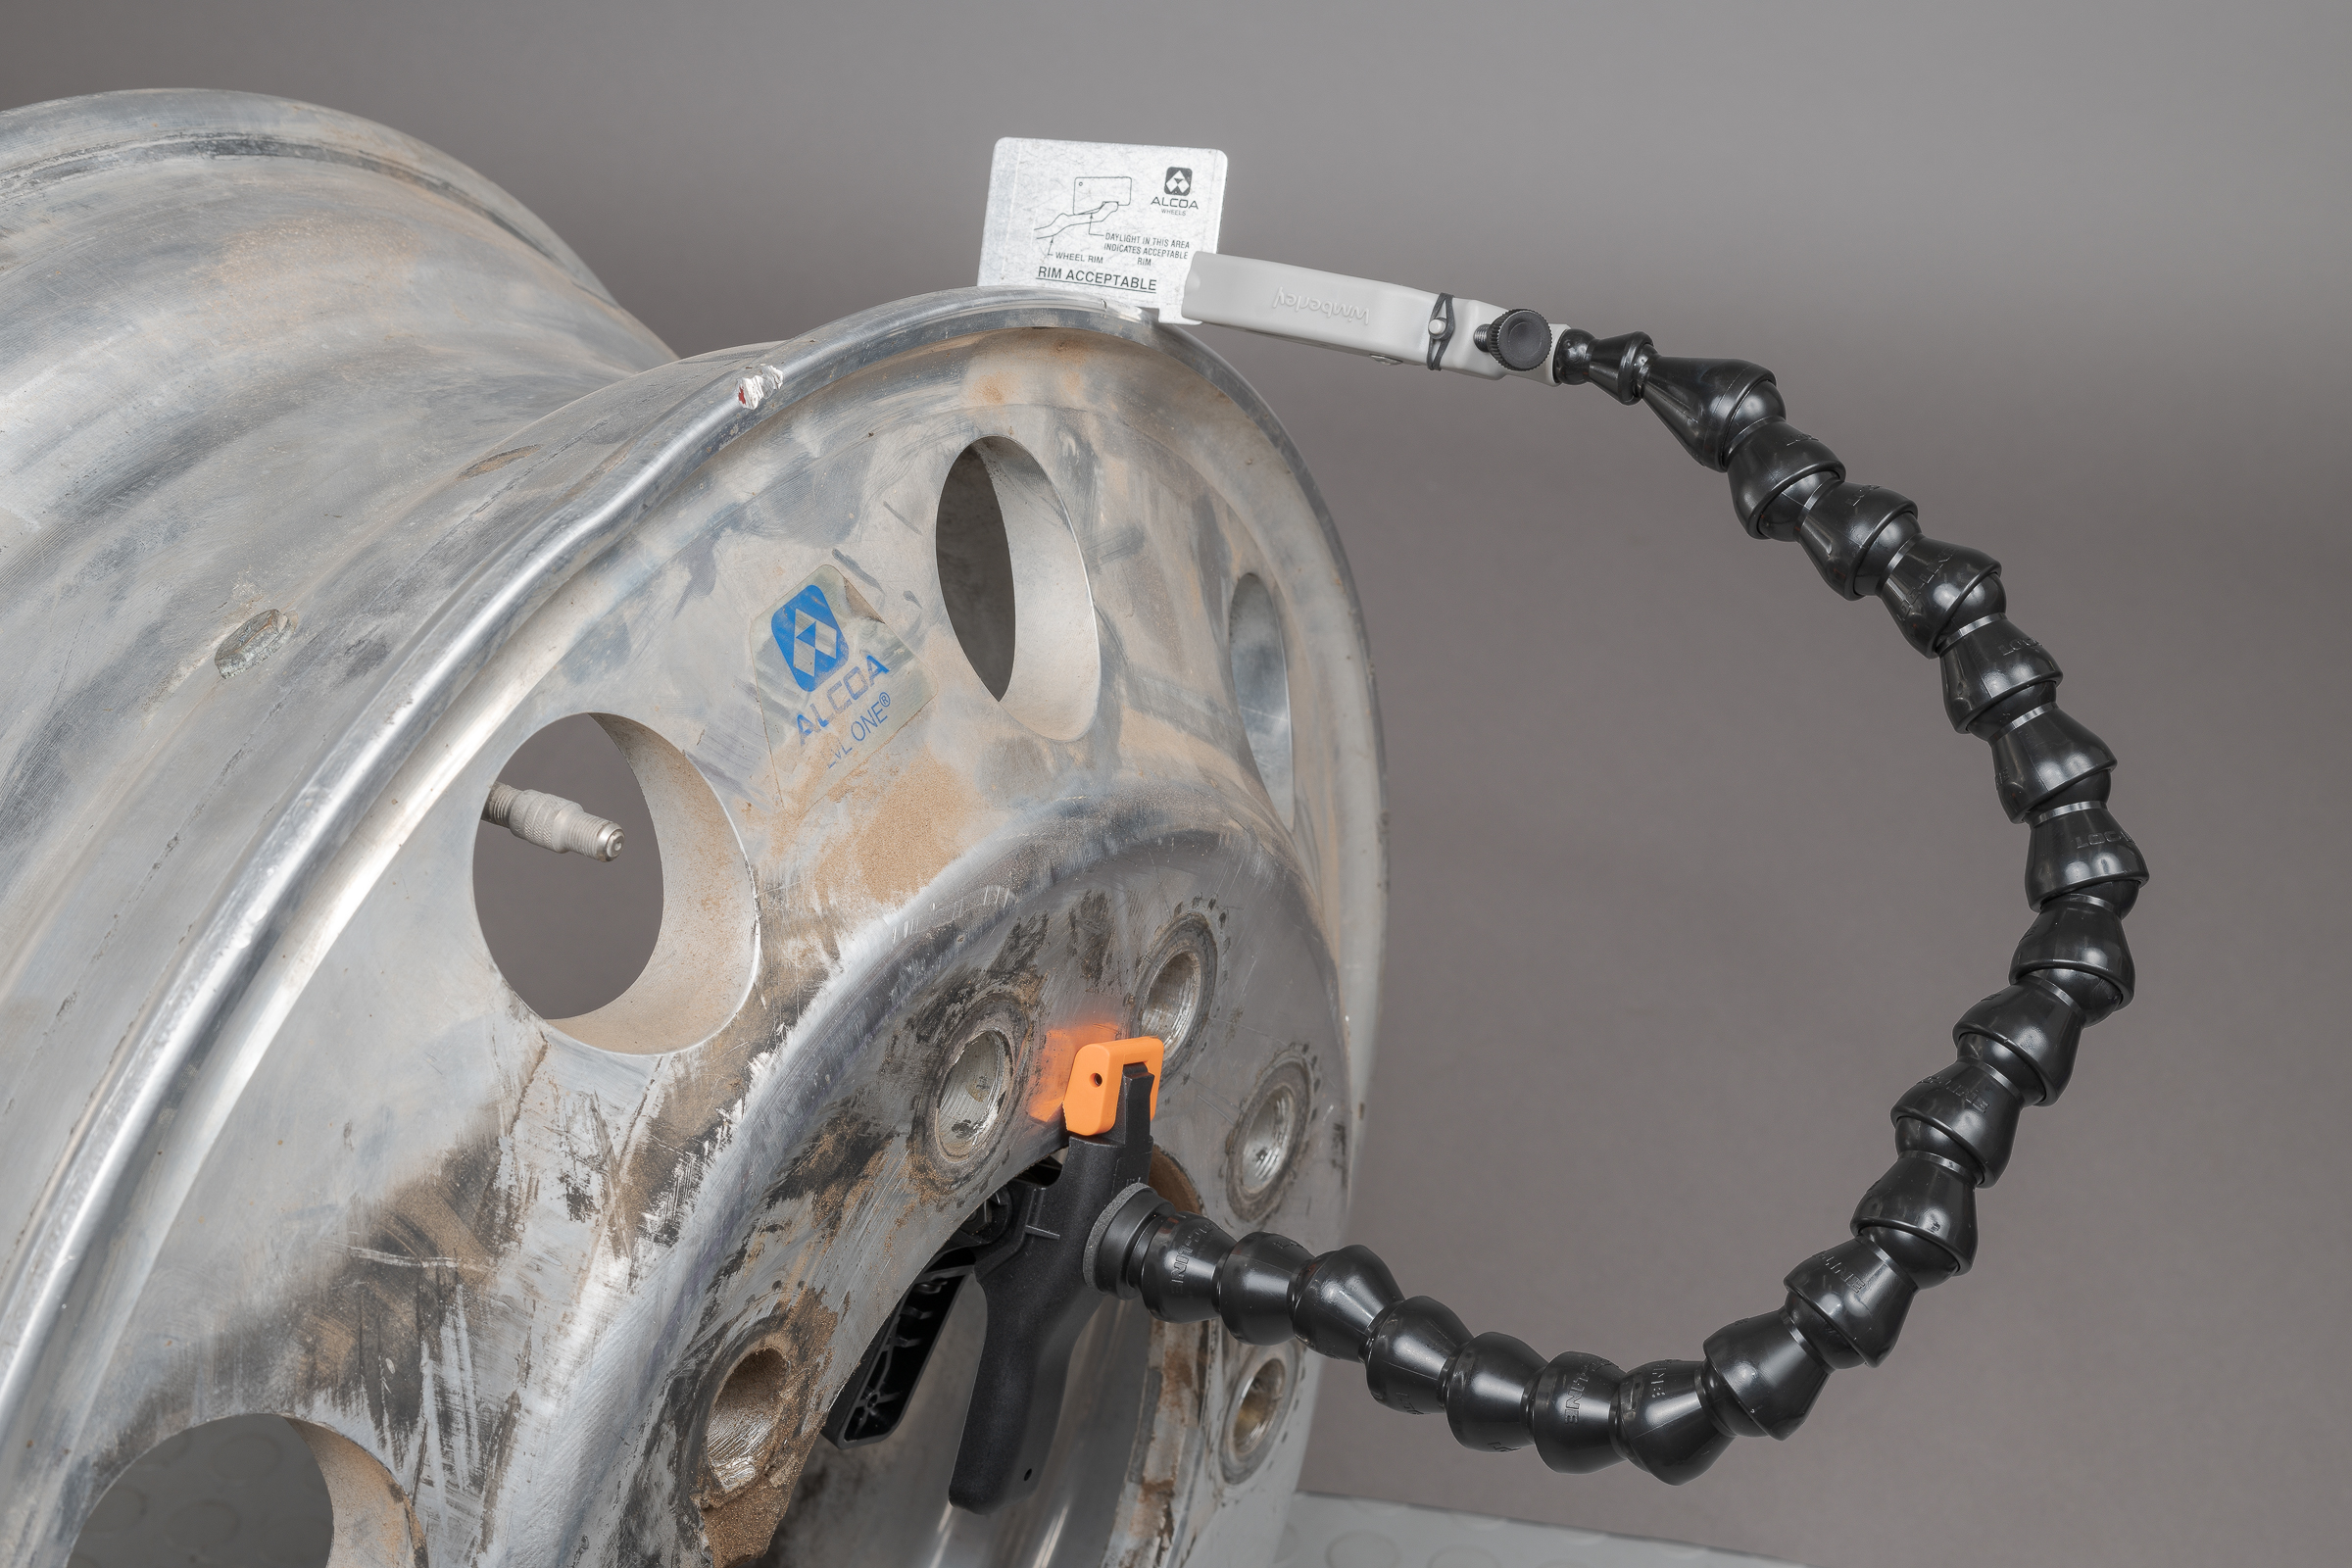
About half the truck wheels sold today are aluminum rather than steel. As with anything, there are trade-offs when comparing steel and aluminum wheels. Aluminum wheels weigh less but cost more than steel wheels. Aluminum wheels don’t rust, of course, but they can suffer from flange wear. Alcoa recommends checking for excessive flange wear using a simple go-no go gauge (Part No. 000700).Alcoa Rim Wear Gauge Go-No Go. (From 2015 Alcoa Wheel Service Manual.)Here’s a photograph of the gauge in use. (Click on image to enlarge, then click on back arrow to return.)Alcoa Rim Wear Gauge on rim flange. (Made with ZEISS Milvus 50 mm macro lens on Nikon D850 with flashes.)While the gauge is quite easy to use, it is more challenging to photograph. It can be tricky to hold the thin aluminum gauge in the proper position while also making a photograph. To make the photograph above, I used a Wimberley The Plamp II with one end clamped on the wheel center hole, and the other end clamped to the gauge.Using Wimberley The Plamp II to hold Alcoa Rim Wear Gauge in place for photography, with flash. (Made with ZEISS Milvus 50 mm macro lens on Nikon D850 with flashes.)The Plamp II is fantastic since it is flexible enough to get into any position, yet stiff enough to remain in place once released. Here’s a link on B&H: Wimberley The Plamp II from B&H. The Plamp II allowed me to quickly and steadily hold the Alcoa gauge perpendicular to the rim and properly up against the flange. It was easy to focus and shoot without any motion from trying to hold the gauge by hand. It also allowed me to get the flashes into position with no shadows from my arm across the photo.
If you need to photograph something like a gauge or ruler, it is worth taking the few minutes to secure it and light it properly. You can often just tape it in place, but that wouldn’t have worked to position this flange wear gauge.
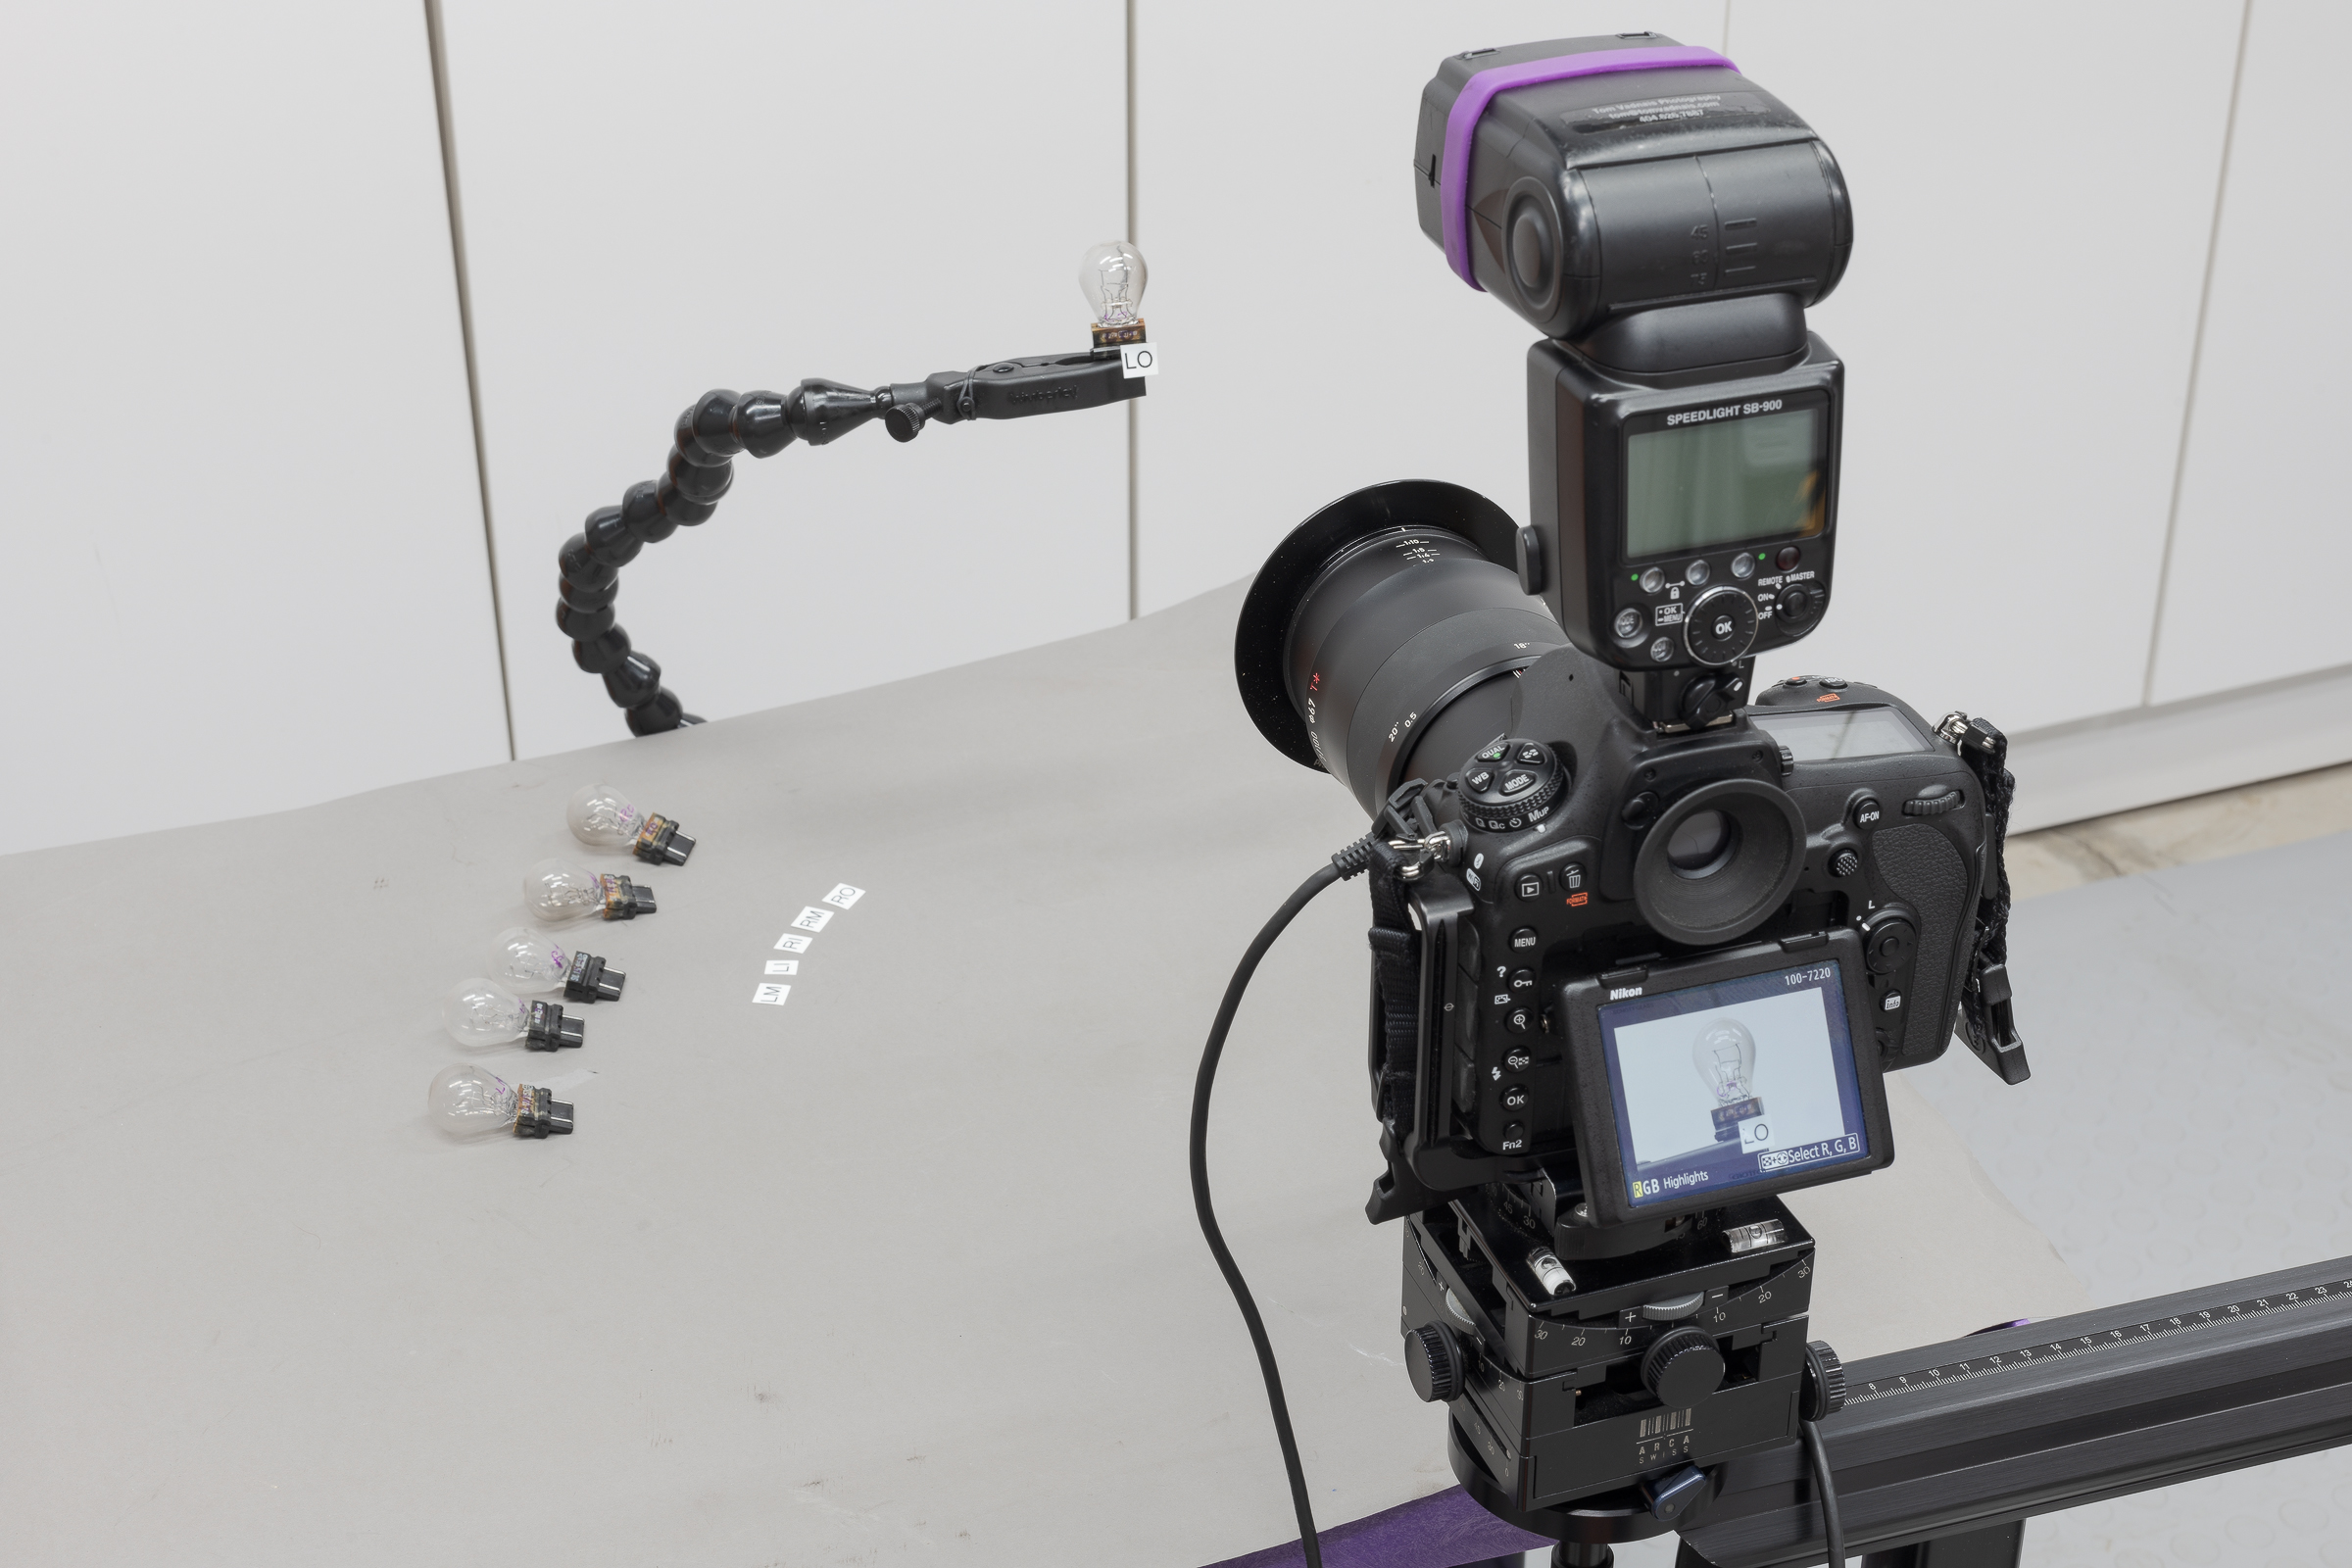
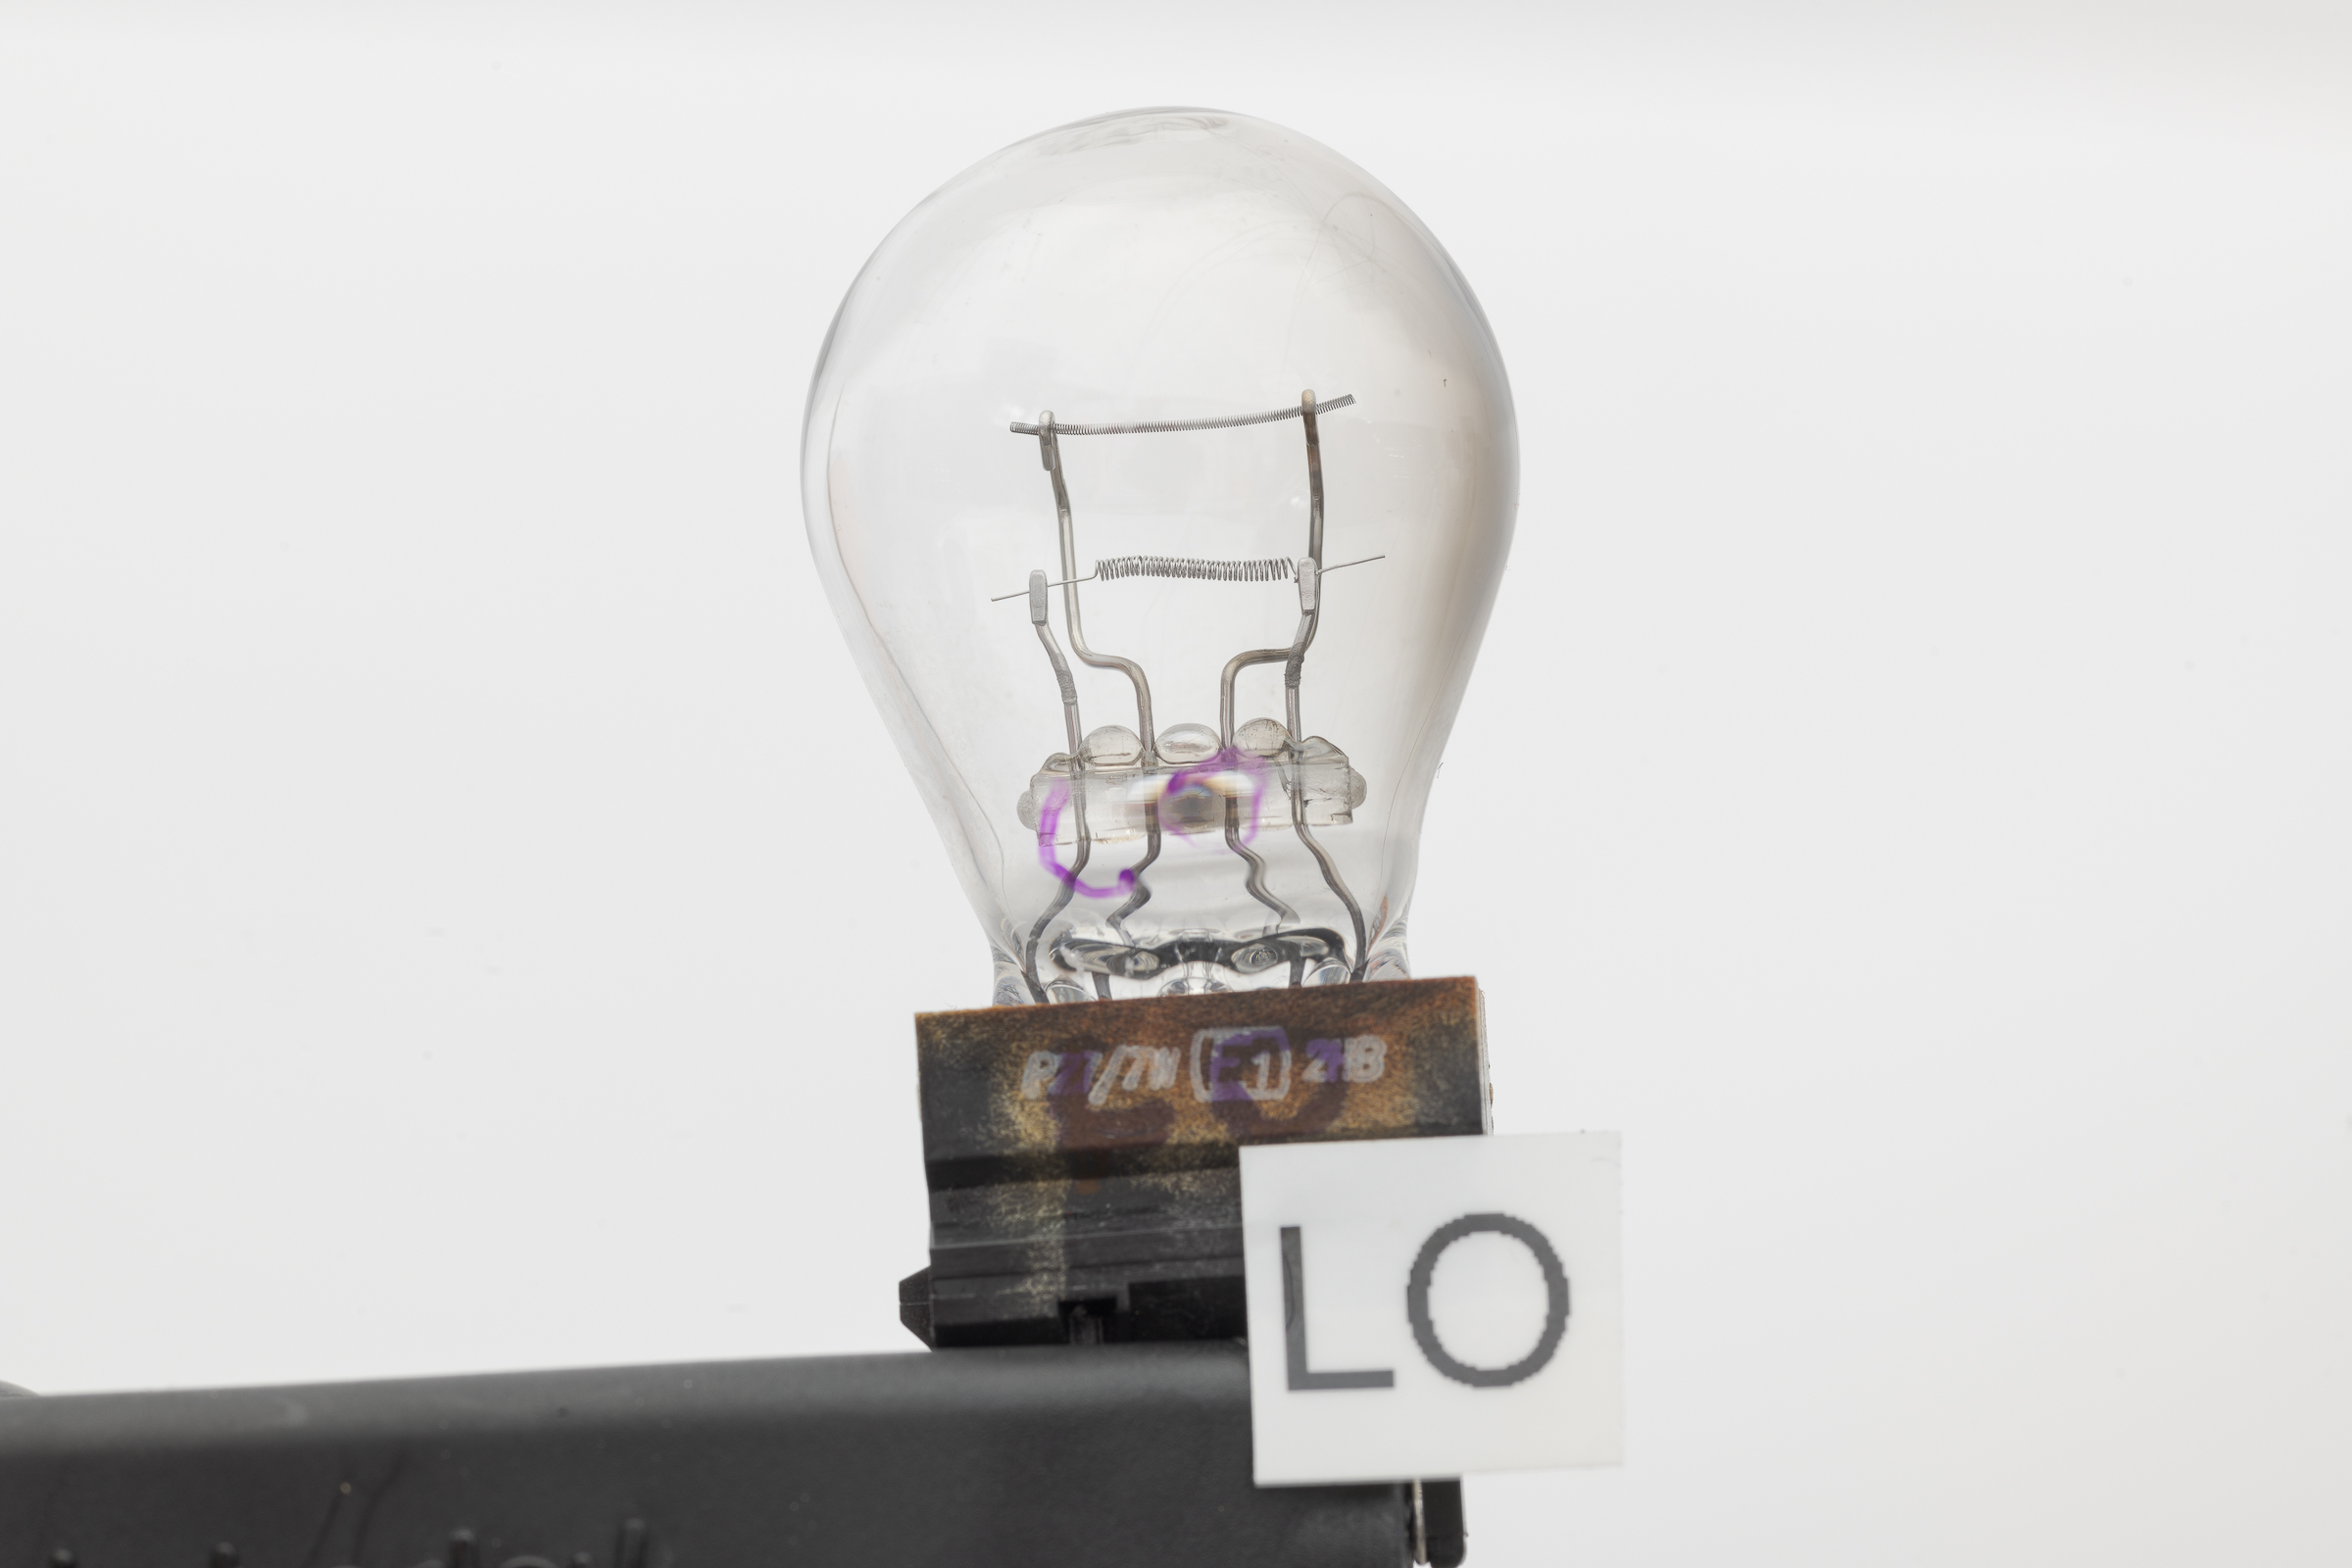
Glare on the glass globes can obscure the filaments when photographing light bulbs. This first photo shows the effects of overhead lights reflecting on the bulb. (LO refers to Left Outside taillight bulb.) (Click on image to enlarge, then click on back arrow to return.)Bulb reflecting overhead lights. (ZEISS Milvus 100mm Macro lens on Nikon D850.)Below is the setup that was used to create that photo.Setup for bulb with reflections on globe. (ZEISS Otus 55mm f/1.4 lens on Nikon D850.)The bulb was held in place with a Wimberley The Plamp II, and the camera was locked down on a studio camera stand. The white cabinet door was used as the background. Note that the flash was not used.
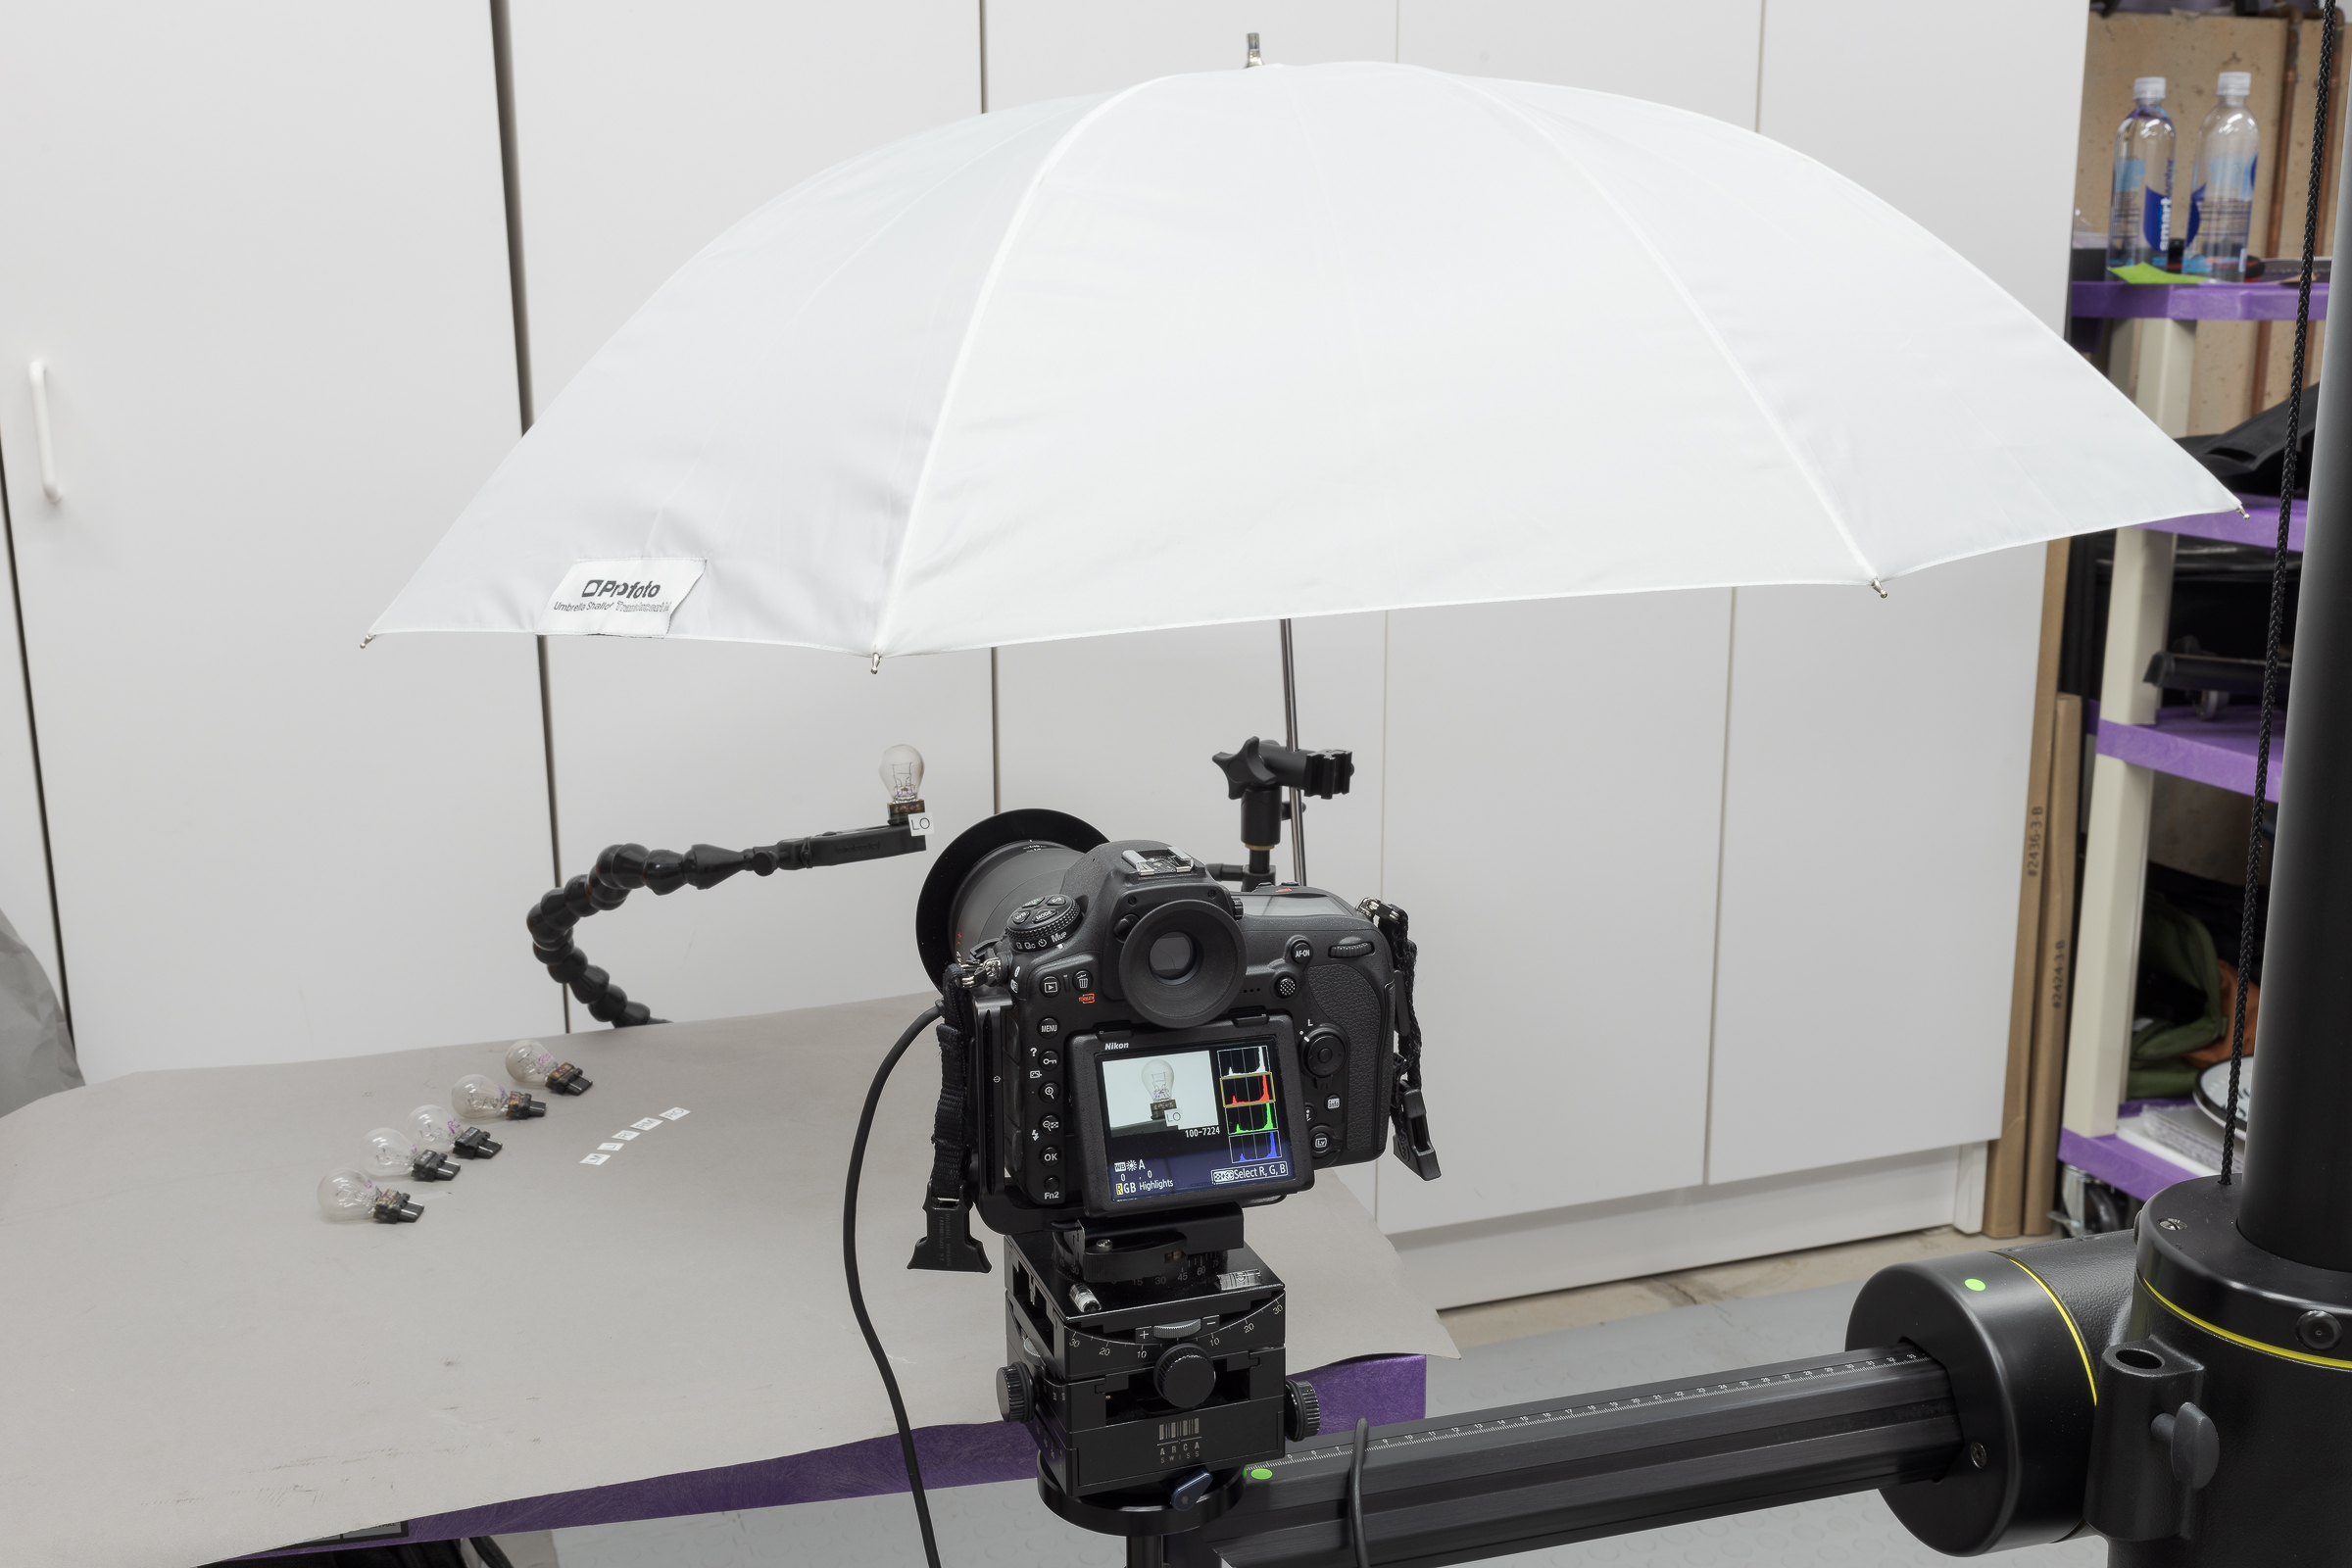
All the glare from the overhead lights was eliminated by placing a translucent umbrella on a small light stand above the bulb. That umbrella was lowered and moved around until all of the glare from the overhead lights was gone. Here’s what the setup looked like with that simple change.Setup for photographing bulb with no reflections on globe. (ZEISS Milvus 35mm f/1.4 lens on Nikon D850.)As you can see below, the resulting photograph had no glare, and clearly showed the filaments and the posts.Taillight bulb with no reflections on globe under translucent umbrella. (ZEISS Milvus 100mm Macro lens on Nikon D850.)Translucent umbrellas have the advantages of being inexpensive (well, except for this one by Profoto), lightweight, and compact. So this setup can be used anywhere outdoors or indoors, with a tripod replacing the studio stand. When using outdoors, typically you’ll just have one source of glare from the sun. Many times, you’ll be able to just prop the umbrella on the vehicle or ground without needing a light stand or some other holder. If it’s dark or shaded, you might need supplemental lighting (flash, LED, or other light sources). These can be fired through the translucent umbrella to prevent glare from them. That will be the subject of a future post.
Including a scale in a photograph is an excellent way to document dimensions. But it’s essential to properly position the camera to record an accurate measurement.
One of the most common mistakes made when photographing scales or rulers is making the photo from an angle. The camera lens must be perpendicular to the scale, both vertically and horizontally. A camera positioned too low or too high, and correspondingly tilted up or down, will result in parallax distortion. Worse is a horizontal offset that results in misleading measurements due to the angle of the camera to the scale markings.
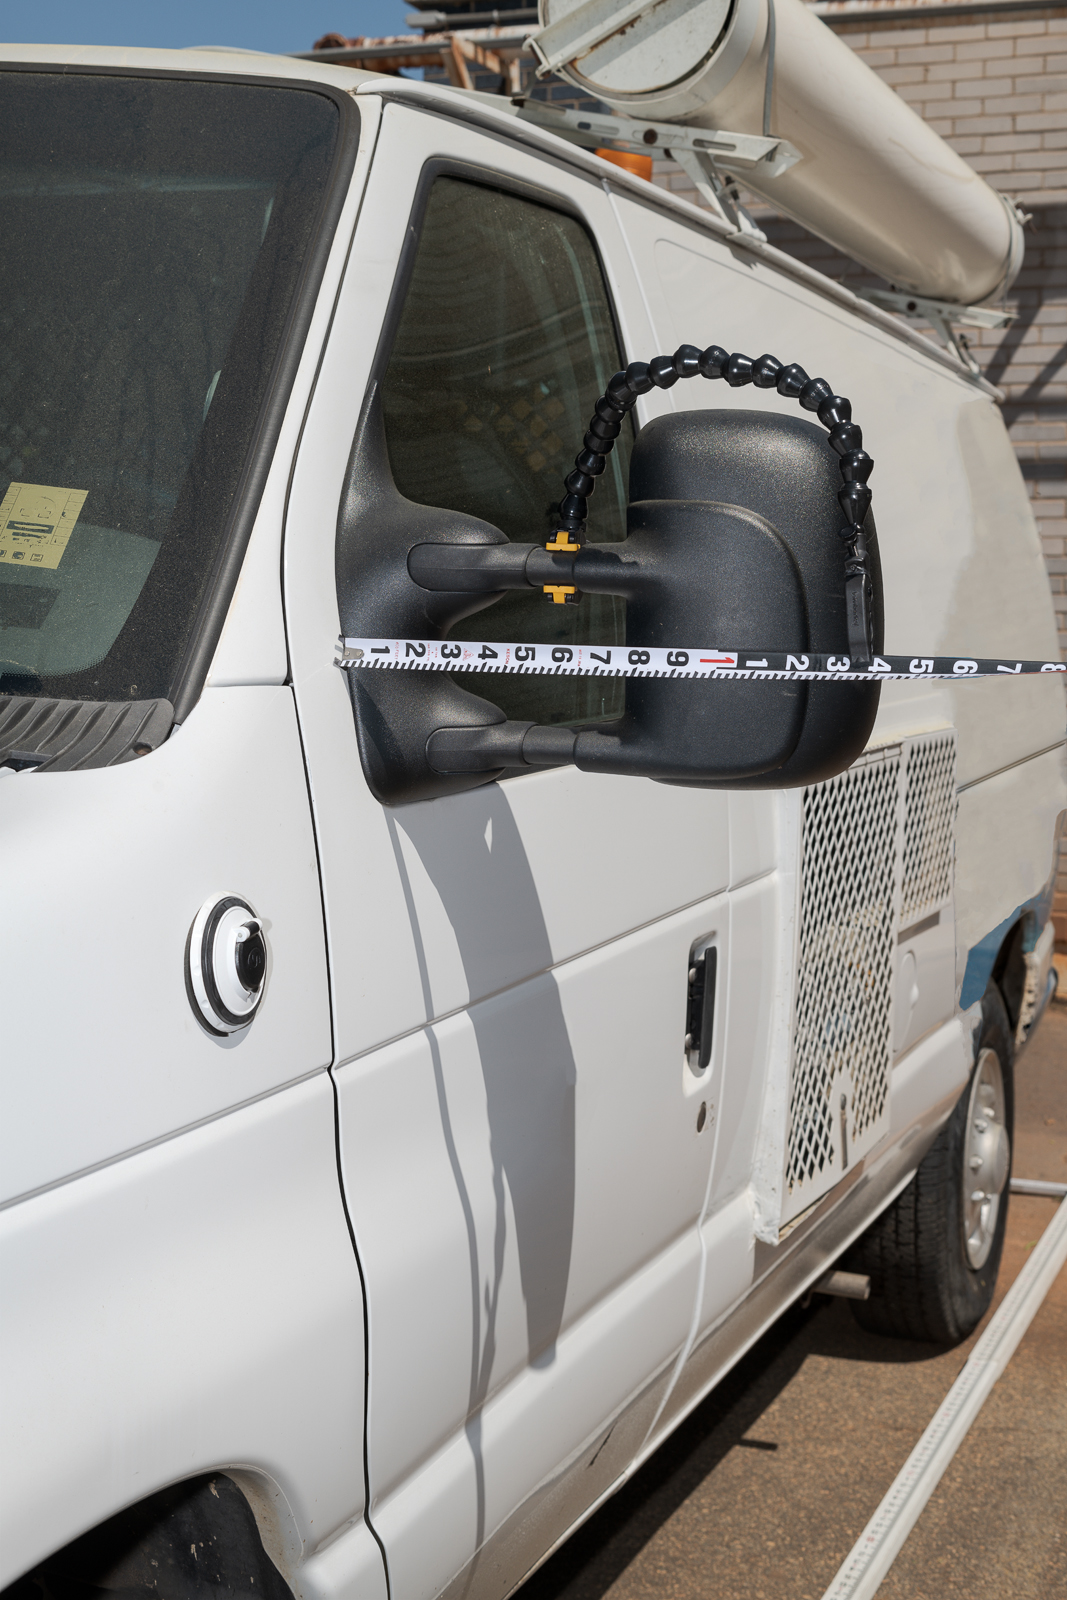
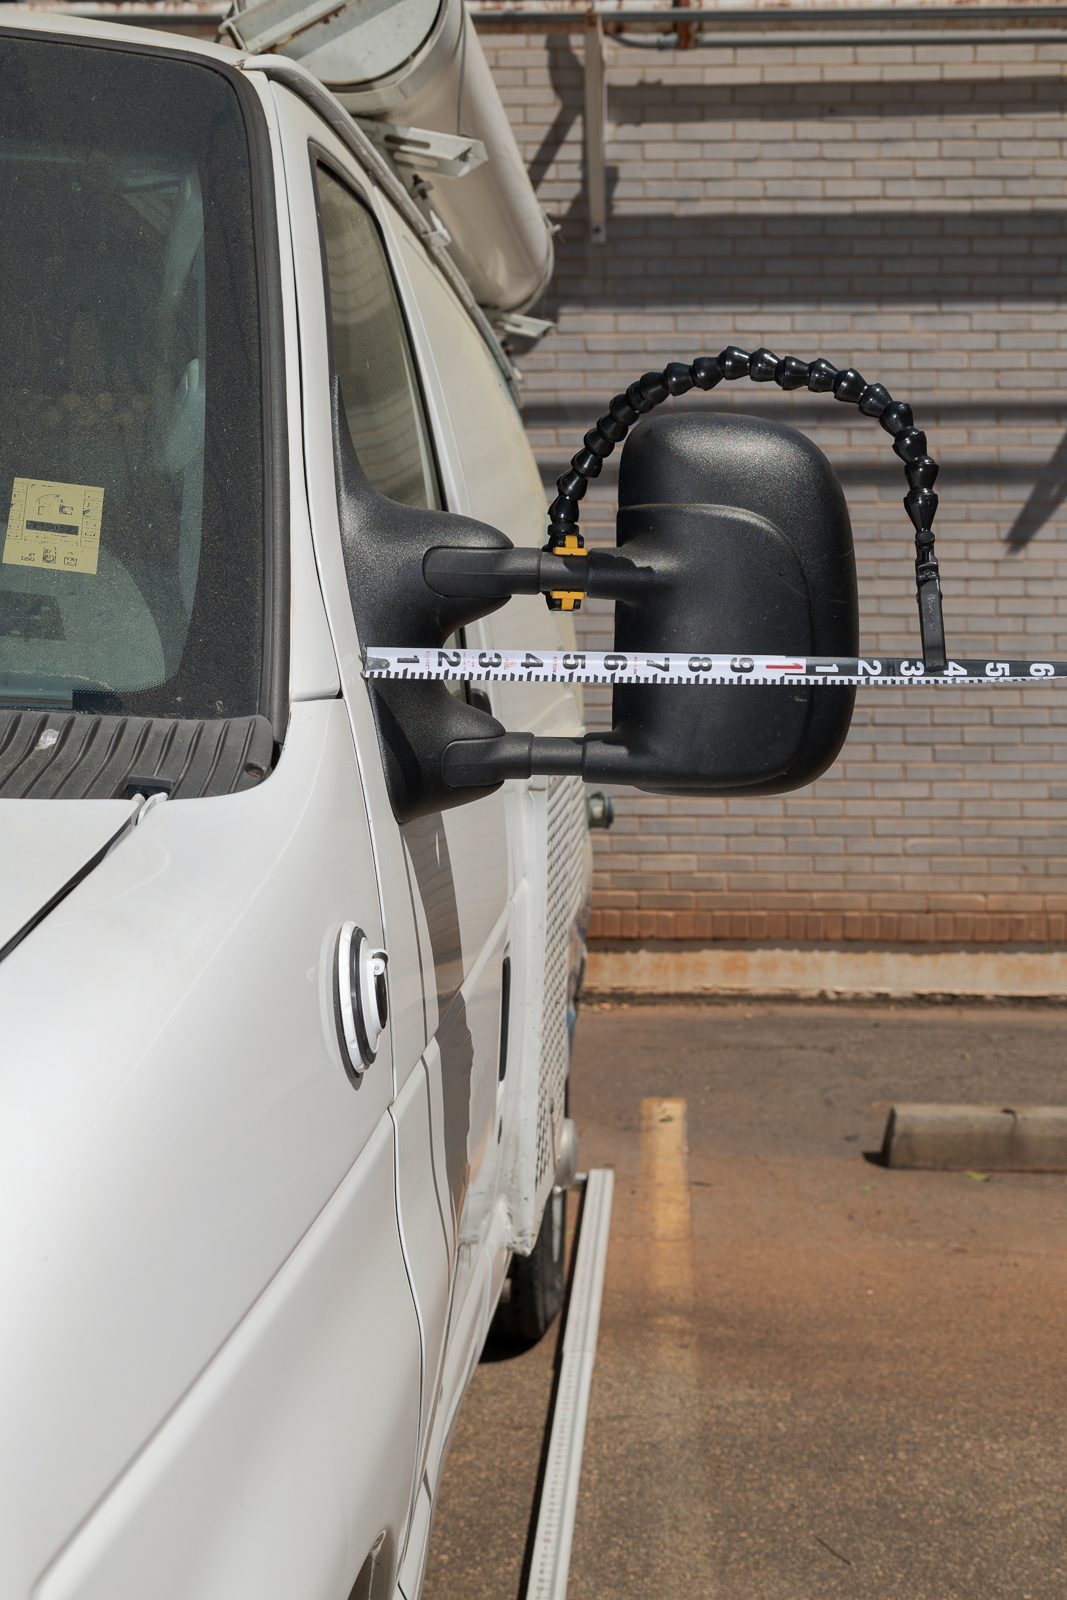
Take this example made to show how far a mirror protruded from the side of a van. The first photo was taken at the proper scale height, but was at an angle to the scale. Note how different the reading appears in the second image with the camera perpendicular to the scale. The latter accurately showed the measurement. (Click on image to enlarge, then click on back arrow to return.)Photographed at angle to scale. (Made with ZEISS 50mm f/2 macro lens on Nikon D850 with fill flash.)Photographed perpendicular to scale. (Made with ZEISS 50mm f/2 macro lens on Nikon D850 with fill flash.)Making an accurate photograph requires several steps:
-1- Make sure the pocket rod is parallel with the ground. Use something like a Wimberley Plamp clamped onto the upper mirror support arm to hold it at the proper height. Place the other end of the pocket rod firmly against the ground with enough pressure to hold the rod in proper position and angle.
-2- With the camera on a tripod, make sure the center of the lens is vertically level with the pocket rod.
-3- Move the tripod until the center of the lens is centered on pocket rod horizontally.
-4- Use a hot shoe bubble level or the in-camera level to make sure camera is level.
-5- Manually focus, or make sure your autofocus point is directly on the scale.
-6- Use a normal (50mm) or longer focal length to eliminate wide angle lens distortion. Macro lenses are ideal because of their flat field and edge-to-edge sharpness.
-7- Use fill flash to balance image, despite abundant sunshine.
Use scales, but take care to get the camera in position to show them accurately. Fortunately, you can check the results on your camera’s LCD (zoom the view if necessary) to make sure the dimension in the photograph matches the measurement you made. Fairly close isn’t accurate, and is misleading. A deceptive photo is worse than no photo at all.
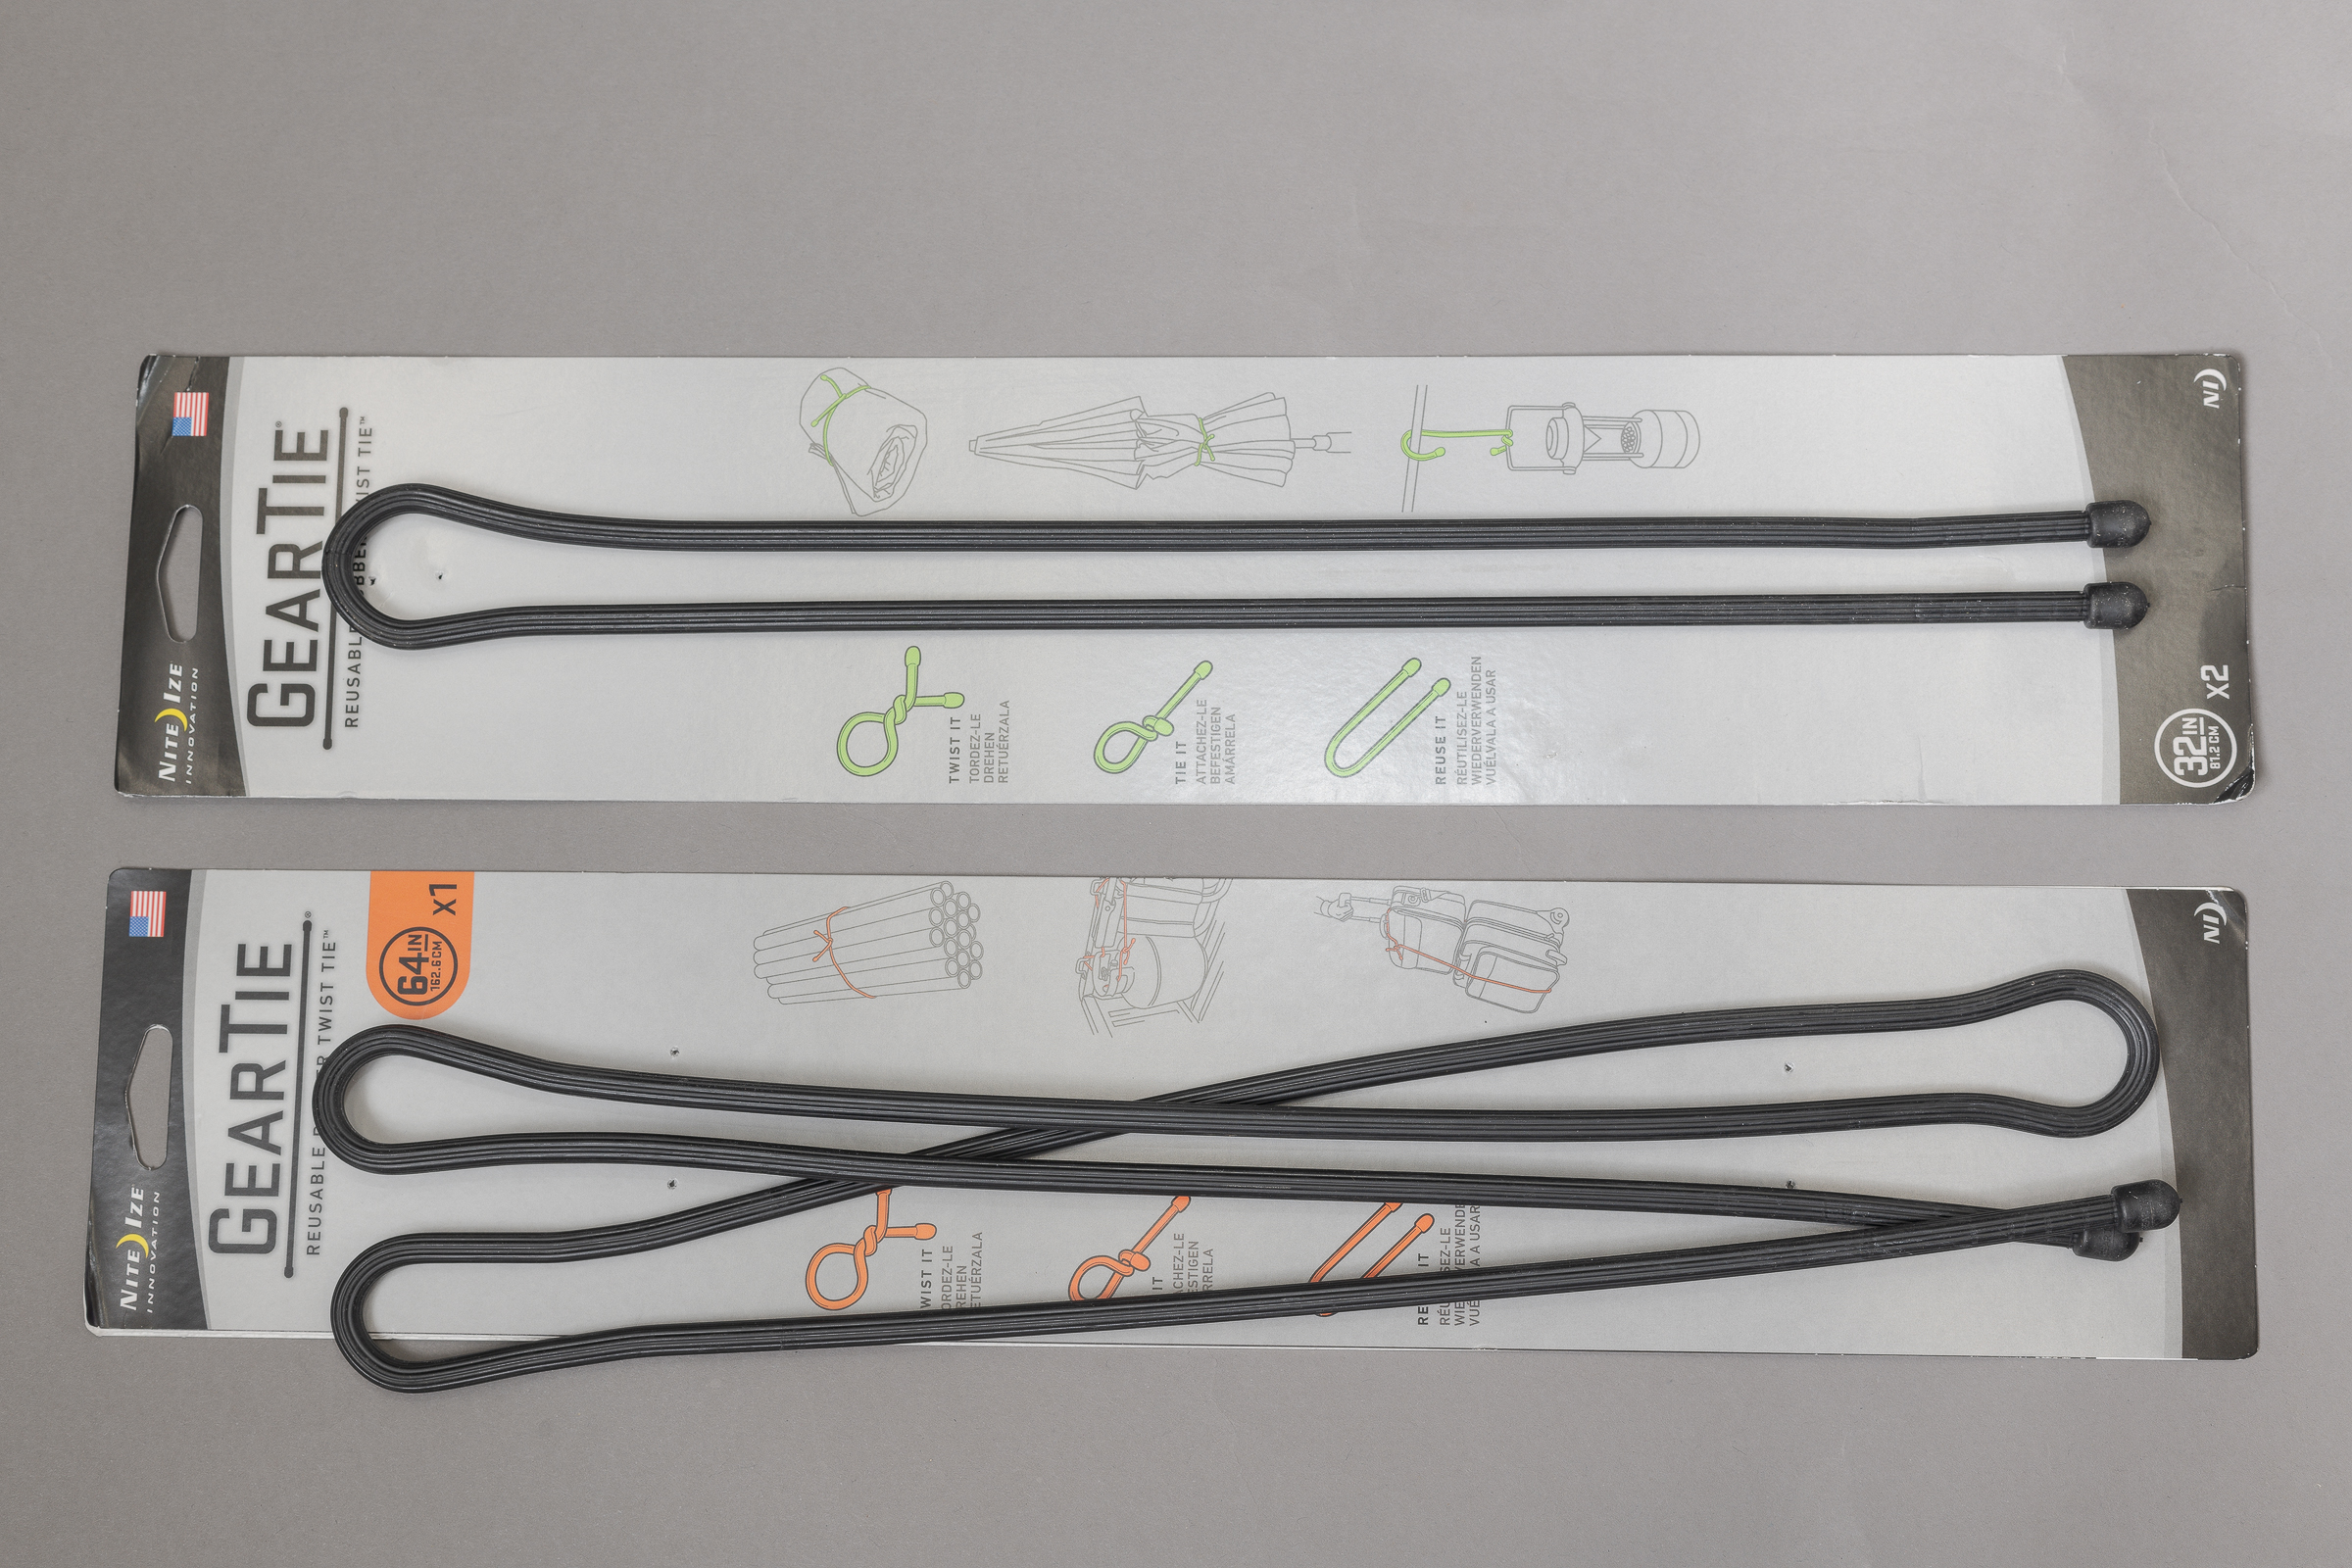
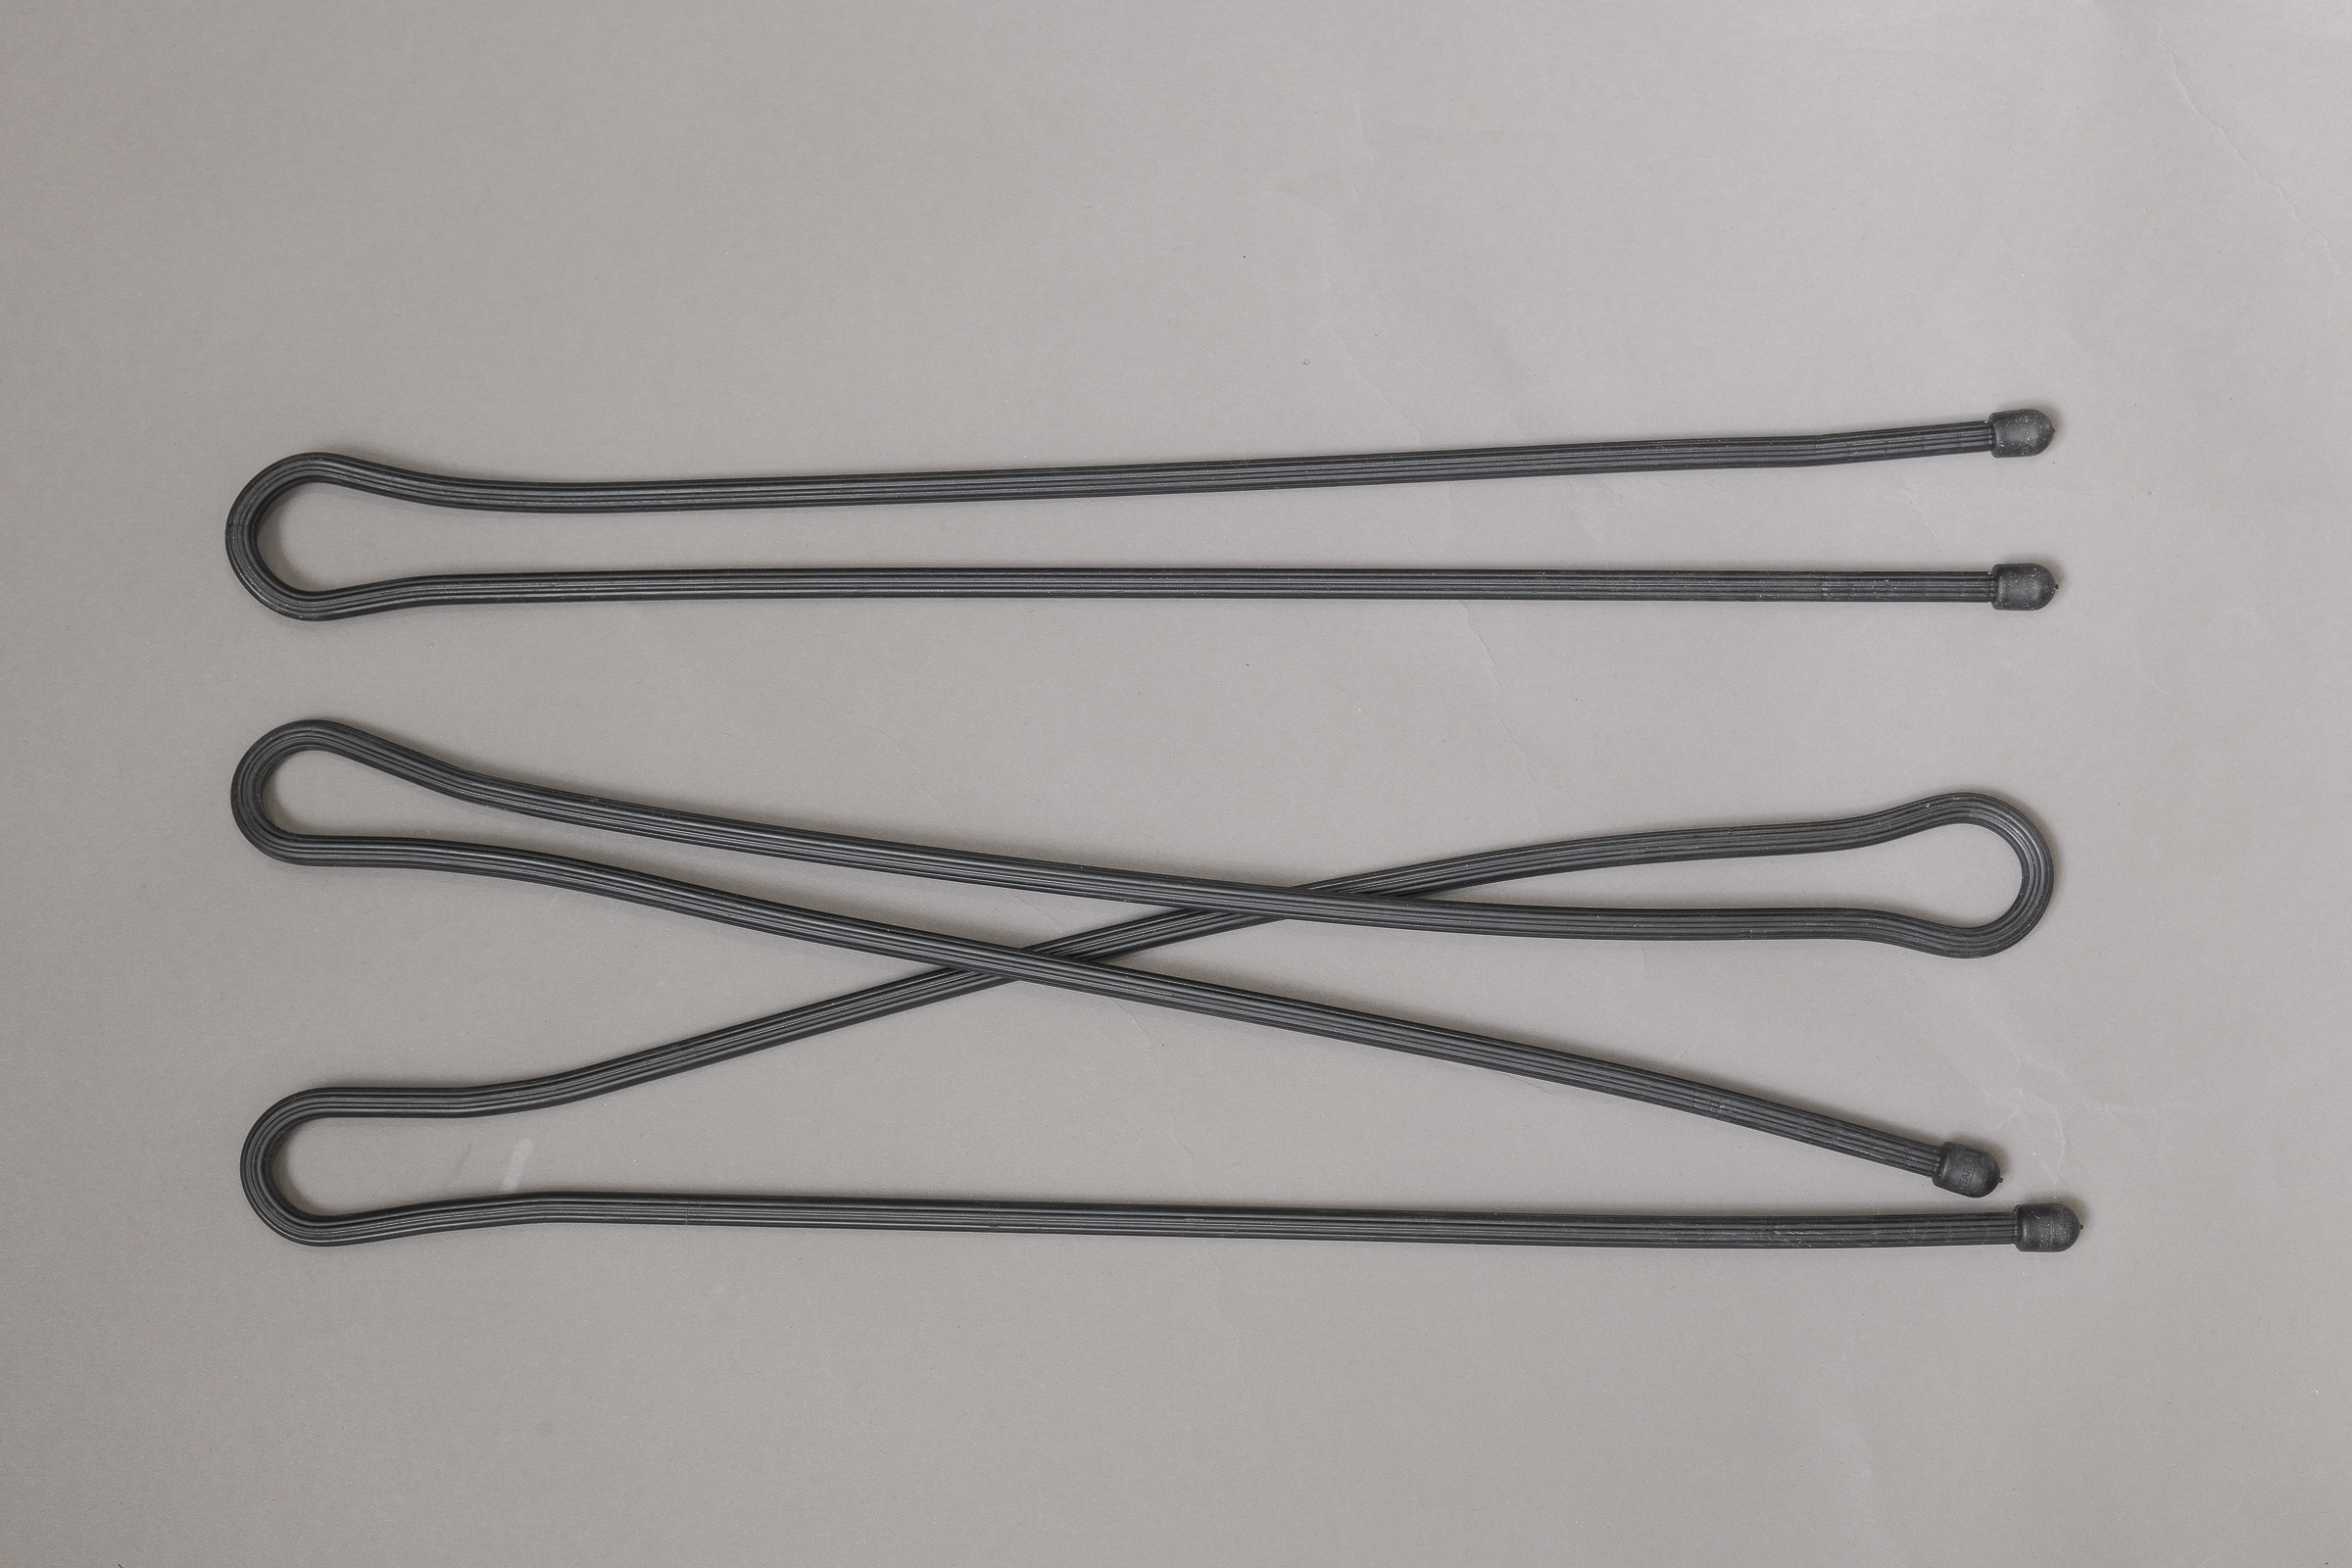
How do you hold loose items in place long enough to photograph them, especially when you’re by yourself? I encounter this with almost every tire failure and vehicle I analyze. I have tried every Velcro strap, bungee cord, string, wire, rope, and tape I can find. Each worked—a little. But I kept searching for a clean, simple, and reusable solution for years. I finally found it at The Home Depot! It’s a reusable rubber tie called Gear Tie by Nite Ize. You can get them at The Home Depot, Amazon, or directly from Nite Ize: Nite Ize Gear Ties (Click on image to enlarge, then click on back arrow to return.)Nite Ize Gear Tie Packaging. (ZEISS 50mm f/2 on Nikon D850.)Gear Ties are available from 3″ through 64″. I’ve found the 32″ and 64″ most useful for securing passenger/light truck and medium/heavy truck tire pieces, respectively.Nite Ize Gear Ties: 32″ Top; 64″ Bottom. (ZEISS 50mm f/2 on Nikon D850.)You can also use them to hold sprung doors, loose bumper covers, and loose pipes or wires in place while you photograph them. Conversely, Gear Ties are also handy for holding wires, trim, etc., out of your photographs.
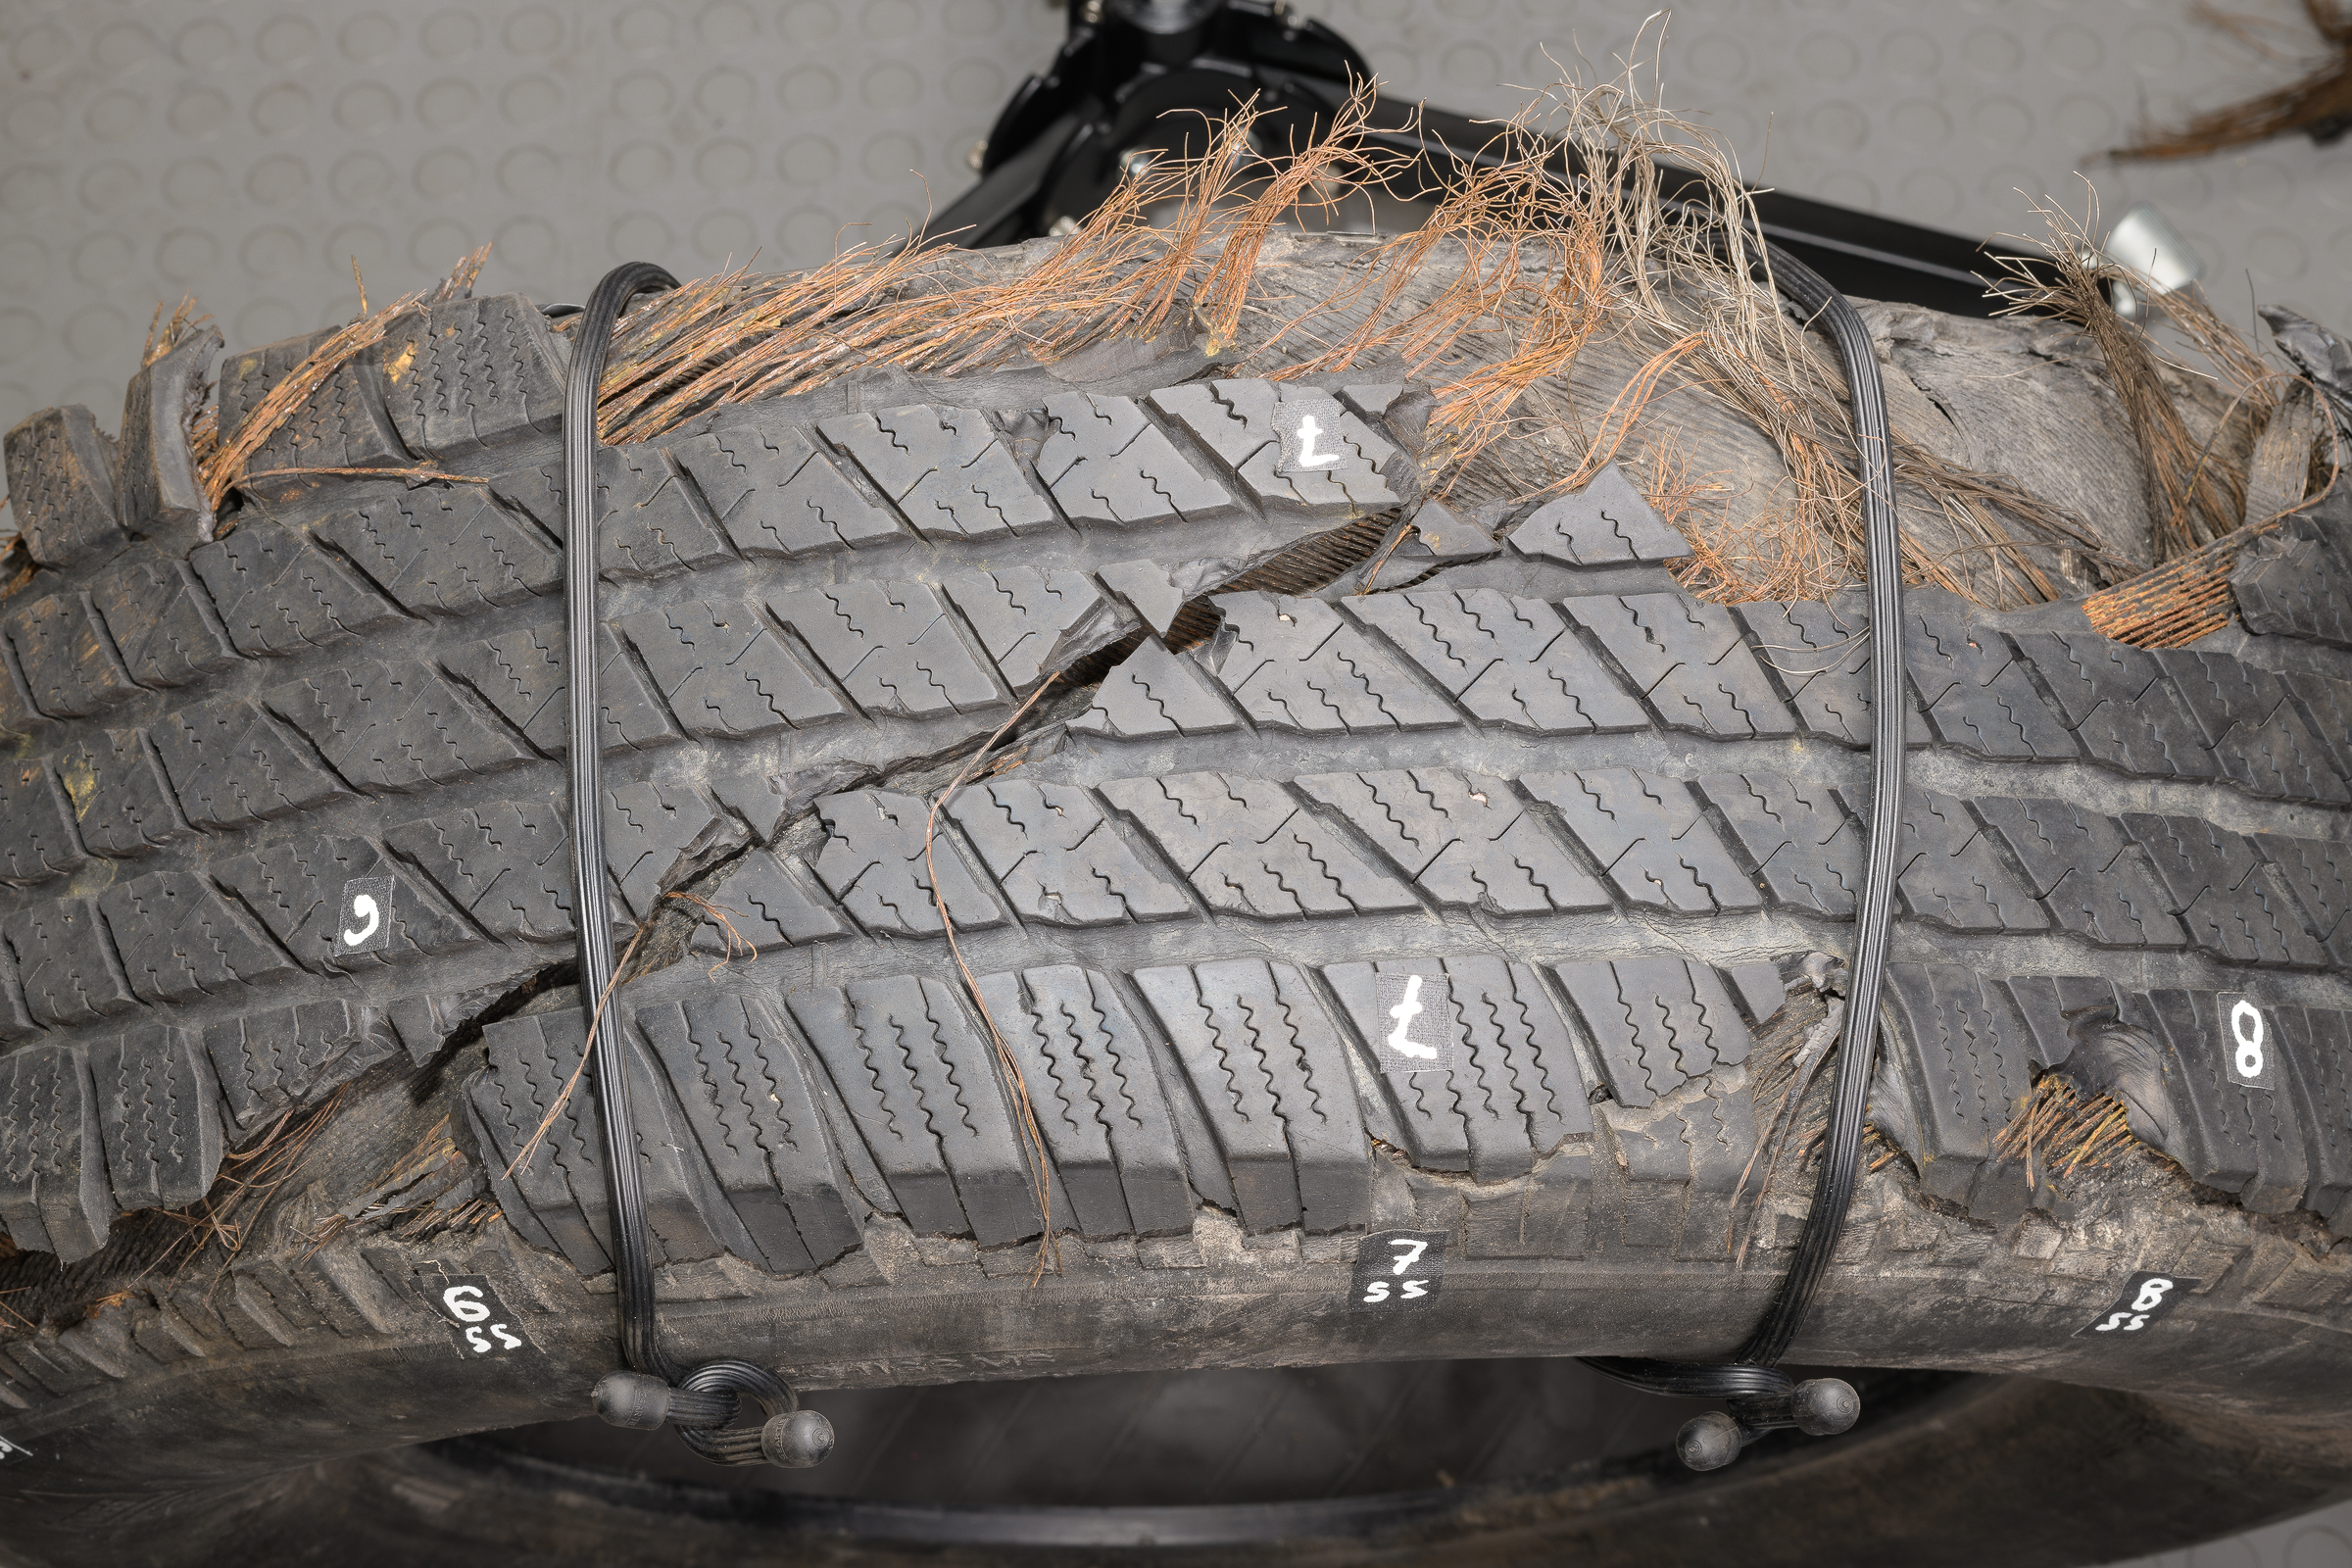
Here’s an example where two 32″ Gear Ties are holding two separated pieces from a passenger tire in place so I can photograph them.Using 32-inch Gear Ties on Tire Pieces .(ZEISS 50mm f/2 on Nikon D850.)I carry sizes from 12″ through 64″ with me. You won’t find more useful “third hands”. Highly recommended.
When I travel for a work or a personal photography trip, I either drive my Toyota 4Runner TRD Pro or rent an SUV so I can easily access my gear in the field. Years ago, my friend and mentor Bruce Dale suggested a cheap, easy way to keep prying eyes from cargo and luggage in the back. It’s a black flat bed sheet. I bought two of them at Walmart; one for my 4Runner and one to keep packed in my travel bag. They’ve become the black sheets of my family. (Sorry, couldn’t resist.) (Click to enlarge, then back arrow to return.)Cover your gear.If I’m going to be parking any distance from the inspection site, I try not to keep valuables in my vehicle, if possible. But I’ll still cover even extra jackets, water, snacks, or empty camera bags or luggage. I find the black sheet most useful when going to and from my shooting or working location, at airports, restaurants, and hotels, and when stopping at any store or gas station. It’s cheap, simple deterrence. I even use it day-to-day when I’m at home.