Wow, that’s quite a name for a great, unique lens, and that name should make sense by the time you finish reading this.
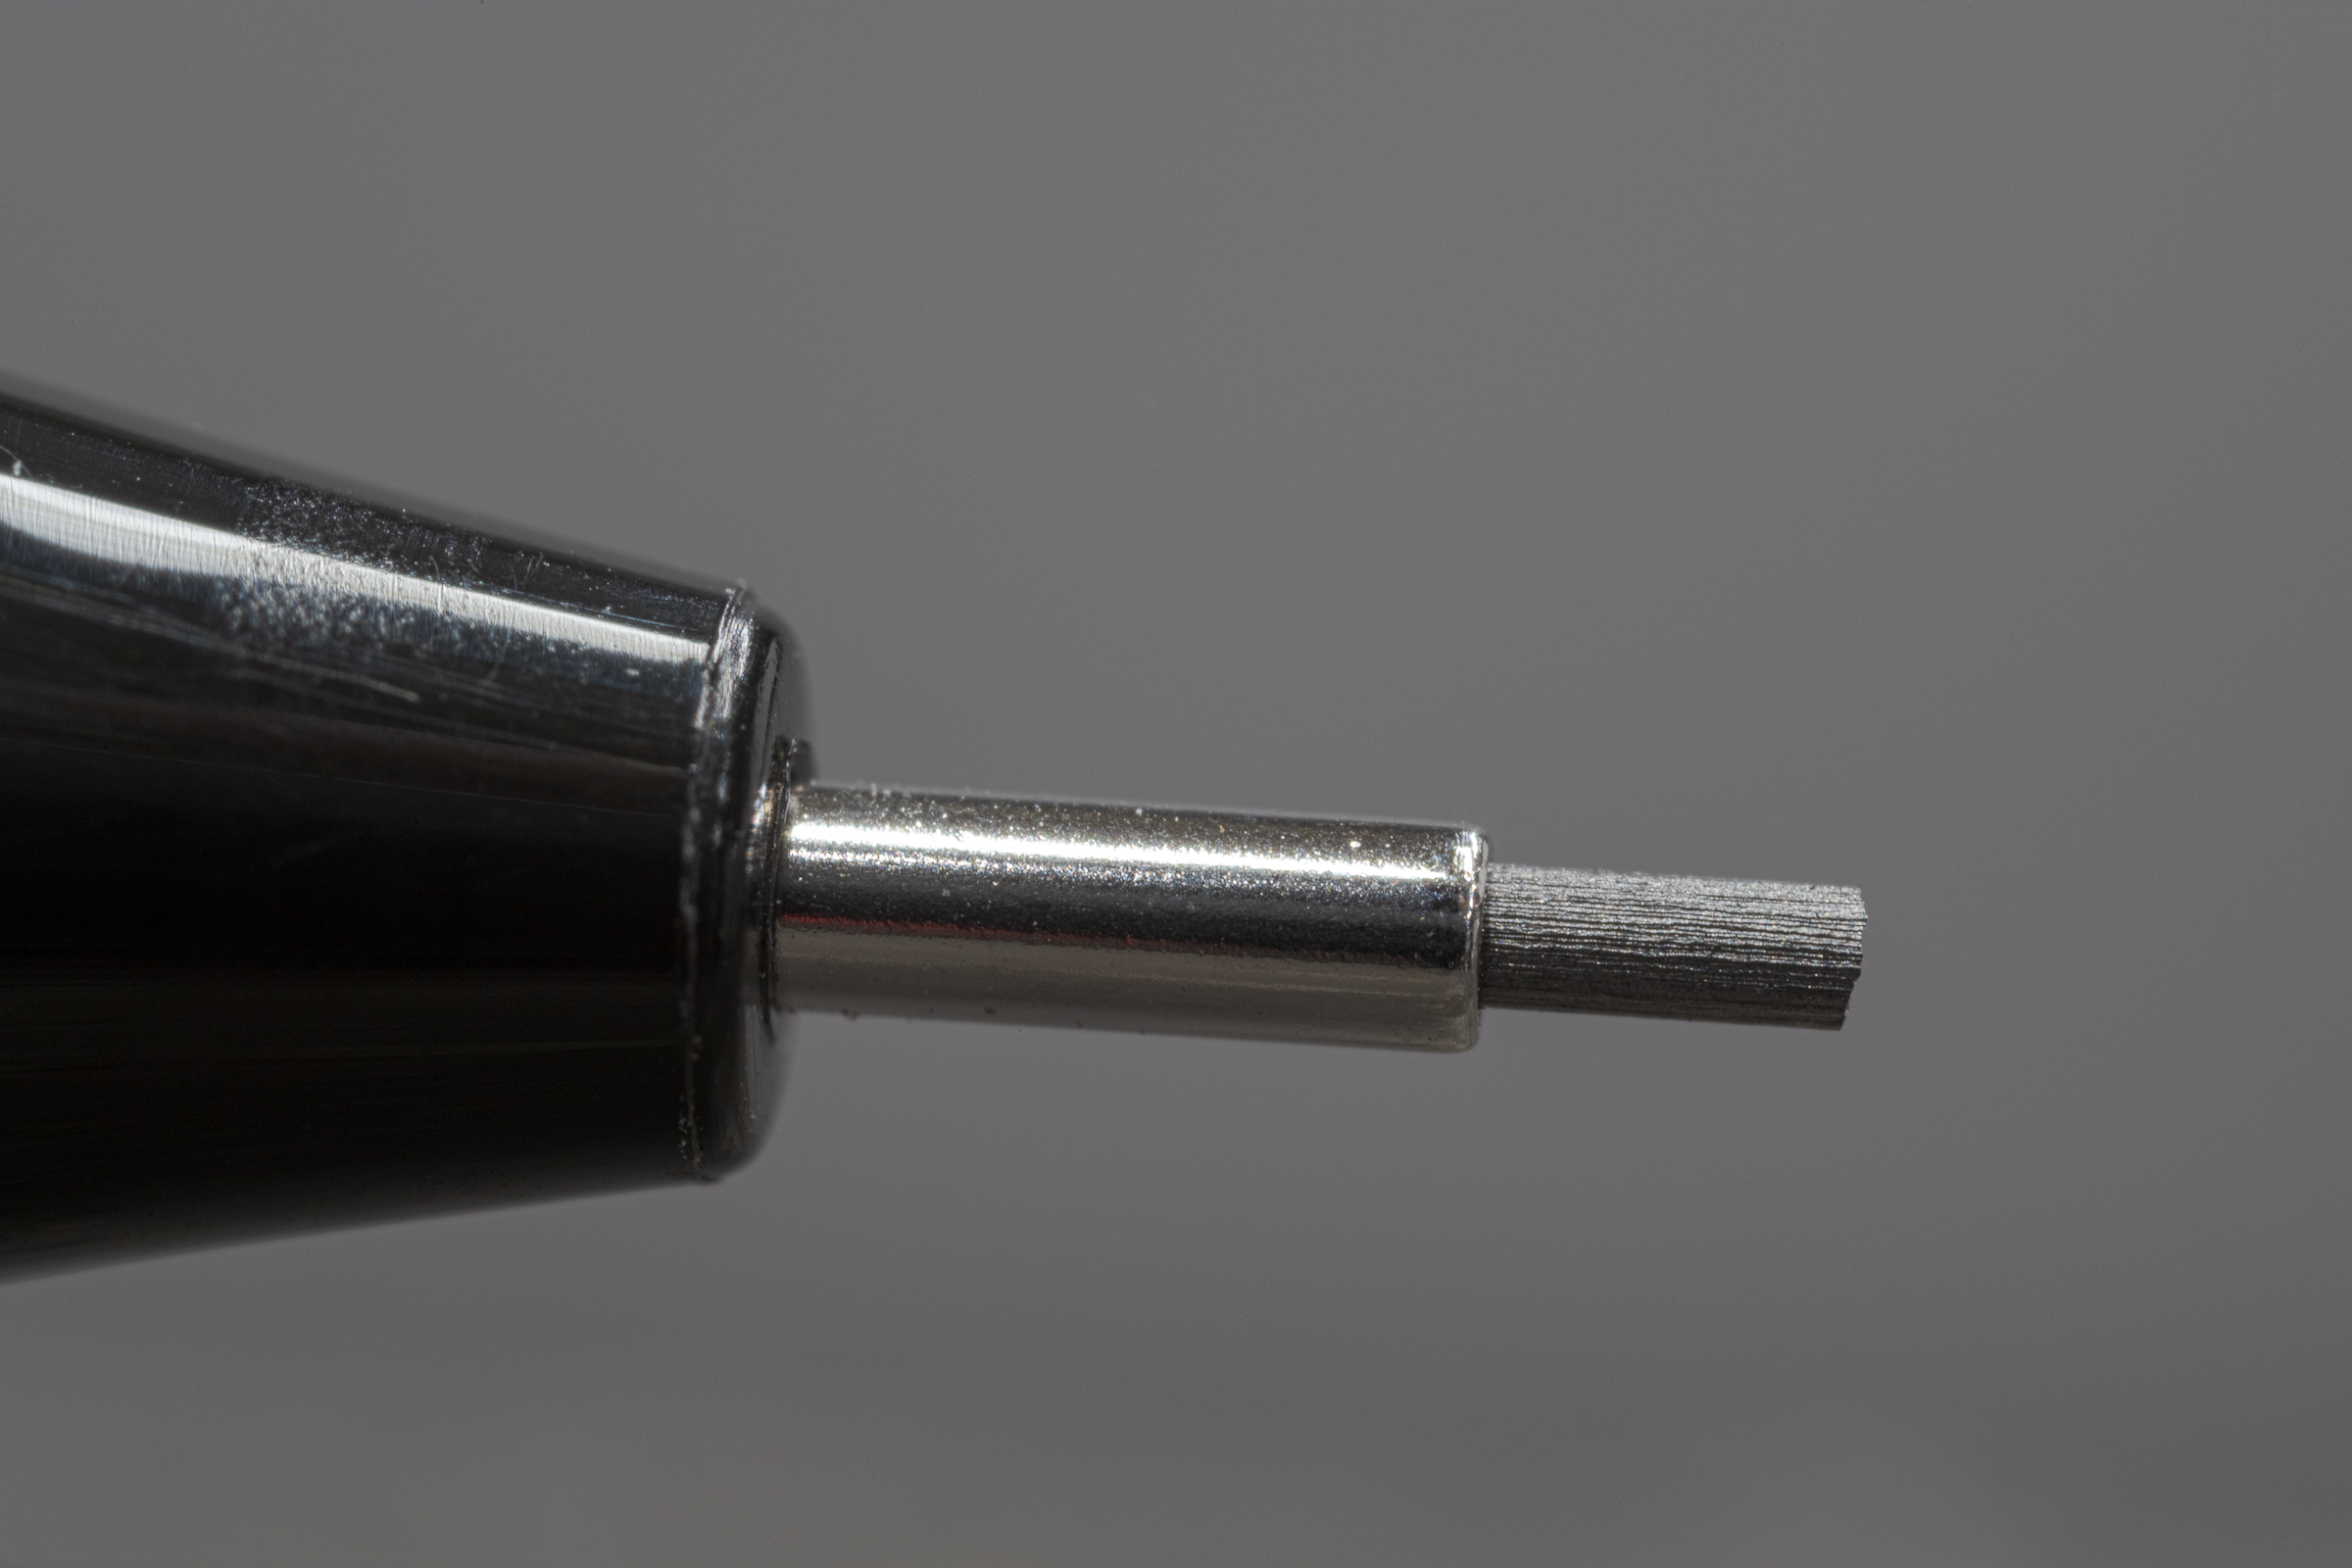
This photograph is a single shot of a 0.5 mm pencil lead at 4X magnification (4:1 reproduction ratio) made with that lens on a Nikon D850. I made it in my studio lab without using flash. The lens aperture ring was at f/11. I set the ISO at 160 and the shutter speed at 2.5 seconds. It is a full-frame image. In other words, it has not been cropped. (Click on any image to enlarge, then click back arrow to return to this post.)
By definition, a macro lens captures an image at 1:1 or 1X or life size, which all mean the same thing: the subject will be the same size on your sensor as it is in real life. Since a full frame sensor (FX in Nikon world) is a 1″ x 1.5″ rectangle, the subject, or piece of the subject you’re showing, would have to be no more than 1.5″ wide or 1″ high.
Most macro lenses have a reproduction ratio of either 1:1 (life size) or 1:2 (half life size). These may also be referred to as a 1X or 1/2X magnification, respectively.
My 60 mm and 105 mm Nikon macro lenses (“Micro-NIKKOR” in Nikon-speak) both have a 1:1 reproduction ratio. My usual lenses are ZEISS Milvus 50 mm and 100 mm macro lenses (ZEISS calls them Makro-Planar) have maximum reproduction ratios of only 1:2, or half life size. While either 1:1 or 1:2 is just fine for much of the photography I do, I often need greater magnification for certain details—especially for tire or other product analysis photos.
If you have a camera with a high resolution sensor, you could crop the image to just the area you want to show. But by cropping, you will be throwing away pixels and restricting the size of the image you can print or project as a trial exhibit. That negates the benefit of a high resolution camera. It’s much better to capture the image full frame without cropping so you keep all the resolution your camera can deliver.
After trying all kinds of lenses and attachments, I found the Laowa 25 mm f/2.8 2.5-5X Ultra Macro lens works incredibly well. And it’s inexpensive at only $399 (http://www.venuslens.net/product/laowa-25mm-f-2-8-2-5-5x-ultra-macro-2/) or at B&H Photo Video (https://www.bhphotovideo.com/c/product/1399602-REG/venus_optics_ve2528n_laowa_25mm_f_2_8_2_5_5x.html). This lens is available in Nikon F, Canon EF, Pentax K, and Sony FE mounts. Adapters will allow it to be used on most other DSLR and mirrorless cameras.
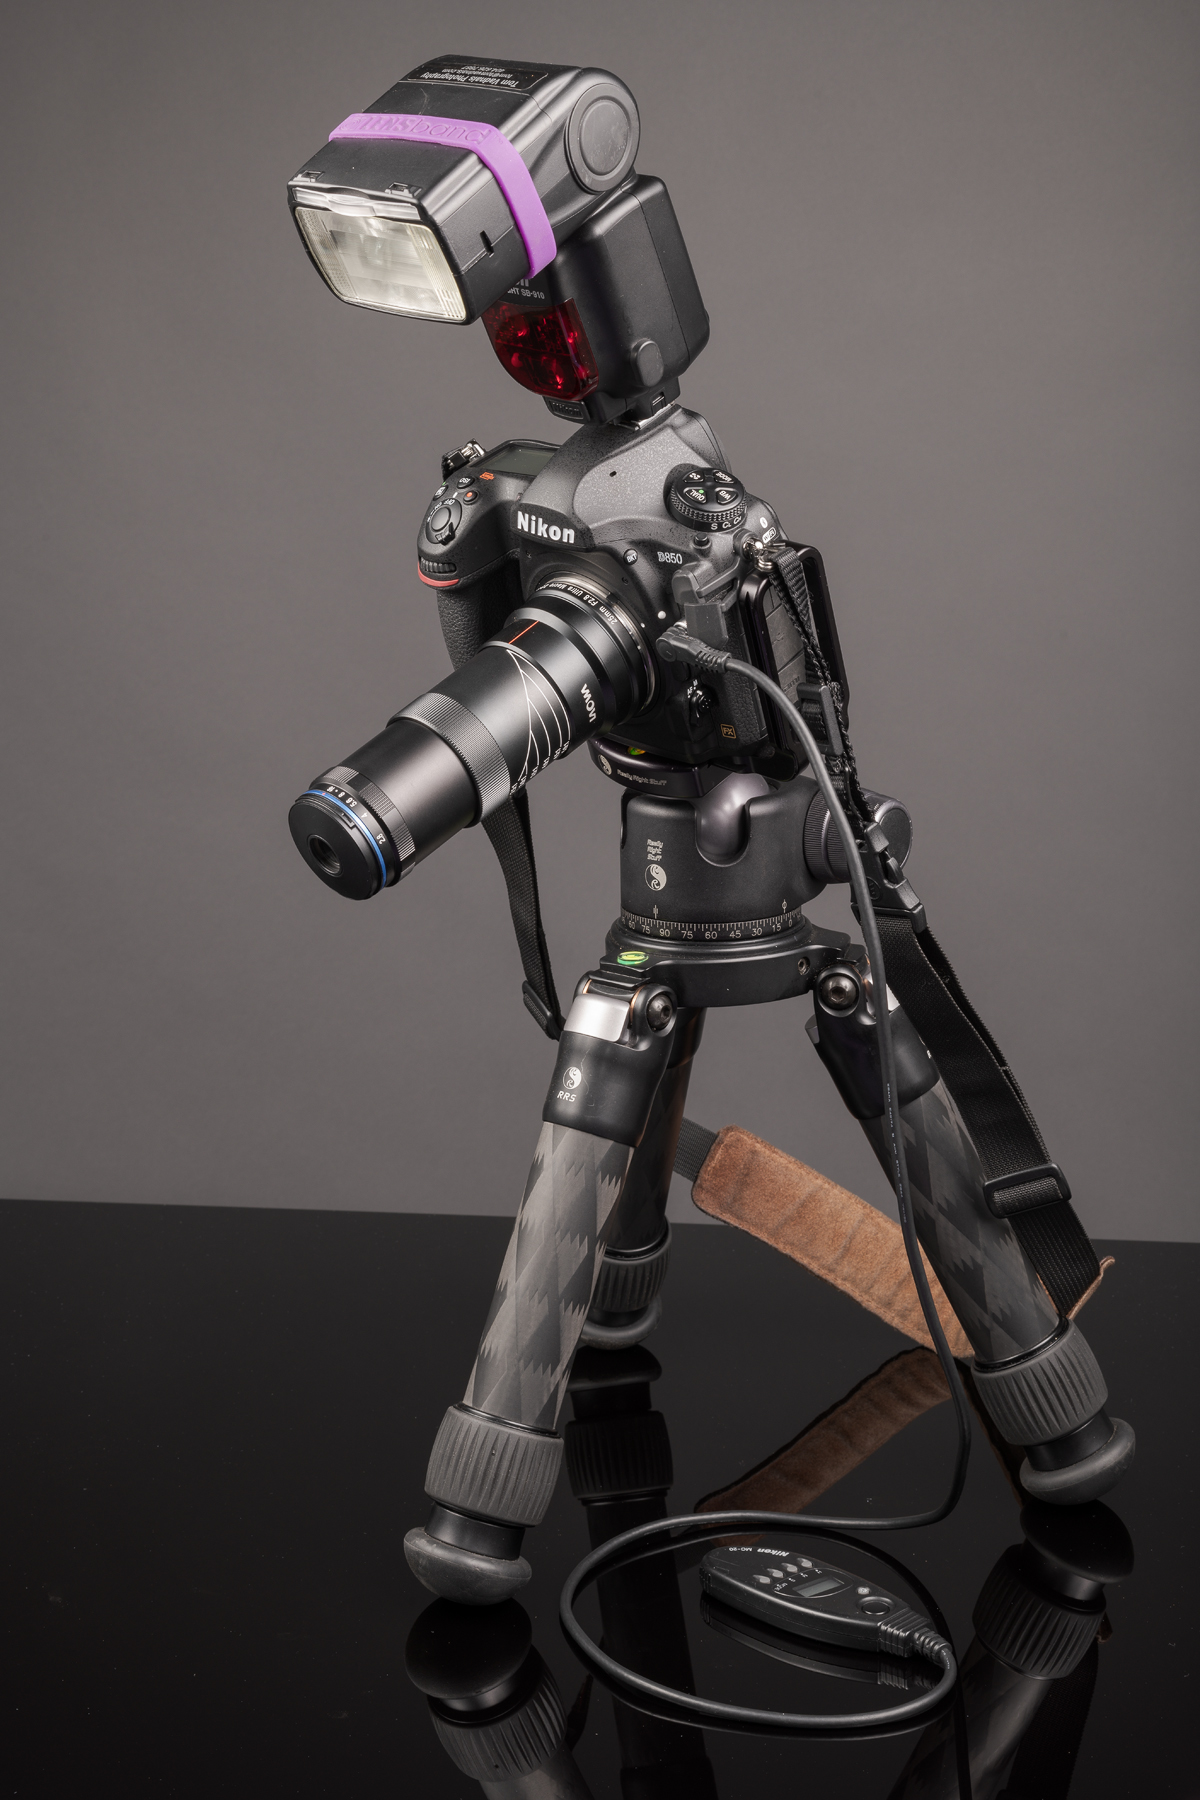
Now, this is not a lens that you just pop on your camera and start taking incredible macro photos with. It’s a fully manual lens that does not communicate with your camera. It also doesn’t have a focus ring. So auto exposure and autofocusing are out.
Here are some considerations to keep in mind when using this lens:
-1- You need lots of light or very long shutter speeds for any kind of macro work. And the greater the magnification, the more light you need. This can be tricky with the small working distances involved.
-2- Raising your ISO won’t often be a great option because any additional noise will destroy the fine details you’re trying to capture.
-3- With high magnification, both your subject and your camera need to be perfectly still. That often means clamping down your subject and definitely means using a good, sturdy tripod for your camera.
-4- There is no focusing ring on the Laowa lens. You focus by moving the lens closer to or further away from your subject. Handholding is completely out of the question. Even with a good tripod, it can be quite tedious. You’ll really benefit from a macro focusing rail. It works best with Live View zoomed in to 100%. You’ll also want to illuminate your subject with a flashlight while you focus.
-5- You set the aperture on the lens, then adjust the ISO and shutter speed to match your lighting. You’ll need some experimentation and practice to get your exposure correct. This will become easier with experience.
-6- While stopping down your aperture increases depth of field (DOF), it also increases diffraction, which destroys the fine details you are trying to capture. The greater the magnification, the less DOF you have at any given aperture. If you can’t get adequate DOF at a given magnification, you should consider focus stacking a series of photographs. That involves taking multiple images with varying focus points, then blending them in Photoshop, Helicon Focus, or Zerene Stacker. More on focus stacking in a later blog post.
-7- To ensure the greatest DOF in a single image, or just a few images, it is best to photograph with your camera as perpendicular to your subject as possible. The greater the angle your camera is to your subject, the shallower the DOF will appear. To keep an offset subject all in focus would require multiple shots stacked in post-processing.