To facilitate my tire, wheel, and product analysis and photography, I set up my Studio Lab in my basement. Although it continues to evolve, it had fortuitously been set up and in use for nine years before the COVID-19 pandemic of 2020 brought most travel and meetings to a halt. In fact, long before the pandemic, I have preferred having tires, wheels, and other products shipped to me for analysis and/or photography in my Studio Lab rather than traveling to where they might be stored.
In my Studio Lab, I have all the inspection and photography equipment I need to do a complete analysis and documentation, regardless of what I encounter. Besides, I can leave any setup in place for several days if needed. (Click on an image to enlarge it. Then click back arrow to return to this post.)
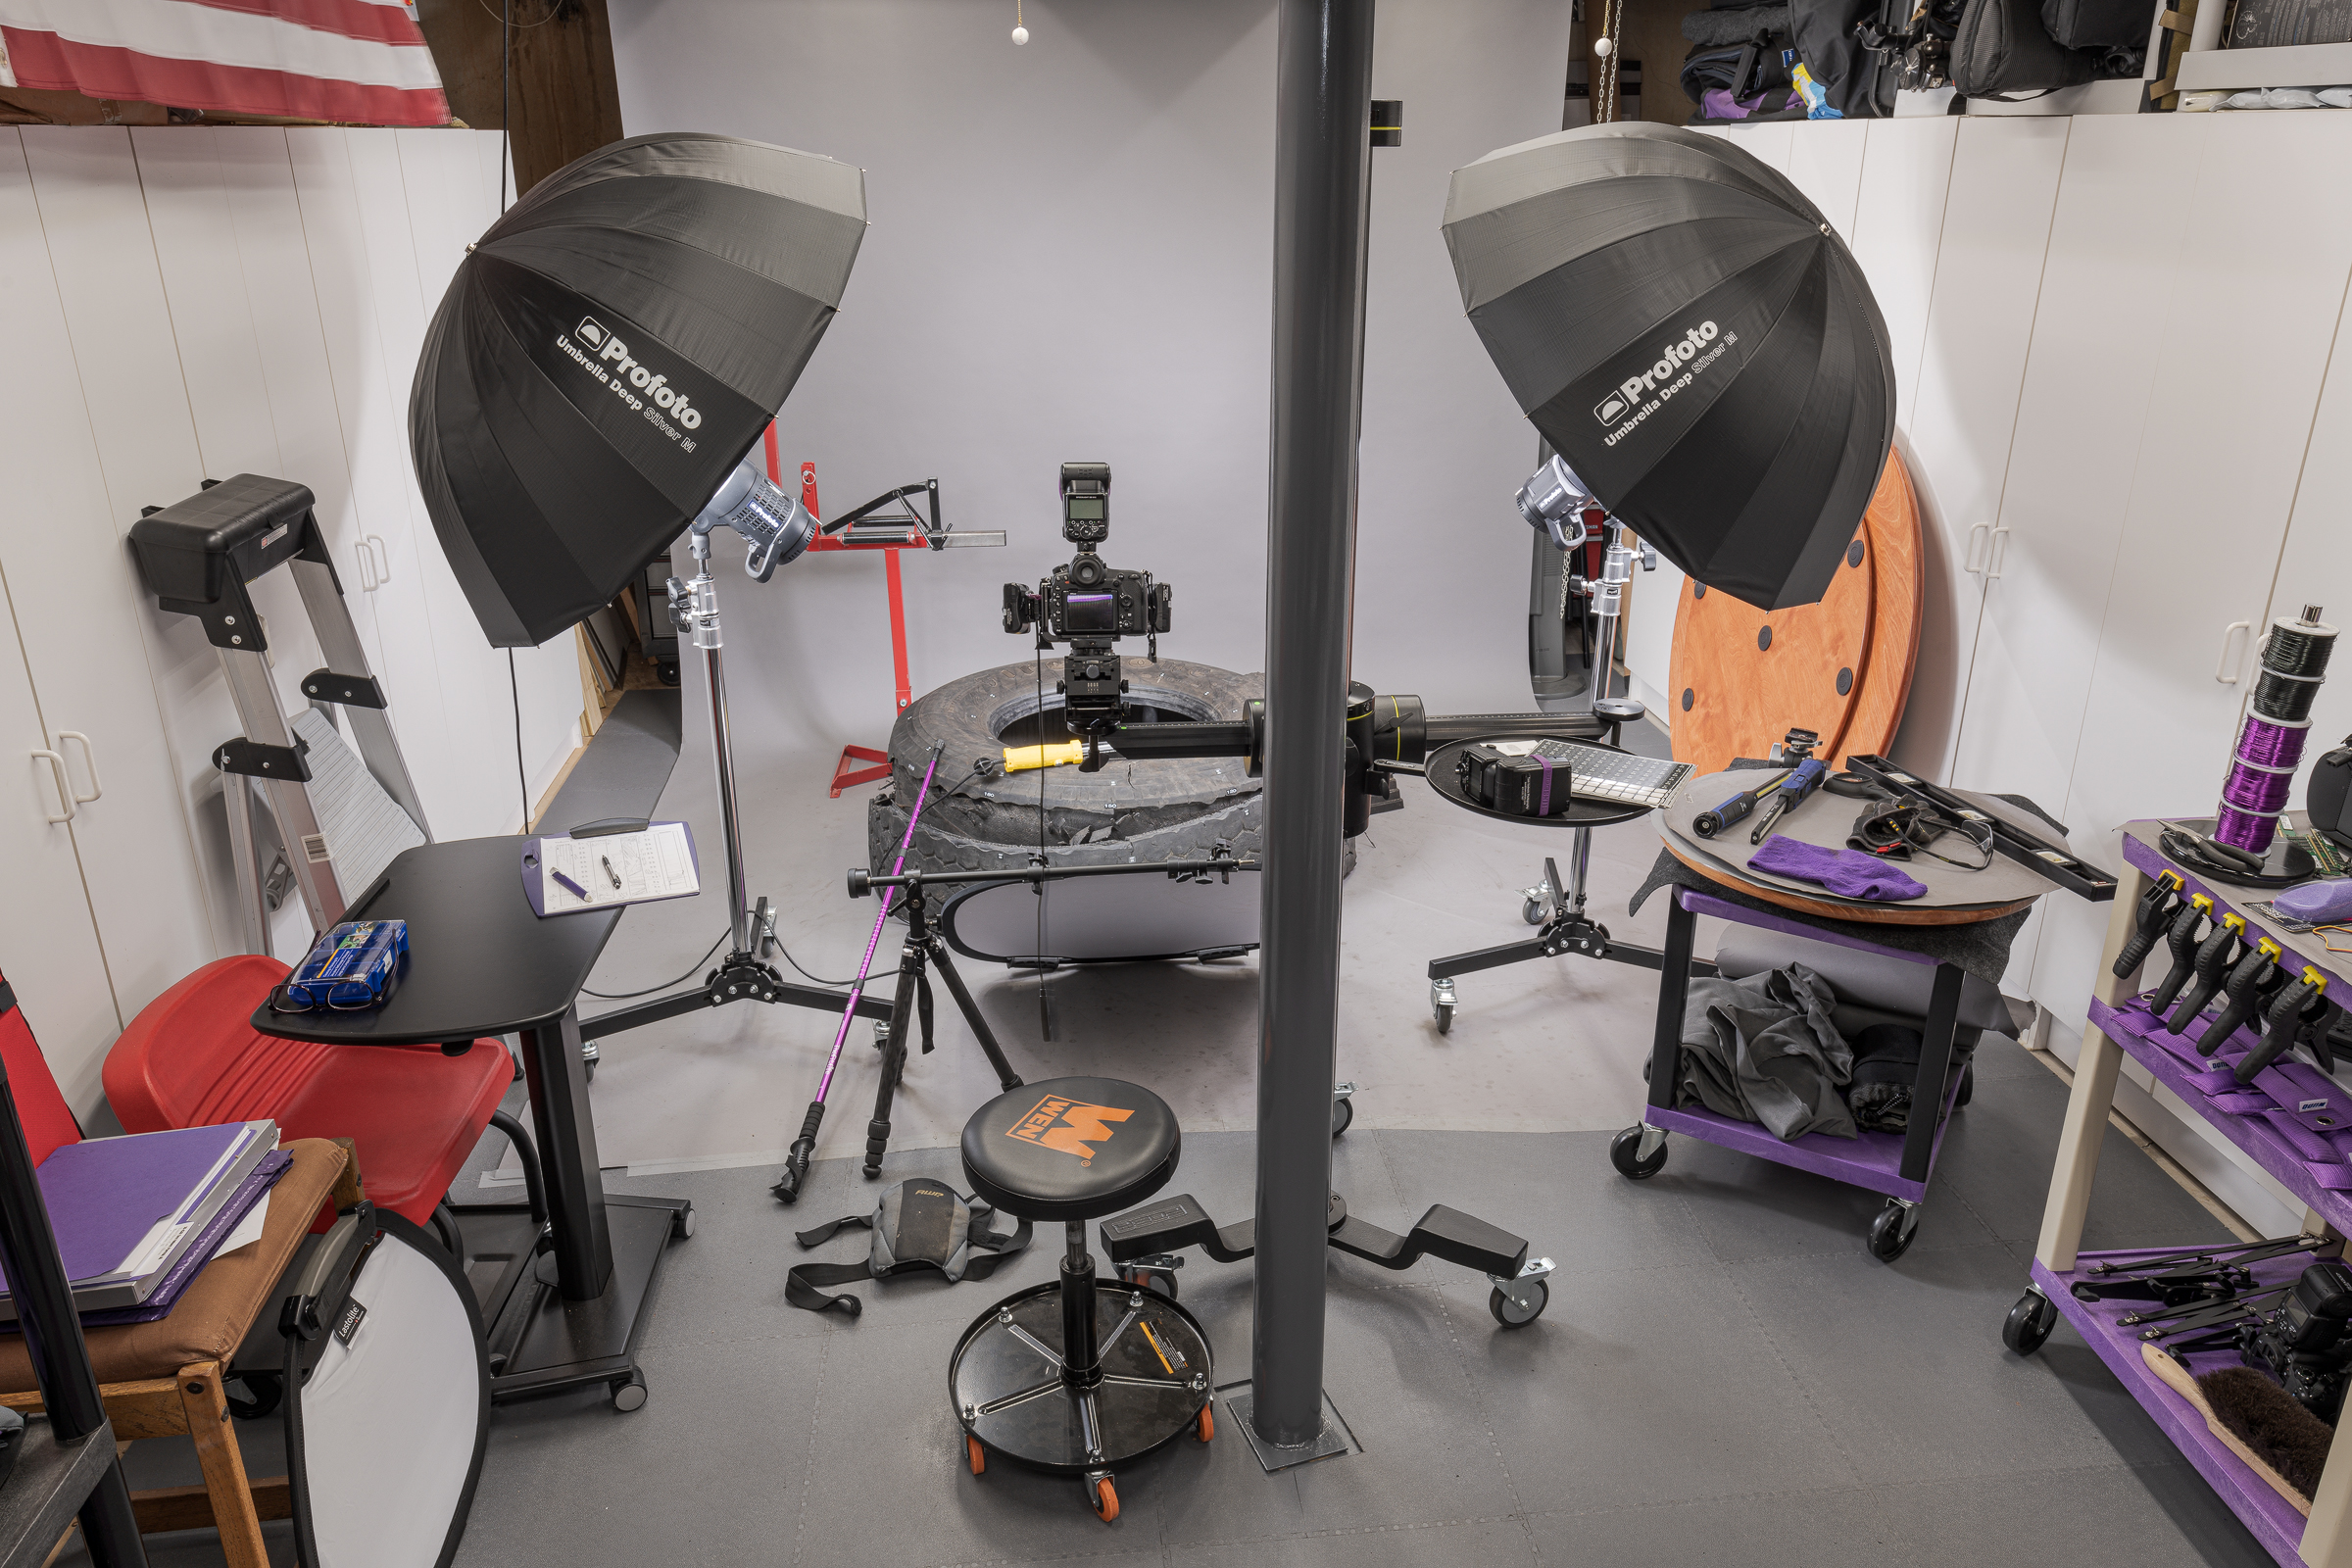
Although it is partly obscured by the support pole in the photograph above, I mount a camera on one end of the sliding arm of a Foba rolling studio stand. One of my favorite pieces of gear, a studio stand is much faster to adjust and move than a tripod. The arm rotates around, slides back and forth on, and moves up and down on a solid pole mounted to a base with three lockable wheels. These adjustments allow a camera to be brought and held in the exact position needed—both rapidly and securely.
I then mount as many lights as required on rolling light stands, floor stands, C-stands, or clamps. Having the camera and lights on rolling stands makes it quick and easy to change their positions. My large collection of reflectors and reference scales can be held in position with a variety of clamps, as needed.
I also use one of three wooden or four plastic lazy susans, depending on the size of the tire, wheel, or product. I cover the lazy susans with gray paper or cloth, and use a neutral gray background paper from a large ceiling-mounted roll.
Because tires and wheels are usually neutral in color—shades of black, gray, silver, or white—the neutral gray background neither clashes nor contaminates the subjects. With other products, I may use gray, black, or white backgrounds.
I’ve installed so many LED shop lights overhead that a couple visitors have described the area as bright as an operating room. Even with this much light, I still use a number of handheld LED lights during inspections, and to assist with composition and focusing while photographing. (Click on an image to enlarge it. Then click back arrow to return to this post.)
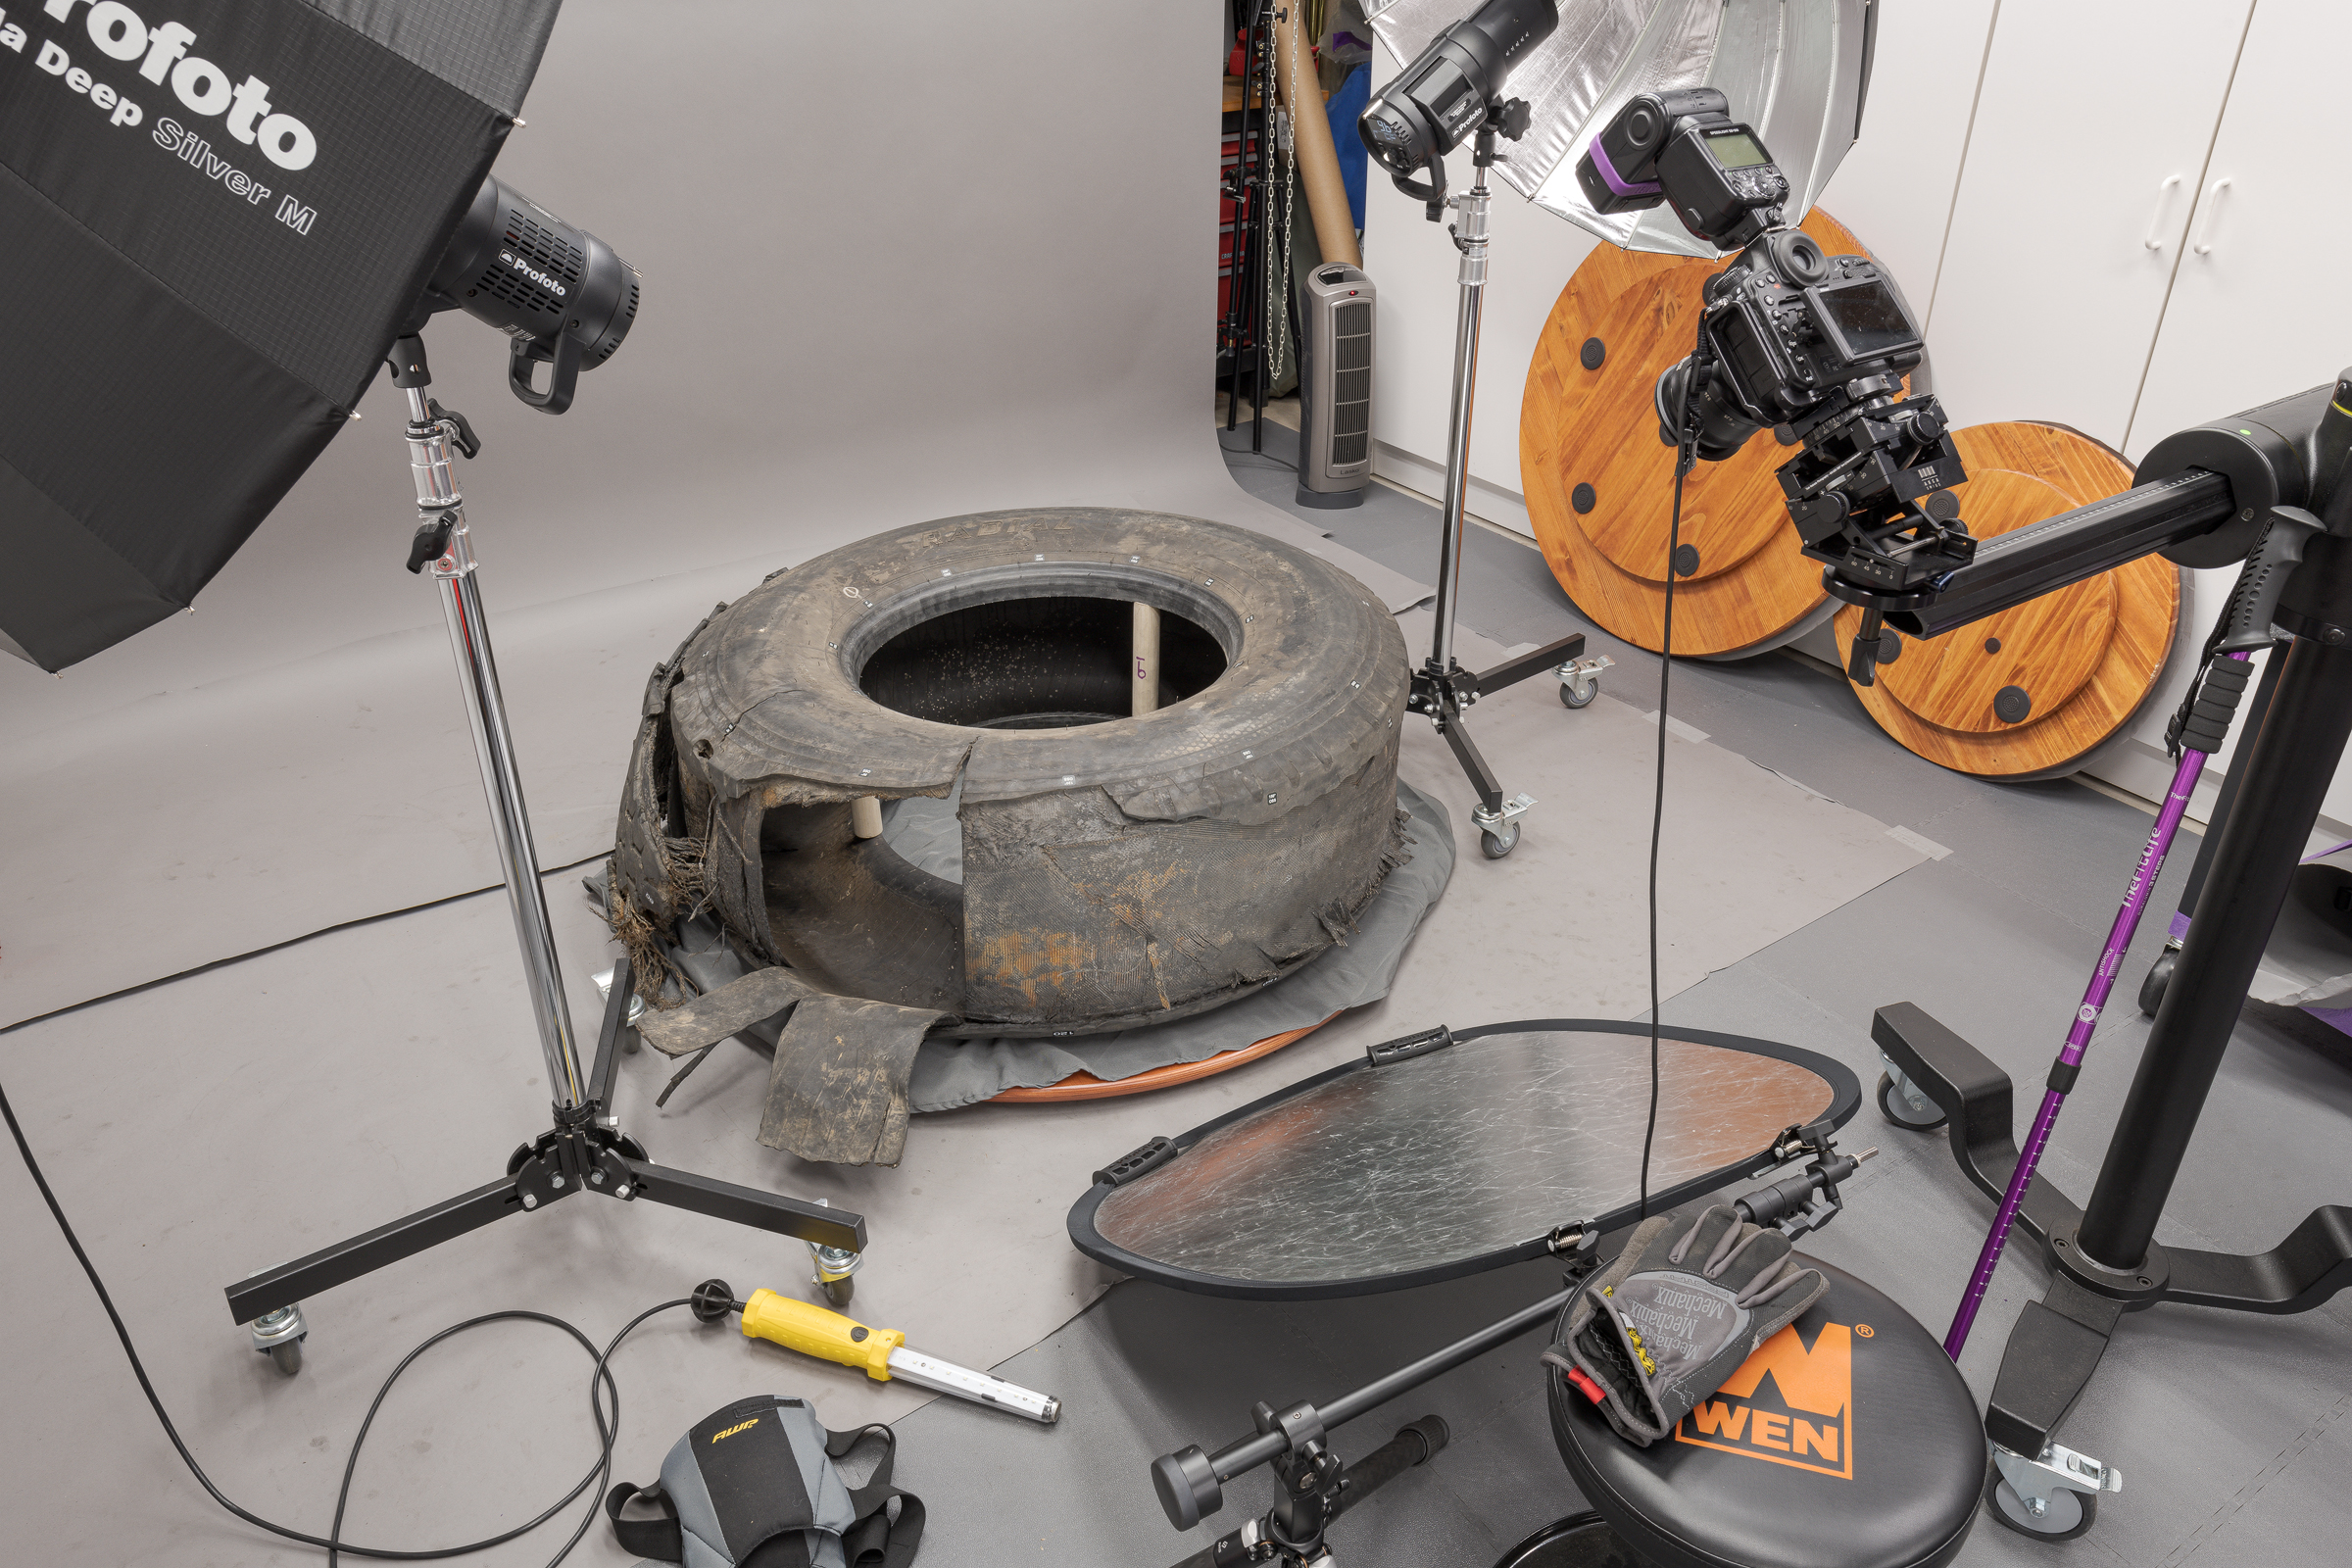
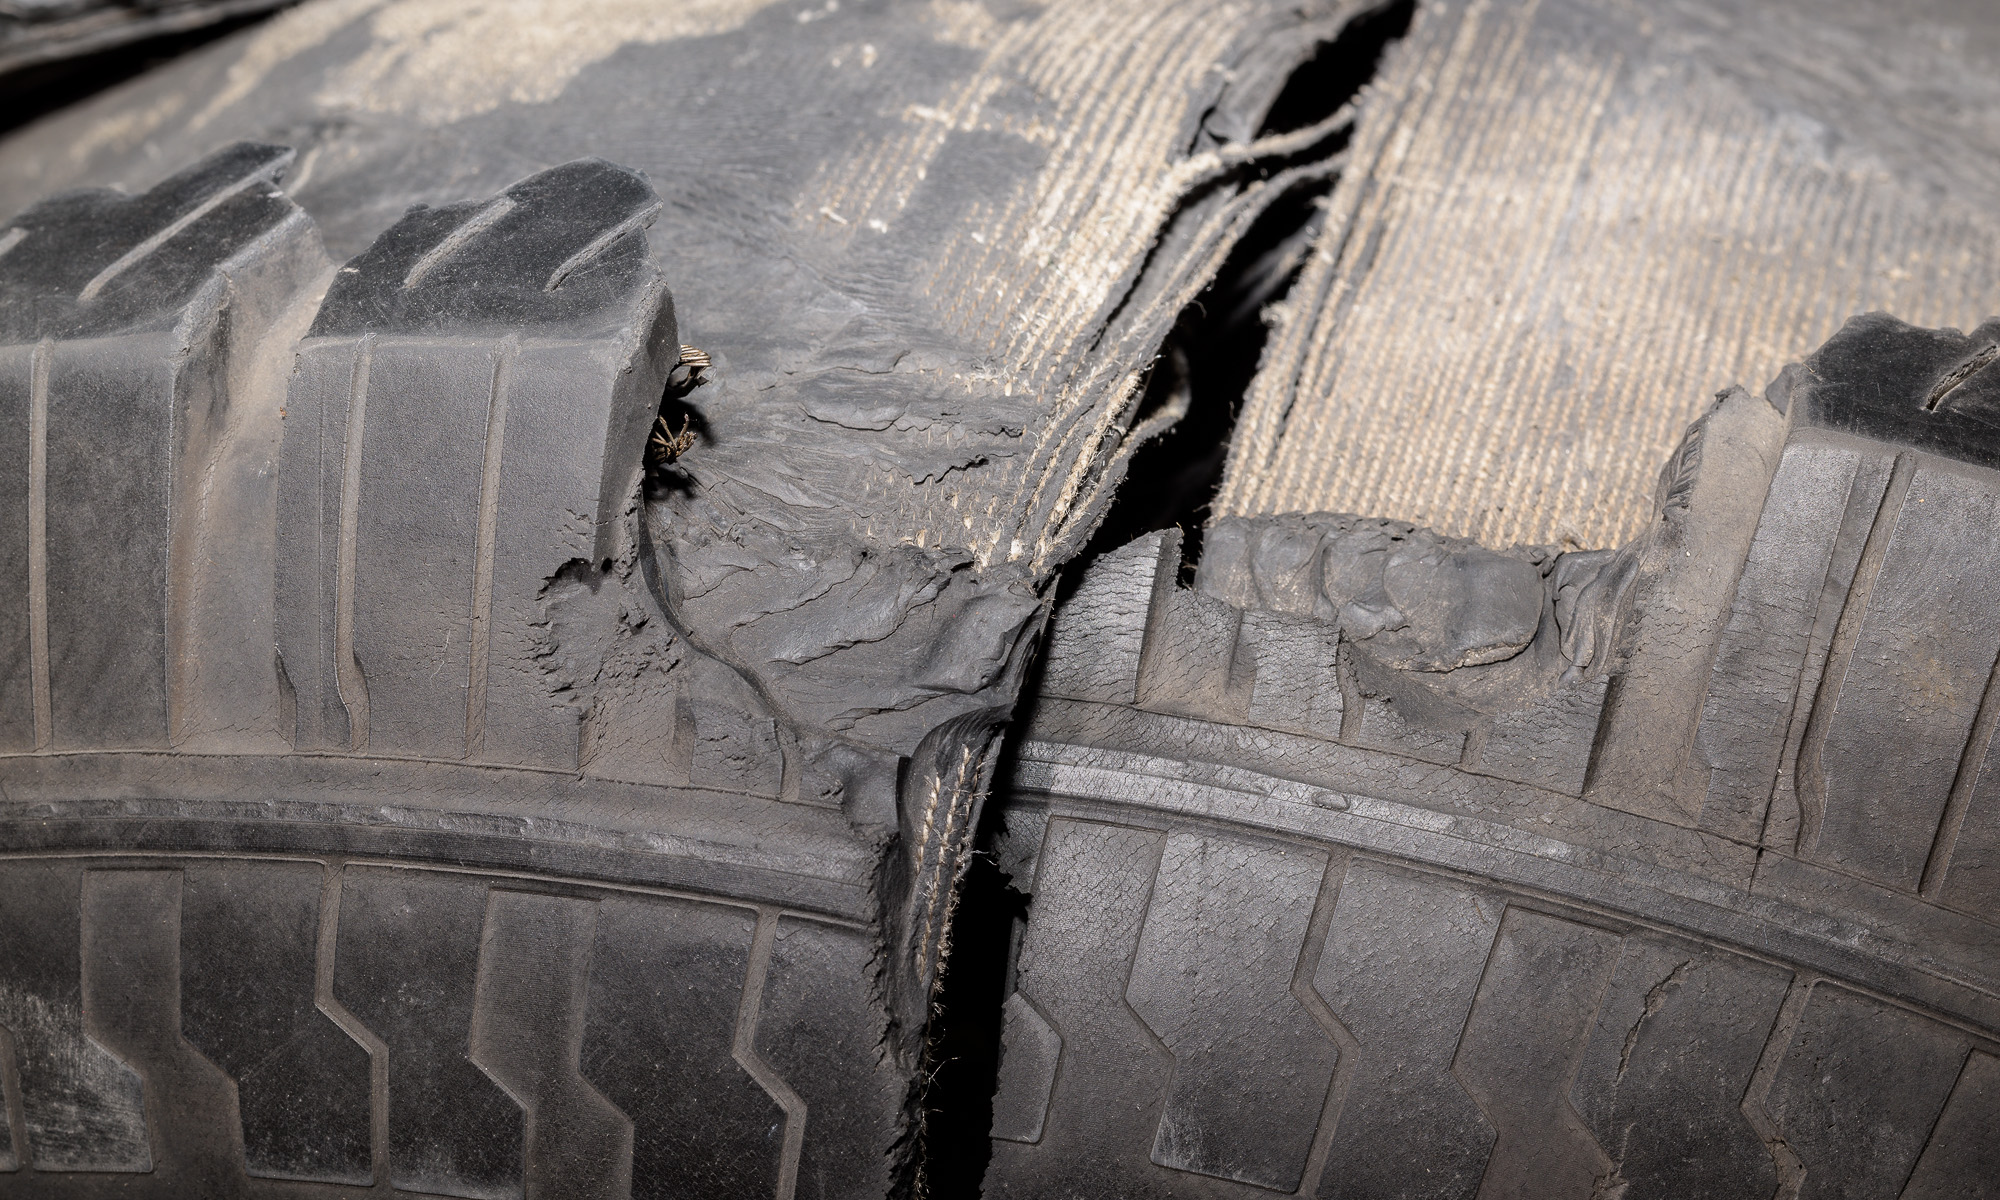
I will describe lighting for specific items in future posts, but for tires, I generally use two Profoto Pro-B3 750 W/s studio strobes—both mounted on rolling light stands. (For tires, I now use the strobes without umbrellas to get even more contrast and details.) A Godox TT685IIN flash affixed to the hot shoe a Nikon Z 8 mirrorless camera triggers both studio strobes, along with supplemental remote Godox TT685IIN’s and/or Godox MF-12 macro flashes, if required. A silver Profoto reflector bounces light onto the tread or belt surface.
If you’re wondering, I use the purple trekking pole to rotate a tire while I’m sitting on the Wen mechanic’s rolling seat behind the camera. Using that pole allows me to look at the image through the grid on the camera’s rear LCD while I precisely line up the position stickers on the tire with the gridlines.
The cable hanging from the camera is the remote shutter release. With this, I can trip the shutter without touching the camera to insure there is no motion blur in the photo.
I will share more of the techniques and gear I use in future posts.