Often, evidence is stored in plastic bags or containers with shiny surfaces that result in reflective glare when photographed. This glare can obscure both the content and any markings on the bag or container.
As an example, a small piece of the bead toe from a tire was placed in a plastic bag, which was labeled with a black magic marker. (The writing on the bags in the images below has been intentionally altered to preserve anonymity.)
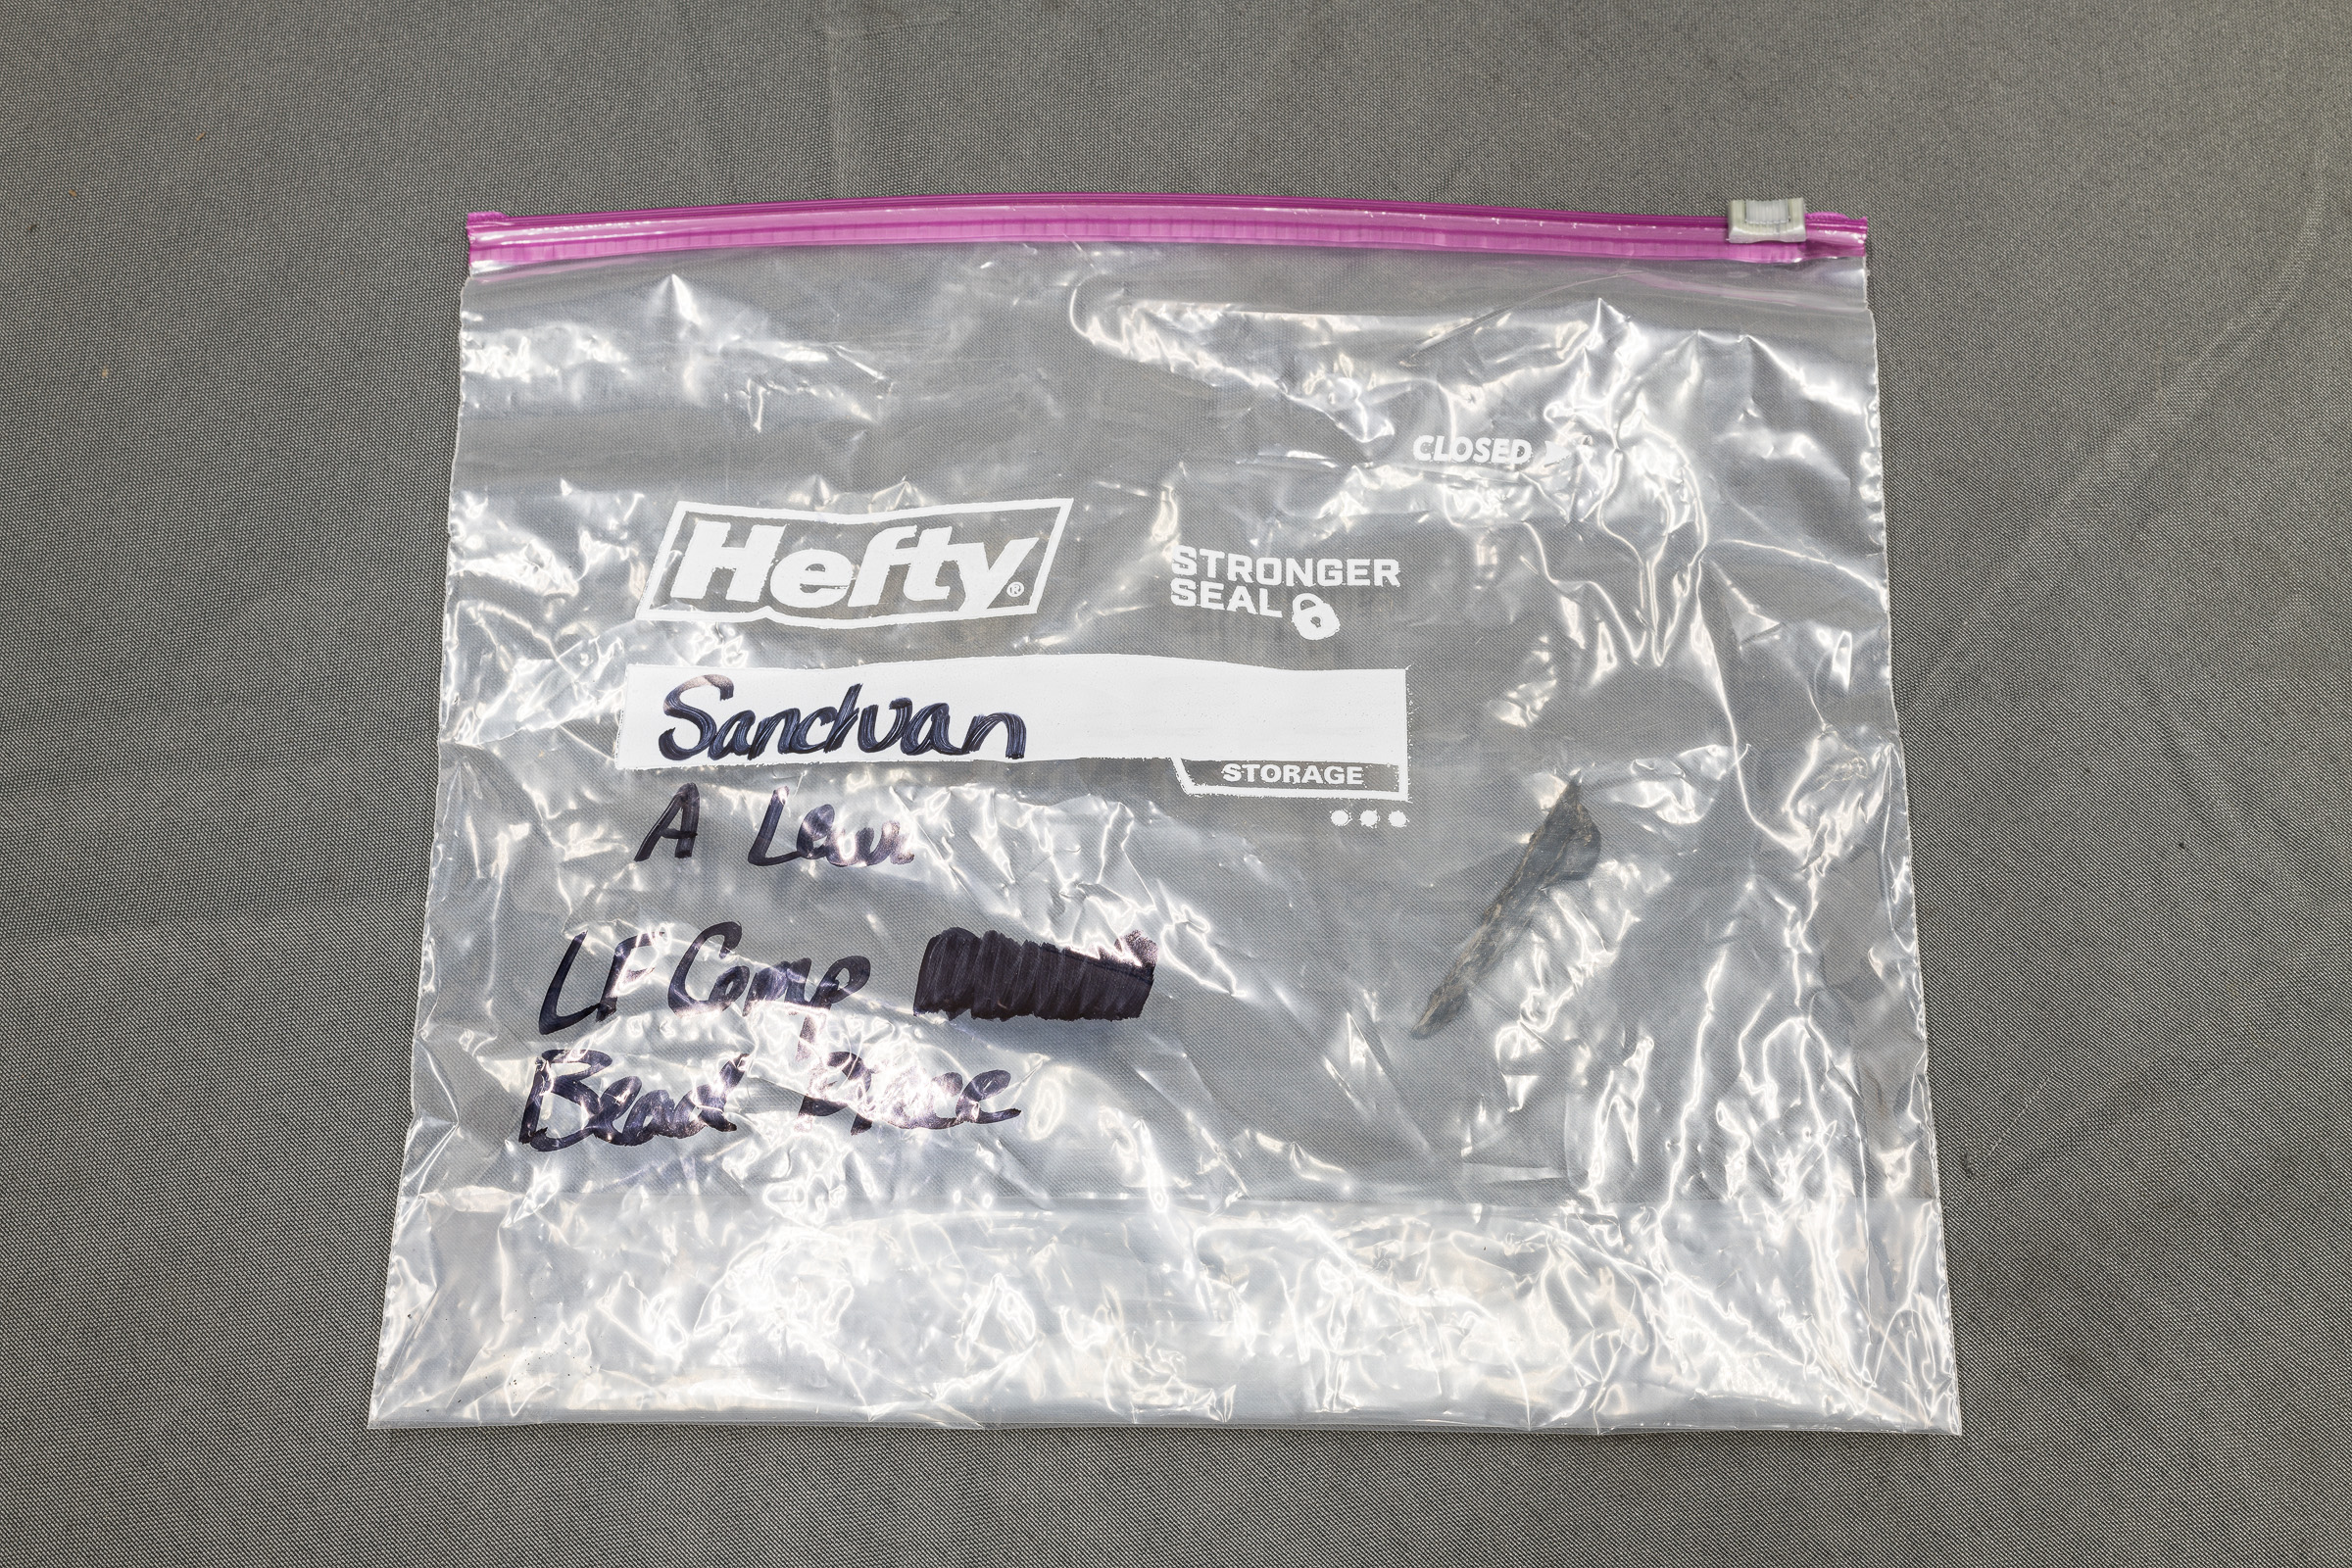
This first image was made in my Studio Lab using just the overhead LED lights. [Click on image to enlarge, then click on left arrow to return to this post.]

Even though the image is properly exposed, the overhead LED lights resulted in so much glare that it is difficult to make out the tiny tire piece inside or the writing on the outside of the bag.
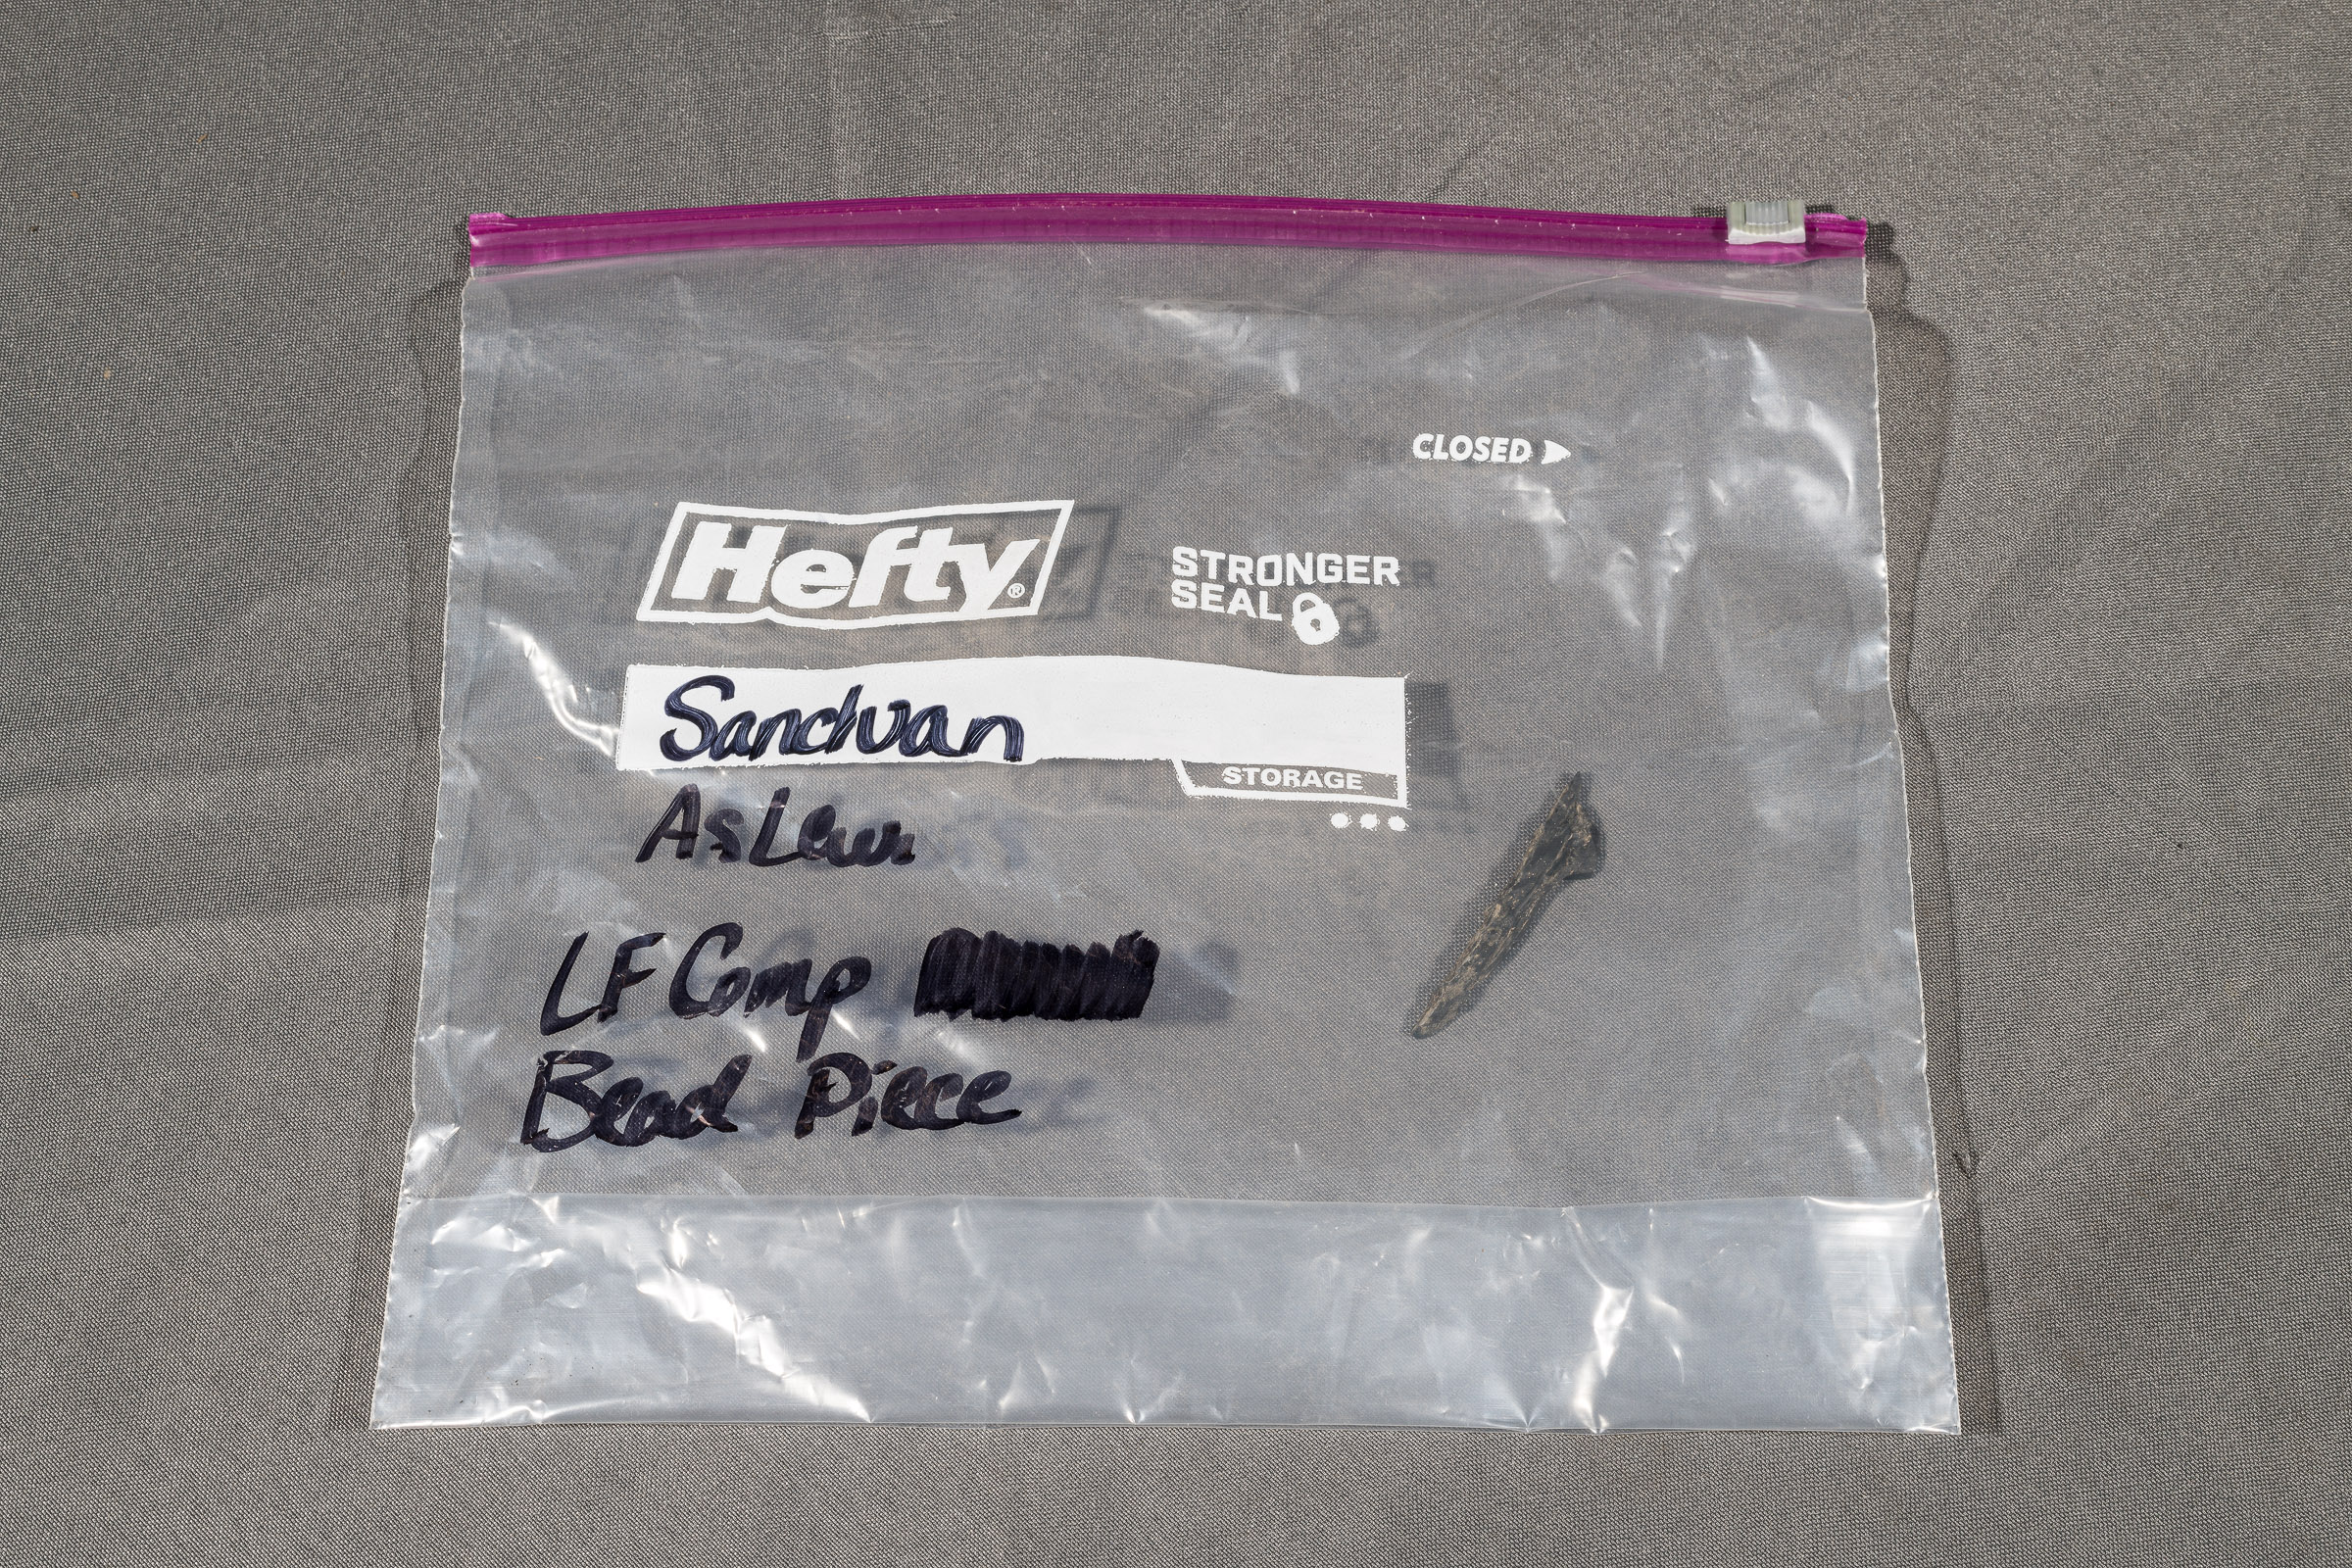
To show both the contents and the writing, I kept the overhead LED lights on, but added a Profoto B1x studio flash on the right and on the left side of the bag. (Note: any remote flashes or speedlights can be used for the same effect.) [Click on image to enlarge, then click on left arrow to return to this post.]

Wait, how did adding even more light eliminate the glare? Two things combined to make that work.
First, the added light from the flashes allowed me to significantly reduce the overall exposure. In this case, for both images I kept the aperture at f/16 for depth of field, and the ISO at 64 for lowest noise/highest dynamic range.
In the original image using the overhead LED lights only, the shutter speed was 1 second. When I added the flashes, I reduced the shutter speed down to 1/200 second. This faster shutter speed prevented the overhead LED lights—and their reflections—from recording at all. If I turned off the flashes, the image would have been black, even though the overhead LED lights were on.
Second, the light that reflected from each flash bounced away from its respective flash, and not into the camera lens. Hence, their reflections were not recorded by the camera.
Takeaways:
-1- To reduce or eliminate glare from overhead lights, reduce the exposure enough to cause the image to go black, or nearly so.
-2- Add one or more flashes positioned (usually to the sides) such that any reflections bounce away from the lens, not into it.
-3- Adjust the power of the flash(es) to properly light the subject at the new exposure.
-4- Note: With curved or irregularly shaped objects (like plastic bags), some localized reflections may remain. These may or may not be moved or eliminated by changing the positions of the camera or the flash(es).
