One kind of forensic night photography requires you to accurately capture the appearance of a scene as closely as possible under lighting conditions similar to what they were at the time of an incident. Of course that results in an overall image that appears dark since, after all, it is a night scene.
Using fully automatic exposure modes will result in the scene being significantly (and obviously) overexposed. This is because the camera is trying to record the scene as a mid-tone (frequently referred to as “middle gray” even when the subject isn’t gray). This automatic brightening of night scenes usually results in noisy, overexposed images that don’t resemble the actual scene at all.
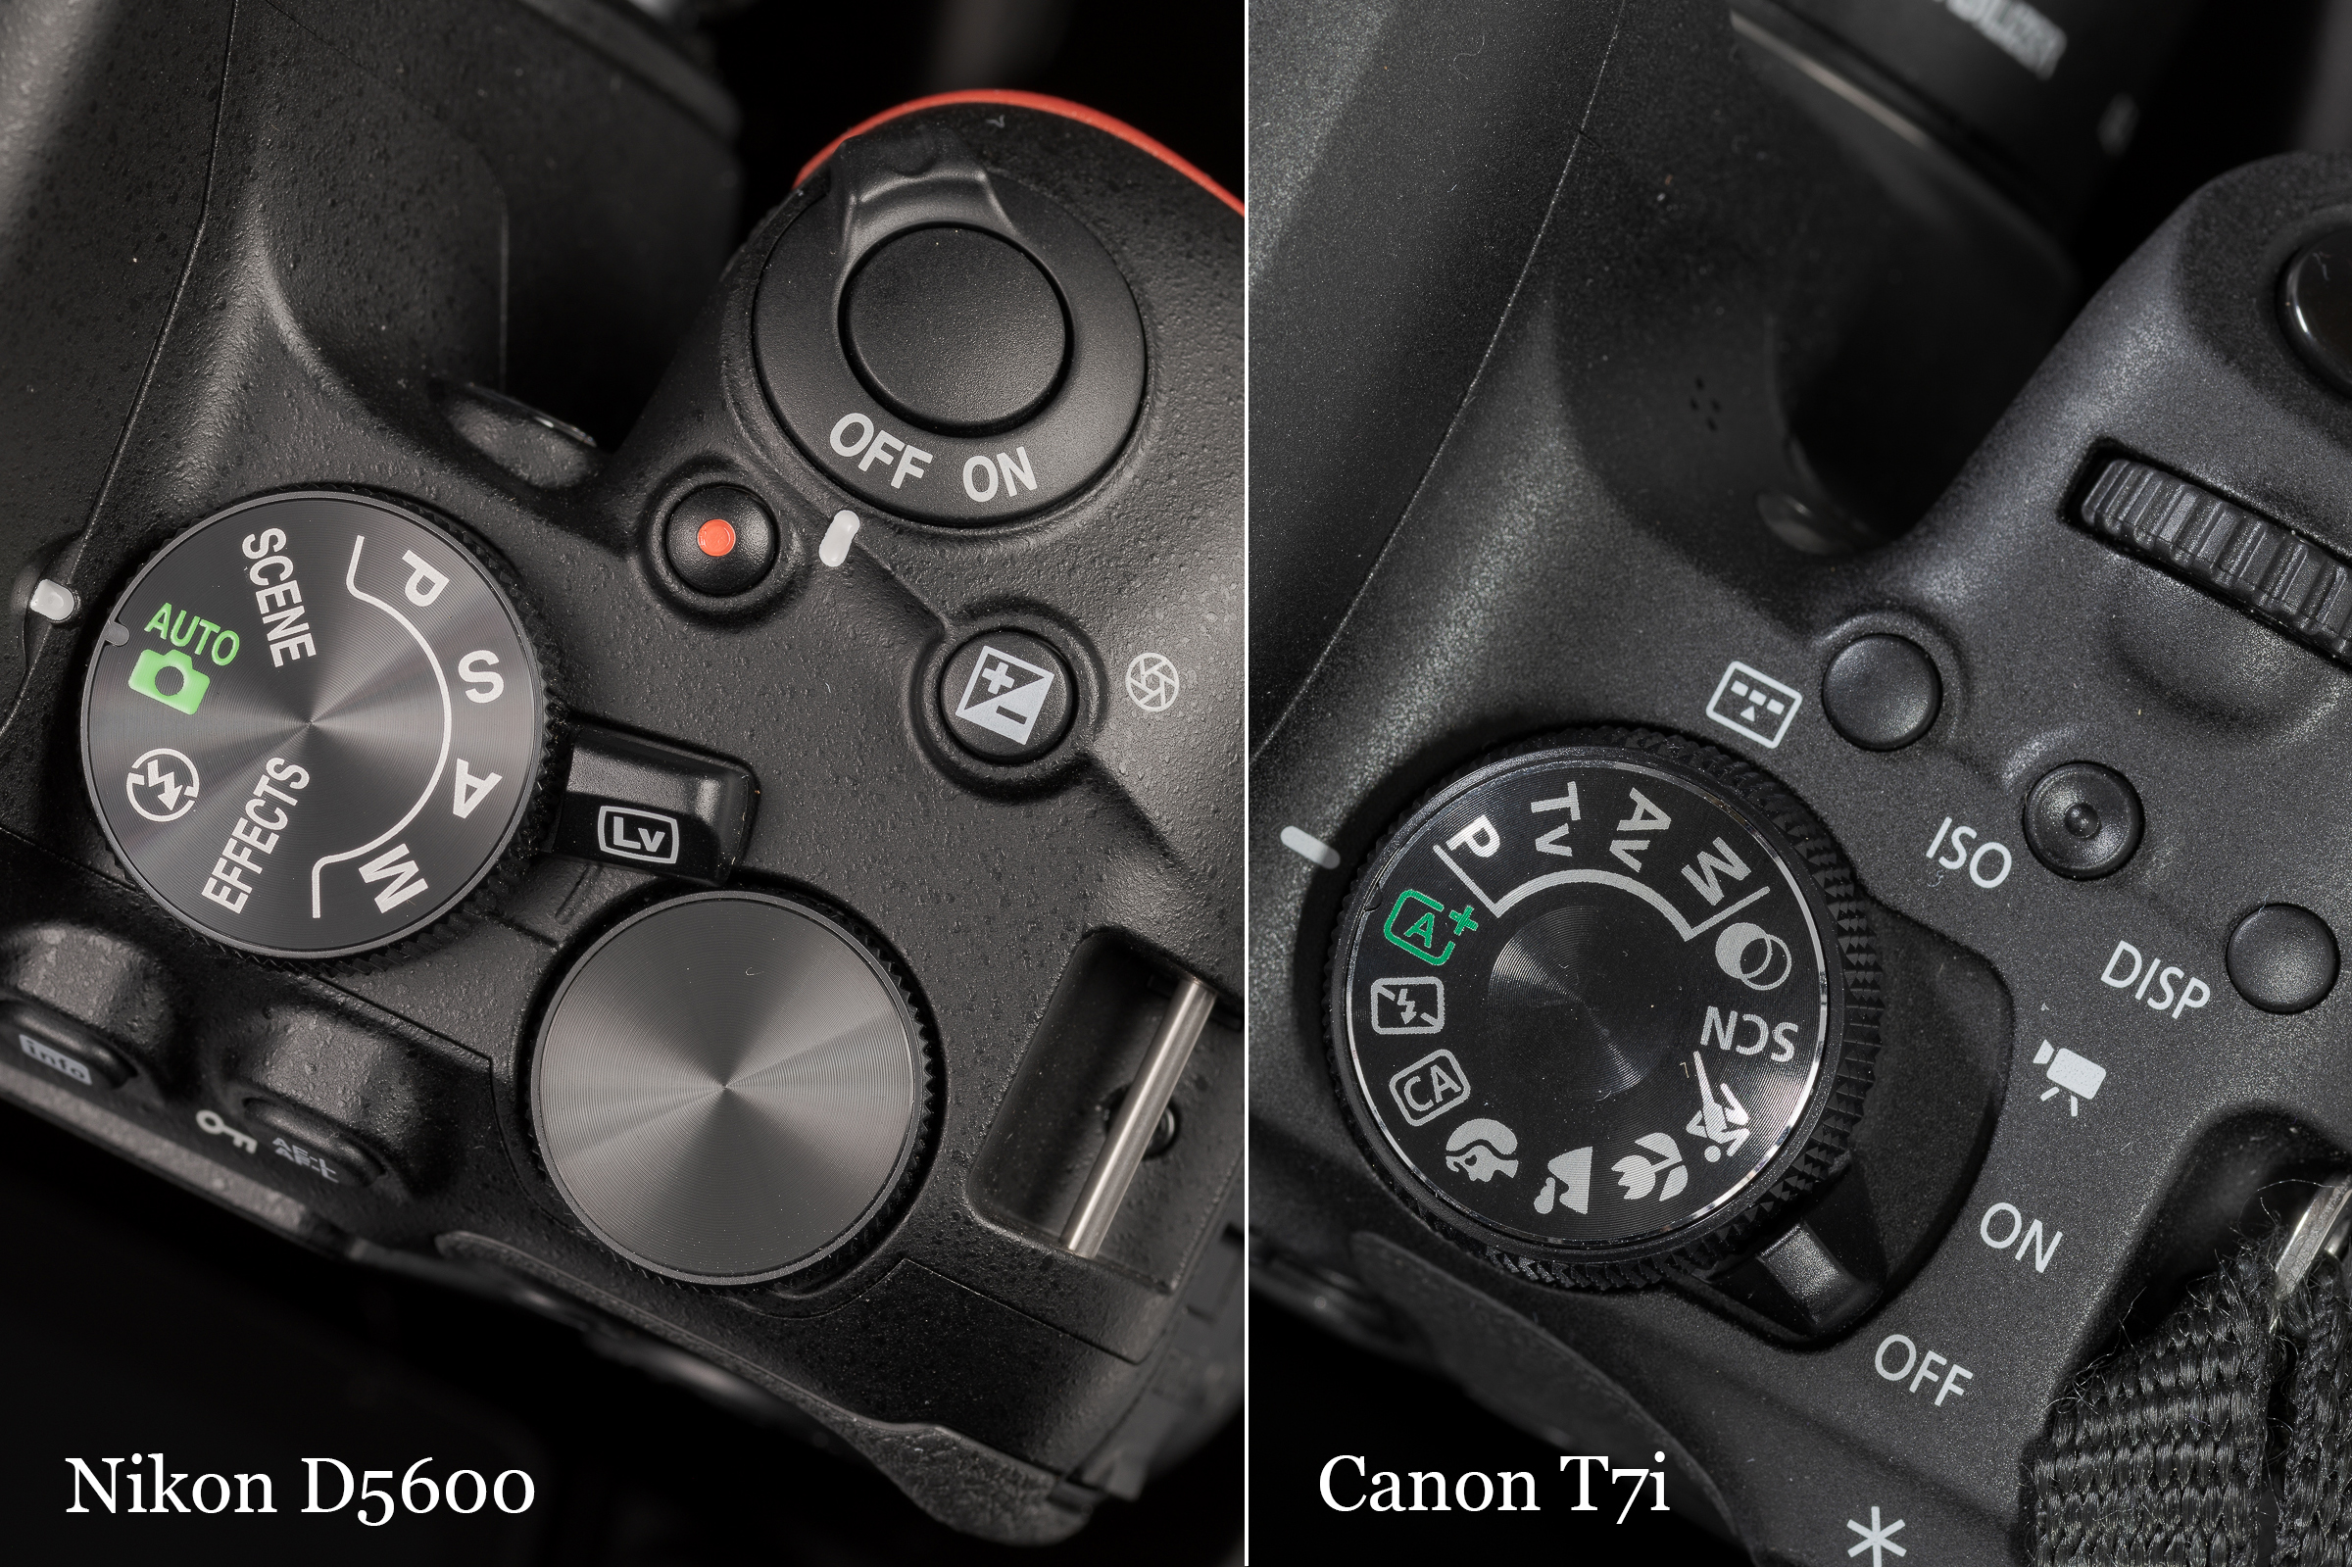
Almost all consumer and prosumer cameras have a fully automatic exposure mode denoted by a green camera icon with or without the word “Auto”. The image below shows the full Auto mode icon on a Nikon D5600 and Canon T7i. (Professional cameras like my Nikon Z 8’s often do not have this mode.) [Click on the image to enlarge. Then click on back arrow to return to this post.]
In Auto mode, the camera sets the aperture, shutter speed, and ISO, and you cannot change or override any of them! Because the photographer cannot affect exposure in any way in full Auto mode, when teaching I refer to it as the “Green Mode of Shame” to drive home the point that you as the photographer are left without any ability to control your exposure (or a number of other important settings). While this mode might work for ideal lighting during the day, it just doesn’t—and can’t—work for ambient light night photographs. (Note: Semi-automatic exposure modes Program, Aperture Priority, and Shutter Priority will be addressed in a future post.)
I made the following two images in a lighted parking lot that had a white, a black, and a silver vehicle in the scene. (Note: both images were captured in the camera’s raw NEF format.)
For this first image, I used a Nikon Z 5 in Auto mode (its Green Mode of Shame). As discussed above, the camera tried to create a mid-tone image, and I couldn’t do anything about it. [Click on the image to enlarge. Then click on back arrow to return to this post.]
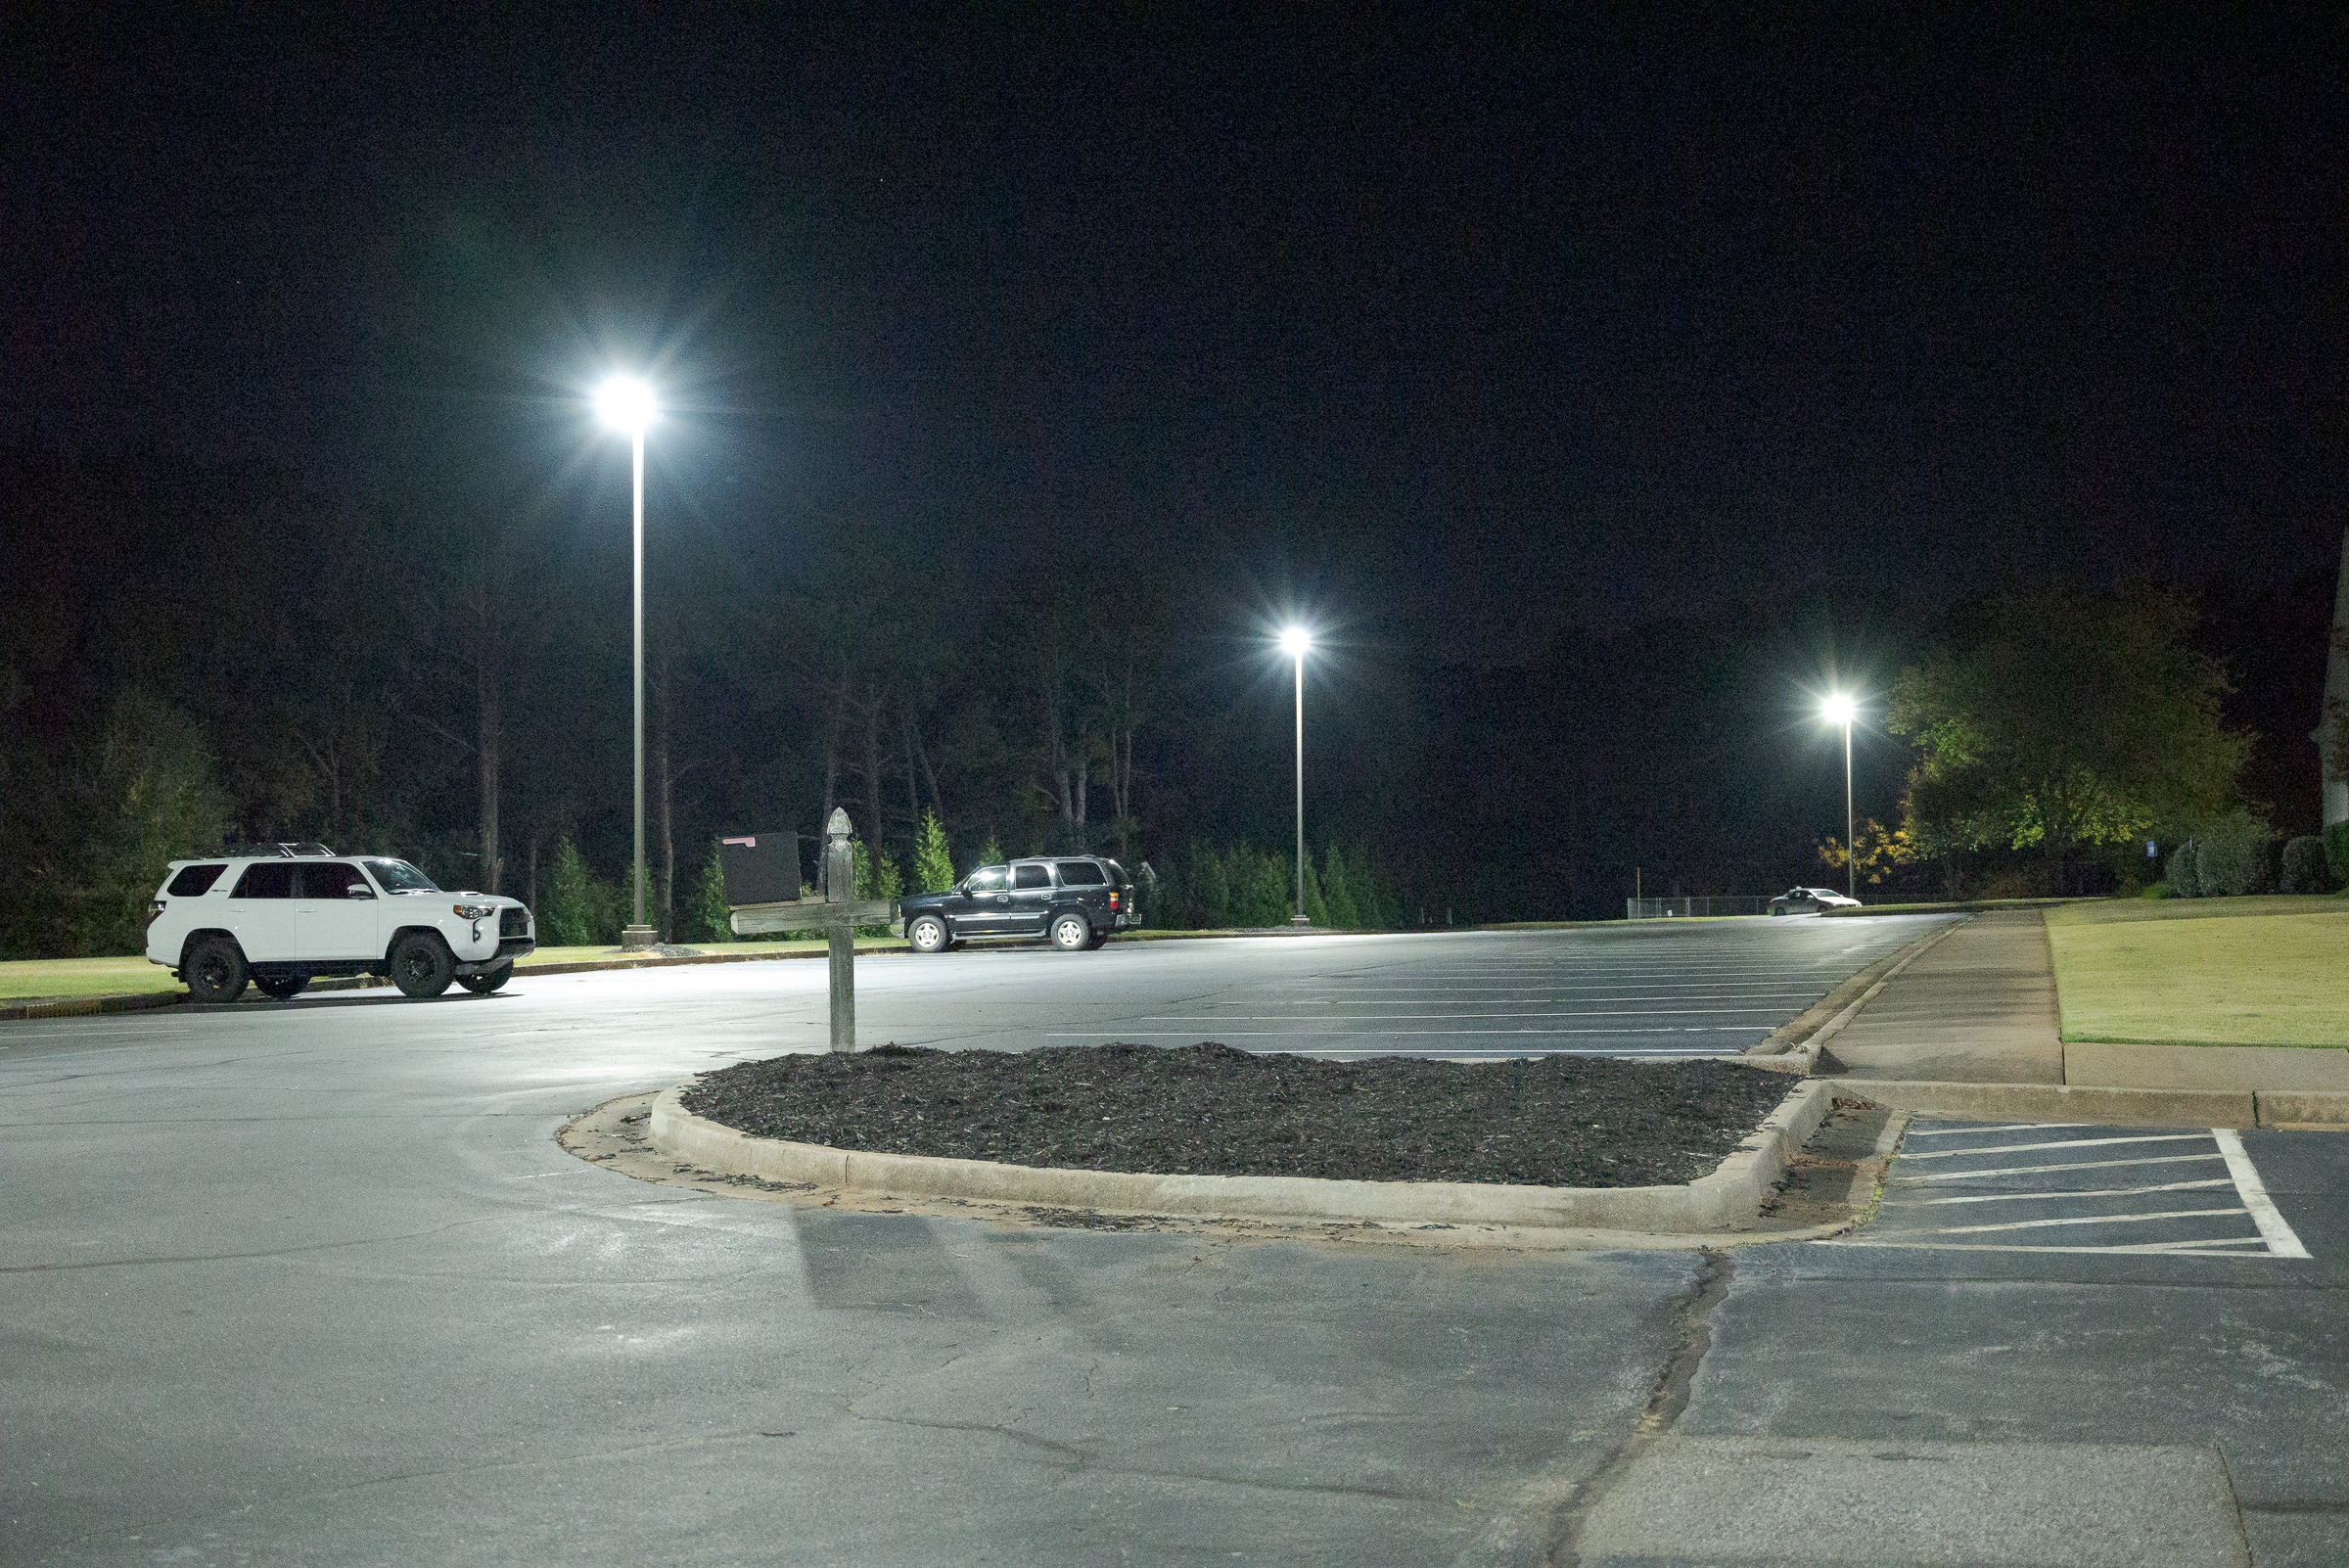
Note the camera chose a wide open aperture to let in as much light as possible (f4 on that lens), and an ISO of 25,600(!), while setting the shutter speed to 1/50 of a second. (A shutter speed of 1/50 of a second is considered handholdable with a near 50 mm focal length. The thinking is that if someone is going to use a camera in Auto mode, the camera will most likely be handheld. Consequently, the camera will open the aperture and boost the ISO to keep the shutter speed handholdable. But as usual, I had this camera on a tripod, like I almost always do in any light. )
Even though the original image is quite noisy (the great reduction in size and the JPEG compression of this posted image reduced the appearance of noise from the original raw), that’s not the biggest issue with it. The real problem is the scene was nowhere near this bright; it didn’t look anything like this at the time I made this image.
For the image below, I switched to manual exposure mode (the only exposure mode I ever use). I kept the aperture at f/4, but then set the ISO to the camera’s minimum of 100 to minimize the image noise. Because the camera was on a tripod, I wasn’t too concerned about shutter speed as long as it stayed within reason. [Click on the image to enlarge. Then click on back arrow to return to this post.]
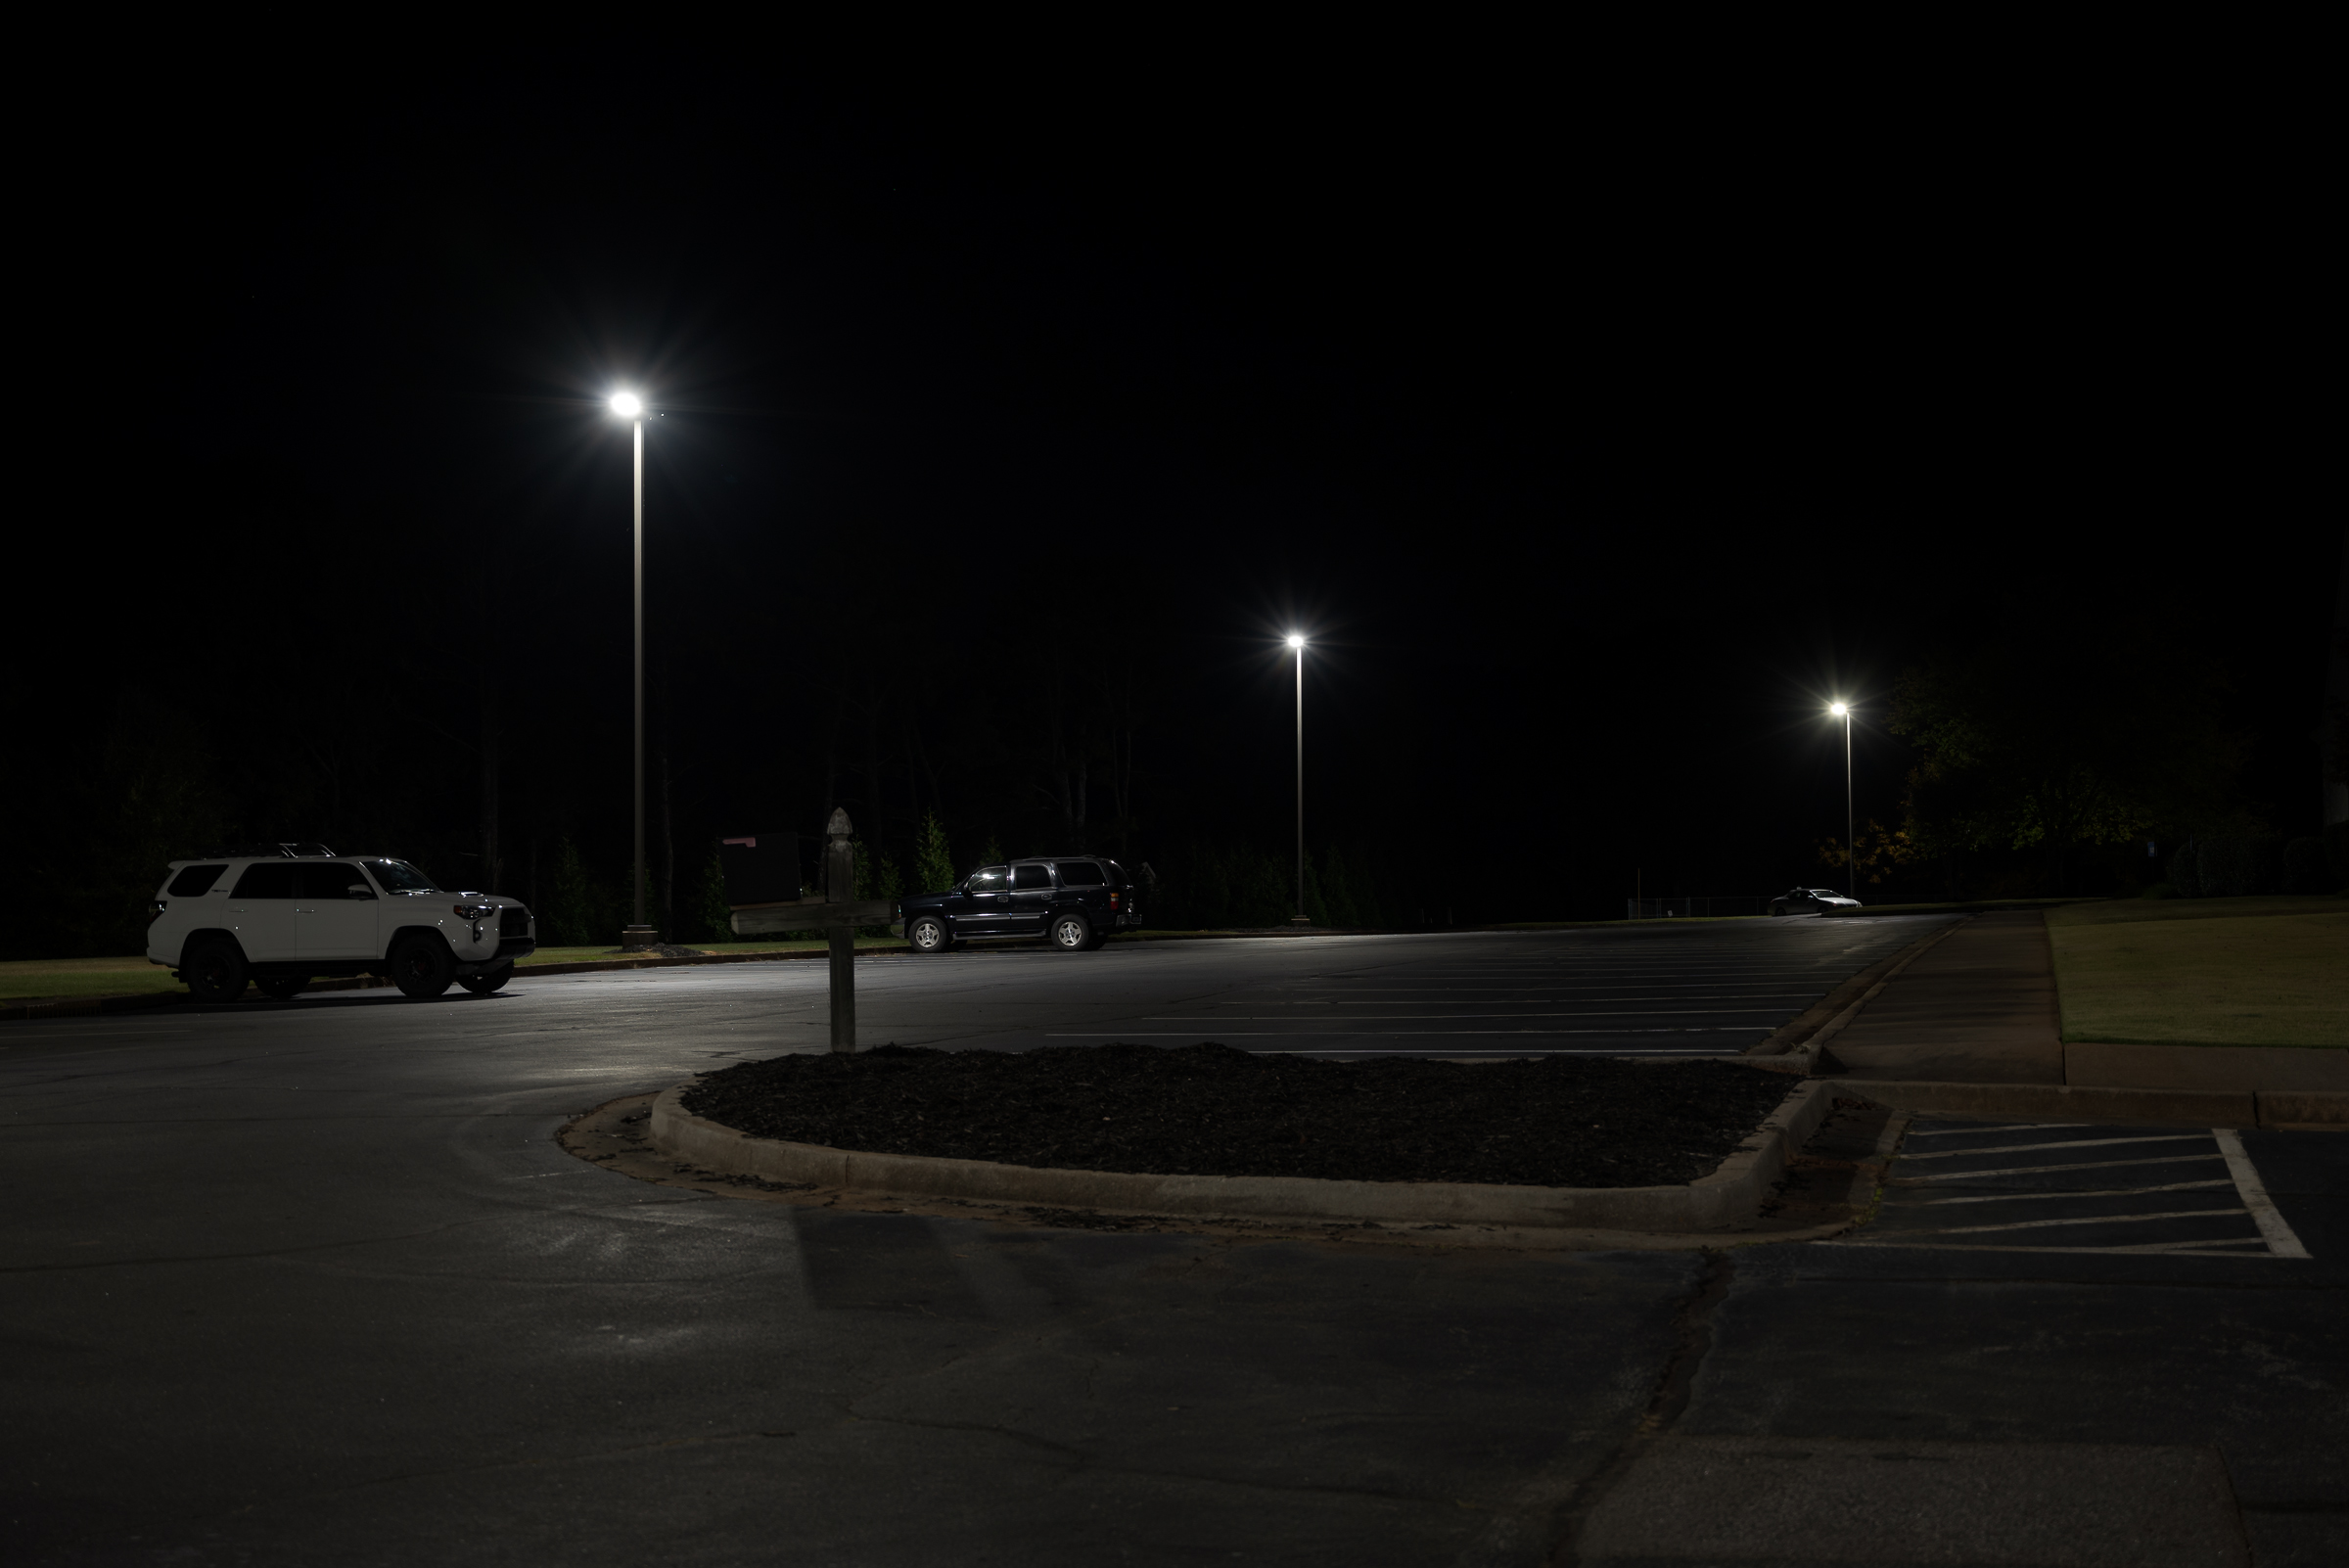
With the aperture and ISO set, I adjusted the shutter speed until the image on the back of the LCD looked like what I was seeing with my naked eye. As it turns out, the Auto image was four stops lighter than this more accurate one.
Note 1: By default, I have the camera’s Picture Control set to Neutral with reduced contrast and saturation so the LCD closely matches my computer monitor.
Note 2: For an actual night photograph case, I start by tethering my camera to a laptop that is calibrated to match my desktop monitor. There’s much more to the actual process than I did for this demo, but it’s close enough to illustrate the point that you need to take manual control of the camera.
While this second image is close to showing the scene as I saw it, to view it properly, you would need to view it with a black surround in a darkened room with your monitor brightness set to 140 cd/m² to match what I see. Regardless of these technicalities, comparing the two images—in whatever light you’re in or computer you’re on—it is obvious that the upper Auto exposure image doesn’t look anything like the more accurate lower manual exposure mode image.
In a number of cases where I’ve done both the night photography and explained why photographs submitted by other experts or photographers were improper and misleading, all of those inaccurate photographs have been stricken and disallowed by the judge.
While it’s a little bit off-topic, being able to explain how and why photographs were made and why they accurately represent what they purport to show—and why other ones don’t—is critical in almost all ambient light night photography cases.
Takeaways:
-1- Fully automatic exposure modes (like Auto) are not designed to—and cannot—accurately capture ambient light night images.
-2- You need to shoot night photographs using manual exposure mode with a low ISO to minimize noise, with the appropriate aperture for the depth of field you need, and with the shutter speed set to match what the scene looks like to the naked eye. There’s much more to the whole process, but that’s the essence of it.
-3- While the lower photo looks much closer to what the parking lot looked like when I made the photographs, it was not made with the procedure I use for case work. It is close enough to make a quick demo comparison against a demonstrably incorrect Auto method that yielded a demonstrably incorrect image.