Deprecated: Function WP_Dependencies->add_data() was called with an argument that is deprecated since version 6.9.0! IE conditional comments are ignored by all supported browsers. in /home/vadnaise/public_html/wp-includes/functions.php on line 6131
Deprecated: Function WP_Dependencies->add_data() was called with an argument that is deprecated since version 6.9.0! IE conditional comments are ignored by all supported browsers. in /home/vadnaise/public_html/wp-includes/functions.php on line 6131
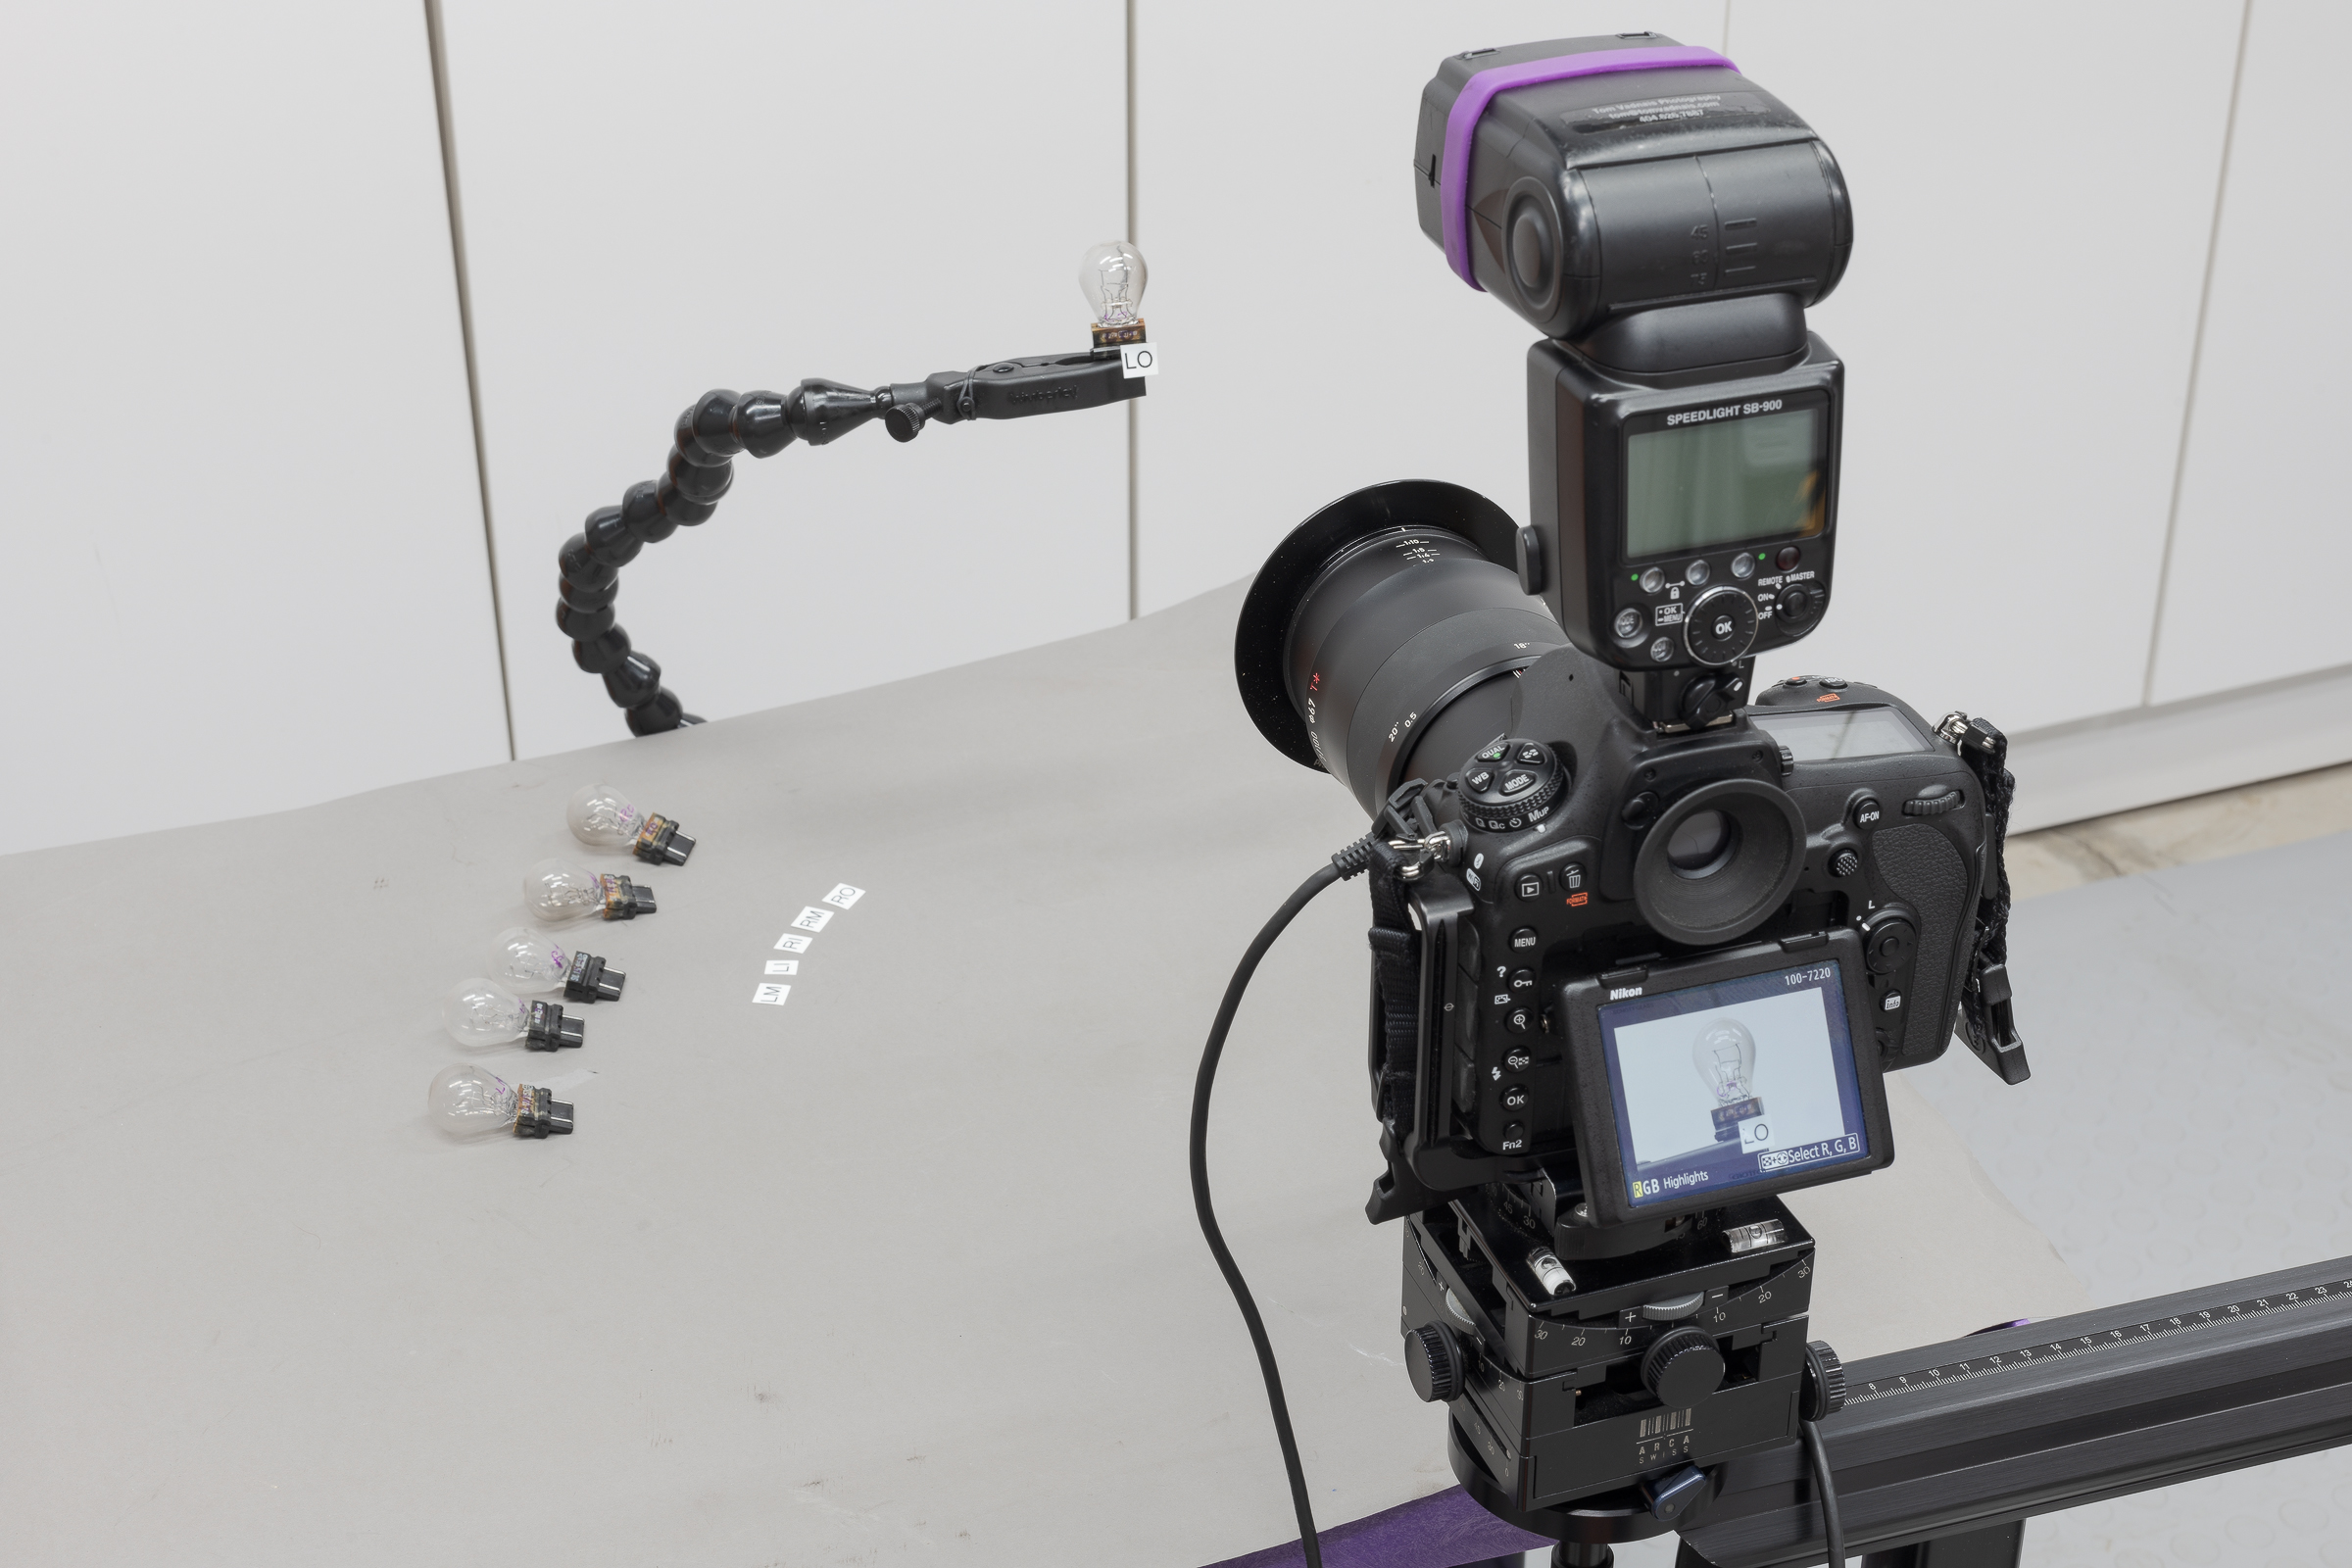
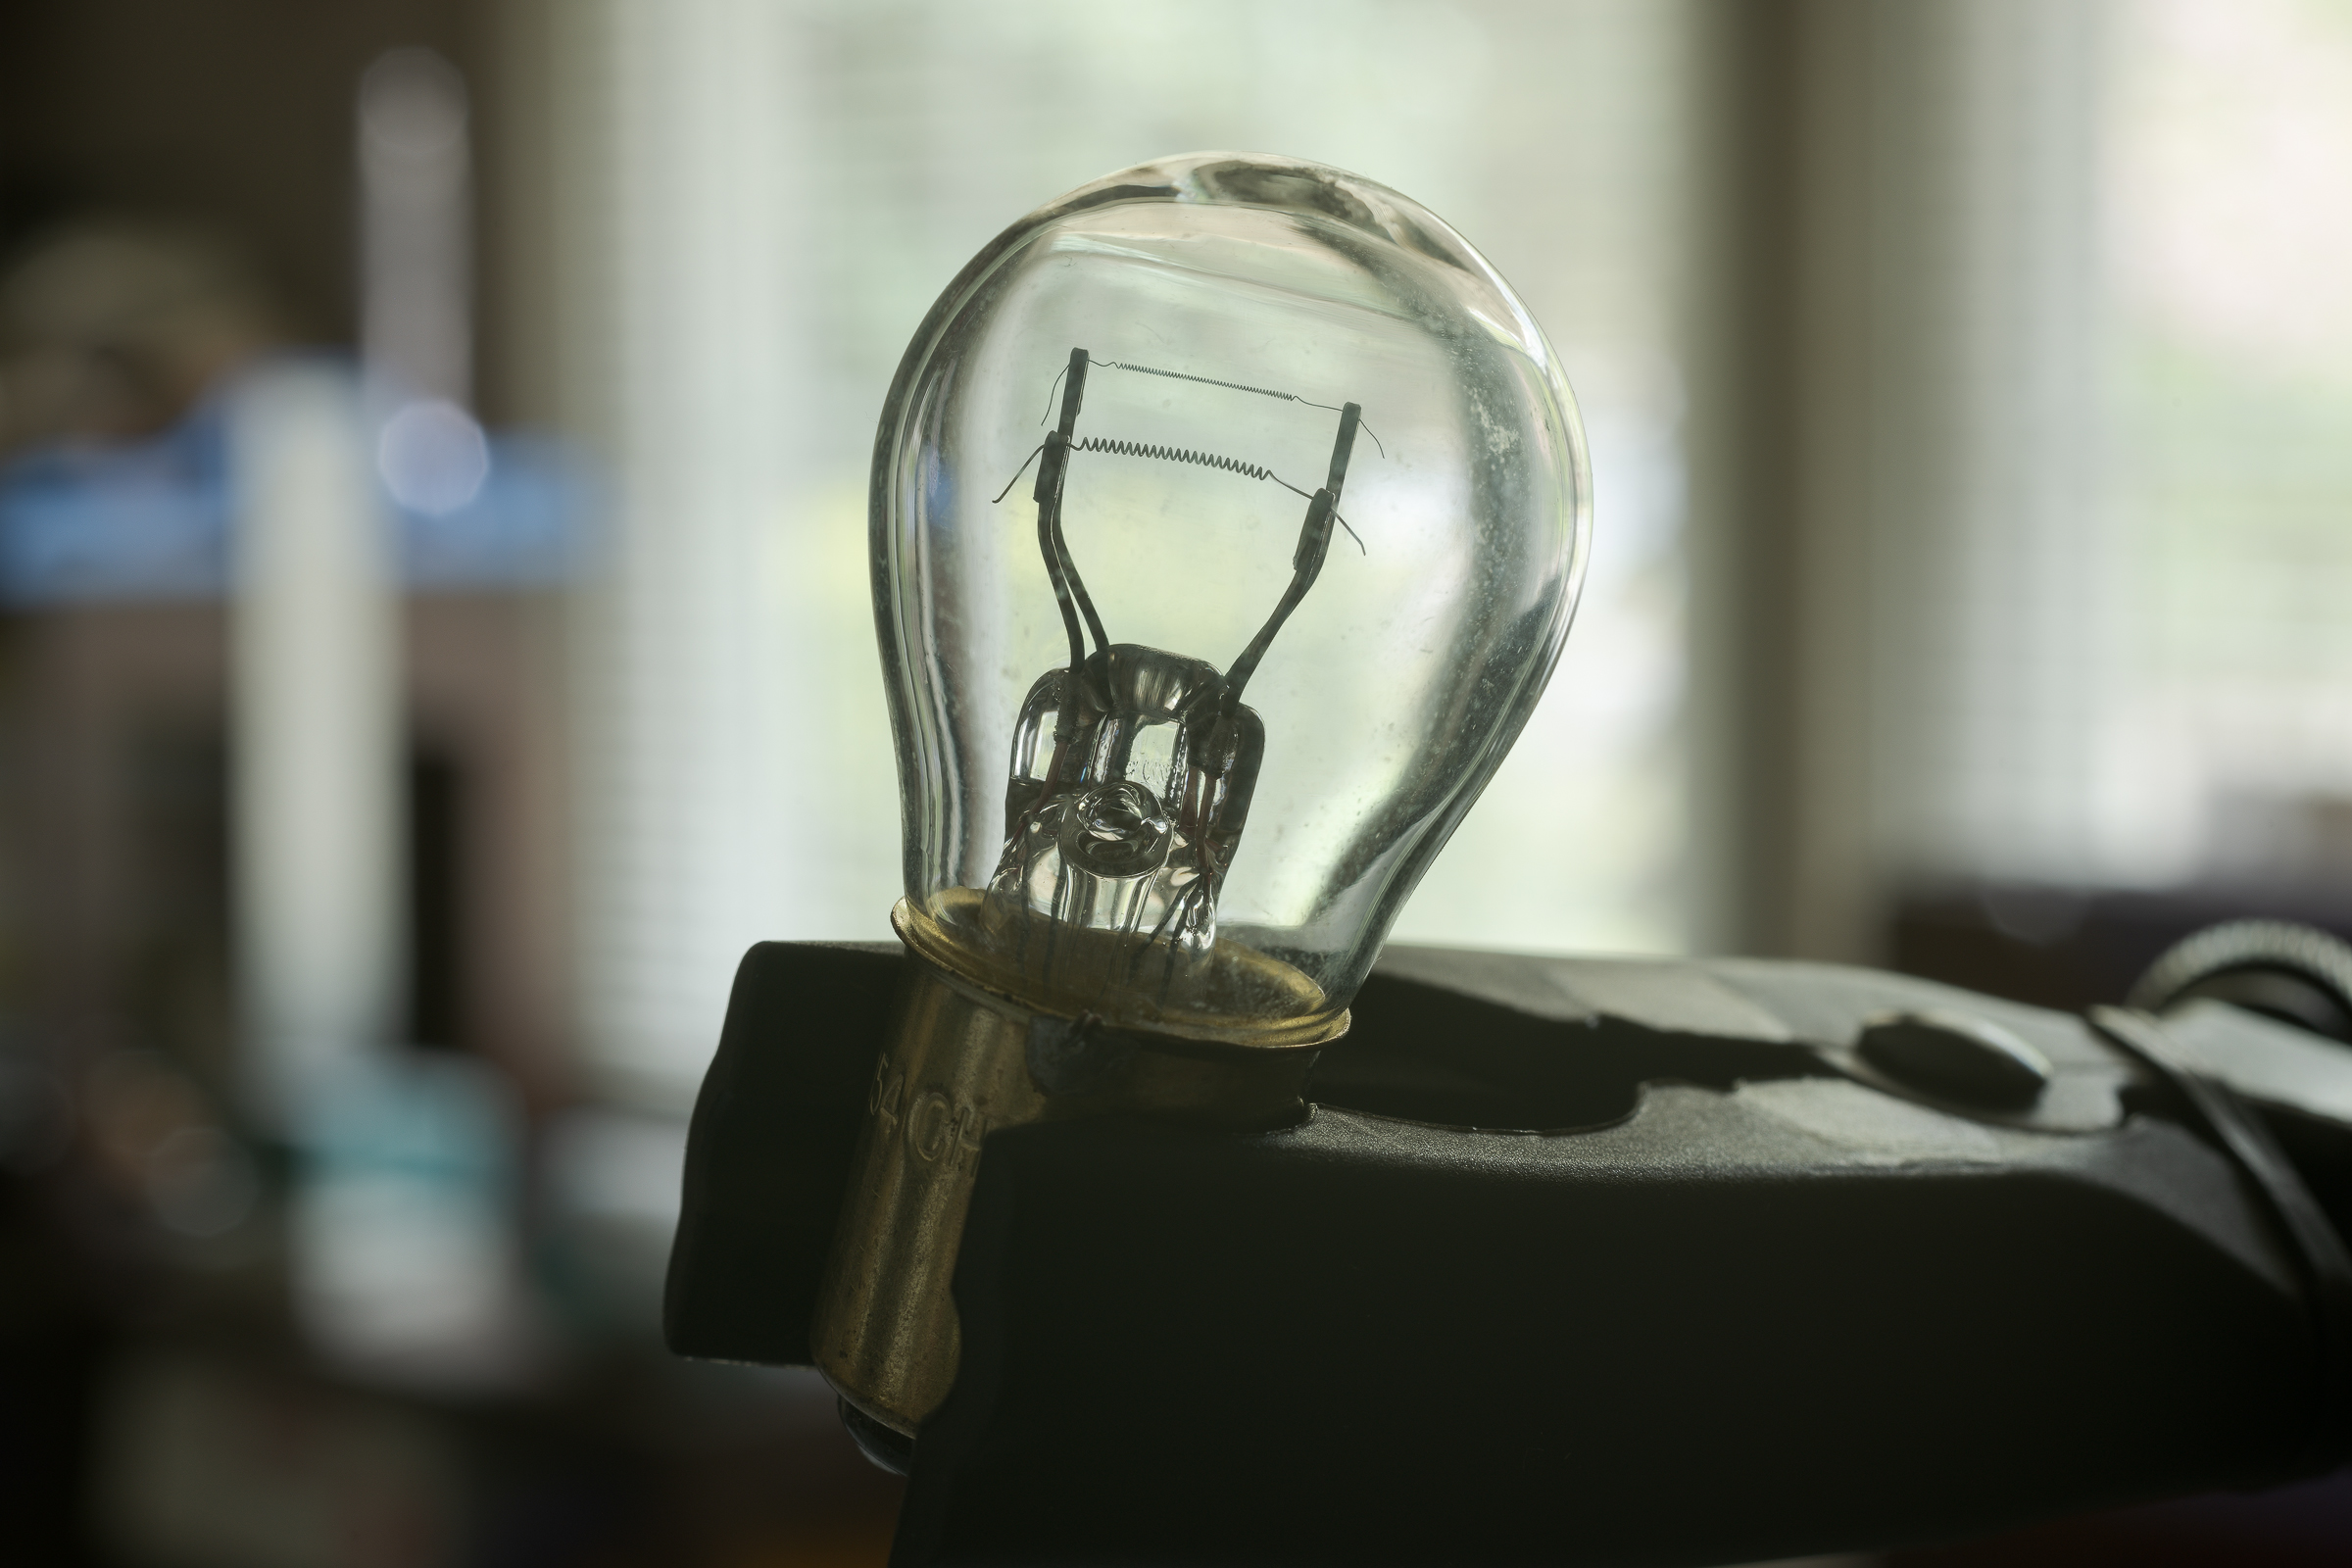
Glare on the glass globes can obscure the filaments when photographing light bulbs. This first photo shows the effects of overhead lights reflecting on the bulb. (LO refers to Left Outside taillight bulb.) (Click on image to enlarge, then click on back arrow to return.)Bulb reflecting overhead lights. (ZEISS Milvus 100mm Macro lens on Nikon D850.)Below is the setup that was used to create that photo.Setup for bulb with reflections on globe. (ZEISS Otus 55mm f/1.4 lens on Nikon D850.)The bulb was held in place with a Wimberley The Plamp II, and the camera was locked down on a studio camera stand. The white cabinet door was used as the background. Note that the flash was not used.
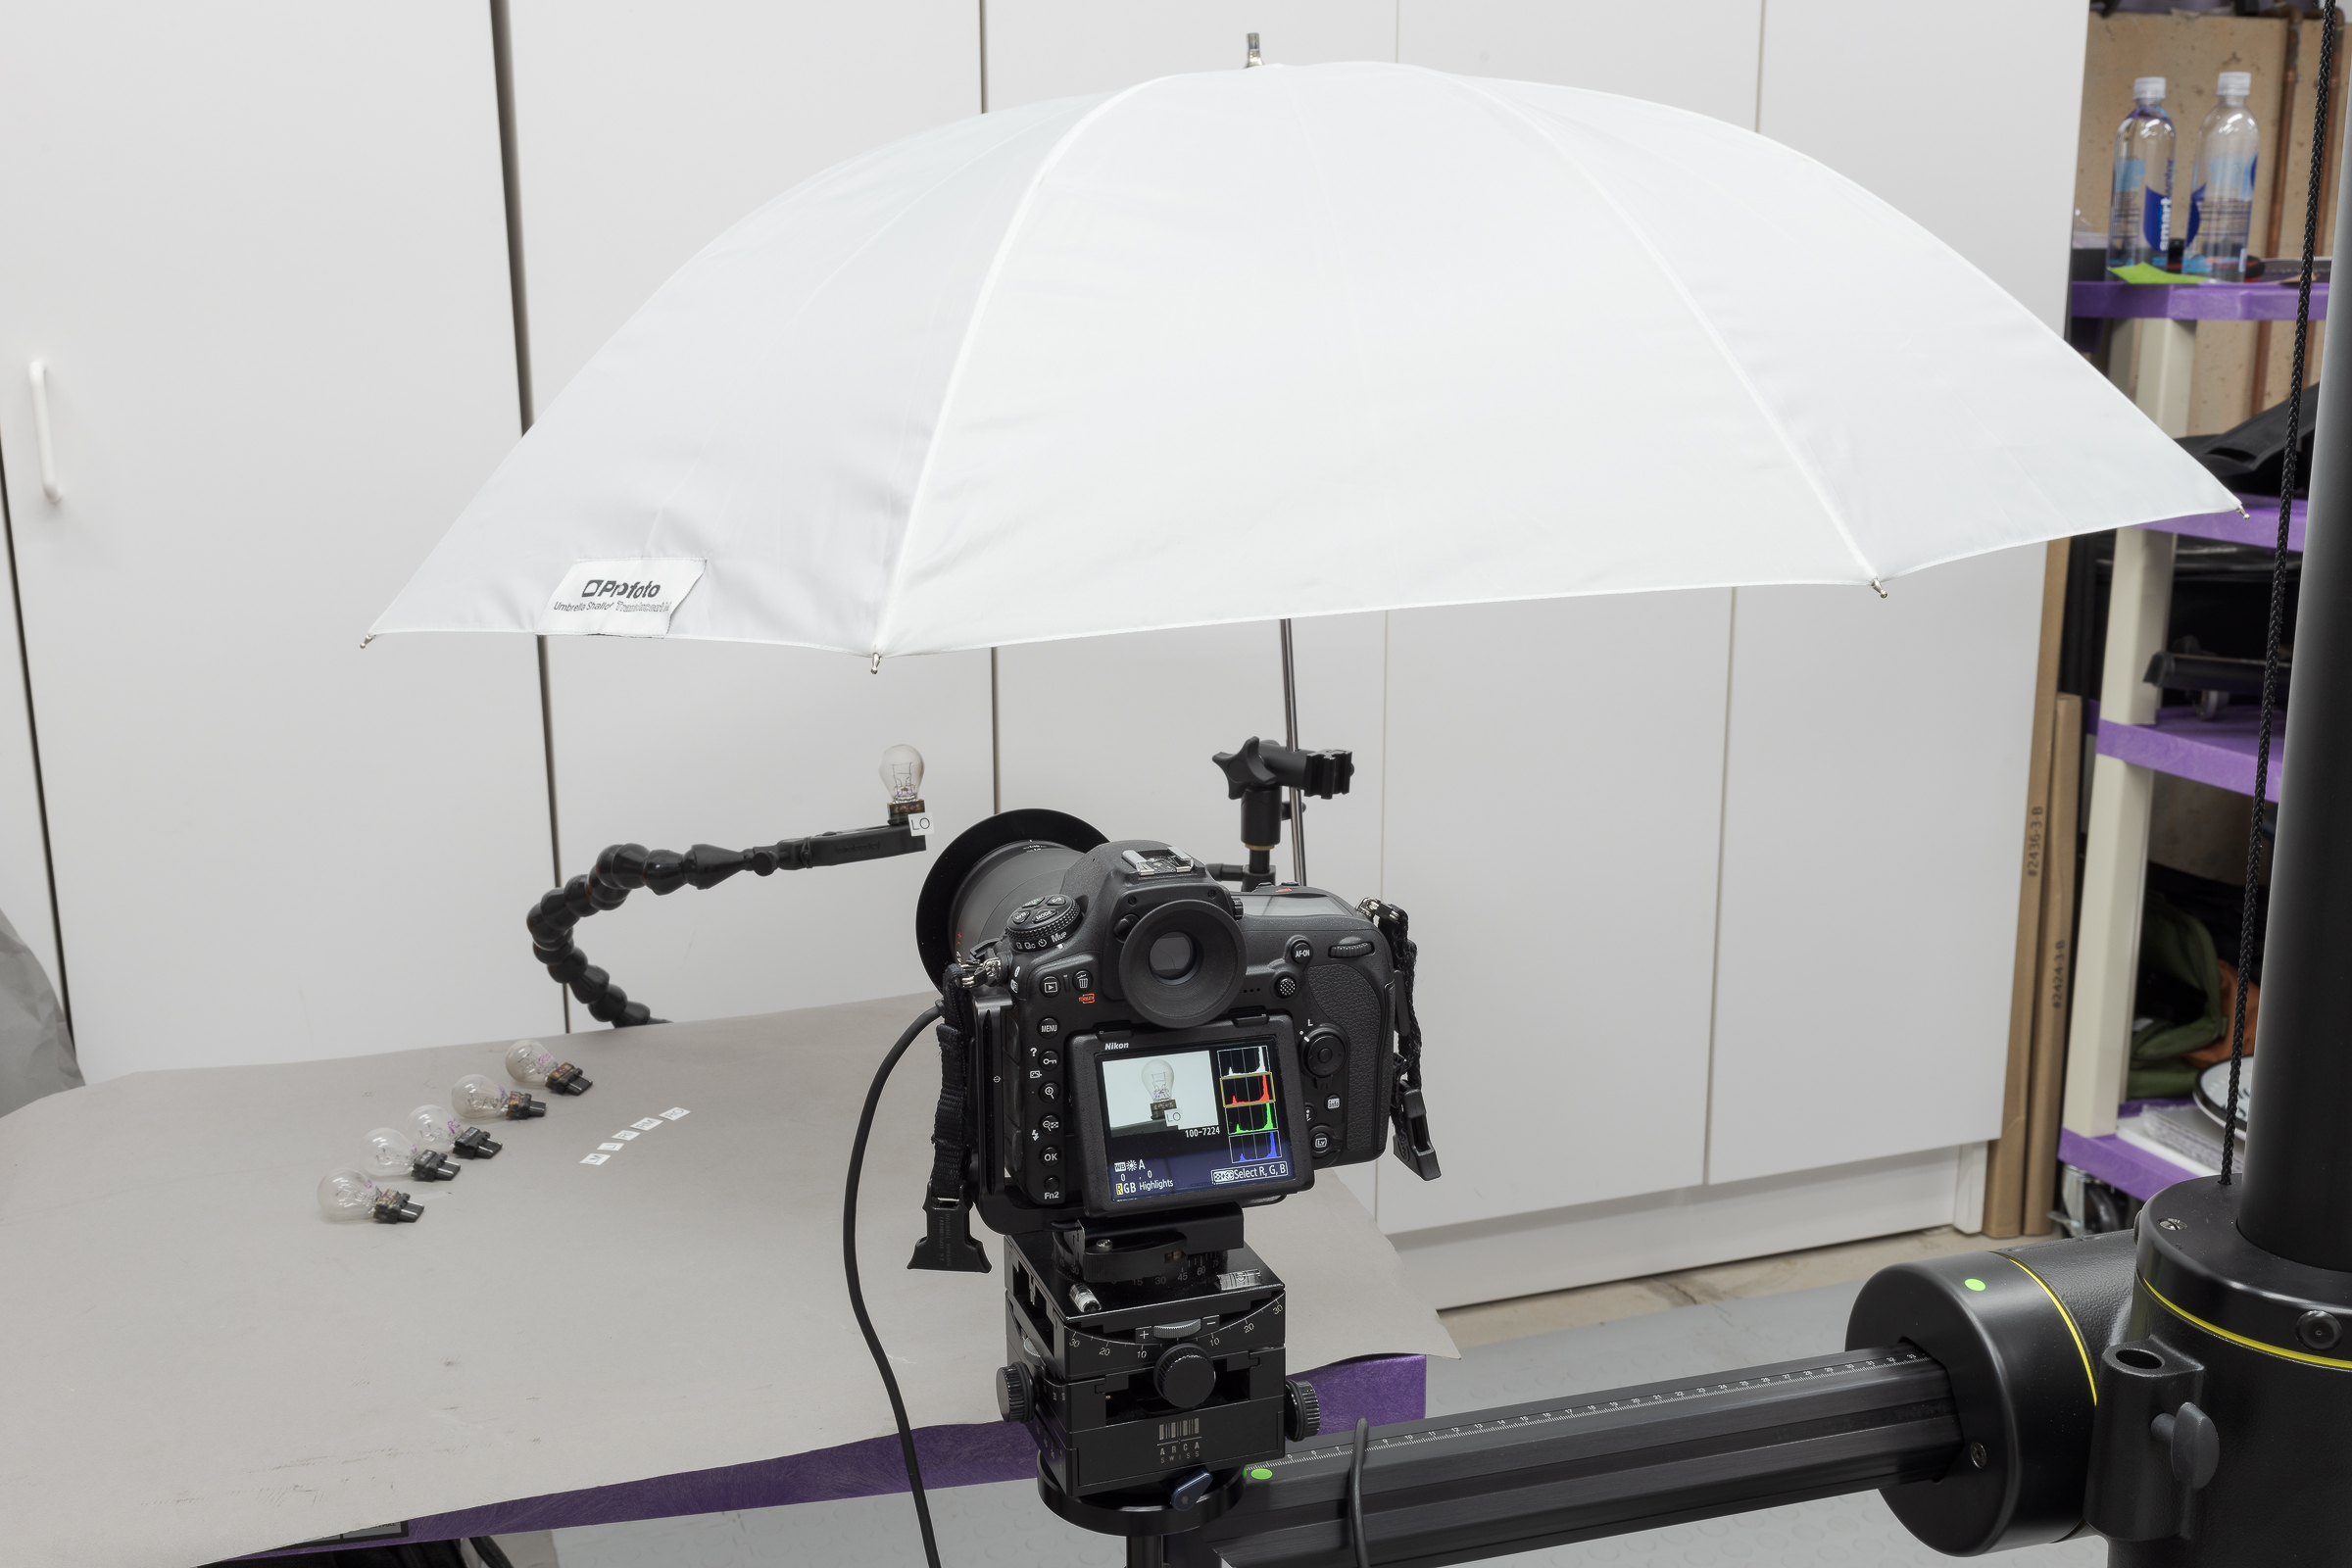
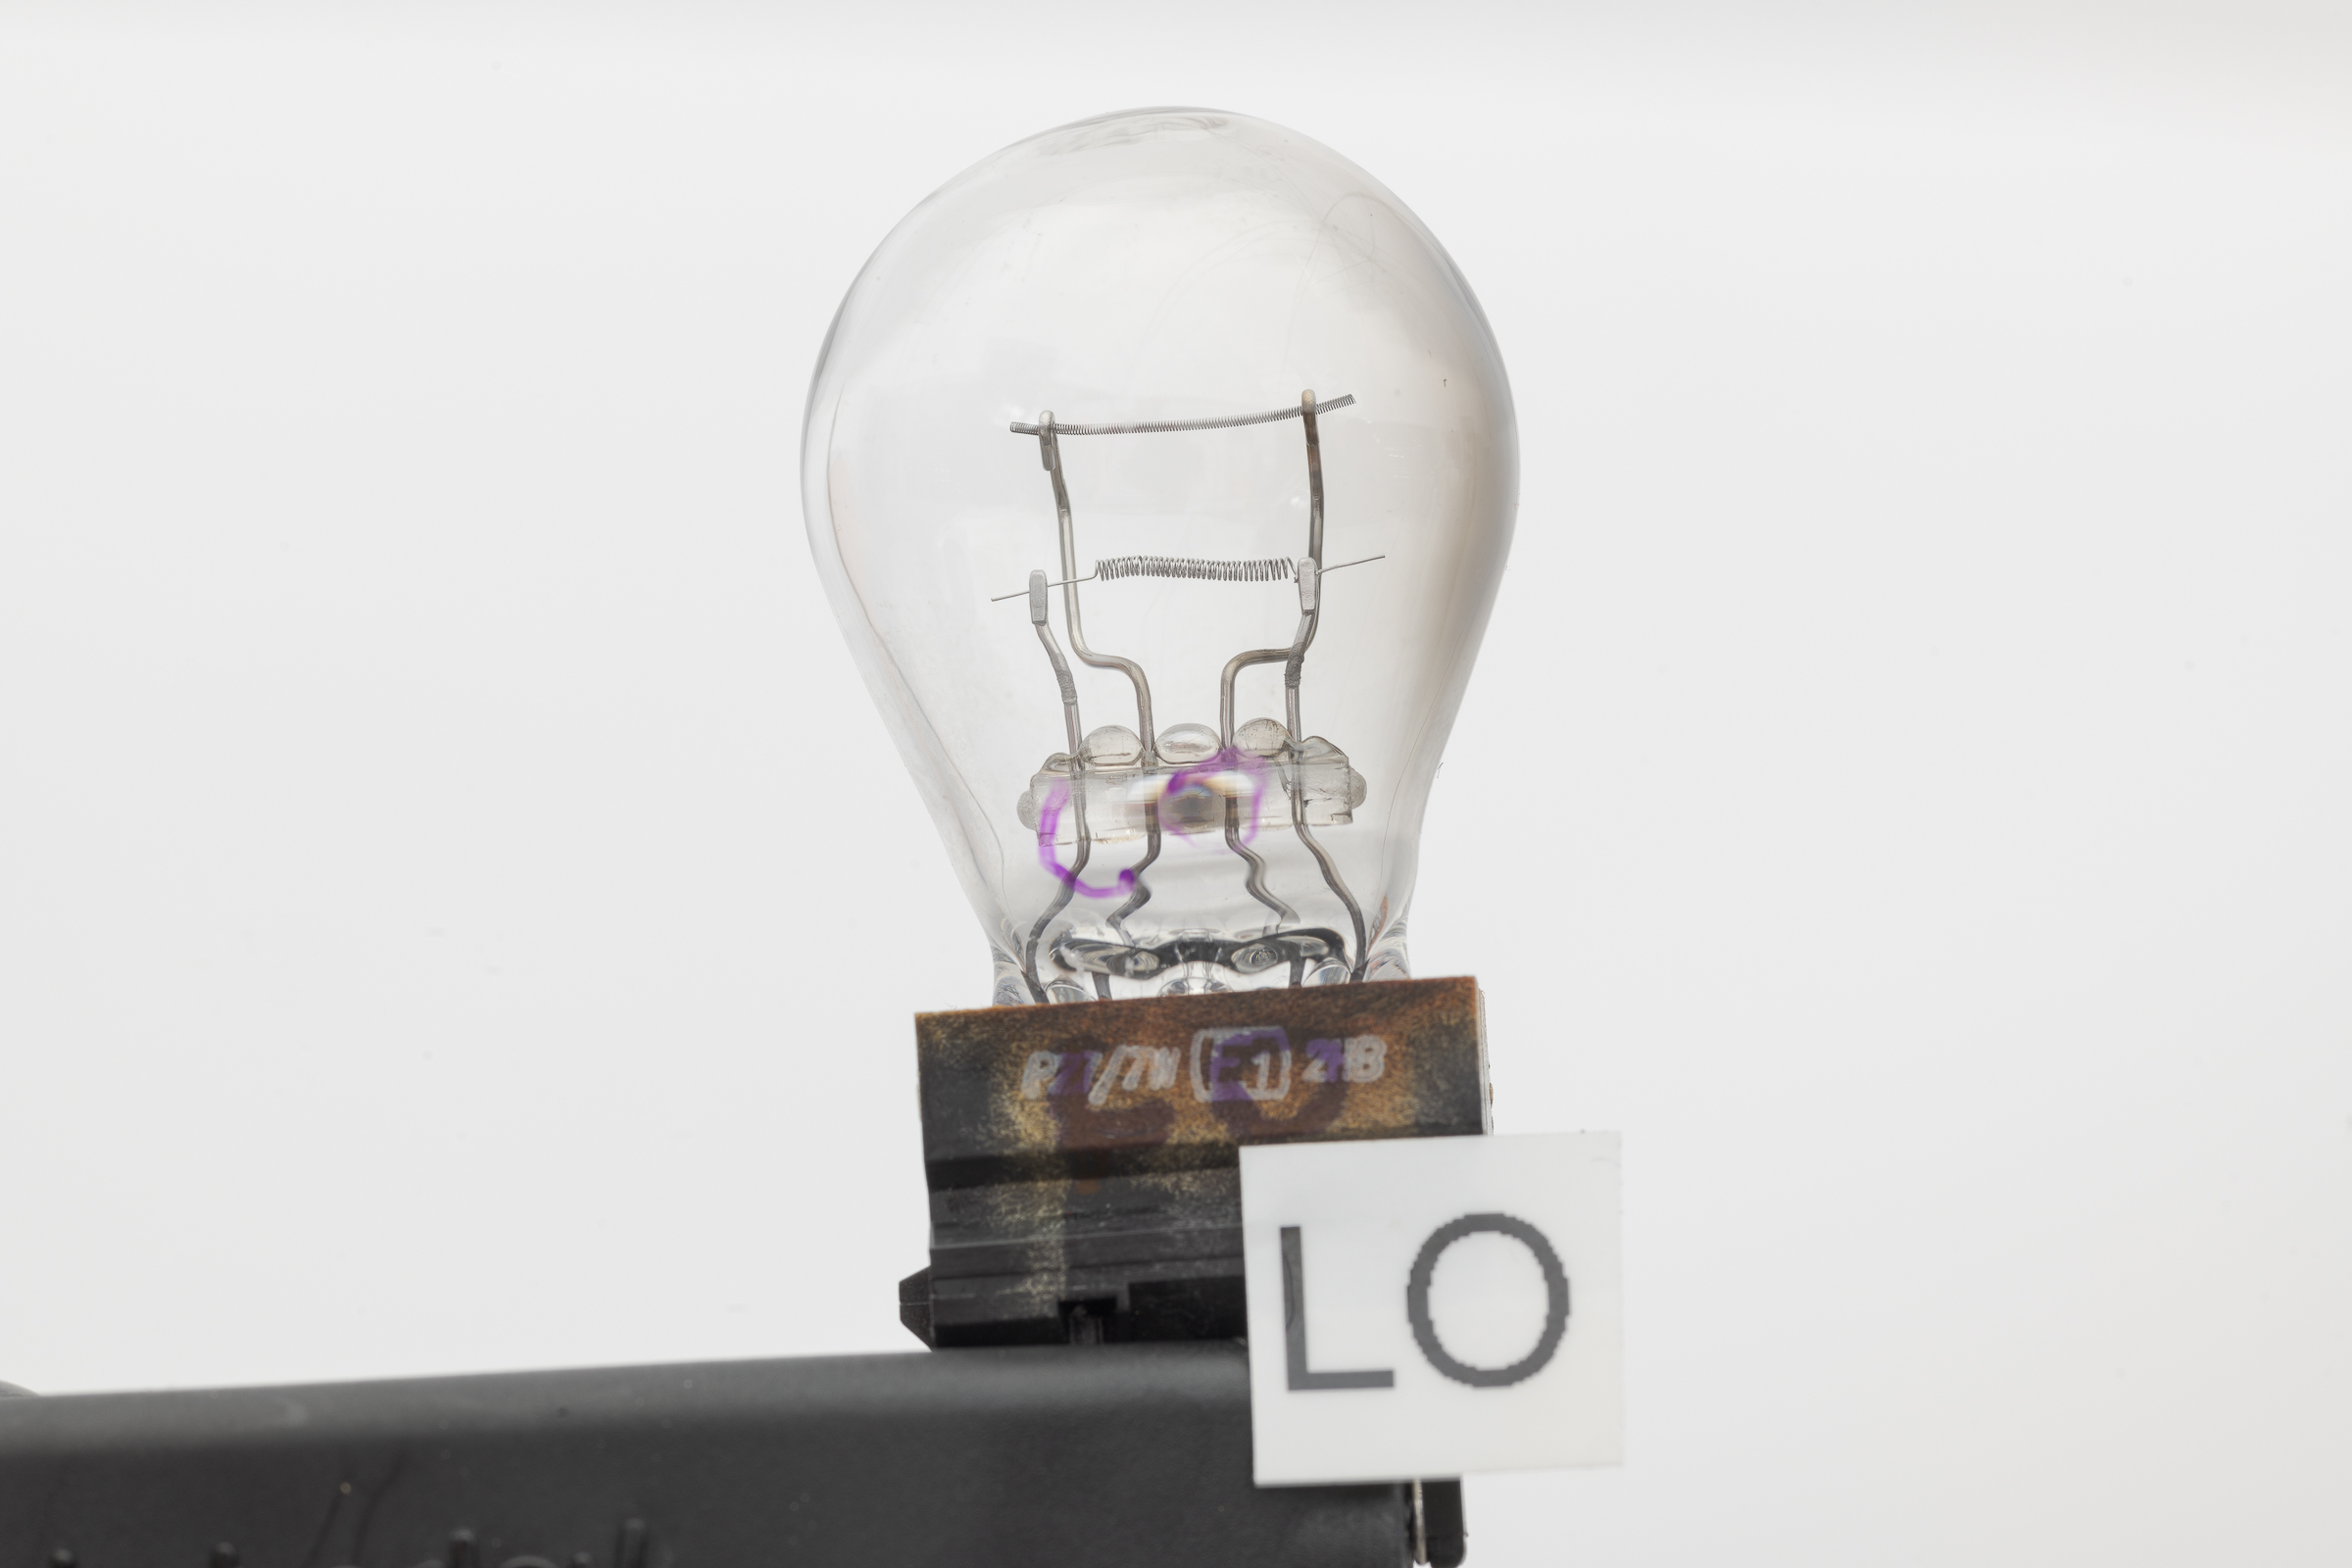
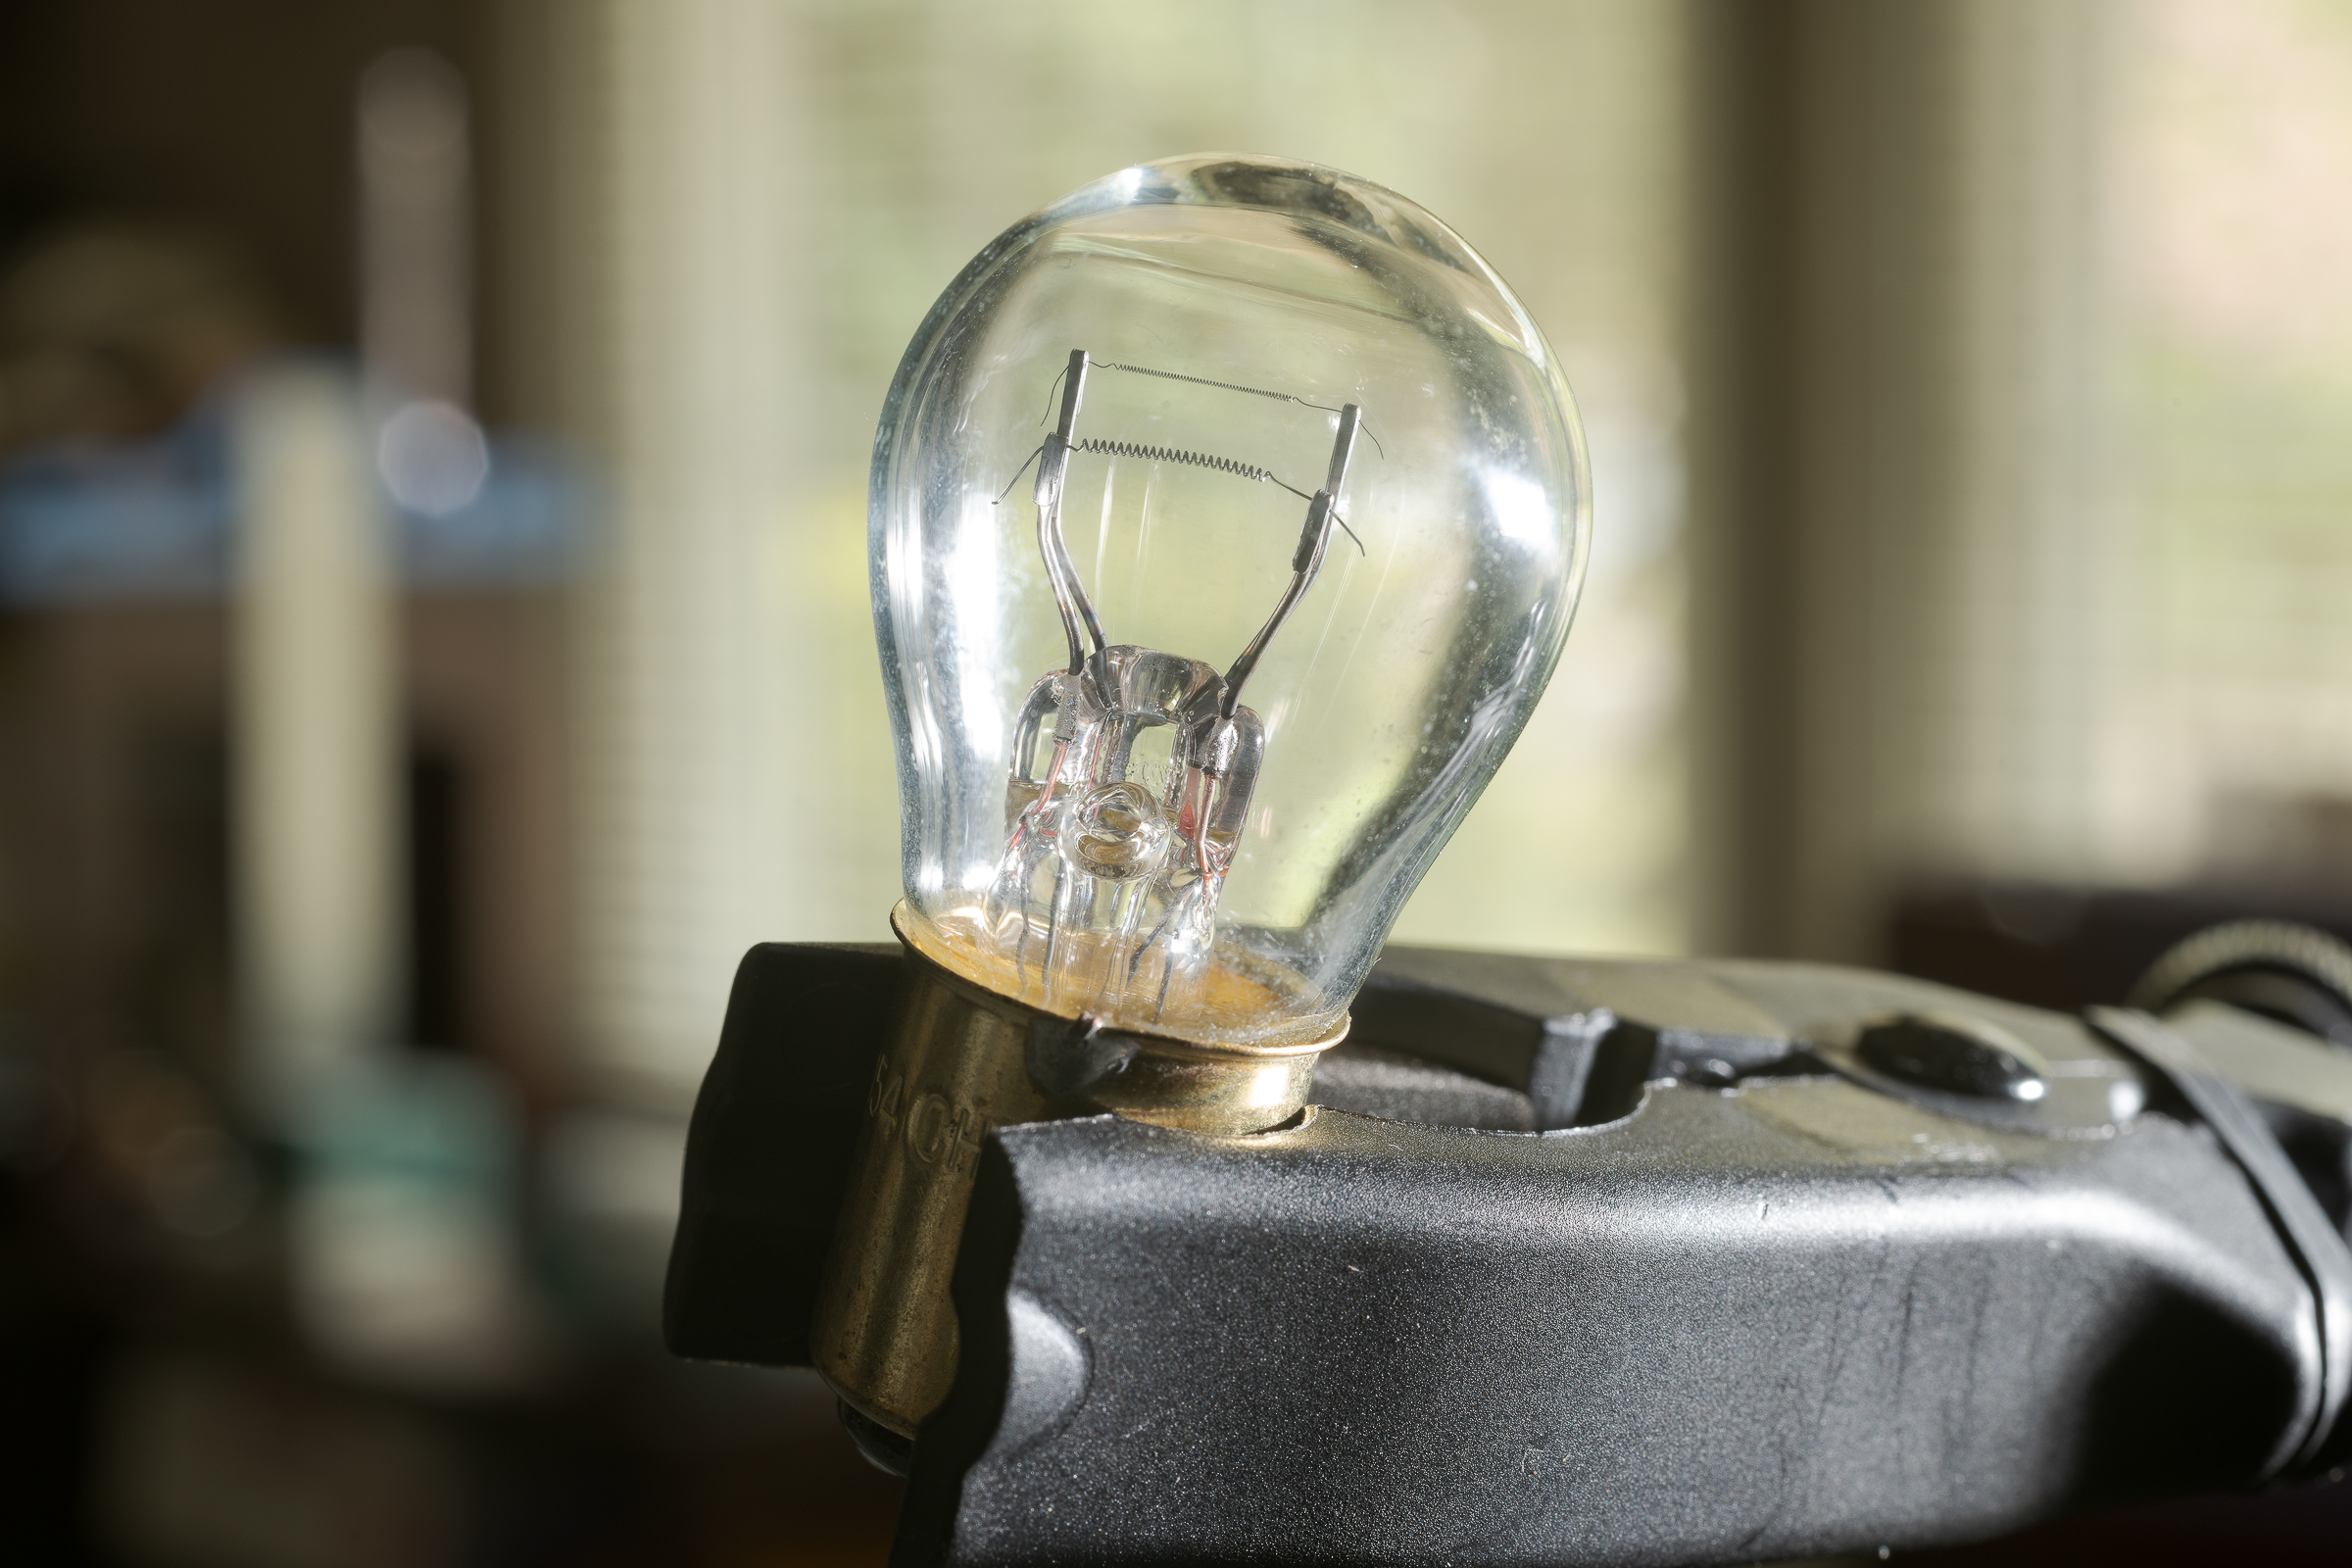
All the glare from the overhead lights was eliminated by placing a translucent umbrella on a small light stand above the bulb. That umbrella was lowered and moved around until all of the glare from the overhead lights was gone. Here’s what the setup looked like with that simple change.Setup for photographing bulb with no reflections on globe. (ZEISS Milvus 35mm f/1.4 lens on Nikon D850.)As you can see below, the resulting photograph had no glare, and clearly showed the filaments and the posts.Taillight bulb with no reflections on globe under translucent umbrella. (ZEISS Milvus 100mm Macro lens on Nikon D850.)Translucent umbrellas have the advantages of being inexpensive (well, except for this one by Profoto), lightweight, and compact. So this setup can be used anywhere outdoors or indoors, with a tripod replacing the studio stand. When using outdoors, typically you’ll just have one source of glare from the sun. Many times, you’ll be able to just prop the umbrella on the vehicle or ground without needing a light stand or some other holder. If it’s dark or shaded, you might need supplemental lighting (flash, LED, or other light sources). These can be fired through the translucent umbrella to prevent glare from them. That will be the subject of a future post.
Including a scale in a photograph is an excellent way to document dimensions. But it’s essential to properly position the camera to record an accurate measurement.
One of the most common mistakes made when photographing scales or rulers is making the photo from an angle. The camera lens must be perpendicular to the scale, both vertically and horizontally. A camera positioned too low or too high, and correspondingly tilted up or down, will result in parallax distortion. Worse is a horizontal offset that results in misleading measurements due to the angle of the camera to the scale markings.
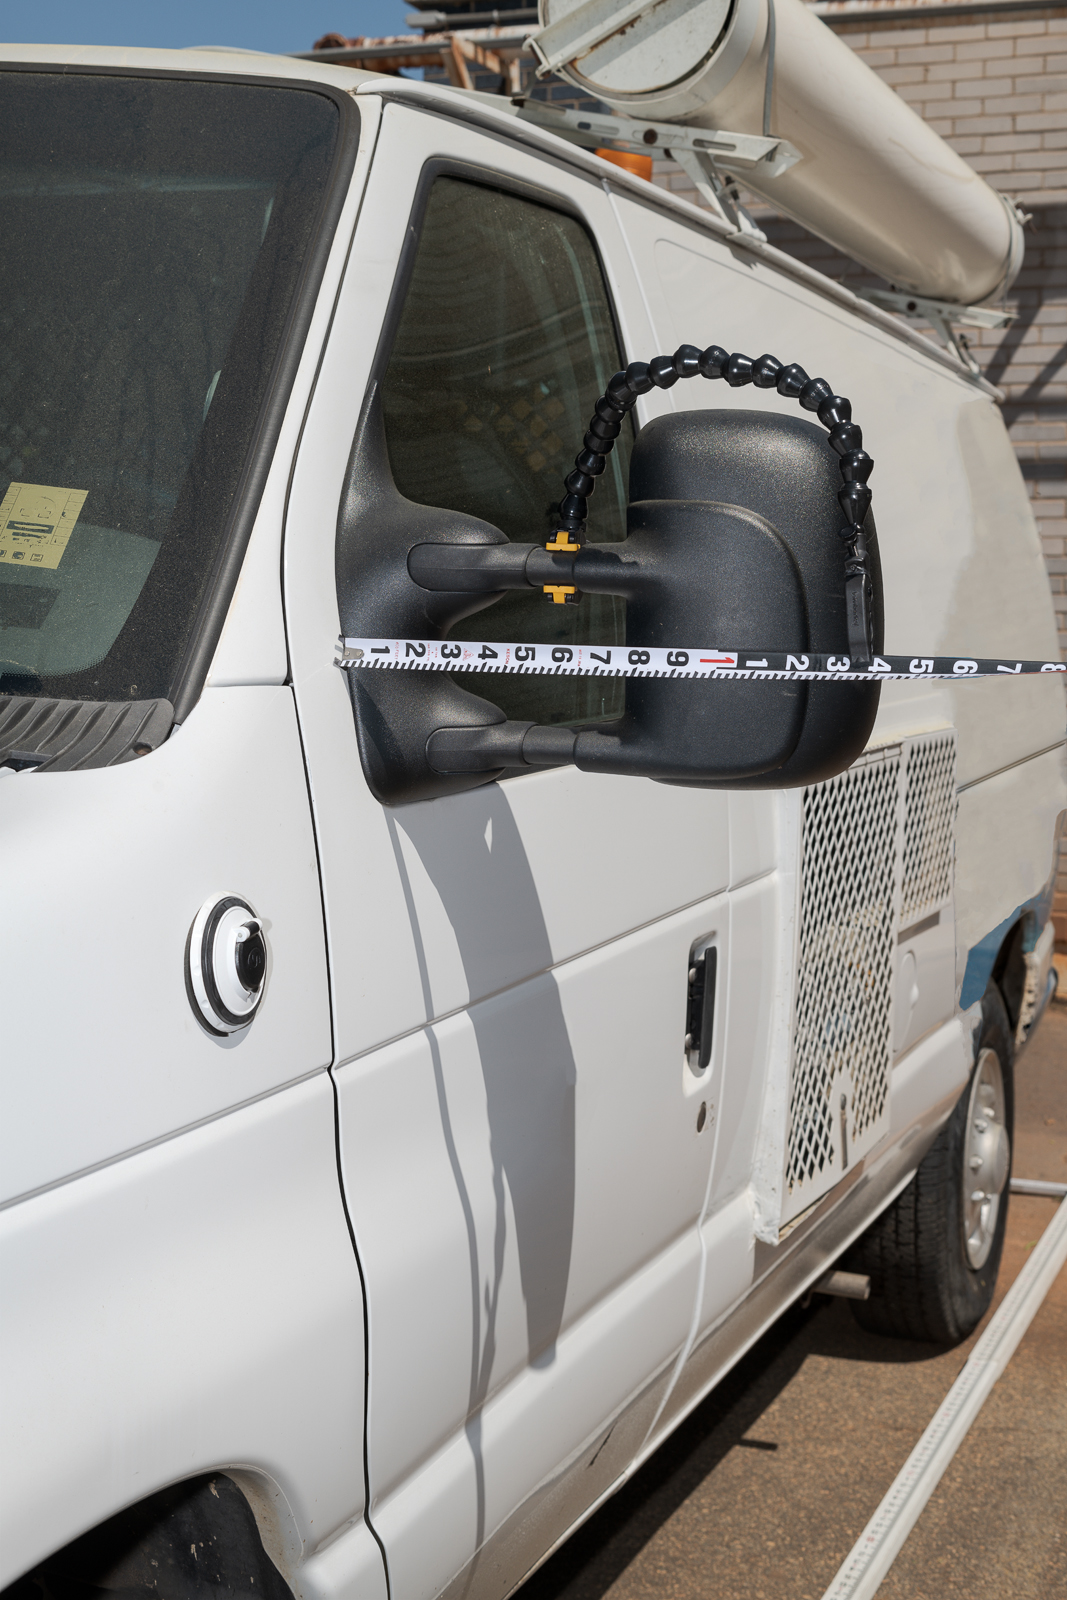
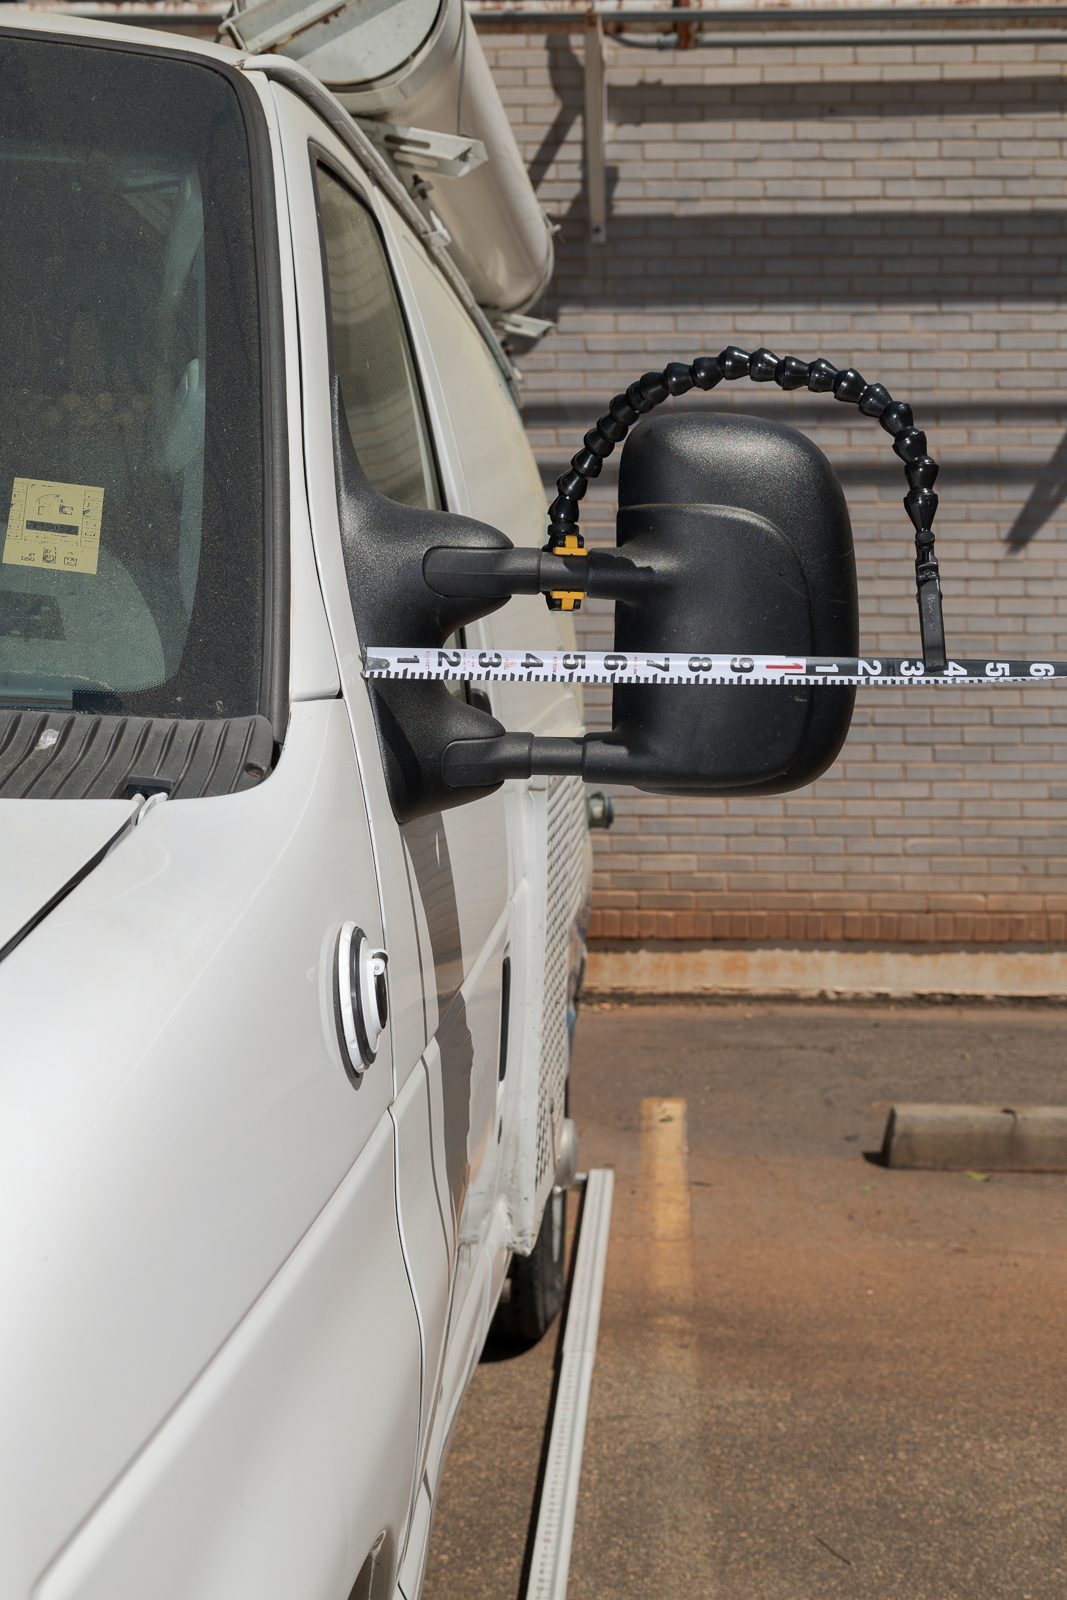
Take this example made to show how far a mirror protruded from the side of a van. The first photo was taken at the proper scale height, but was at an angle to the scale. Note how different the reading appears in the second image with the camera perpendicular to the scale. The latter accurately showed the measurement. (Click on image to enlarge, then click on back arrow to return.)Photographed at angle to scale. (Made with ZEISS 50mm f/2 macro lens on Nikon D850 with fill flash.)Photographed perpendicular to scale. (Made with ZEISS 50mm f/2 macro lens on Nikon D850 with fill flash.)Making an accurate photograph requires several steps:
-1- Make sure the pocket rod is parallel with the ground. Use something like a Wimberley Plamp clamped onto the upper mirror support arm to hold it at the proper height. Place the other end of the pocket rod firmly against the ground with enough pressure to hold the rod in proper position and angle.
-2- With the camera on a tripod, make sure the center of the lens is vertically level with the pocket rod.
-3- Move the tripod until the center of the lens is centered on pocket rod horizontally.
-4- Use a hot shoe bubble level or the in-camera level to make sure camera is level.
-5- Manually focus, or make sure your autofocus point is directly on the scale.
-6- Use a normal (50mm) or longer focal length to eliminate wide angle lens distortion. Macro lenses are ideal because of their flat field and edge-to-edge sharpness.
-7- Use fill flash to balance image, despite abundant sunshine.
Use scales, but take care to get the camera in position to show them accurately. Fortunately, you can check the results on your camera’s LCD (zoom the view if necessary) to make sure the dimension in the photograph matches the measurement you made. Fairly close isn’t accurate, and is misleading. A deceptive photo is worse than no photo at all.
When using flash, you can control how bright or dark the background by controlling your ambient exposure. A lot of people are afraid of flash, but it’s just another source of light. And it’s light you control.
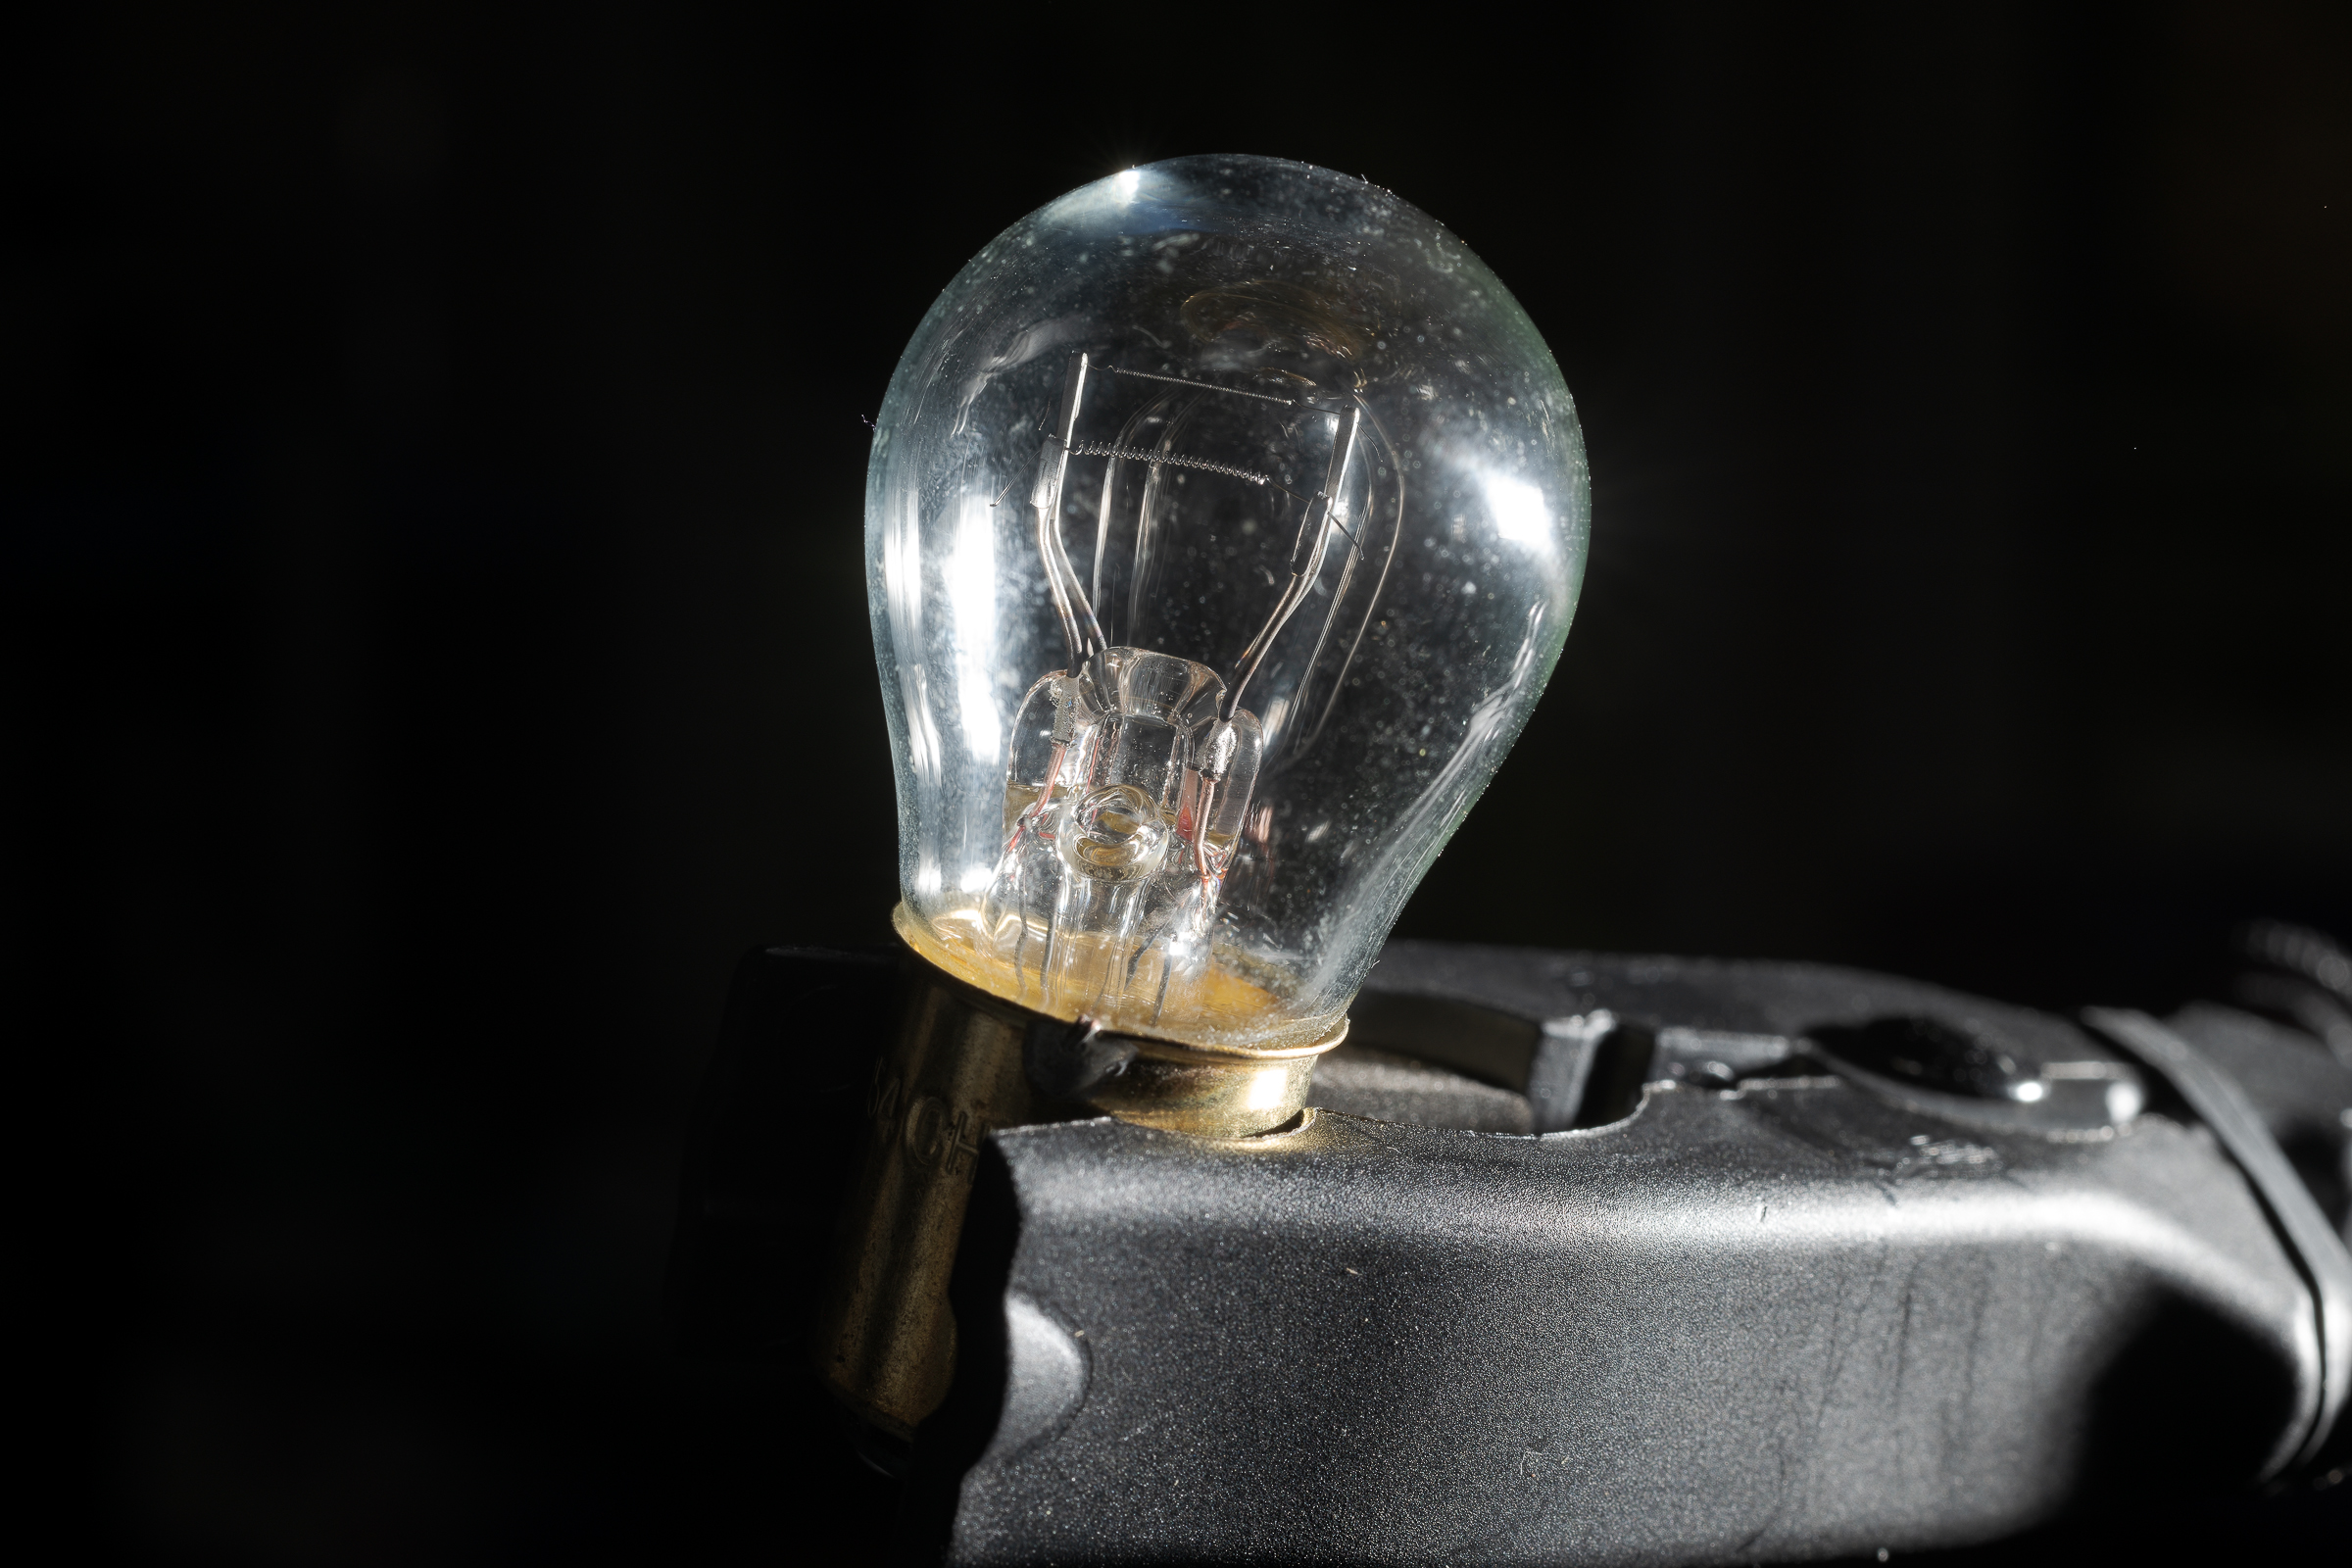
As an example, while you’d never choose this busy background, let’s assume you need to shoot a light bulb indoors with a window in the background. Start with an ambient light shot like this. (Click on image to enlarge, then click on back arrow to return.)Bulb in ambient light with no flash. Exposure f/14, 2.0 sec, ISO 64. (Made with ZEISS 50mm macro on Nikon D850.)The scene out the window in the background is bright, but properly exposed. As a result, the bulb is almost in silhouette.
To bring out detail in the bulb, add a flash at 1/8 power in manual mode off camera to the right. Note this is the same exposure as the first image. The only change is the added fill flash.Bulb with flash at 1/8 power. Exposure f/14, 2.0 sec, ISO 64. (Made with ZEISS 50mm macro on Nikon D850 with Nikon SB-910.)This brings out details in the bulb, but the bright background remains distracting.
To darken the background, keep the flash setting (1/8 power), the ISO (64), and the aperture (f/14) constant. Then reduce the shutter speed to reduce ambient light. Here, the shutter speed was reduced from 2.0 seconds to 1/250 second.Bulb with flash at 1/8 power. Exposure f/14, 1/250 sec, ISO 64. (Made with ZEISS 50mm macro on Nikon D850 with SB-910.)Now, the ambient exposure is so low that most of the background light won’t register. Keeping a consistent amount of flash light on the bulb keeps the exposure constant on the bulb, but darkens the background almost to black.
Again, while you’d never choose such a background as this, this example shows that you can control the brightness of any background simply by using flash and changing shutter speed.
That is the question you’ll have to answer before making each vehicle, product, or component photograph.
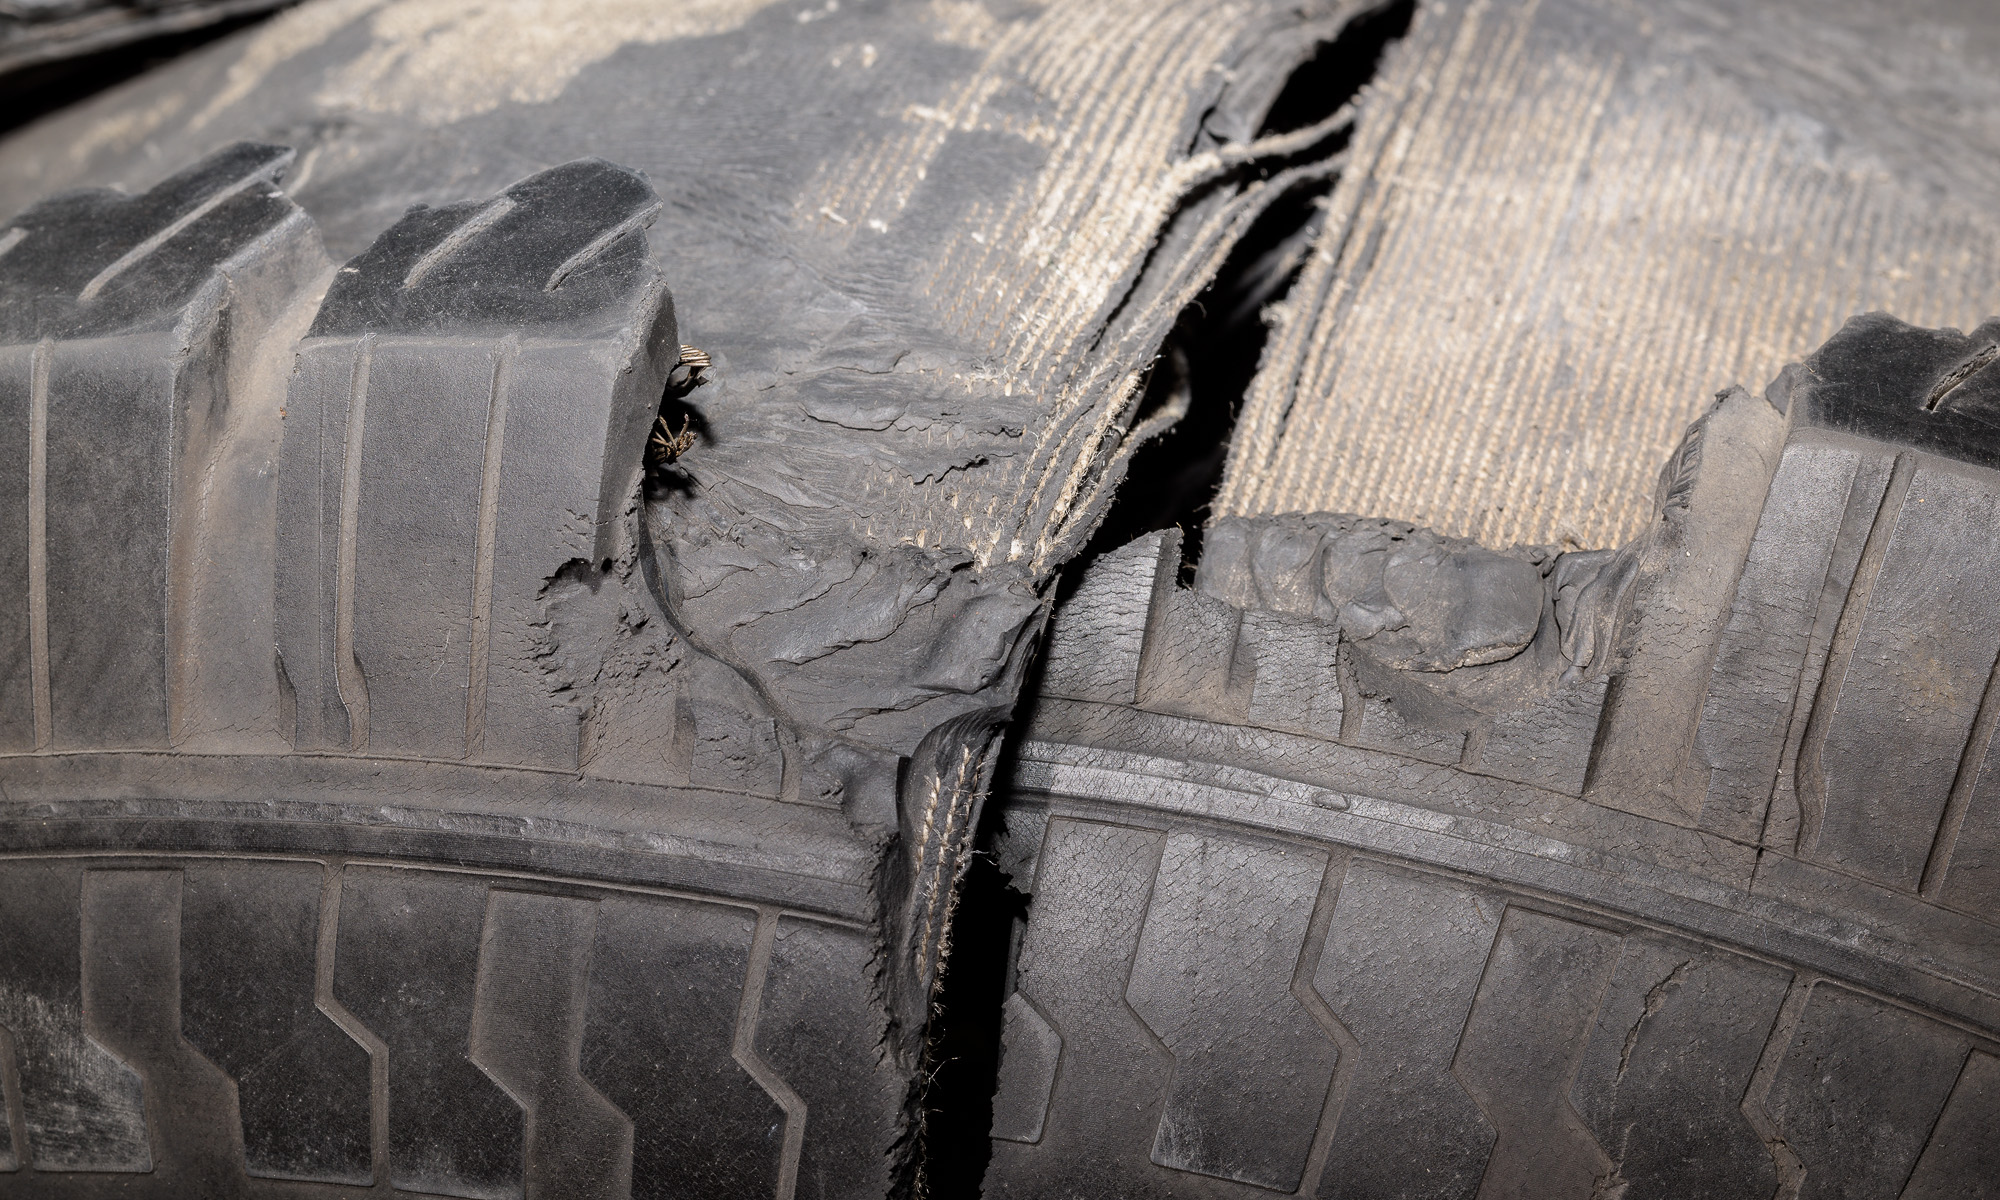
To minimize noise and maximize dynamic range for any image, use the camera’s minimum ISO (it’s ISO 64 on my Nikon D850). For most tire, product, and vehicle component photos, you’ll also want to optimize depth of field (DOF). That requires stopping down the aperture to somewhere between f/11 and f/16. (Stopping down to f/22 or smaller will give you more DOF, but may result in softening due to diffraction.)
Exposure consists of aperture, shutter speed, and ISO. With minimum ISO and a small aperture already chosen, that leaves only shutter speed. The shutter speed will depend on how much light is available. To get enough light for a proper exposure, you can use all ambient light, flash only, or a combination of ambient and flash (often called fill flash).
Flash allows you to add the light you need to get a proper exposure, while maintaining a reasonable shutter speed. This is particularly important if you are handholding the camera. Way too many photographs are blurry because the shutter speed was too low. This can be true even with the image stabilization built into many cameras or lenses. Image stabilization helps some, but many times, component or even vehicle photos have to be made where light is insufficient for handholding.
For tires and other vehicle components, getting enough light to handhold a camera usually requires the use of flash. The alternative is putting the camera on a tripod to keep it steady during a long shutter speed.
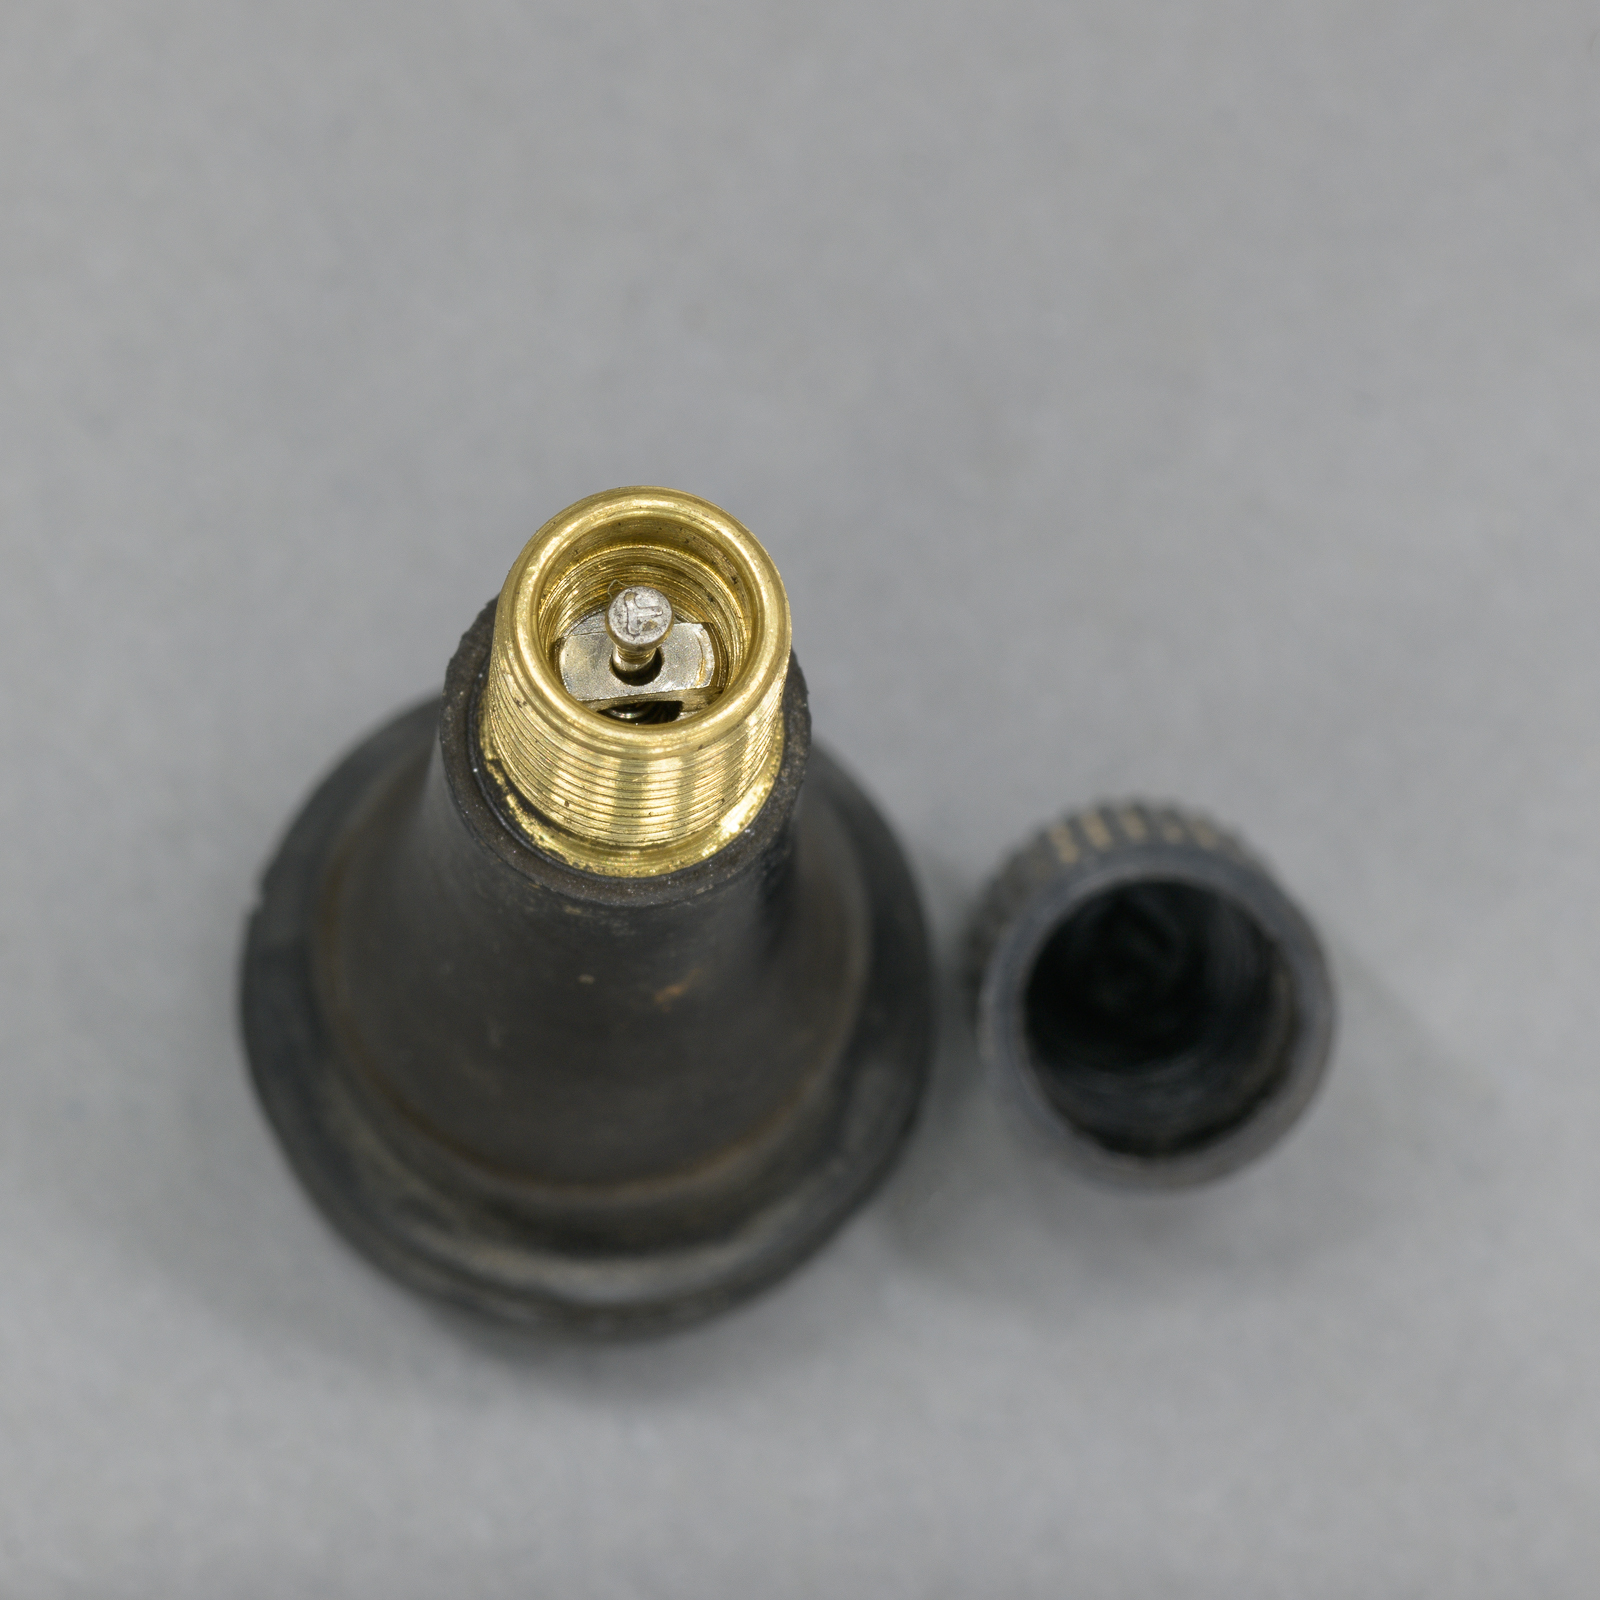
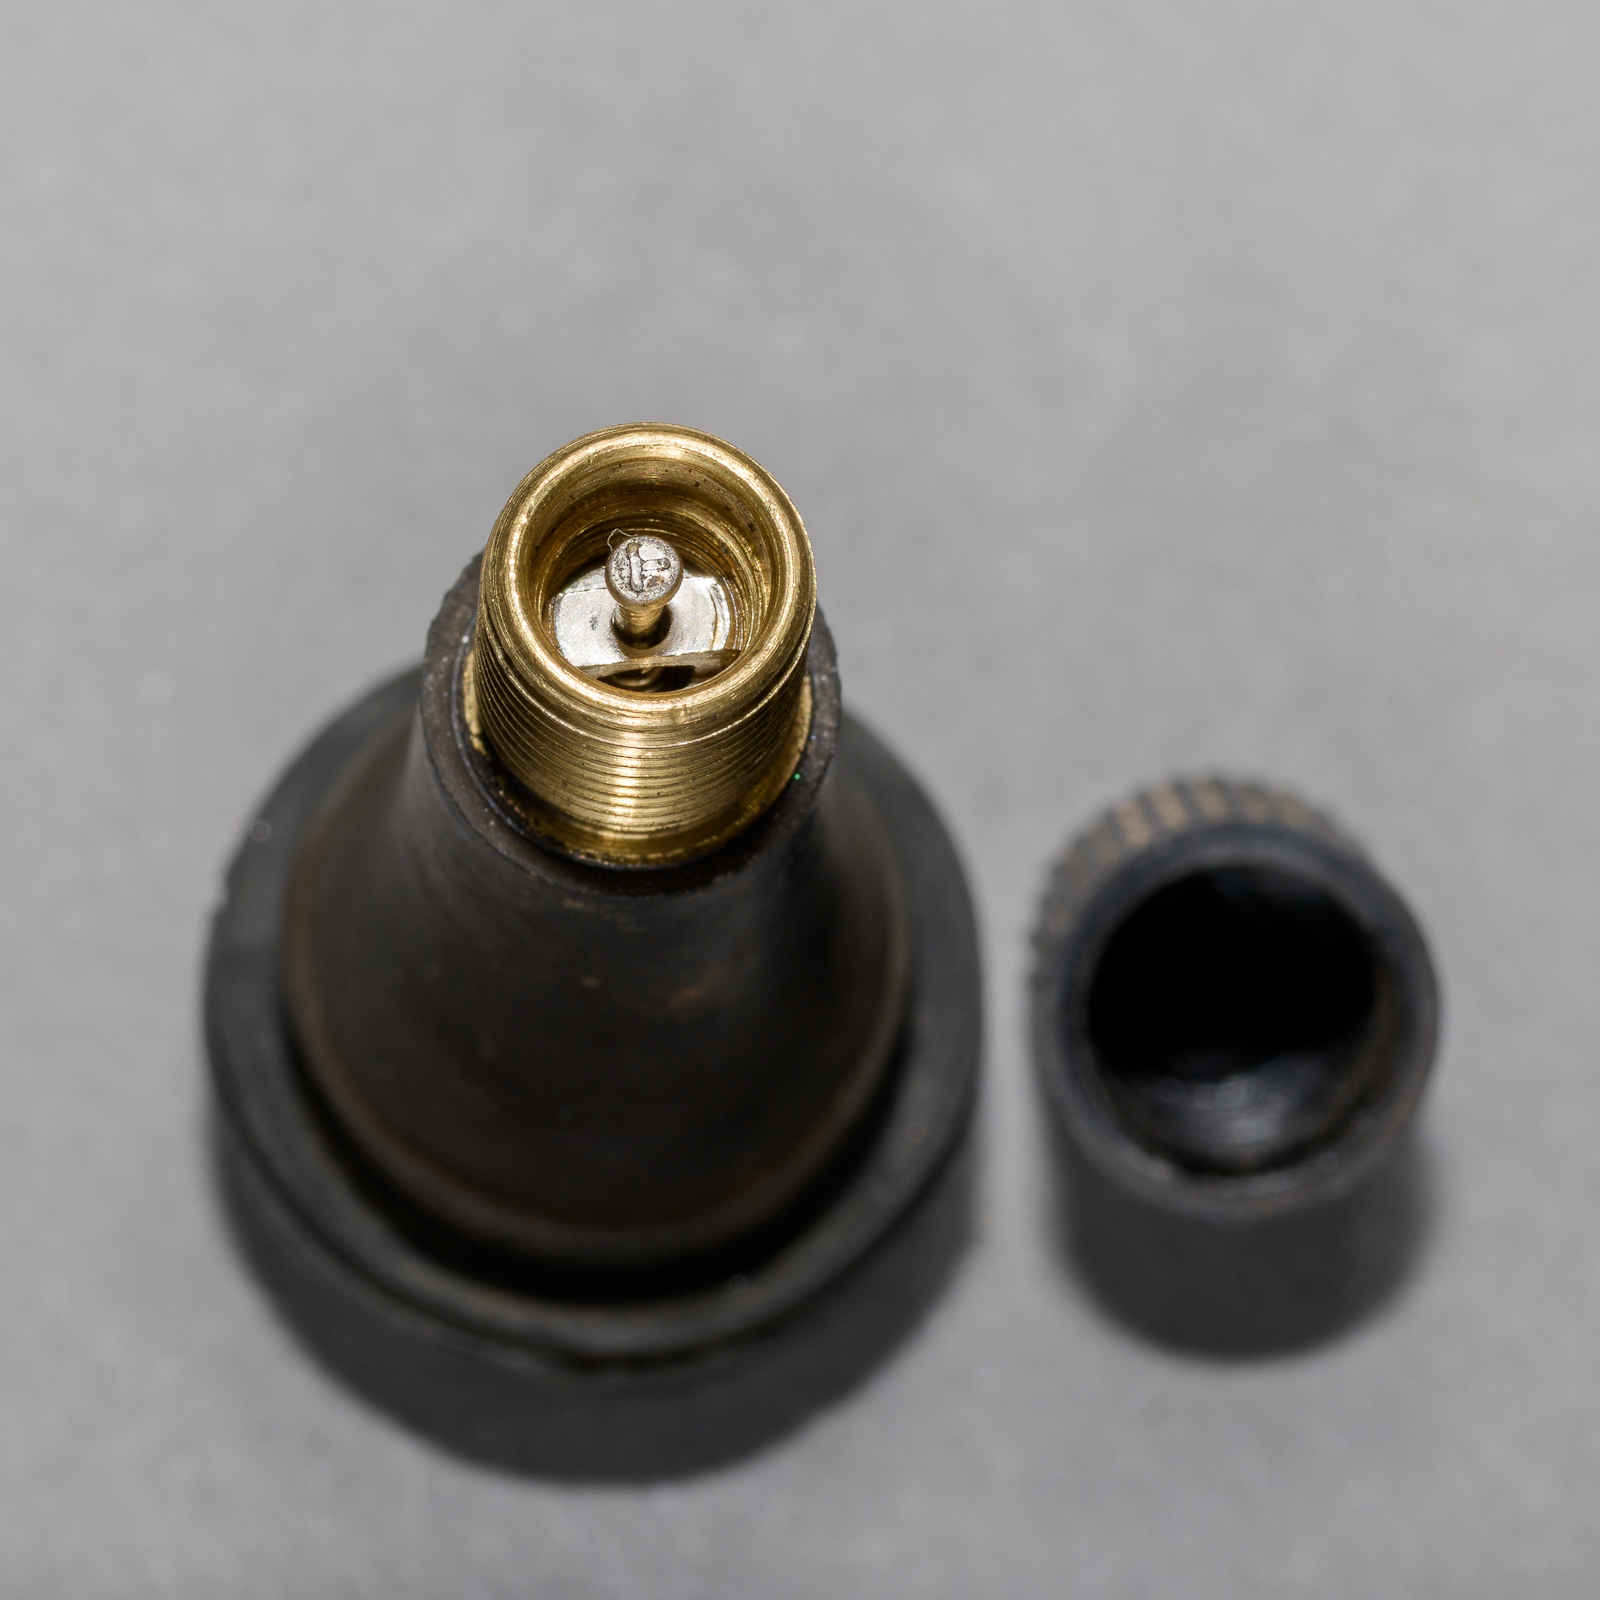
You can get the same overall exposure using a long shutter speed with ambient light only, using a combination of ambient light and flash, or using 100 percent flash. But the resulting image will look different. (Click on image to enlarge, then click on back arrow to return.)Valve Stem Ambient Light (No Flash). Exposure: f/16, 2.5 sec, ISO 64. (ZEISS 100 mm f/2 macro lens on Nikon D850.)Valve Stem with Flash. Exposure: f/16, 1/60 sec, ISO 64. (ZEISS 100 mm f/2 macro lens on Nikon D850.)In my studio lab, I have so many bright white LED shop lights some have said it looks like an operating room. Even with all that apparent light, I still either have to use flash or a very long shutter speed to properly expose an image.
Above are two images of a rubber valve stem. They were both made using my incredibly sharp ZEISS Milvus 100mm macro lens mounted on my Nikon D850, which was mounted on my rolling studio stand. I focused the ZEISS manual focus lens using Live View at 100 percent.
Both images were made at ISO 64 at an aperture of f/16. The image without the flash required a shutter speed of 2.5 seconds, which was obviously not handholdable. With an image completely illuminated by flash, the shutter speed doesn’t contribute to the exposure. (Shutter speed does contribute if the image is a combination of ambient and flash.) In the flash image below, the shutter speed was 1/60 second.
Both images are properly exposed, but they look very different. The image with flash has more contrast, which gives more of a three-dimensional appearance, where the ambient (no flash) image has more even light. When sharp and properly exposed, there’s no right or wrong to flash versus ambient light, but be aware there can be a profound difference between them.
How many times have you looked at a series of photographs but have been unable to find a single one that is clear enough to provide the evidence you need to address a specific issue?
Unfortunately, regardless of the source, many of the photographs you encounter during the investigation of an accident or a product failure are likely mediocre at best, and completely useless at worst. Taking care to make decent photographs applies equally to consulting experts, police agencies, insurance adjusters, and law firm investigators. You don’t have to become a professional photographer (although many of you are getting paid for making photos during your work!), but there are fairly simple things you can do to make your photographs more useful.
At more than one inspection, the subject of making photographs has come up. Quite a few times I’ve heard, “Well, my photos aren’t great, but they’ll be good enough.” Do you treat your measurements, analysis, or reports the same way: “They’re not exactly right, but close enough”?
Some of the all-to-common problems are: blur from camera shake; poor focusing; inappropriate lens focal lengths; bad composition; bad camera menu settings; bad lighting; and incorrect exposure. Close-up photographs are often essential, but have their own additional potential issues.
Fortunately, almost every one of these photo faults is easy to correct with a little care and a little knowledge. Even used on automatic, most cameras and flashes today are incredibly accurate for 95% of the photographic situations you’re likely to face–if you are careful handling your camera. But even the most advanced technology can’t overcome carelessness.
Rather than making this into one giant post, I will be posting a number of separate articles addressing the problems I’ve mentioned above, plus some other photographic issues. In the meantime, remember it’s worth taking the time to make the best photos you can. After all, if you’re not going to try to take good, usable photographs, why bother taking them at all?