In an earlier post, I showed how shooting a sponge with a side flash gave depth to its surface that couldn’t be shown using a direct flash. I used a sponge since sponges are small, readily available, and easy to practice with anywhere. In this post, I’ll show how a side flash gives depth to an automotive subject—namely, a tire tread.
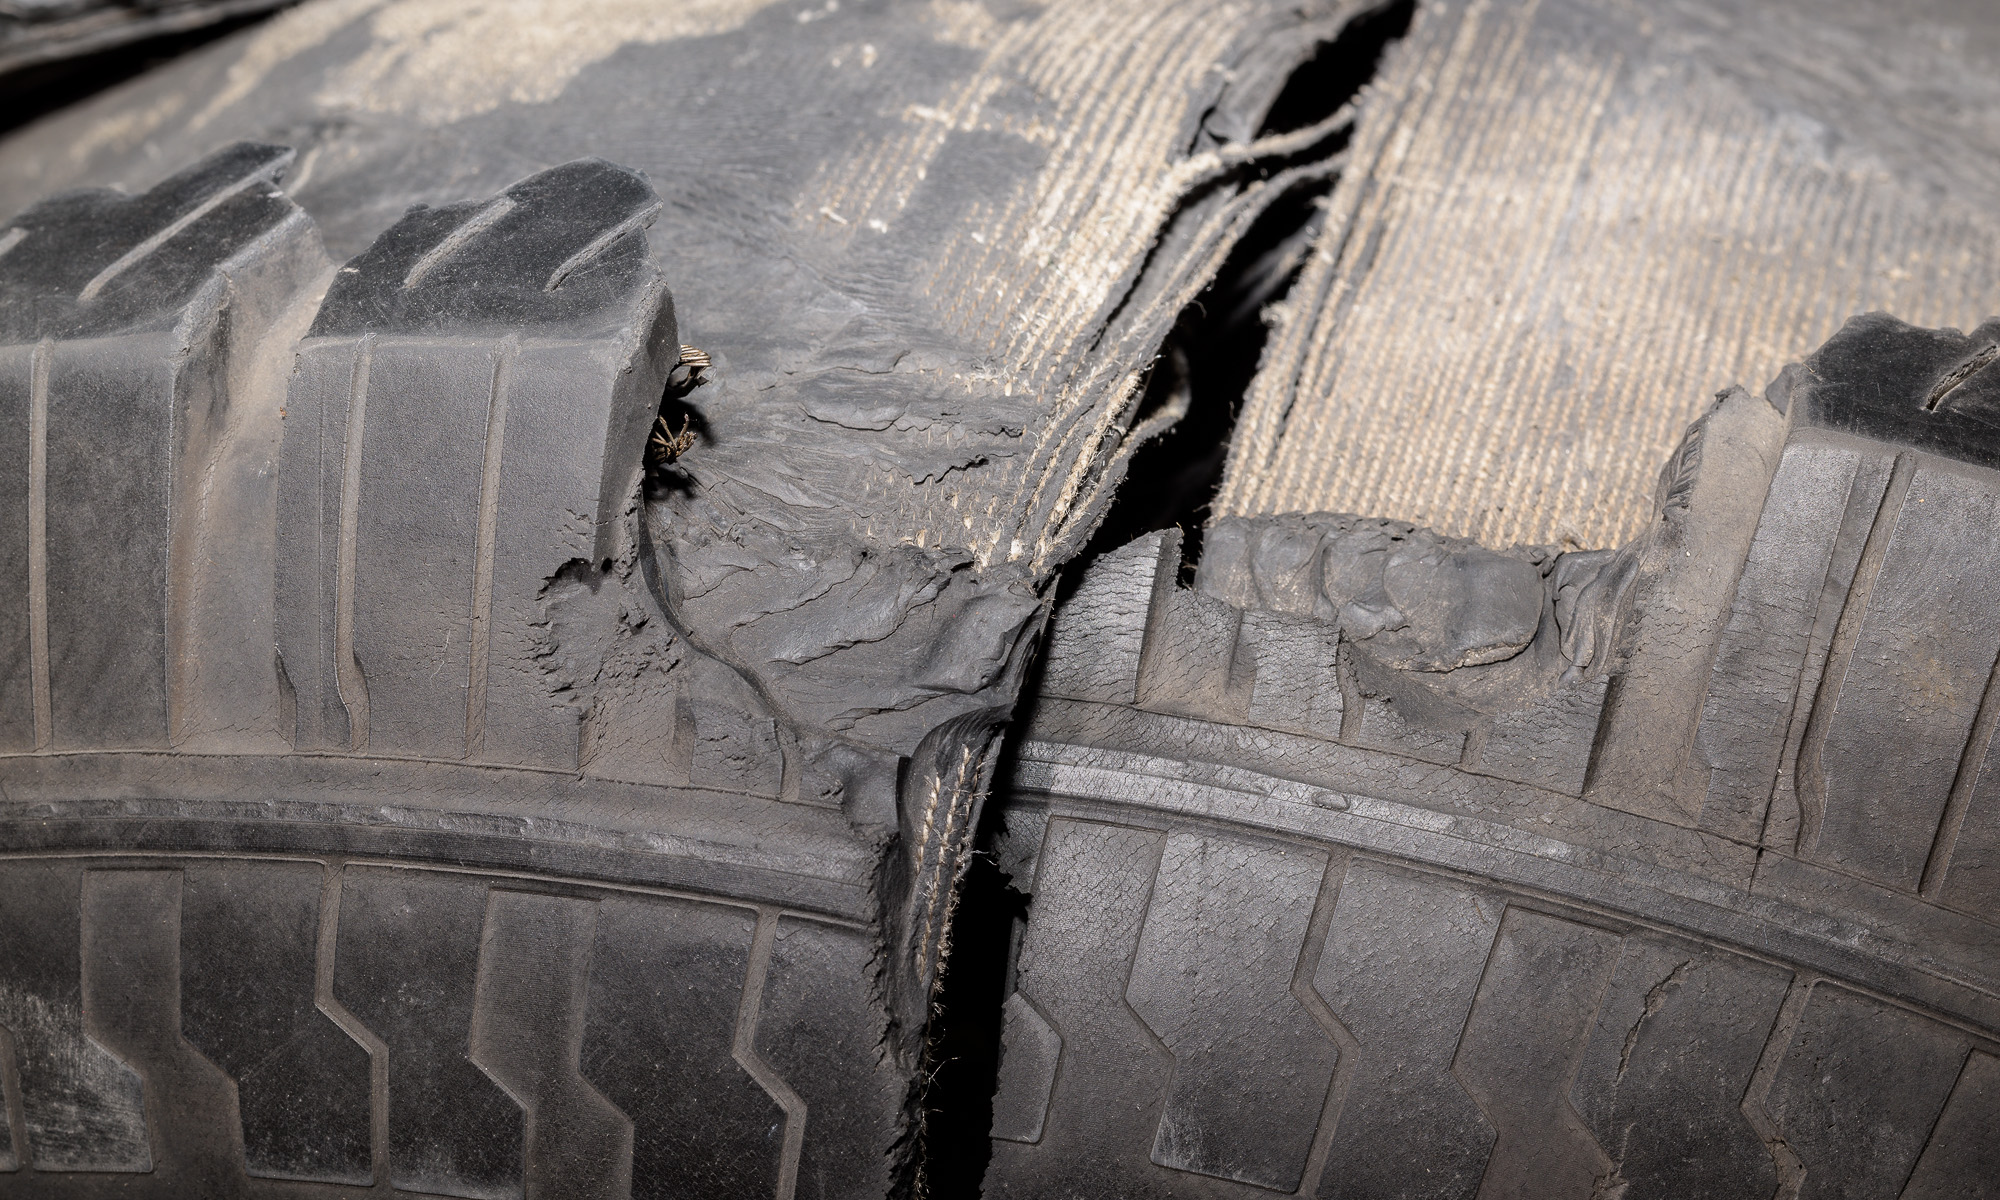
For this first image, I didn’t use any flash, but adjusted the camera for a proper exposure for the ambient light. It’s properly exposed, but the depth and extent of the cuts and chips out of the tread aren’t apparent. (Click on photo to enlarge, then click on back arrow to return to this post.)

This photo was made in my Studio Lab, which has so many LED shop lights overhead people say it looks like an operating room. Even though the room looks bright to our eyes, there is not as much ambient light for photography as you might think. In fact, to make the image above required a 4.0 second shutter speed, which obviously precluded handholding the camera. (I also increased the ISO 2/3 stop from 64 to 100.)
For the second shot, I added a Profoto B1x flash to each side, almost perpendicular to the camera, shooting across the tread. I triggered them with a Nikon SB-910 flash in the hotshoe that was pointed straight up at a very low power so it would not contribute to the exposure. (Click on photo to enlarge, then click on back arrow to return to this post.)

Diffused ambient light and direct flash lighting both evenly light your subject, which fills in the shadows, which, in turn, reduces the appearance of any textures. On the other hand, side flash enhances texture by creating shadows.
[Technical aside #1: With cross-light from the added side flashes, the shutter speed was 9 2/3 stops faster at 1/200 second and the ISO was 2/3 stop less at 64, for a total of 10 1/3 stops less light than the first shot. If the flashes were turned off for the second photo, that exposure would have resulted in a pure black image. The flashes were adjusted to give the proper amount of light for the exposure. This is called a full flash image, where all of the light is provided by flash. This differs from a fill flash image where the light from any flash enhances the ambient exposure, but flash isn’t the only light source. More on this later.]
[Technical aside #2: For an equivalent ambient light image, instead of a 4.0 second shutter speed and ISO 100, you could use 1/60 second shutter speed and ISO 256,000. The 1/60 second shutter speed may allow you to handhold the camera, but ISO 256,000 is guaranteed to be extremely noisy and noticeably lacking in dynamic range. Not a good alternative at all.]
Four major takeaways:
-1- As with the earlier sponge example, flash light coming from the side brings out texture by creating shadows.
-2- Both diffused ambient light and direct flash lighting flood every surface with the same light, obscuring texture and depth differences.
-3- Indoor ambient light may look bright to our eyes, but it will require very long exposures or an extremely high (and noisy) ISO to make the photograph.
-4- You must adjust your exposure accordingly when going between ambient light and full flash lighted images.