Where you place your camera determines the relative positions of objects in your frame. It’s important to be aware of any unintended impressions by the juxtaposition of the objects you are showing. This is best avoided by making photographs from enough different angles to give a complete and accurate representation of the positions of all the elements.
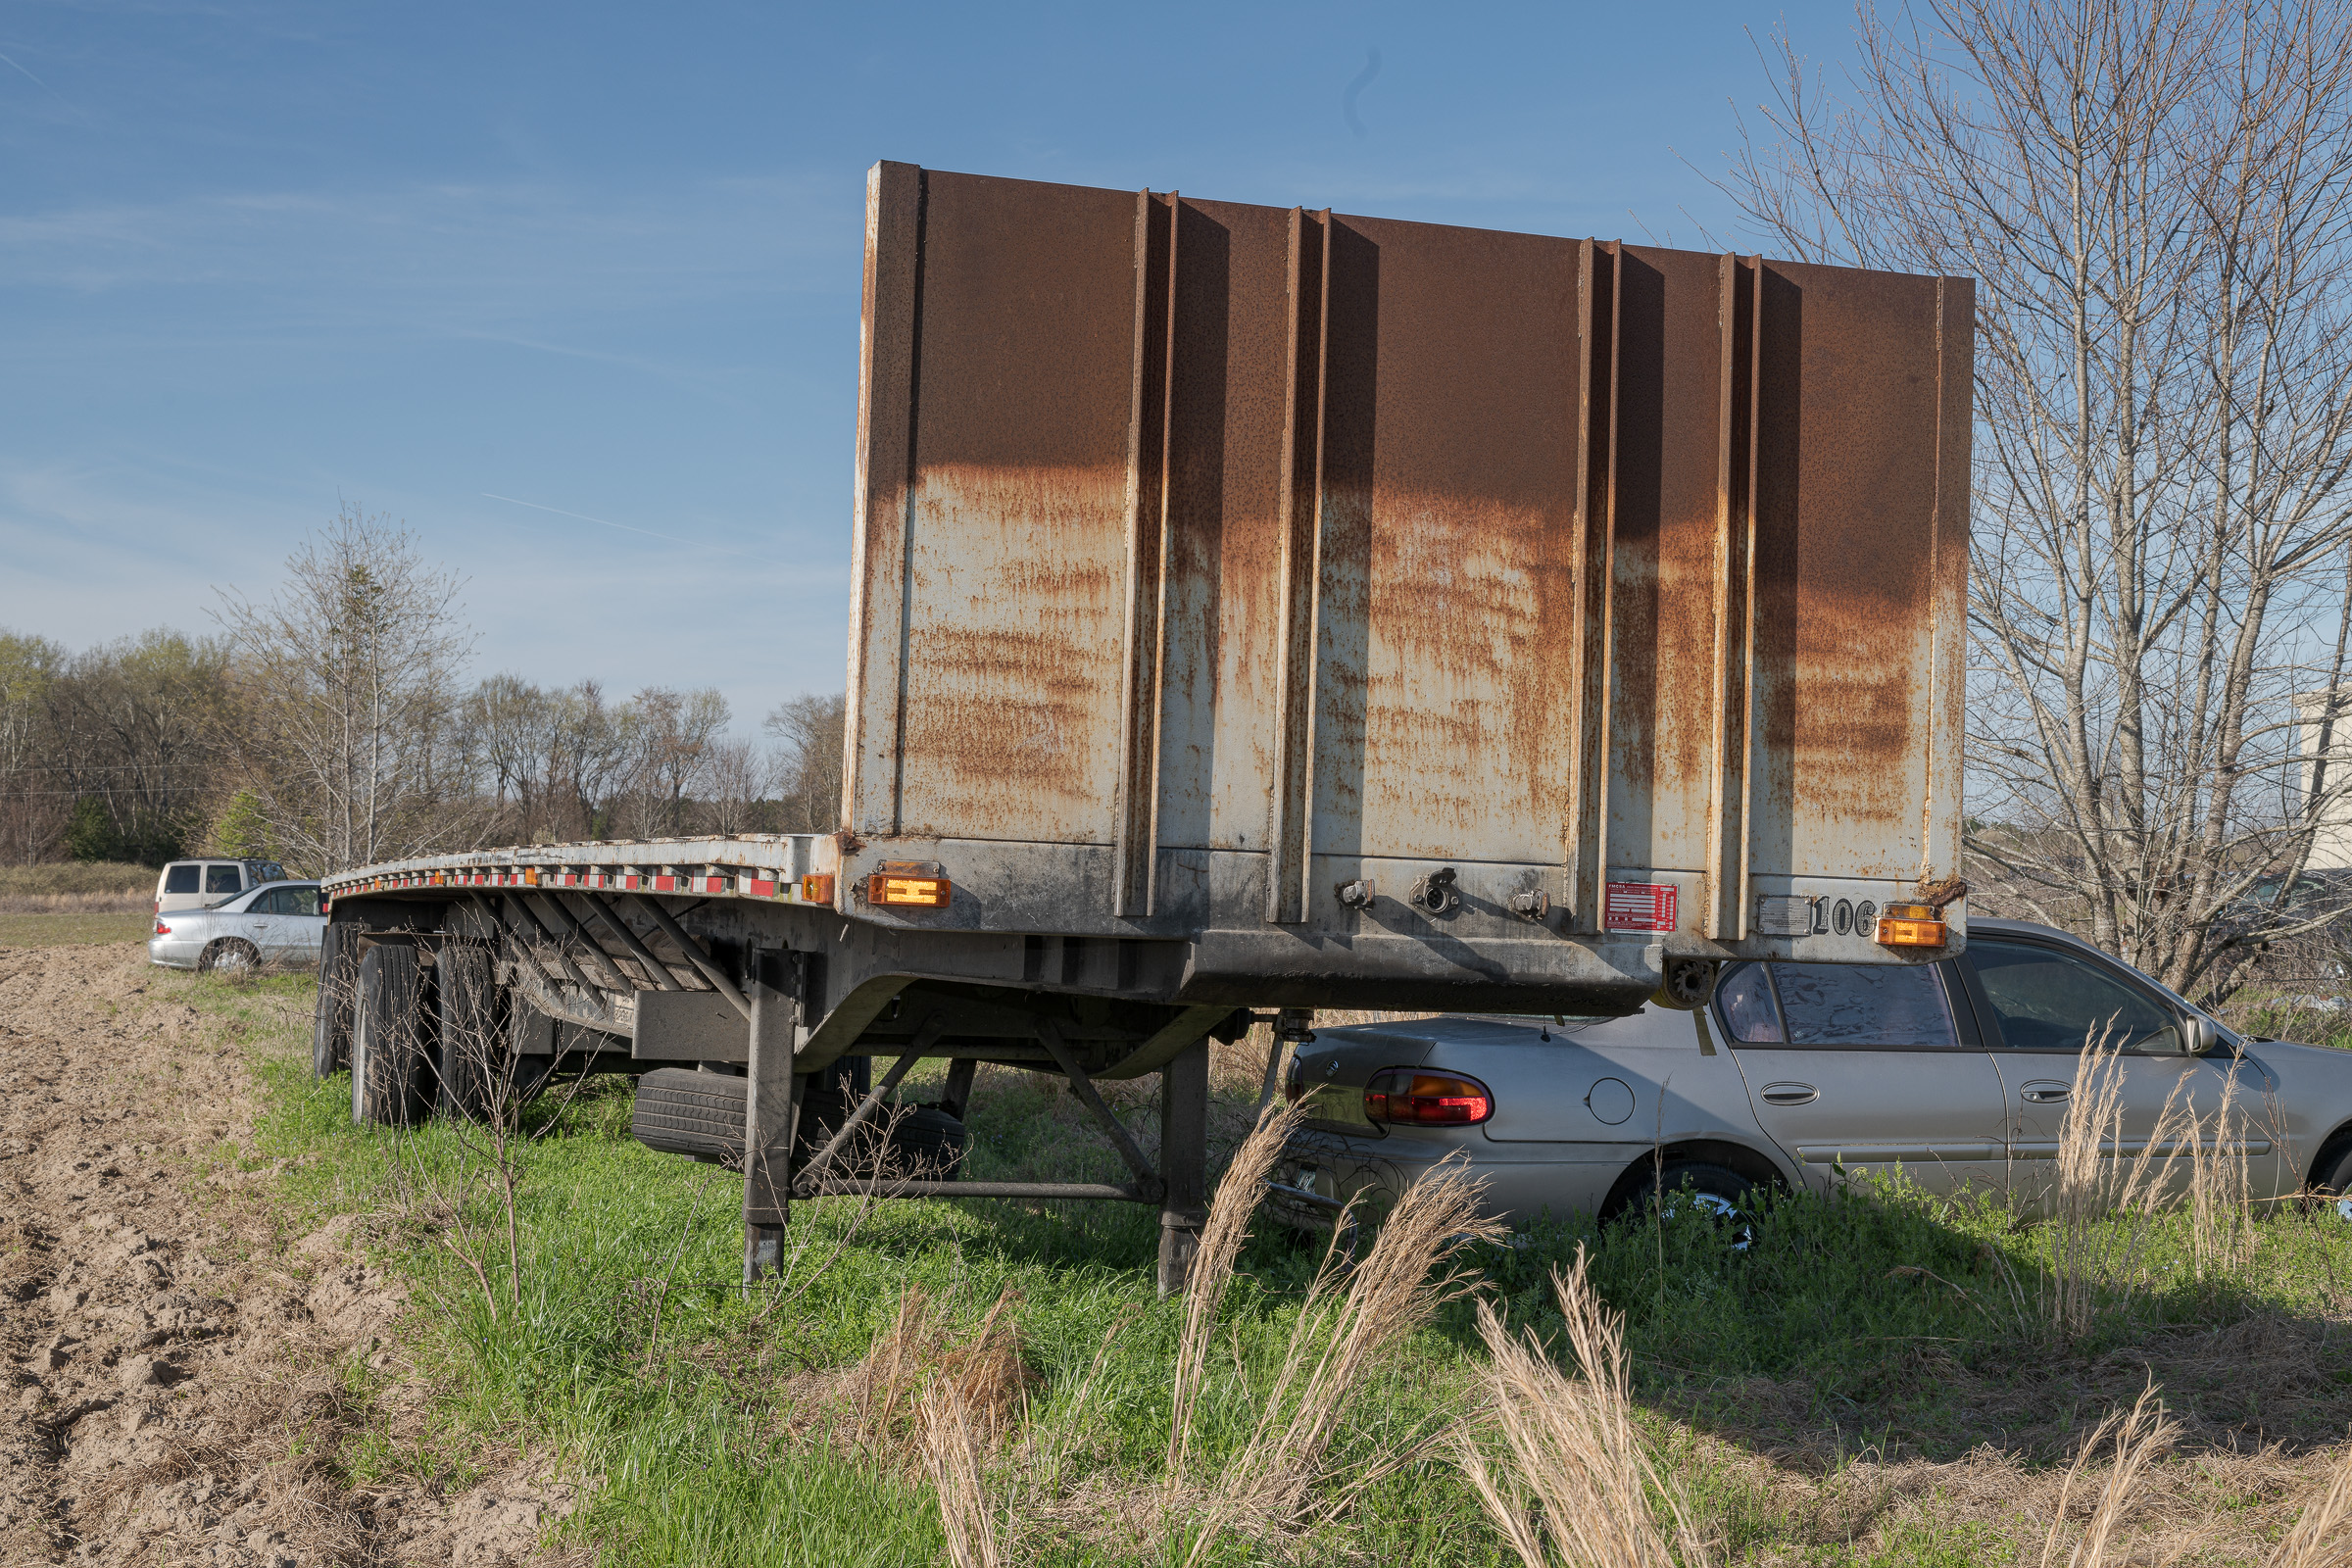
The subject of these photographs was a disused flatbed semi-trailer. It was in a rural field with a number of other discarded vehicles . None could be moved.
All of these photographs were made with the same 50 mm lens on the same full frame sensor camera so there was no variation in the field of view between the images. As mentioned, neither the trailer nor the car were moved. My camera was on a tripod (as always) so all the photos were made from the same camera height.
In the first photo, how far under the trailer do you think the rear of the gold car was? Was its rear bumper against the left landing leg of the trailer? (Click on the image to enlarge, then click on the back arrow to return to the post.)

Moving the camera to the right showed the car’s rear bumper was not against the landing leg, but can you estimate how far the trunk lid was under the side of the trailer? (Click on the image to enlarge, then click on the back arrow to return to the post.)
Further right, looking directly at the front of the trailer, the car’s rear bumper was actually quite far from the trailer’s landing leg, and its trunk lid doesn’t look nearly as far under the trailer as in the two previous photos. (Click on the image to enlarge, then click on the back arrow to return to the post.)

Moving even farther to the right, you can now see that none of the rear of the car was under the side of the trailer. Again, neither vehicle was moved during this sequence. (Click on the image to enlarge, then click on the back arrow to return to the post.)

Three takeaways:
-1- Be aware of possible deception from a single photograph, both when making the photos yourself, and when evaluating photos provided to you. If the first image had been from a wreck scene, you certainly don’t want to opine that the rear of the car ended up under the trailer!
-2- Take multiple images from different camera positions (different perspectives) to give a complete and accurate depiction of your subjects and their relationships to other objects in the frame.
-3- As mentioned in previous posts, using a tripod for every image not only insures a sharp image, but allows careful framing and a consistent look between images all made at the same height.