(Note: This post incorporates several important fundamentals along with the discussion of controlling sun stars. As always, it’s all summarized in the Takeaways at the end.)
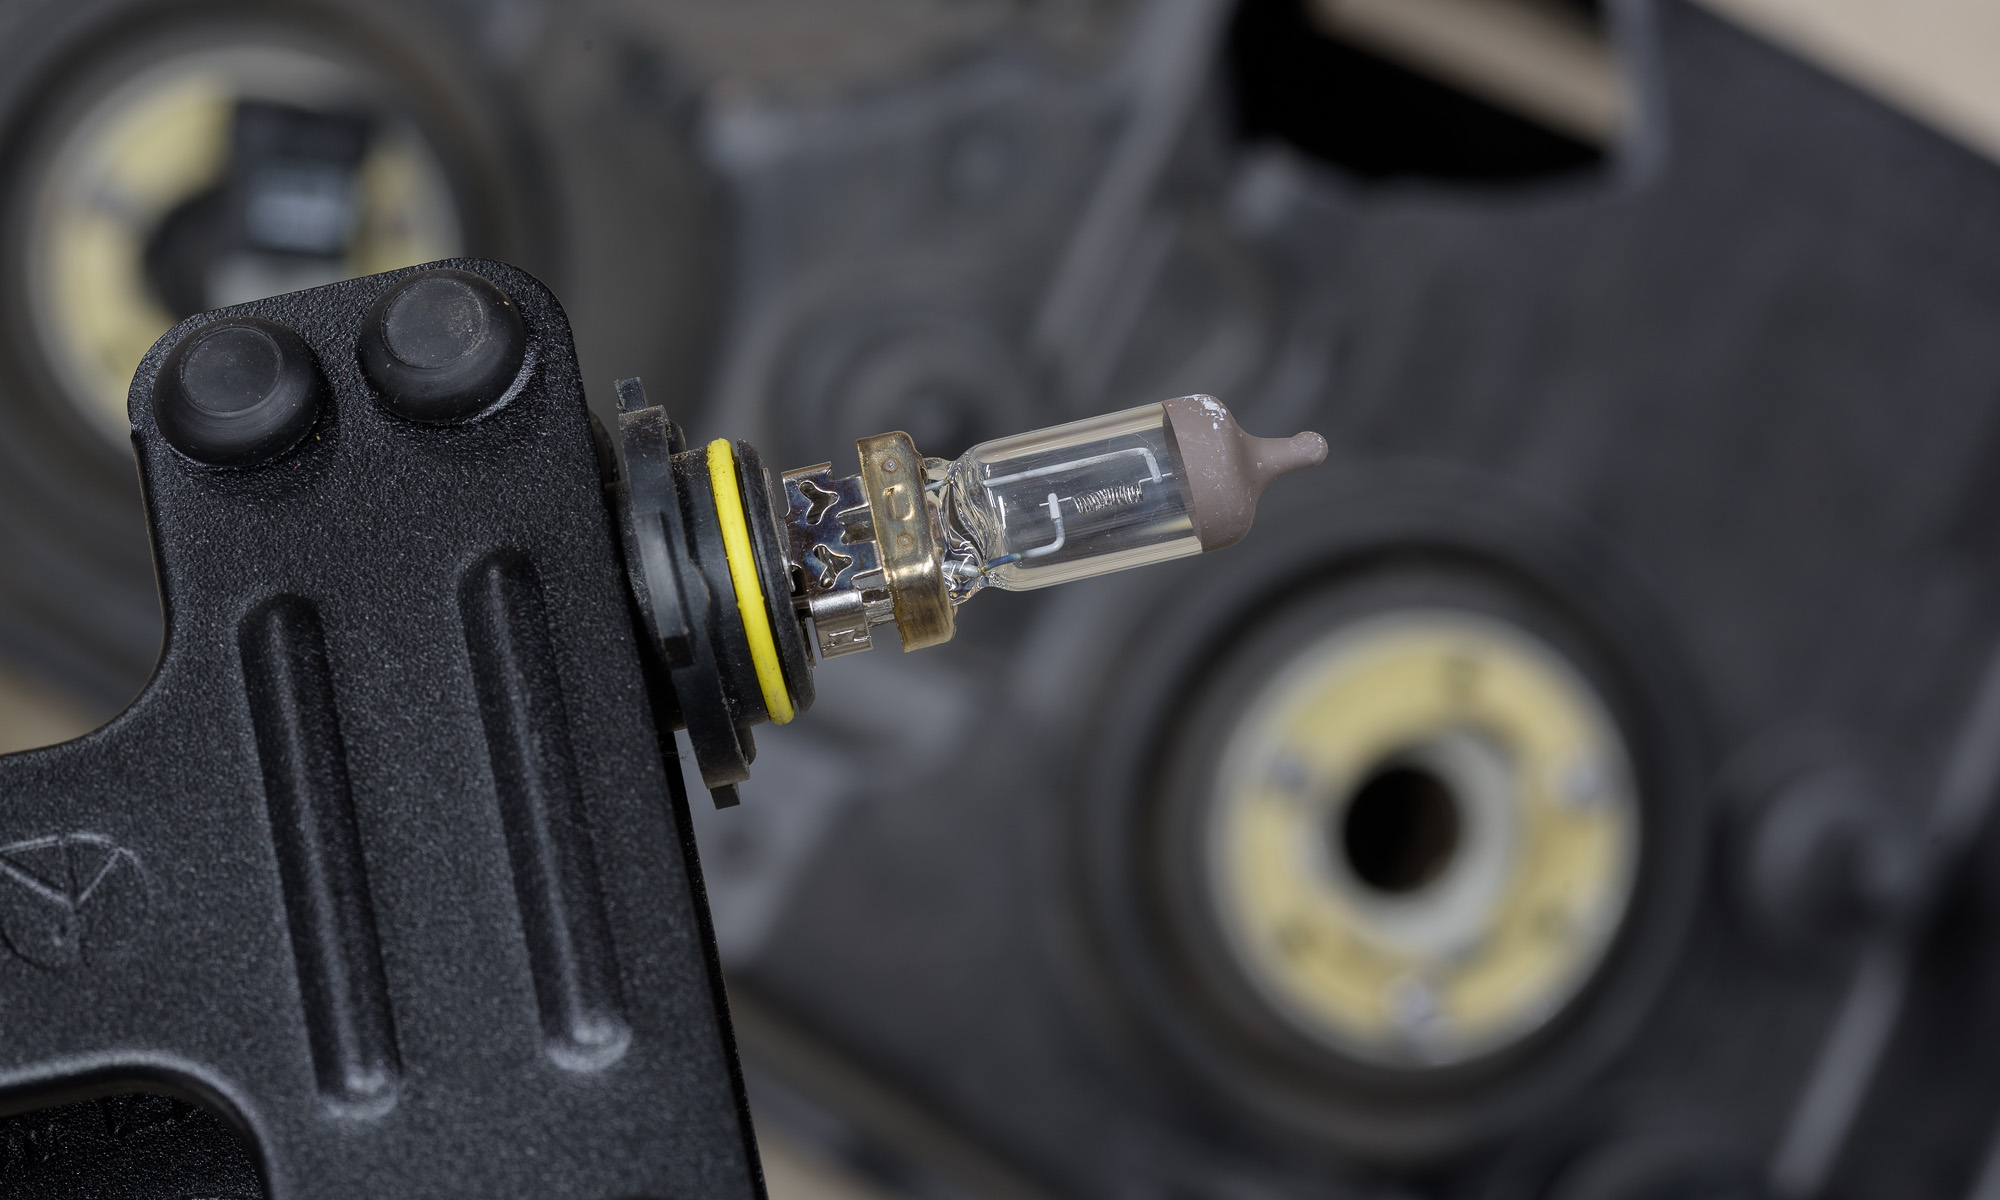
A previous post illustrated how the number of aperture blades affected the number of rays produced in a sun star. As discussed, sun stars are created from bright spots of light in an image when the lens aperture is stopped down. While prominent sun stars might be desirable for landscape or creative photographs, they are usually unwanted in forensic photos. In fact, there have been instances where photographs with distinctive sun stars have been limited or disallowed. Here’s how to control—or even eliminate—their prominence.
There were three small, distinct bright light sources in the following night scene. A series of images was made at every whole aperture from f/16 through f/2. (As a reminder, there are six stops up from f/16: f/11, f/8, f/5.6, f/4, f/2.8, f/2.) Only four of the seven total images—each two stops apart—will be shown below. The other three intermittent images fit in the progression as you’d expect from what you’ll see below.
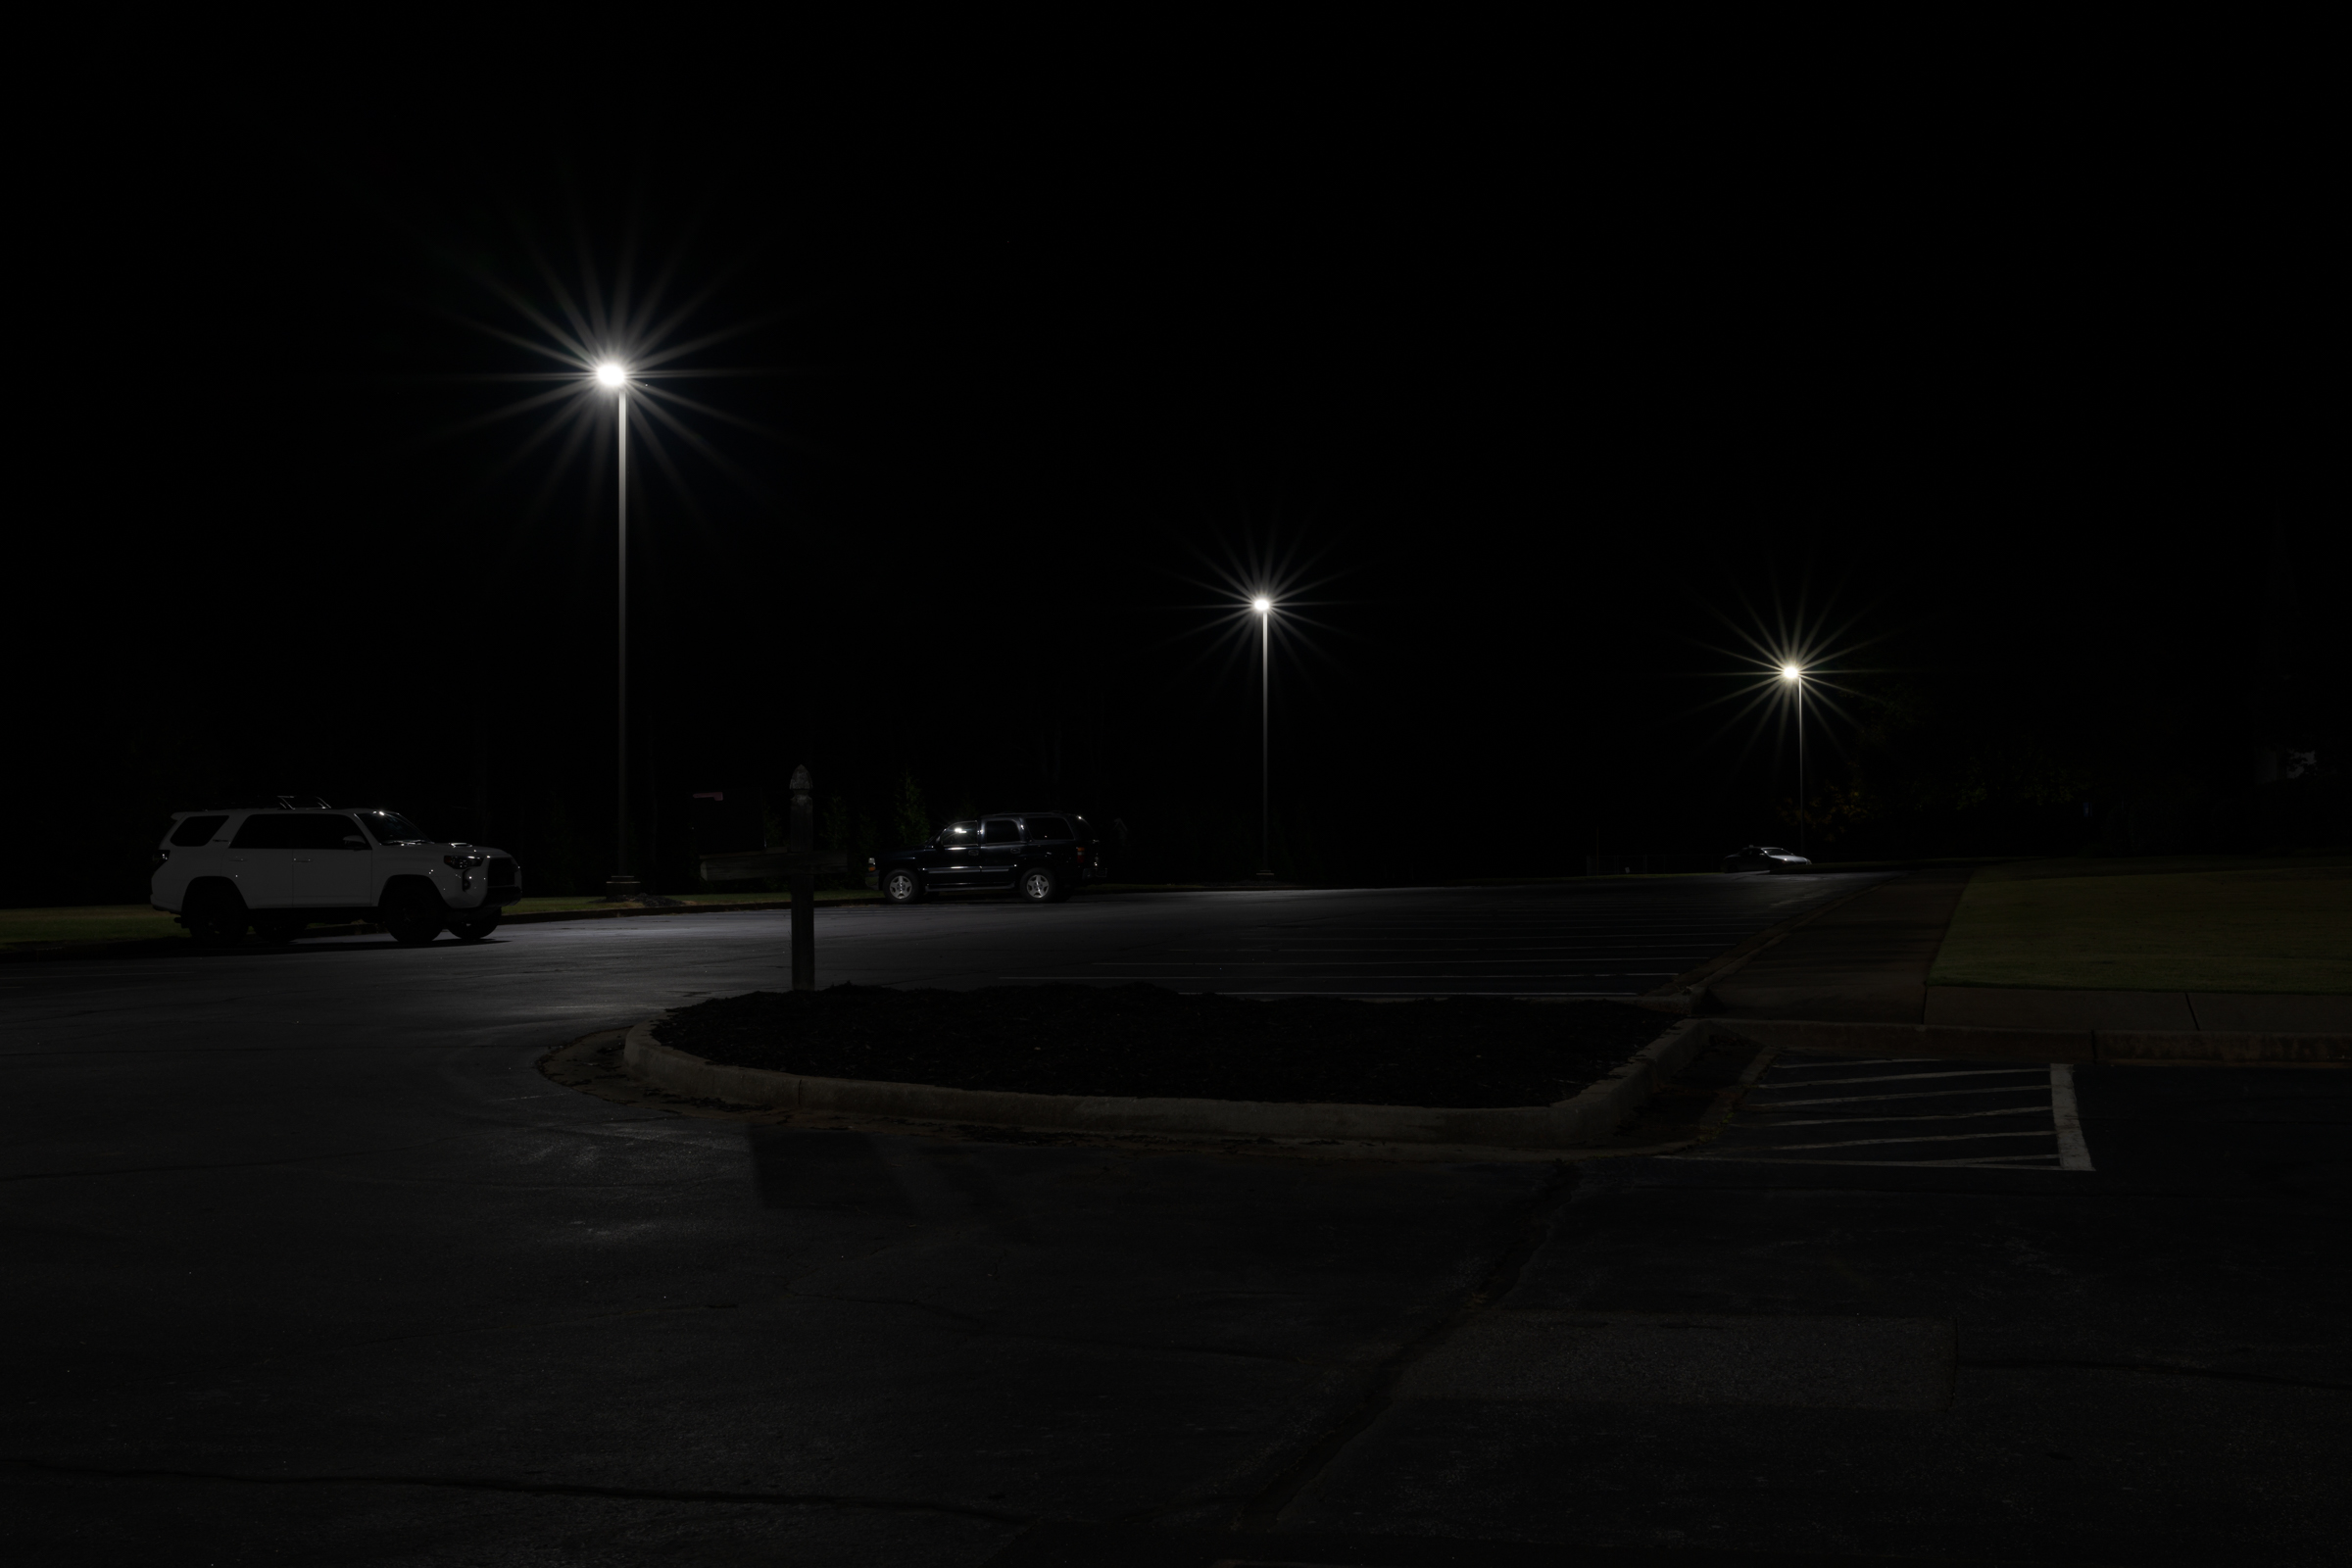
This first image was made with the aperture stopped down to f/16. As expected, the sun star rays were most distinct at this aperture. [Click on image to enlarge, then click on back arrow to return to this post.]
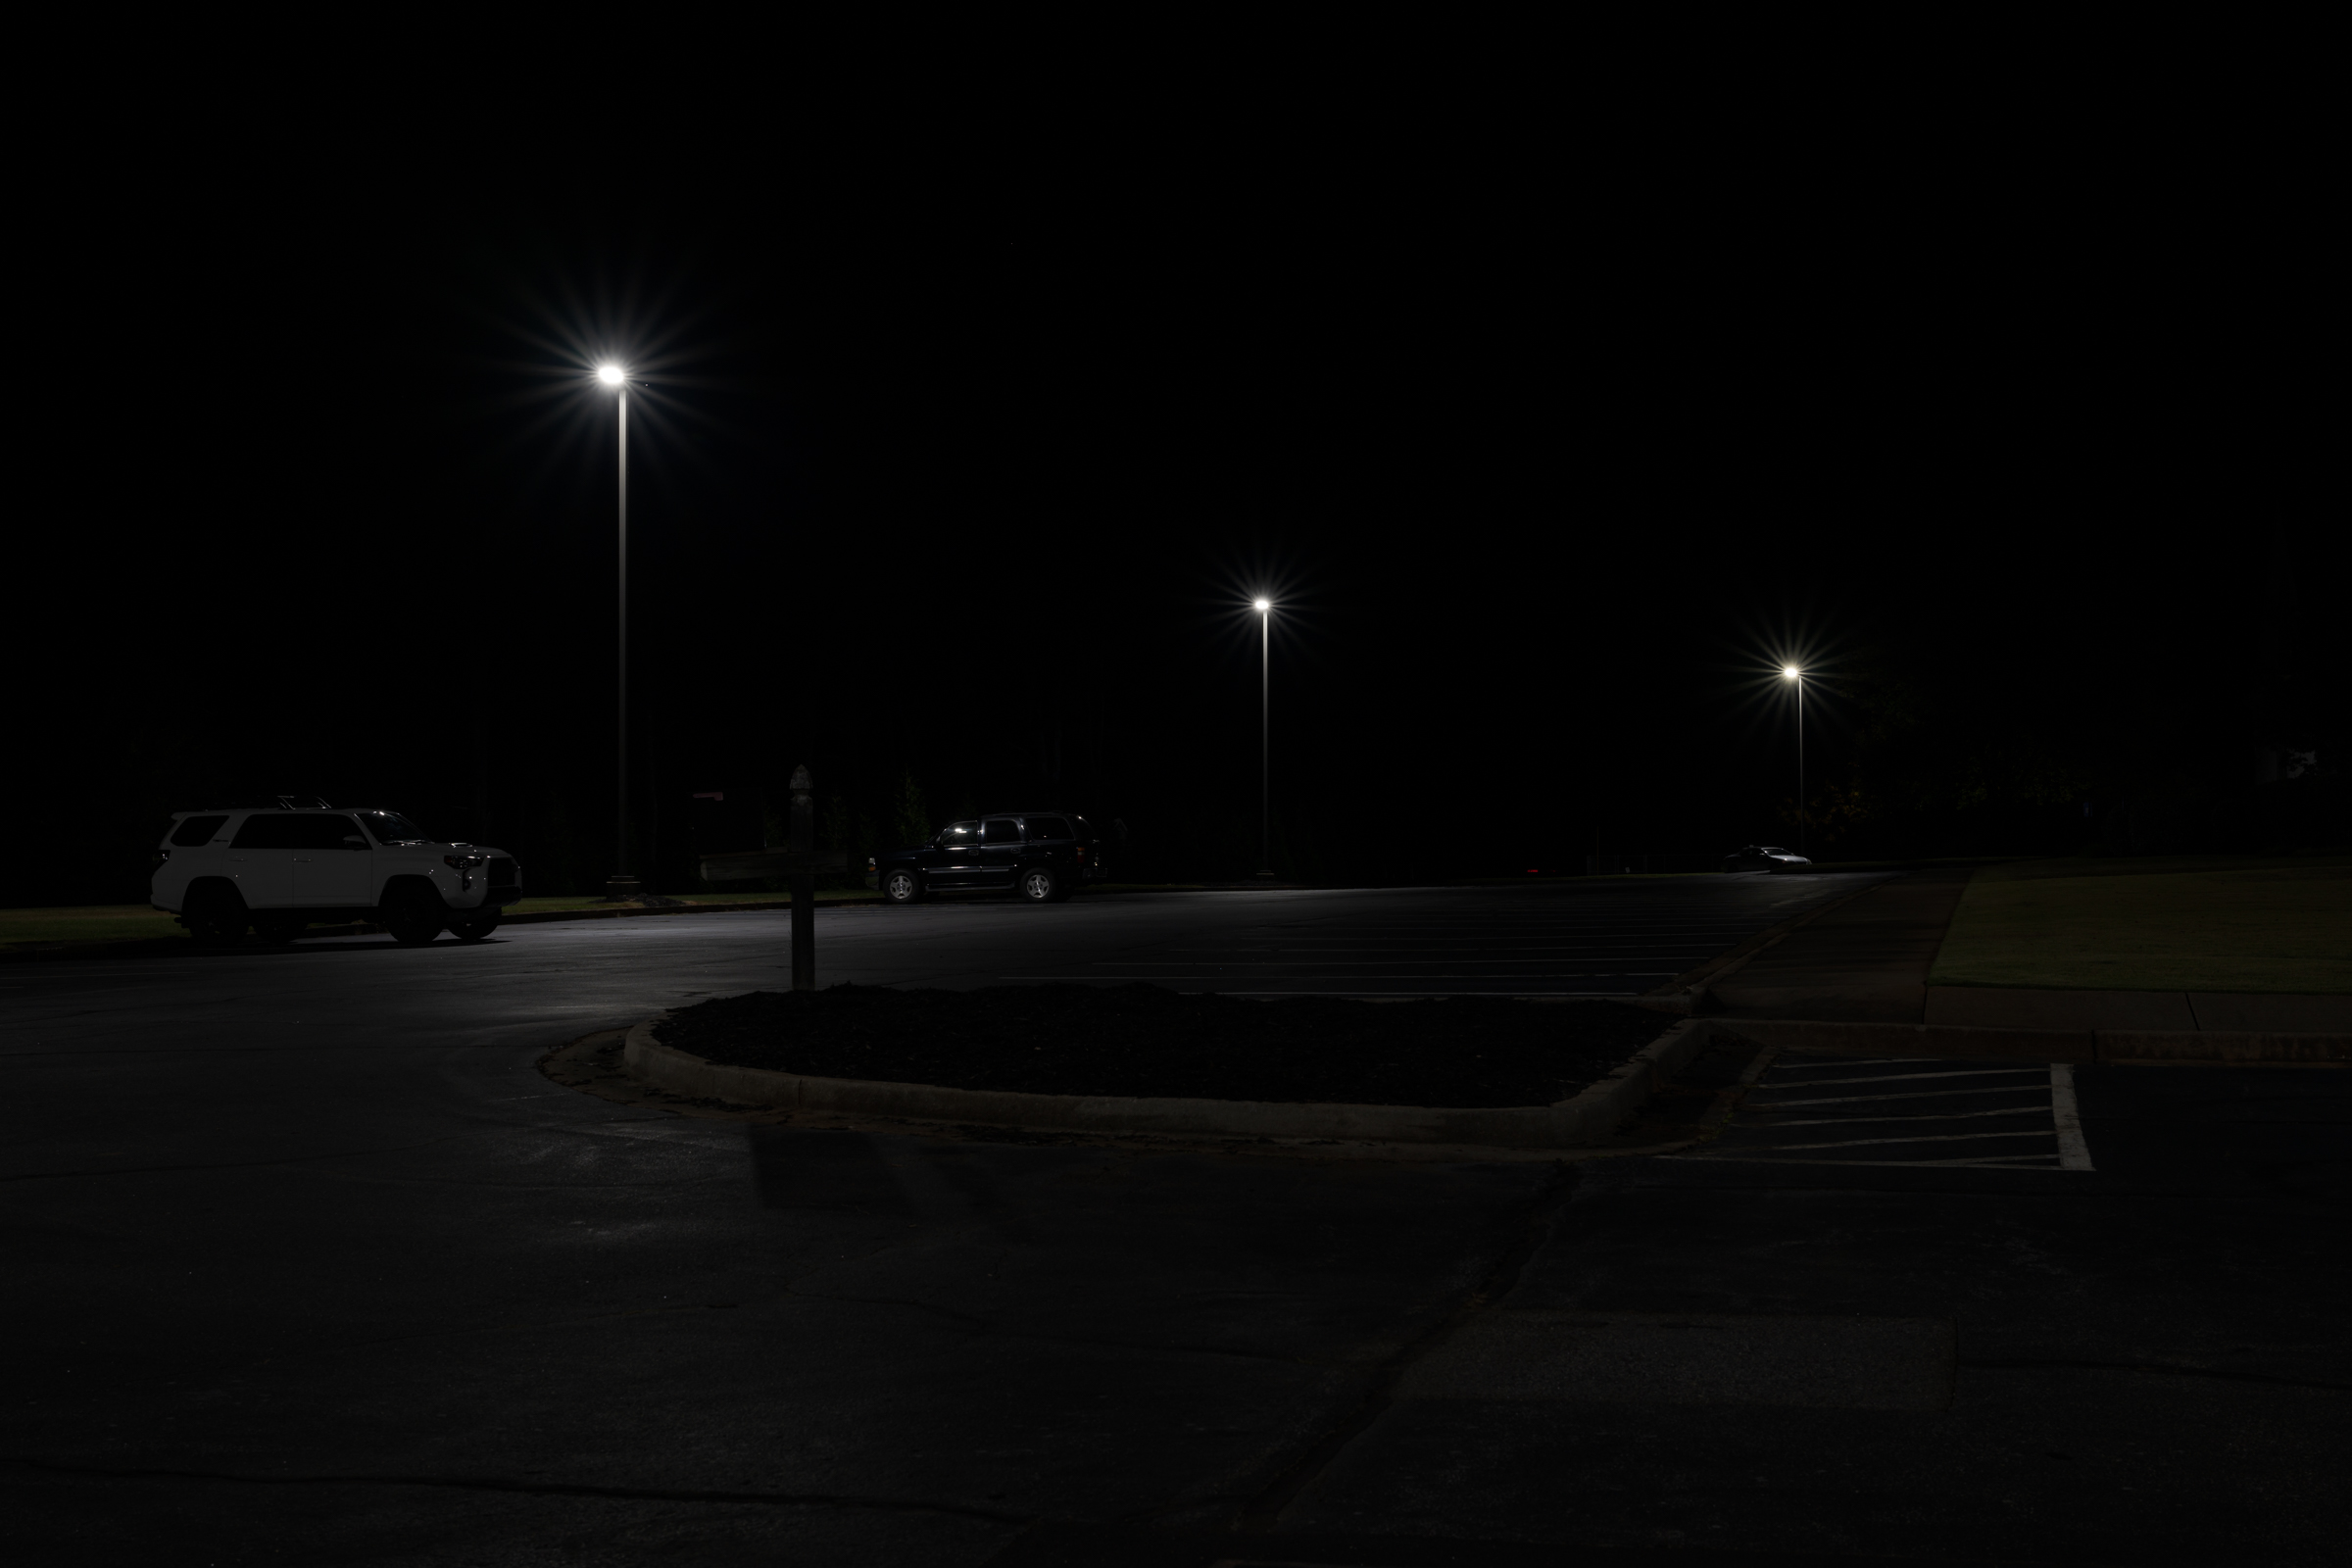
Opening up two stops to f/8 noticeably reduced the sun star effect. [Click on image to enlarge, then click on back arrow to return to this post.]
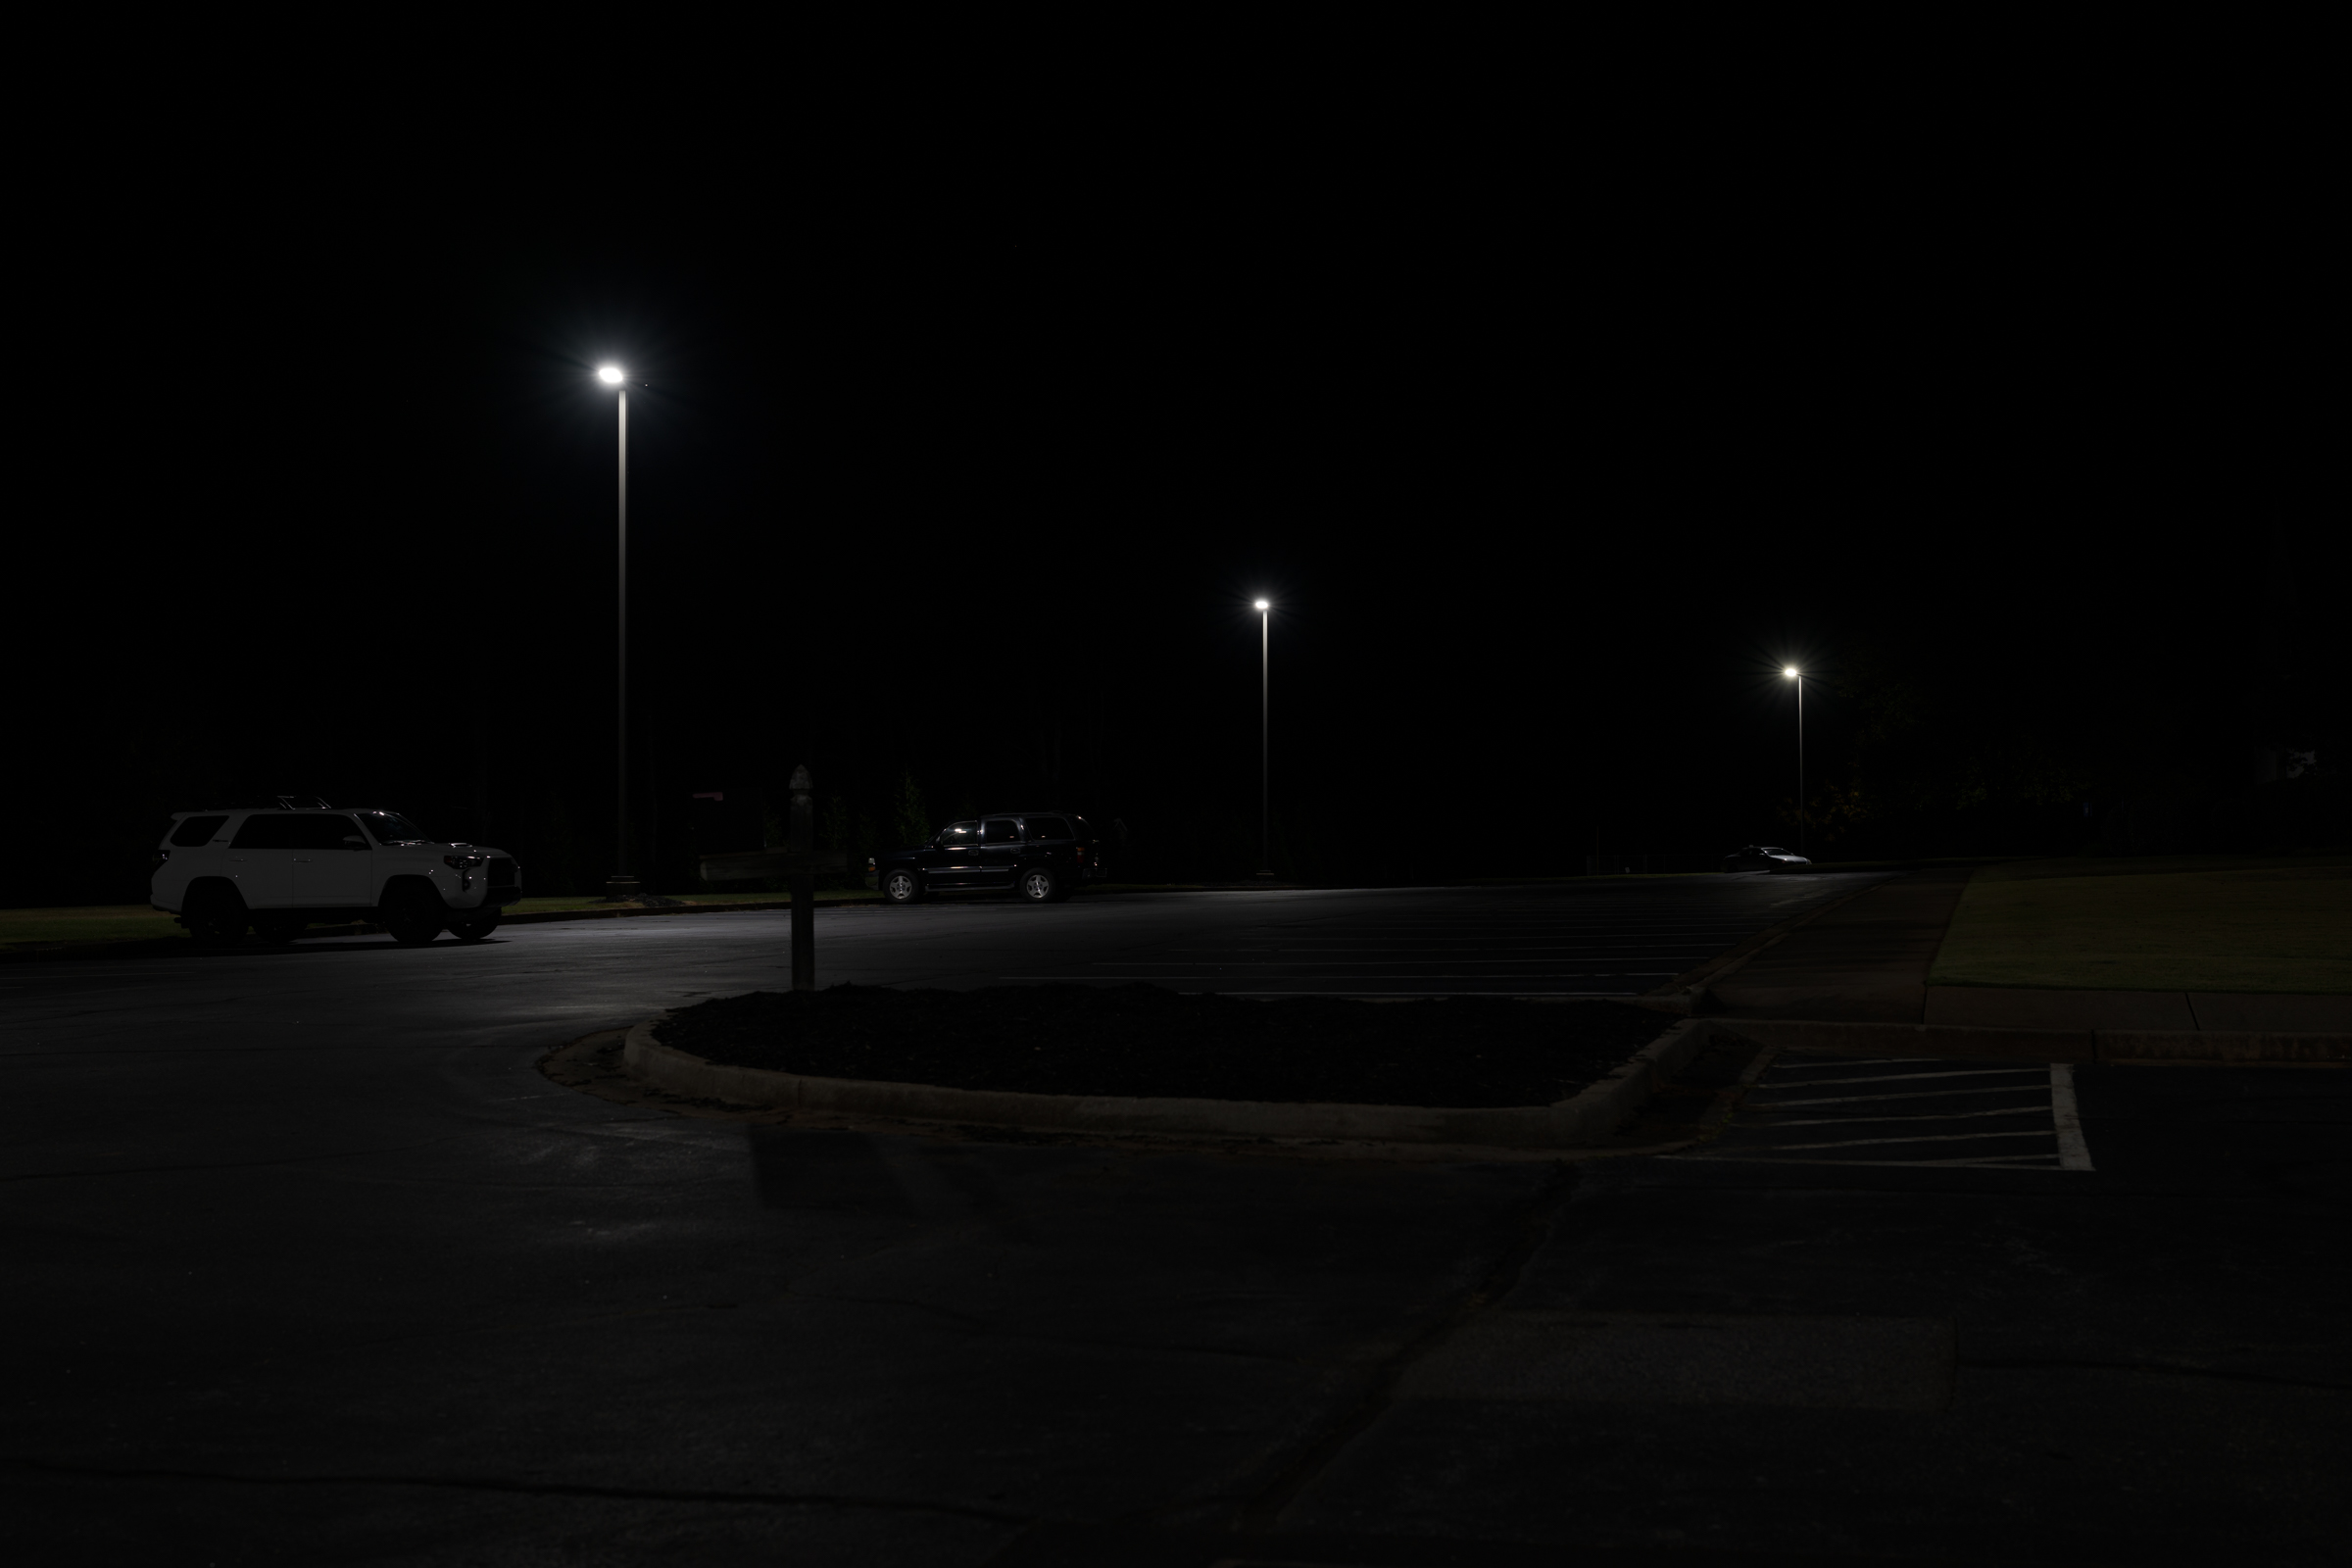
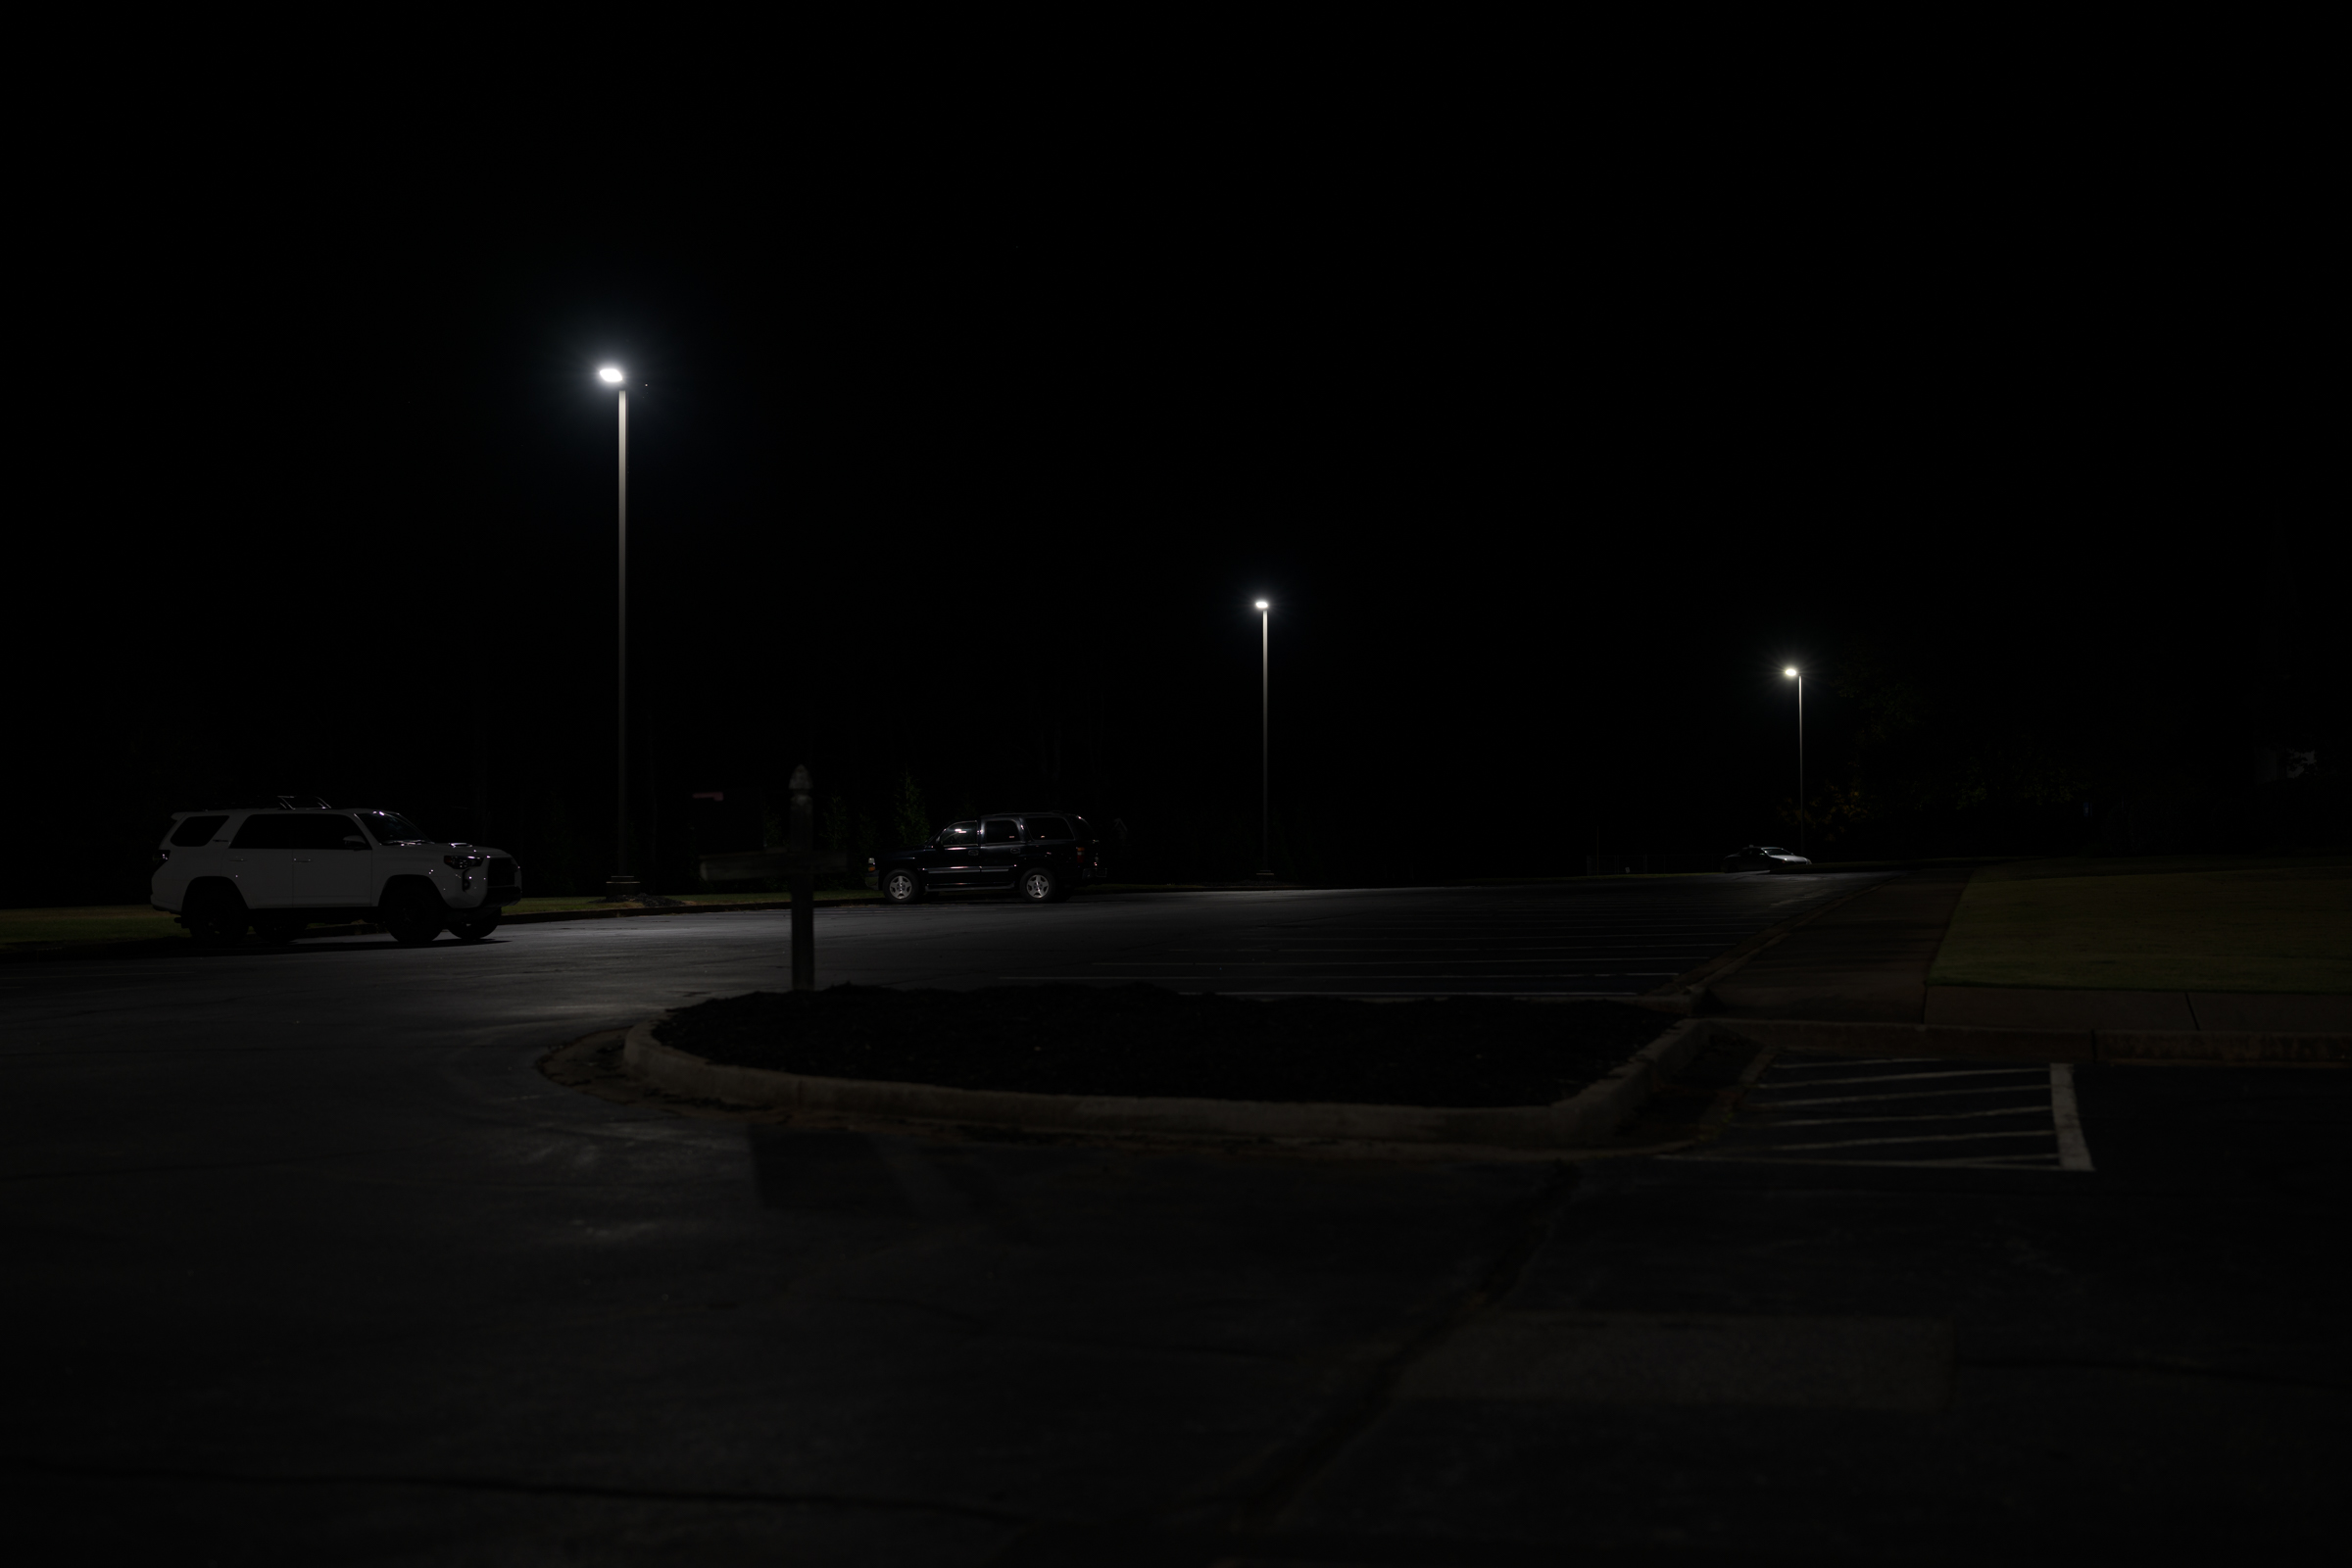
Opening up two more stops to f/4 almost completely eliminated the sun star effect. This should be acceptable for any foreseeable use. [Click on image to enlarge, then click on back arrow to return to this post.]
Finally, opening up yet two more stops to f/2 eliminated any trace of sun star rays. [Click on image to enlarge, then click on back arrow to return to this post.]
As you can see, the wider open the aperture (which means the lower the f-number), the less pronounced are the sun stars. But you can’t just adjust your aperture to either intensify or to eliminate sun stars. Whether it is daytime or nighttime photography, changing your aperture affects your image in two main ways: exposure and depth of field (DOF).
Recall that the smaller the f-number, the larger the lens opening. Just like 1/2 of a pie is twice as large as a 1/4 of a pie, a lens aperture of f/2 is twice the diameter of f/4. Here’s how changing aperture changes exposure and DOF:
Exposure: Opening the lens aperture lets in more light, which brightens the exposure. To keep the overall exposure the same, you must compensate by the same number of stops by using a faster shutter speed, lowering your ISO, or using a combination of both. Since all the above images were already at my Nikon Z 8’s lowest ISO of 64, my only option was to select a correspondingly faster shutter speed every time I opened up the aperture.
This means that for this series of four images, every time I opened up the lens aperture by two stops, I had to use a shutter speed that was two stops faster. As you can see from the captions under the images, at a constant ISO 64, the f/16 image required a 2.5 second exposure. Opening the aperture two stops to f/8 required a shutter speed of 0.6 seconds, which is two stops faster. Likewise, f/4 required 1/6 second and f/2 needed 1/25 second to keep the same overall exposure. Each were two stop increments of aperture and shutter speed.
As a side note, since the camera remained on a tripod throughout all the photographs, the shutter speed had no effect on the sharpness of the images. But changing shutter speeds will definitely affect the appearance of any moving elements in the image frame.
Depth of Field (DOF): DOF is how much of the scene—from near to far—is in acceptable focus for a given focus point. DOF is controlled by aperture. The more open the aperture, the less DOF. Conversely, stopping down the lens aperture increases DOF.
A deeper DOF is more critical in daytime photographs where almost everything is visible and, in most forensic photography, should be acceptably sharp. At night, a more shallow DOF can be perfectly acceptable, especially if the background and foreground are mostly black, as in the photos above.
As you can see on the enlargements by clicking on the photos above, f/4 would likely produce acceptable DOF. Depending on your case, even f/2 (or an aperture between f/2 and f/4) might give you all the DOF you need. As the photographer, you need to (and you get to!) decide on the tradeoff between DOF and sun star prominence.
Takeaways:
-1- You can control the prominence of sun stars from small, bright light sources (day or night) by your choice of aperture. The more stopped down your aperture, the longer and more prominent the rays. Opening up the aperture will shrink the rays until they essentially disappear at the most open apertures.
-2- Opening up or stopping down your aperture will also affect the DOF in your image. You must decide how much DOF you will need. That amount would likely be different for daylight versus night photos—even of the exact same scene.
-3- Just like with any other photography, opening up or stopping down the aperture will require that you correspondingly adjust your shutter speed, ISO, or a combination of both, to maintain the same overall exposure. Make sure your shutter speed is sufficient for your image, especially if there are moving objects in your frame. Also, setting your ISO as low as possible minimizes noise and maximizes dynamic range, both of which are even more important in night photography.
© Copyright 2024 Tom Vadnais. All Rights Reserved.