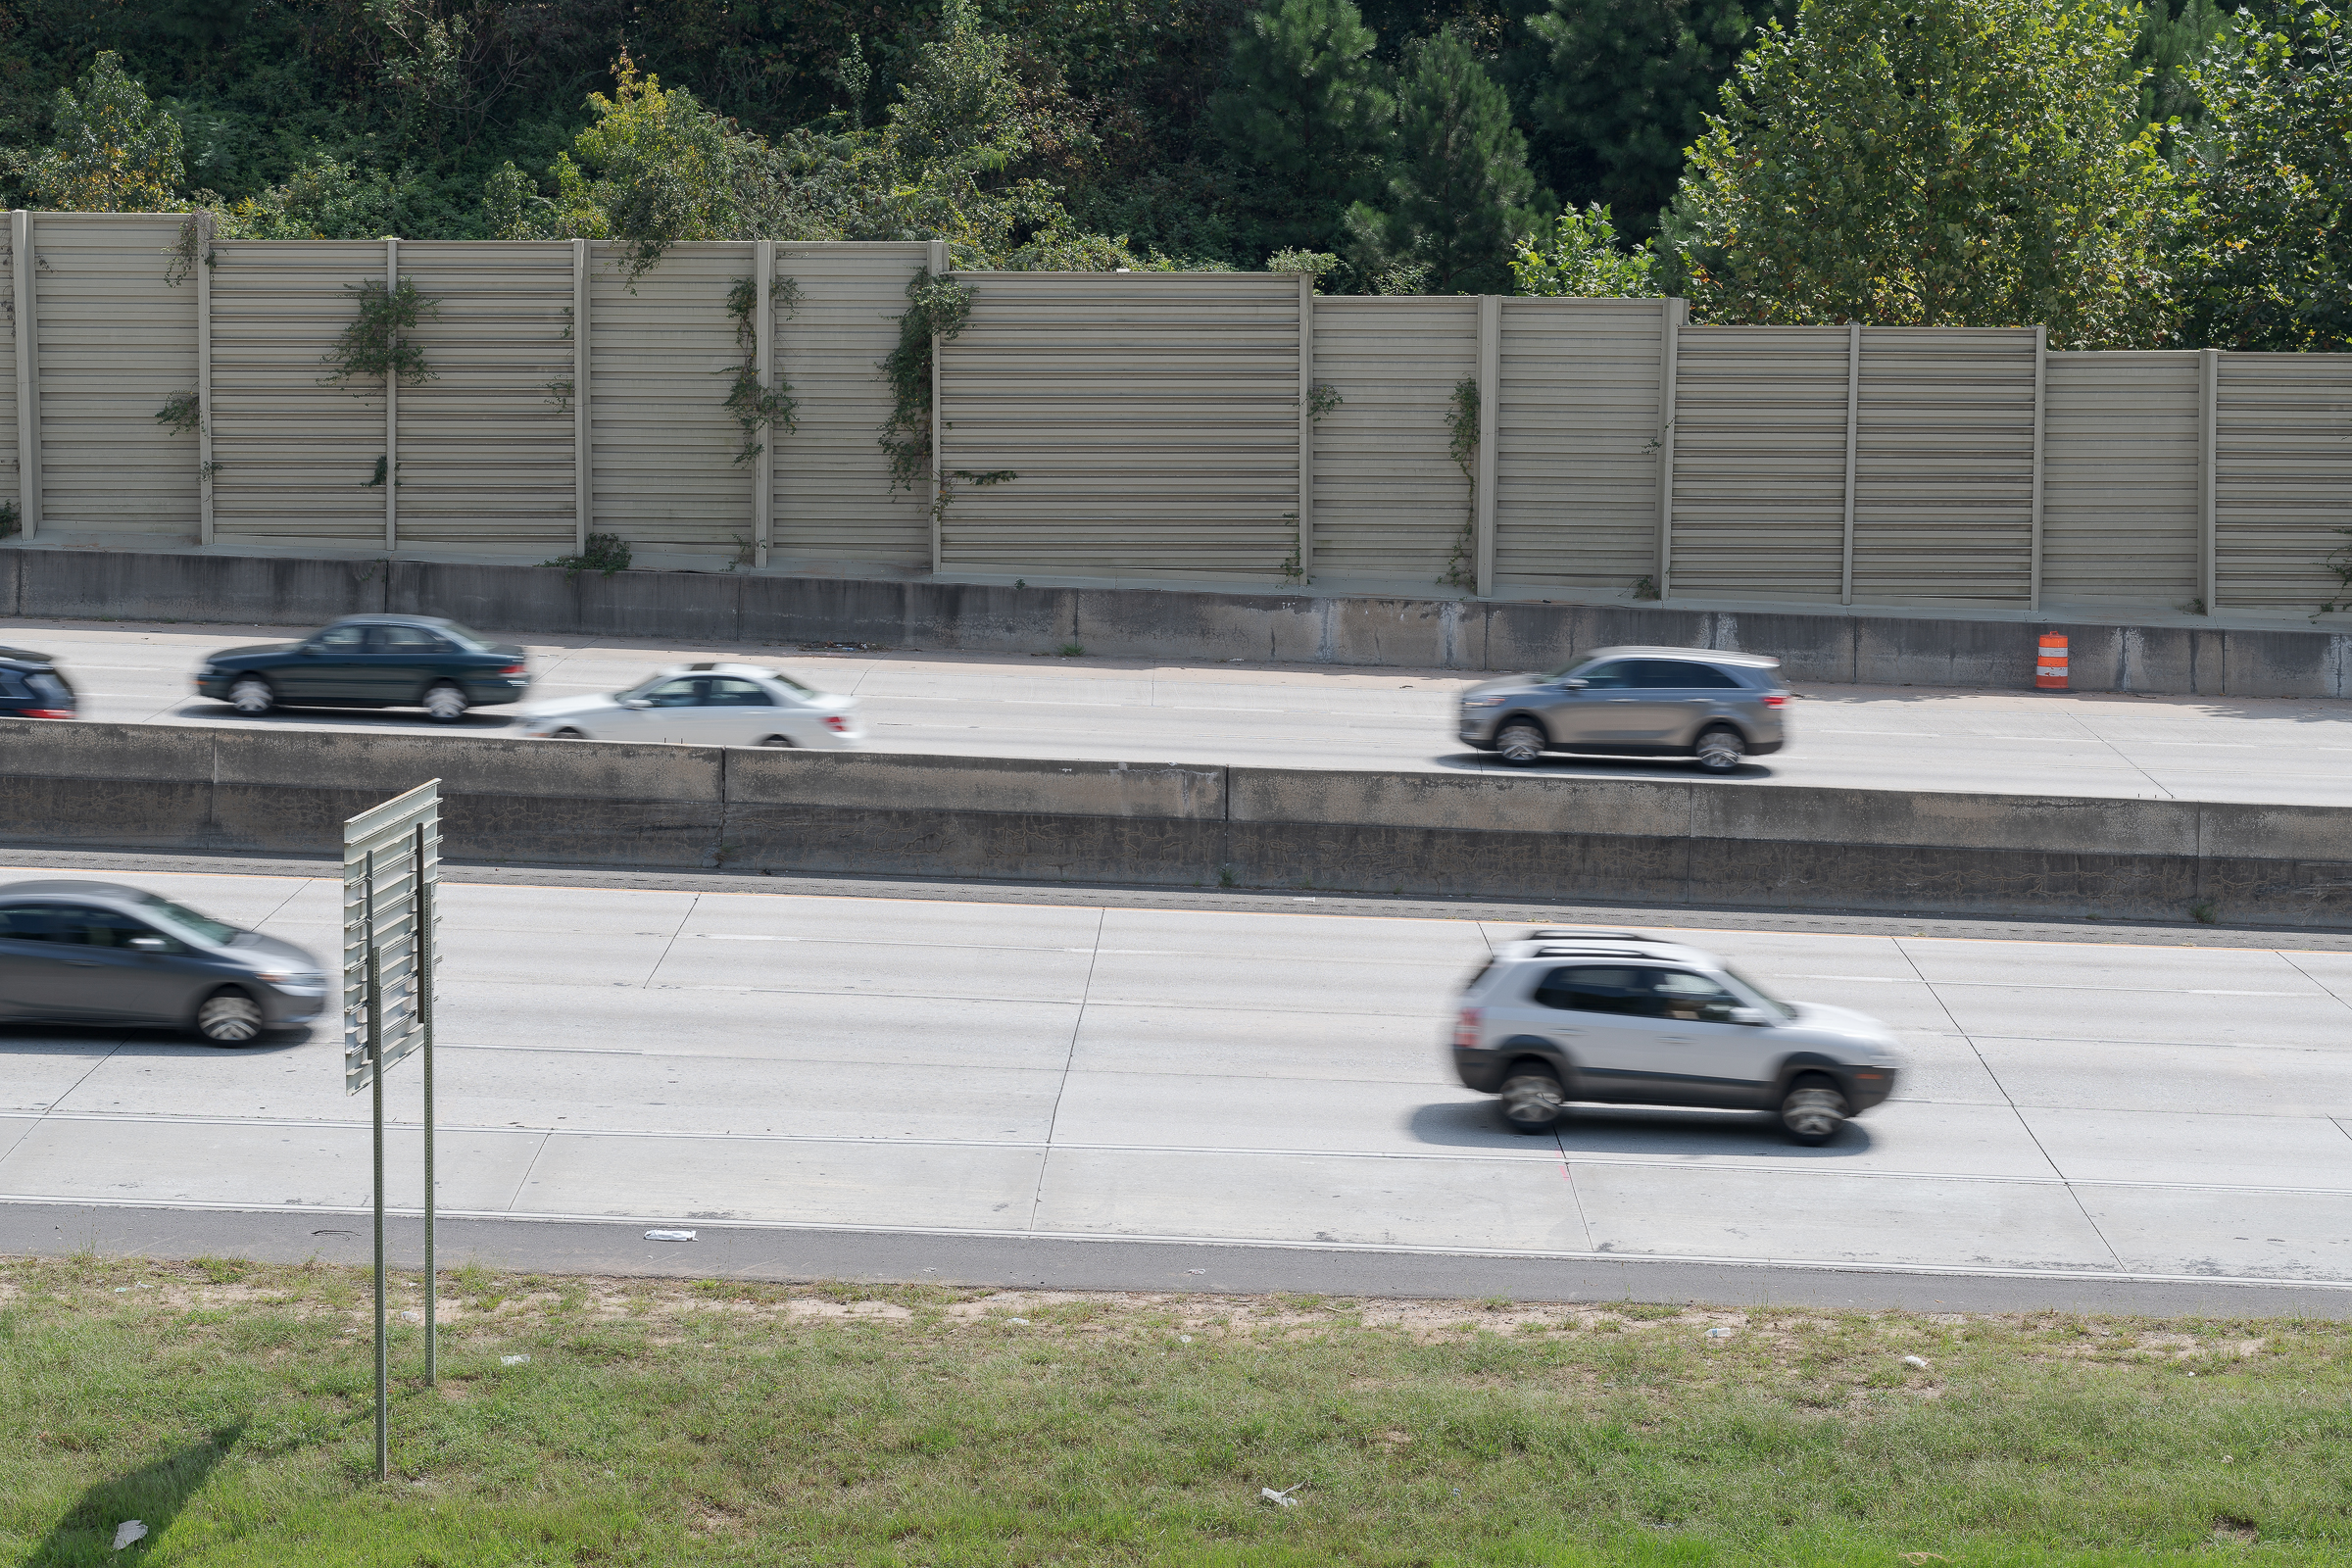
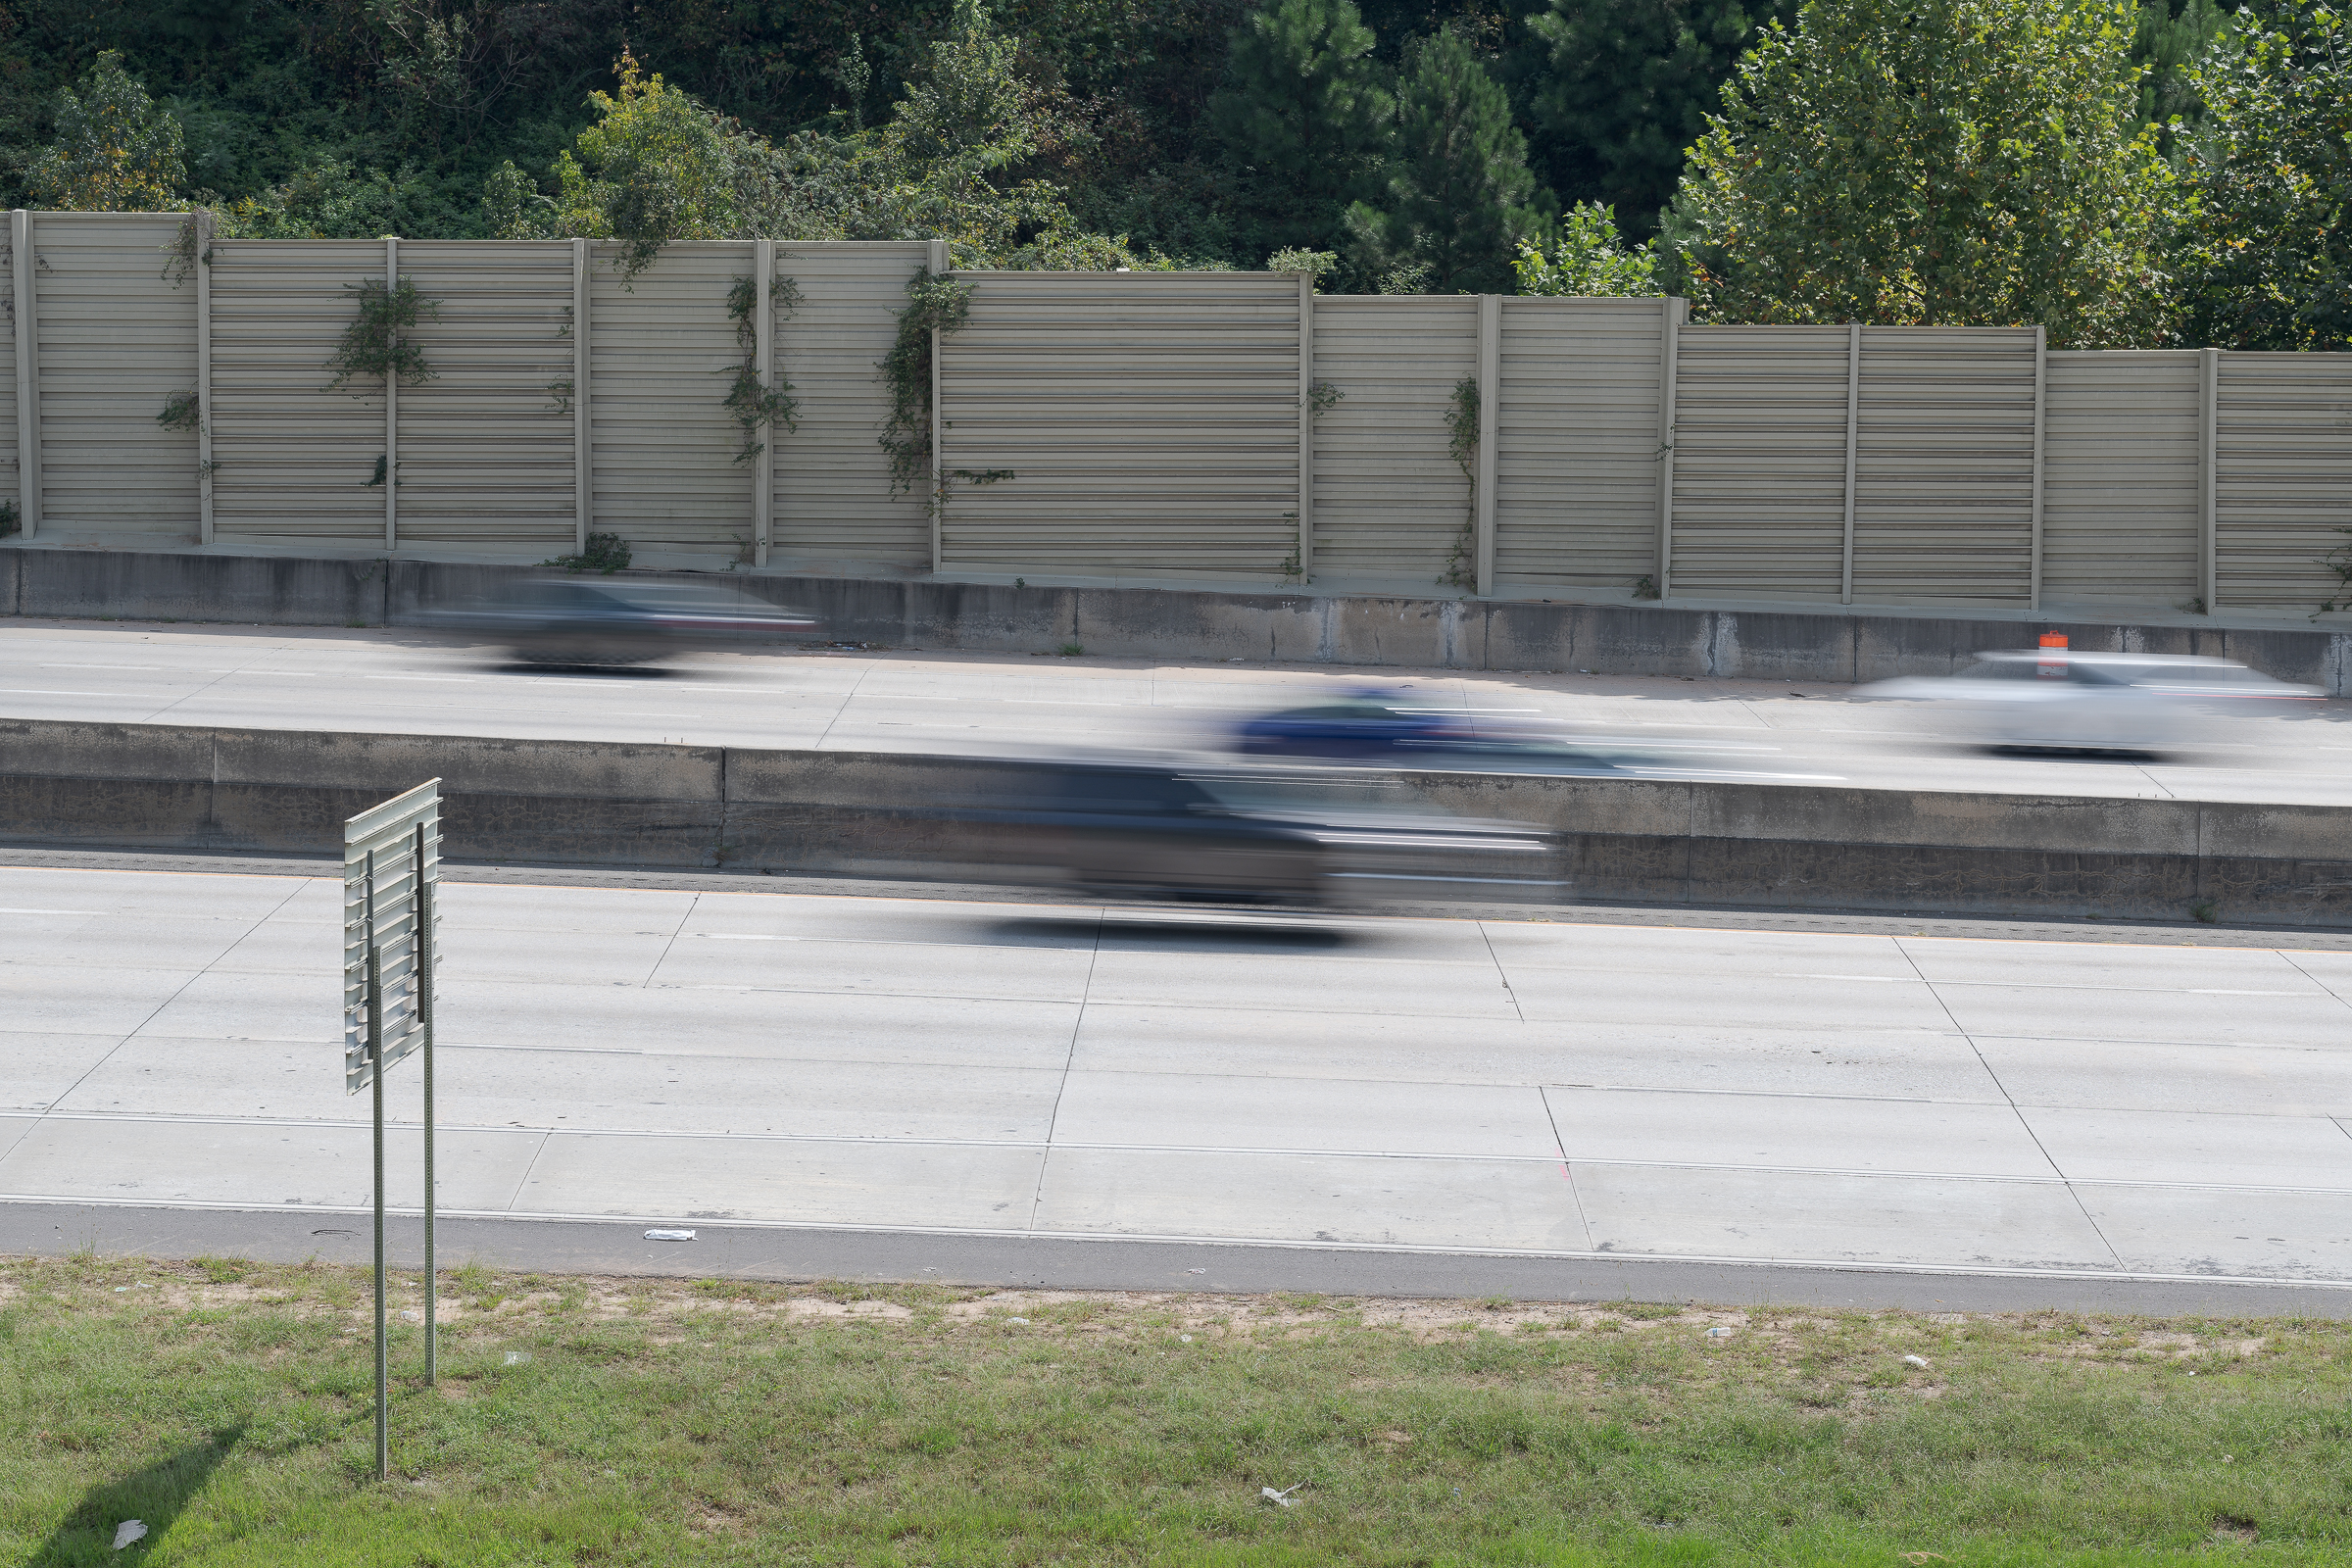
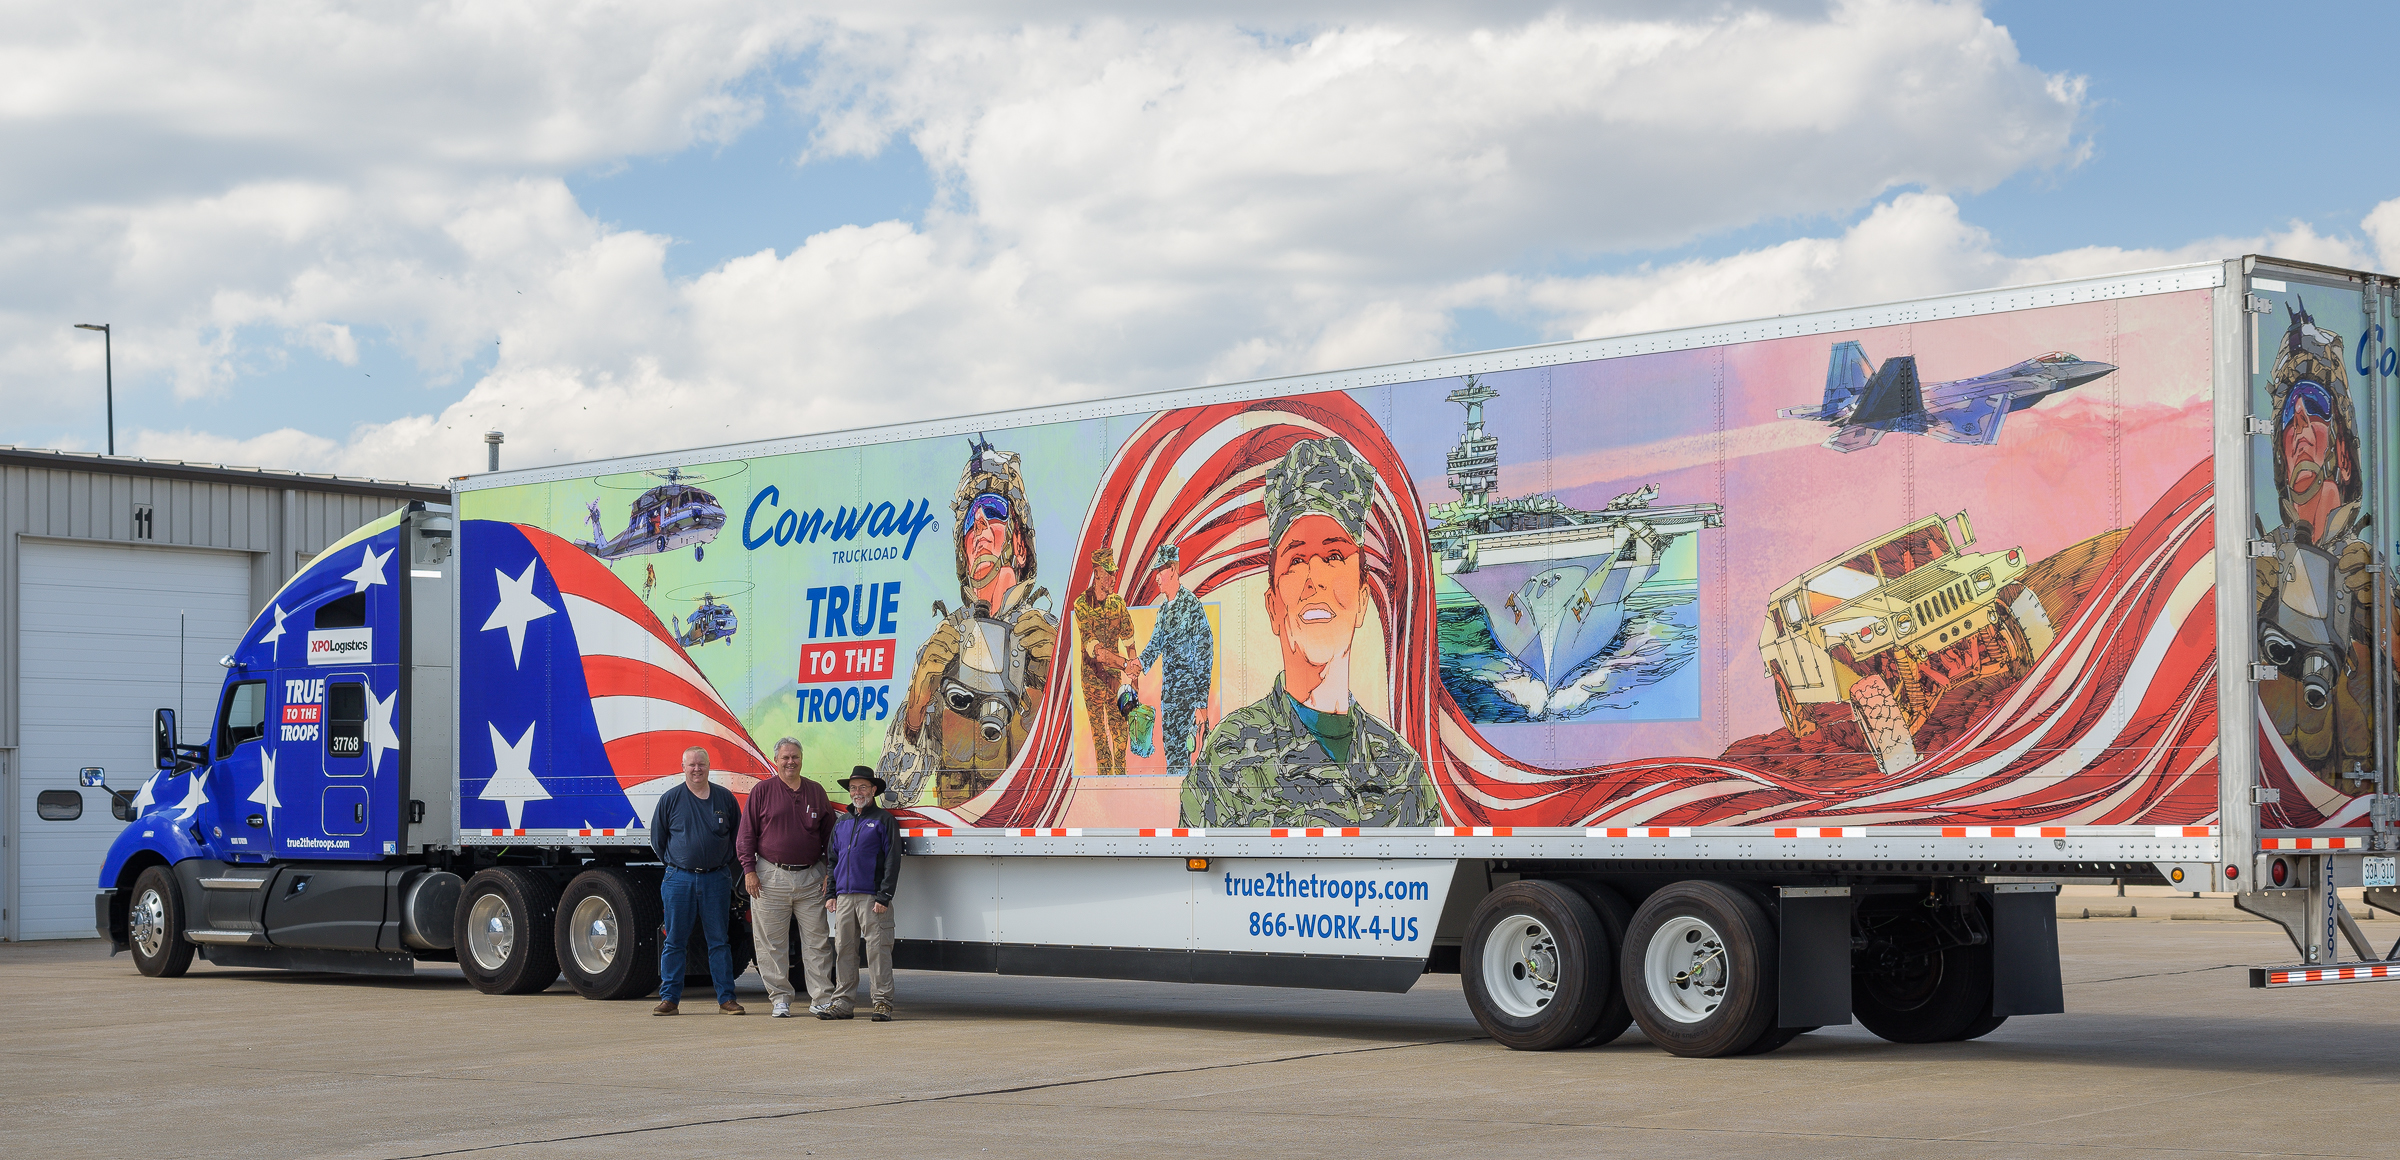
Full-Size Pickup Dimensions 25-Years Apart

I bought my beloved 1995 Ford F-150 XLT SuperCab Flare Side 4×2 pickup 25 years ago as of February 2020. I’ve put more than 360,000 miles on it, and it has been bulletproof. Its original two-tone paint still looks great, and it has never needed a valve job nor had the heads off. I did, however, have to get both fourth and fifth gears replaced in the five-speed manual transmission because they wore out!

1995 vs 2020 F-150: 25 years apart. (Click on image to enlarge, then click on back arrow to return to post.)

I’ve noticed that the latest generation of F-150’s seemed larger than my 1995, but I hadn’t made a direct comparison until recently.  While the 2020 model in the photo was a SuperCrew four-door Lariat, my 1995 was a SuperCab two-door XLT.  (The dealer didn’t have a white 2020 SuperCab XLT.) But the size difference is evident.

For the table below, I compared the dimensions, curb weights, and tires sizes between the 1995 and 2020 model years for a Ford F-150 XLT SuperCab 4×2 Styleside with 6.5-ft bed and a 5.0L V-8 engine. As summarized at the bottom of the chart, the 2020 model was larger in every dimension, had larger wheels and tires, and a notable increase in curb weight. (Click on table to enlarge, then click on back arrow to return to post.)

It’s not only the Ford F-150 that has grown over the years, of course. Many, if not most, cars and light trucks have gotten bigger and heavier over time. When reconstructing an accident, it is important to get the specs for the actual model year of the vehicles involved, and not just assume they are a “standard” half-ton pickup or a “standard” car.

Be Careful When Processing a Photo

1989 Toyota 4Runner photo from print ad. (Click on image to enlarge, then back arrow to return to post.)

In 2016, I bought a Toyota 4Runner TRD Pro. Almost four years later, if I had it to do all over again, I’d buy the exact same one. You can’t ask for anything more when buying a vehicle. It’s great on and off the road, and is the perfect size inside and out for everyday use, my personal landscape photography trips, and for traveling for work. About the only thing I use my beloved F-150 for now is to haul tires and wheels between my warehouse and my Studio Lab in my home office.

When I was researching the history of the 4Runner, I came across this photo that was used in a print ad by Toyota for a first generation model in 1989. While it is a nice image, right away I noticed something was wrong.

If the 4Runner was moving with its tires rotating, its body could only have stayed sharp if the photographer panned the camera with the vehicle as the shutter was clicked. But then the foreground and background would have blurred as the camera moved along with the vehicle. If they were rotating fast enough, the tires could still have shown up as rotating blurs, but there would likely have been streaks behind them.

If the 4Runner was moving and the photographer used a high enough shutter speed, all motion—including rotating wheels—could have been frozen. Here, the 4Runner was not moving in relation to the foreground or background, yet the right side wheels and tires appear to be spinning. If the tires were spinning but the vehicle was not moving, the tires should have been kicking up dirt, which they are not.

More importantly, on closer inspection you can also see that neither left side tire is rotating.  It’s obvious the vehicle was not moving when the photograph was made, but a radial blur filter was applied to the right side wheels and tires in post-processing.

Unlike advertising creatives, project testing engineers and litigation consultants must make only real photographs using proper camera settings.  Never attempt to submit modified images as actual photographs.

That being said, modified photographs can be quite useful for demonstrative exhibits for a trial or to illustrate behavior during testing conditions, but they must be presented as such. Any modifications should be kept as layers in Photoshop, and both the modified and original photos should be presented .

Nailing an Ultra Macro Photo

During my analysis of a failed tire, I noticed what looked like a tiny, tiny nail in one of the sidewalls. I looked inside the tire, but couldn’t see if the tip had penetrated the innerliner. I gingerly felt around the inside to detect if the tip had protruded through. It had. Now I had to document that.

Photographing the head of the nail on the outside was easy, but photographing the tiny tip on the inside was quite a challenge. It was both minuscule and inaccessible. Here is a photo  of the nail made with my usual lens, the ZEISS Milvus 50 mm f/2 macro. (Click on any image to enlarge. Then click on back arrow to return to the post.)

Arrow highlights point of tiny nail through tire innerliner. (ZEISS Milvus 50 mm f/2 macro lens on Nikon D850.)

Even with the arrow, it’s impossible to get any useful information about the nail tip from this photo.

I photographed that nail tip with several other combinations of lenses, lights, and camera supports, but couldn’t get close enough to it optically. Then I remembered my beanbag called “The Pod” (now sold as either The Red Pod or The Green Pod) to which I had added an Arca-Swiss-type quick release clamp.

The Pod beanbag with Arca-Swiss style quick release clamp. (ZEISS Milvus 50 mm f/2 macro lens on Nikon D850.)

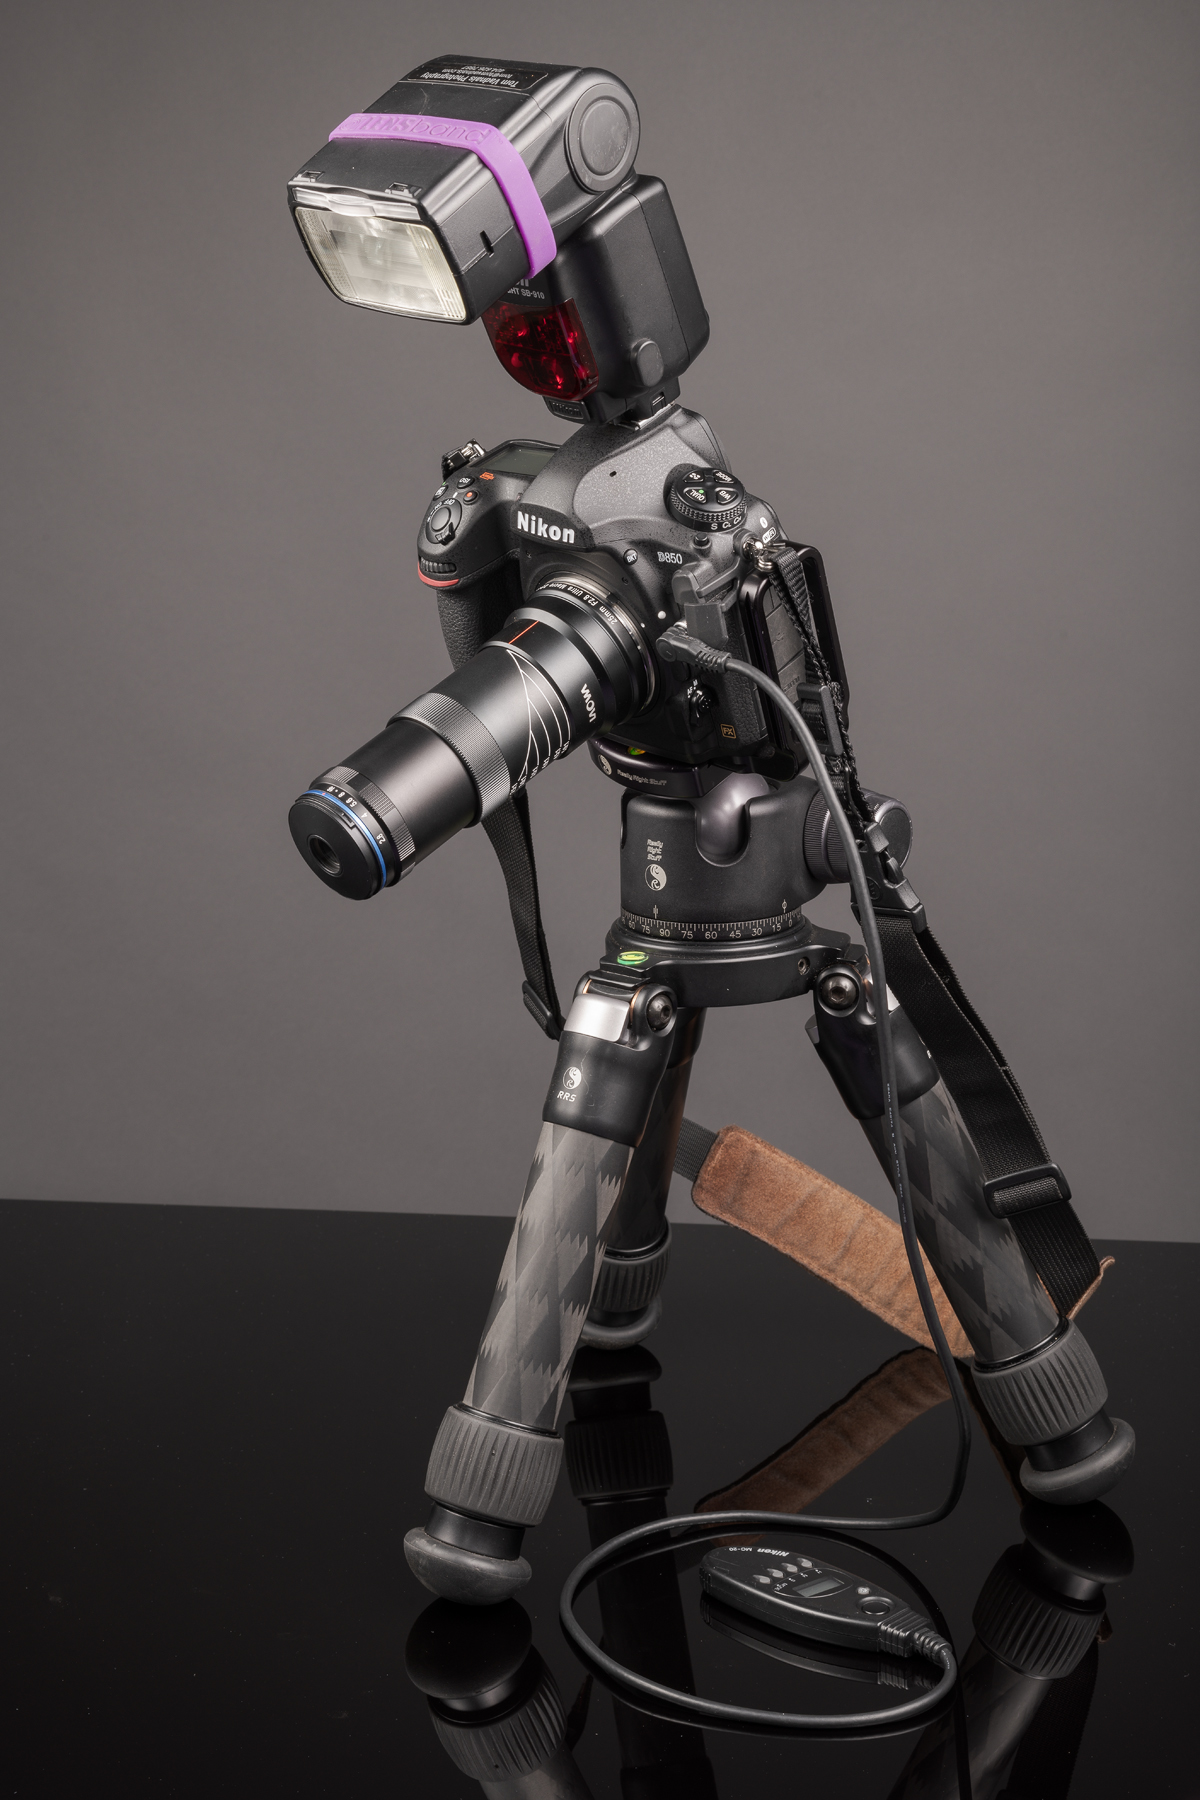
To get the camera lens closer to the nail, I propped the beanbag with a mounted Nikon D850 and the Laowa 25 mm 2.5 to 5x Ultra Macro lens (which I discussed and showed in previous posts) on the opposite side bead. I removed two Nikon SB-R200 macro flashes from the R1C1 ring and placed them on either side of the nail tip. This photo shows the positions of The Pod and the flashes with the camera, lens, and on-camera SB-910 flash removed.

Setup for tiny nail end using The Pod and two Nikon SB-R200 flash units. Laowa 25 mm 2.5 to 5x Ultra Macro lens on Nikon D850 removed from The Pod to show setup. (ZEISS Milvus 50 mm f/2 macro lens on Nikon D850.)

Below is the resulting single-shot, uncropped, full-frame image with the incredible Laowa Ultra Macro lens. A single shot was necessary because the beanbag setup was not rigid enough to allow for focus stacking of multiple images.

Full frame, uncropped close-up of tiny nail. (Laowa 25 mm 2.5 to 5x Ultra Macro lens on Nikon D850.)

Compare the size of the nail tip in the the top and bottom photos, and recall both were full-frame, uncropped images. Considering there was such a significant enlargement of the subject, the detail in the bottom photo was remarkable despite the limited depth of field and the less-than-rigid support from the beanbag as opposed to a tripod.  I’d say that about nailed it!

Use a Polarizer at Accident Sites

Except when making night photographs, I almost always use a polarizing filter (polarizer) when photographing accident sites. Rotating a polarizing filter removes glare and increases saturation relative to the angle of rotation.

Fortunately, to determine the amount of rotation you need for the effect you want, simply look through the polarizer (through the threaded side if you’re holding it, or through the viewfinder or rear LCD once it’s mounted on your lens) as you turn the outside ring. There are no settings or calculations or other analysis you have to do to get the effect you want. But, like polarized sunglasses, polarizing filters decrease the light, so you will have to adjust your exposure accordingly. Most polarizers require an additional one-to-two stops of exposure to compensate.

Speaking of sunglasses, make sure you remove your sunglasses—especially if they are polarized—before looking through your polarizer. Otherwise, you won’t be seeing the actual effect of your filter. In fact, if they line up, you won’t see anything; it will all go black.

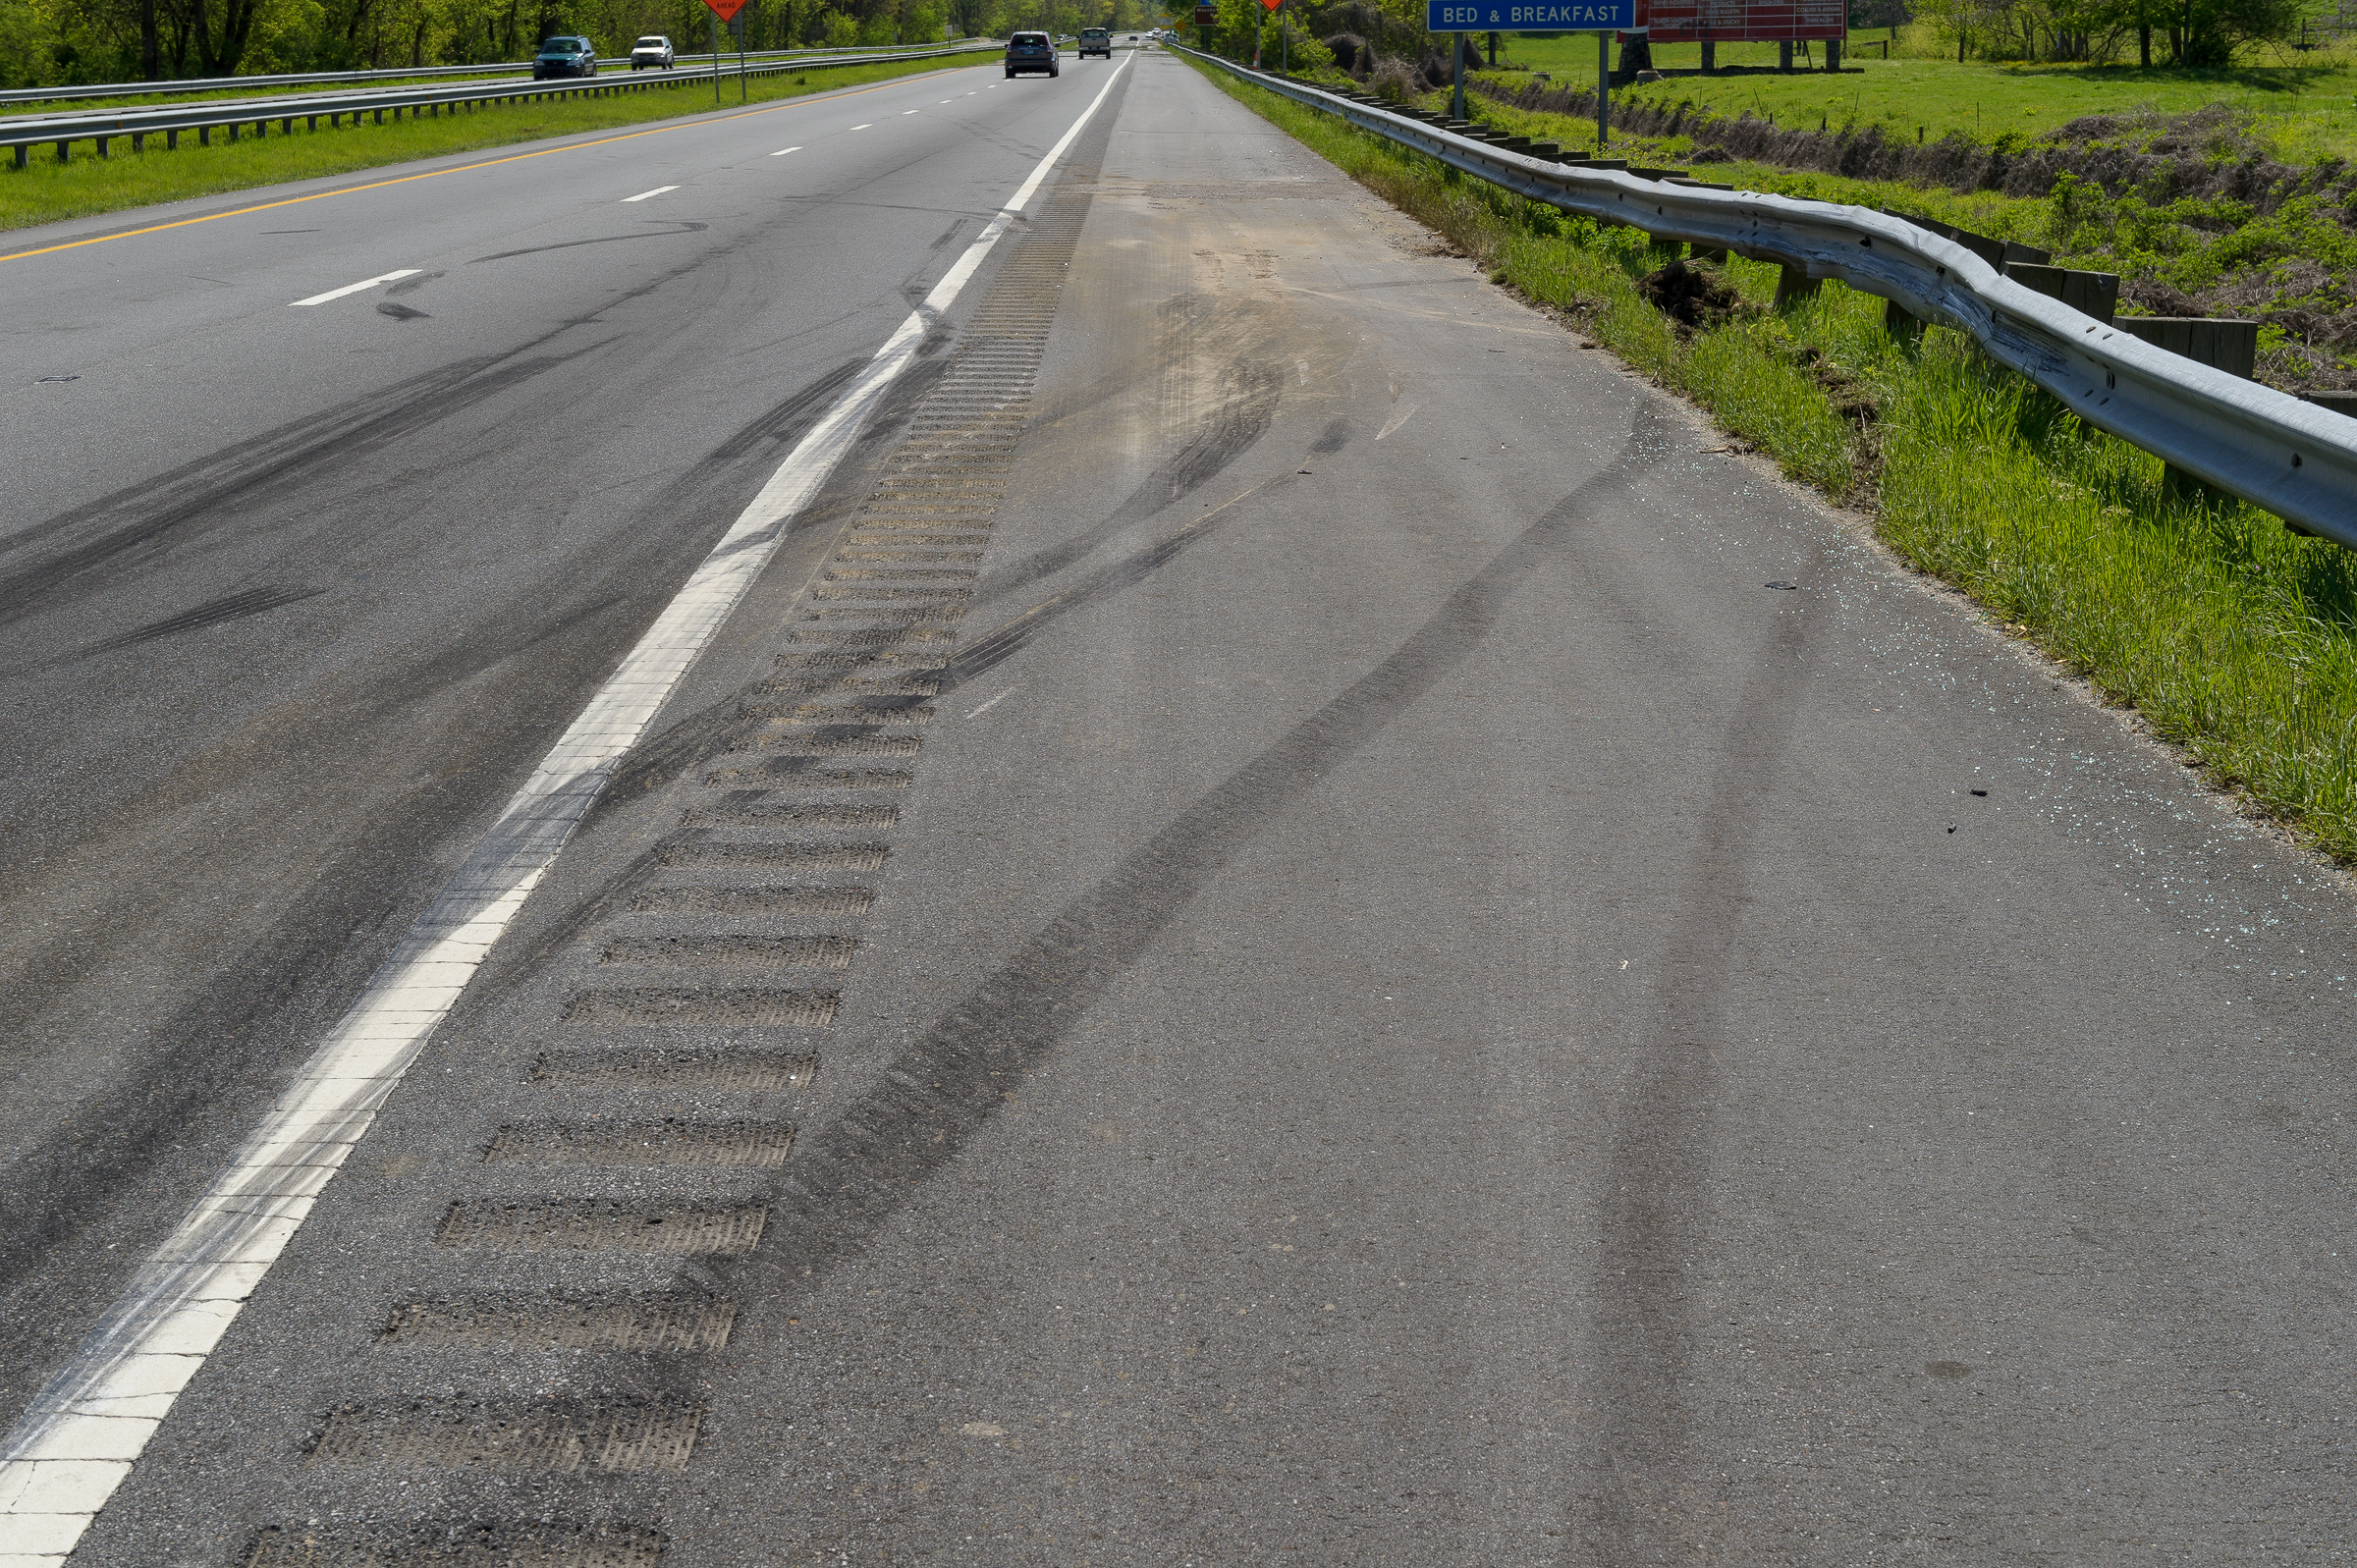
While a polarizer will take the glare off of roads, grass, and trees at accident sites, it has its greatest effect on tire marks. In this first image, you can tell there are multiple tire marks on the road, but they lack definition. The photograph is properly exposed, but glare obscures any detail. (Click on an image to enlarge. Click on back arrow to return to this post.)
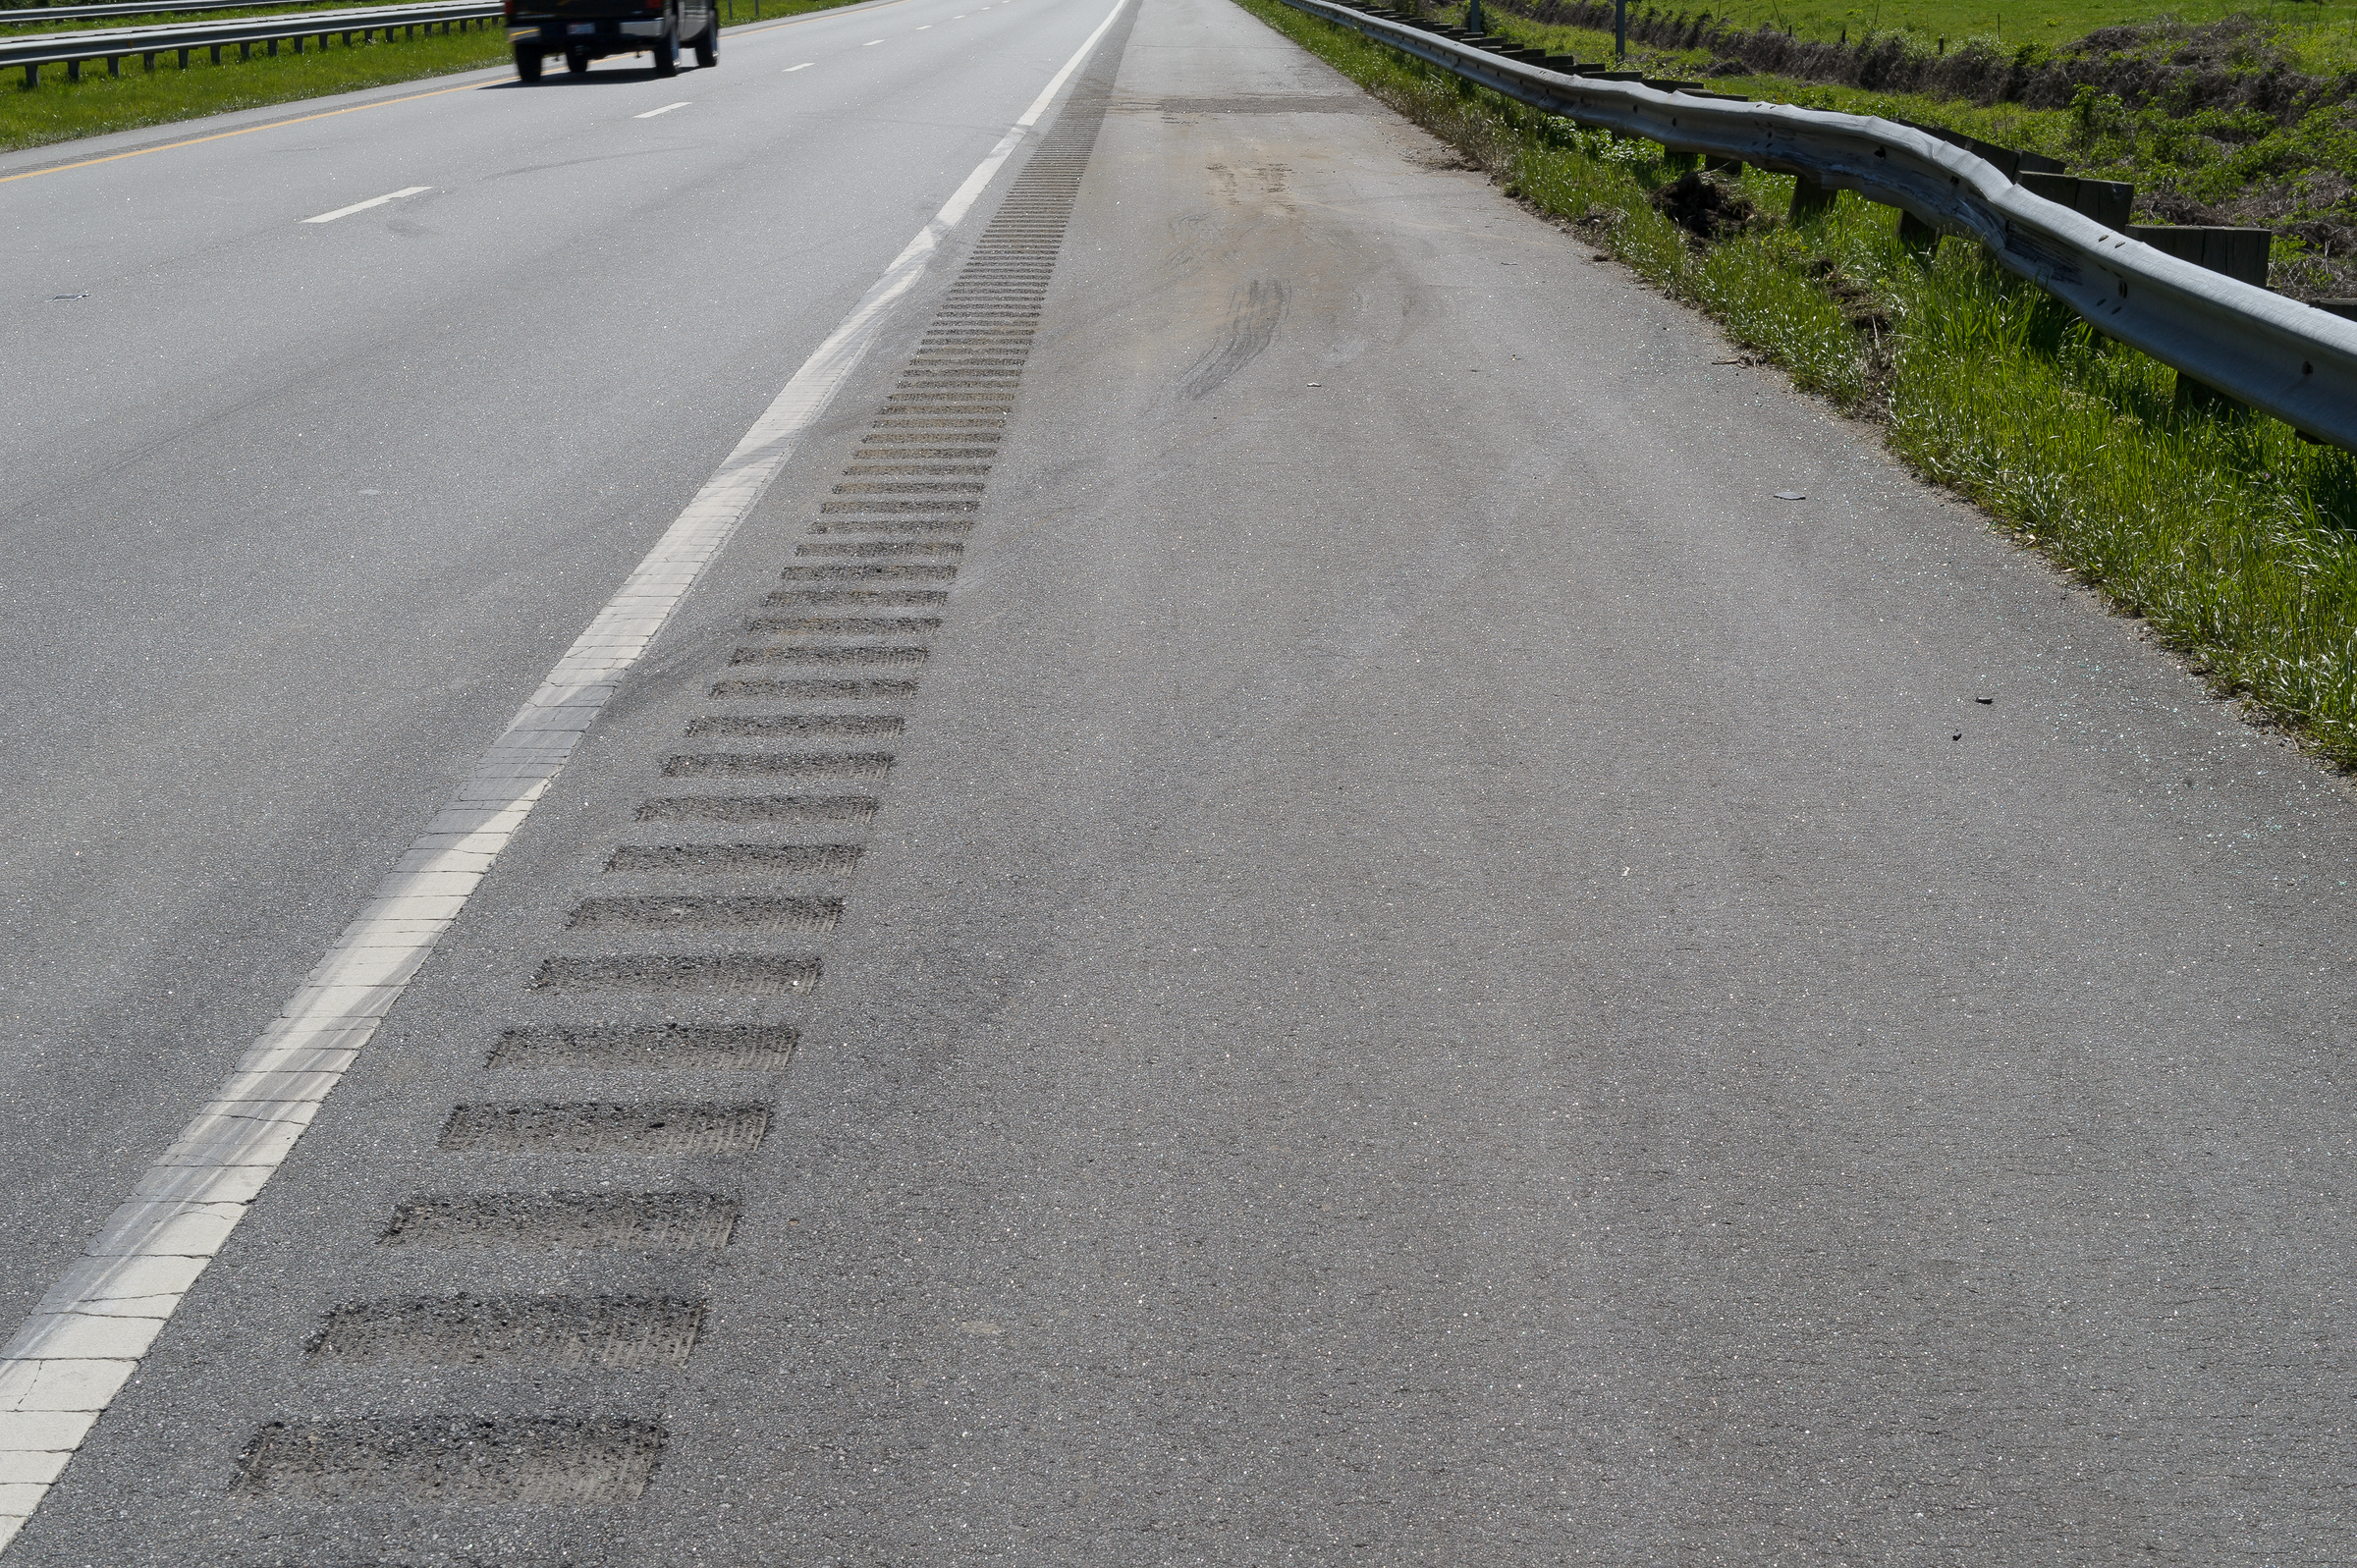
Tire marks without polarizer. (Nikon 24-70 mm lens on Nikon D3s.)

For this second image, I attached a polarizer to the front of the lens, and rotated it until I got the maximum detail in the tire marks. I had to brighten the exposure to compensate for the light lost with the polarizer. This is rarely an issue when your camera is on a tripod, but if your polarizer loses two stops of light, it might be difficult to keep the shutter speed high enough to handhold the camera.
Tire marks with polarizer. (Nikon 24-70 mm lens on Nikon D3s.)

This photograph obviously shows much more detail than you could ever extract from the first image. This increase in detail from reduction of glare is what makes a polarizer one of the three most important accessories for automotive forensic photography, along with flash and a tripod.

It’s important to remember to rotate the polarizer between each shot, and to compensate for any light loss by adjusting your exposure. It is also important to remember that a polarizer is the only filter whose effects you can’t replicate in post-processing.
Use a Polarizer and Fill Flash for Vehicle Photos

Many times, we can’t choose when we will inspect vehicles or accident sites. That means you’ll have to deal with whatever light conditions you encounter. It’s up to you as a professional to come back with good photographs, despite the adverse light.

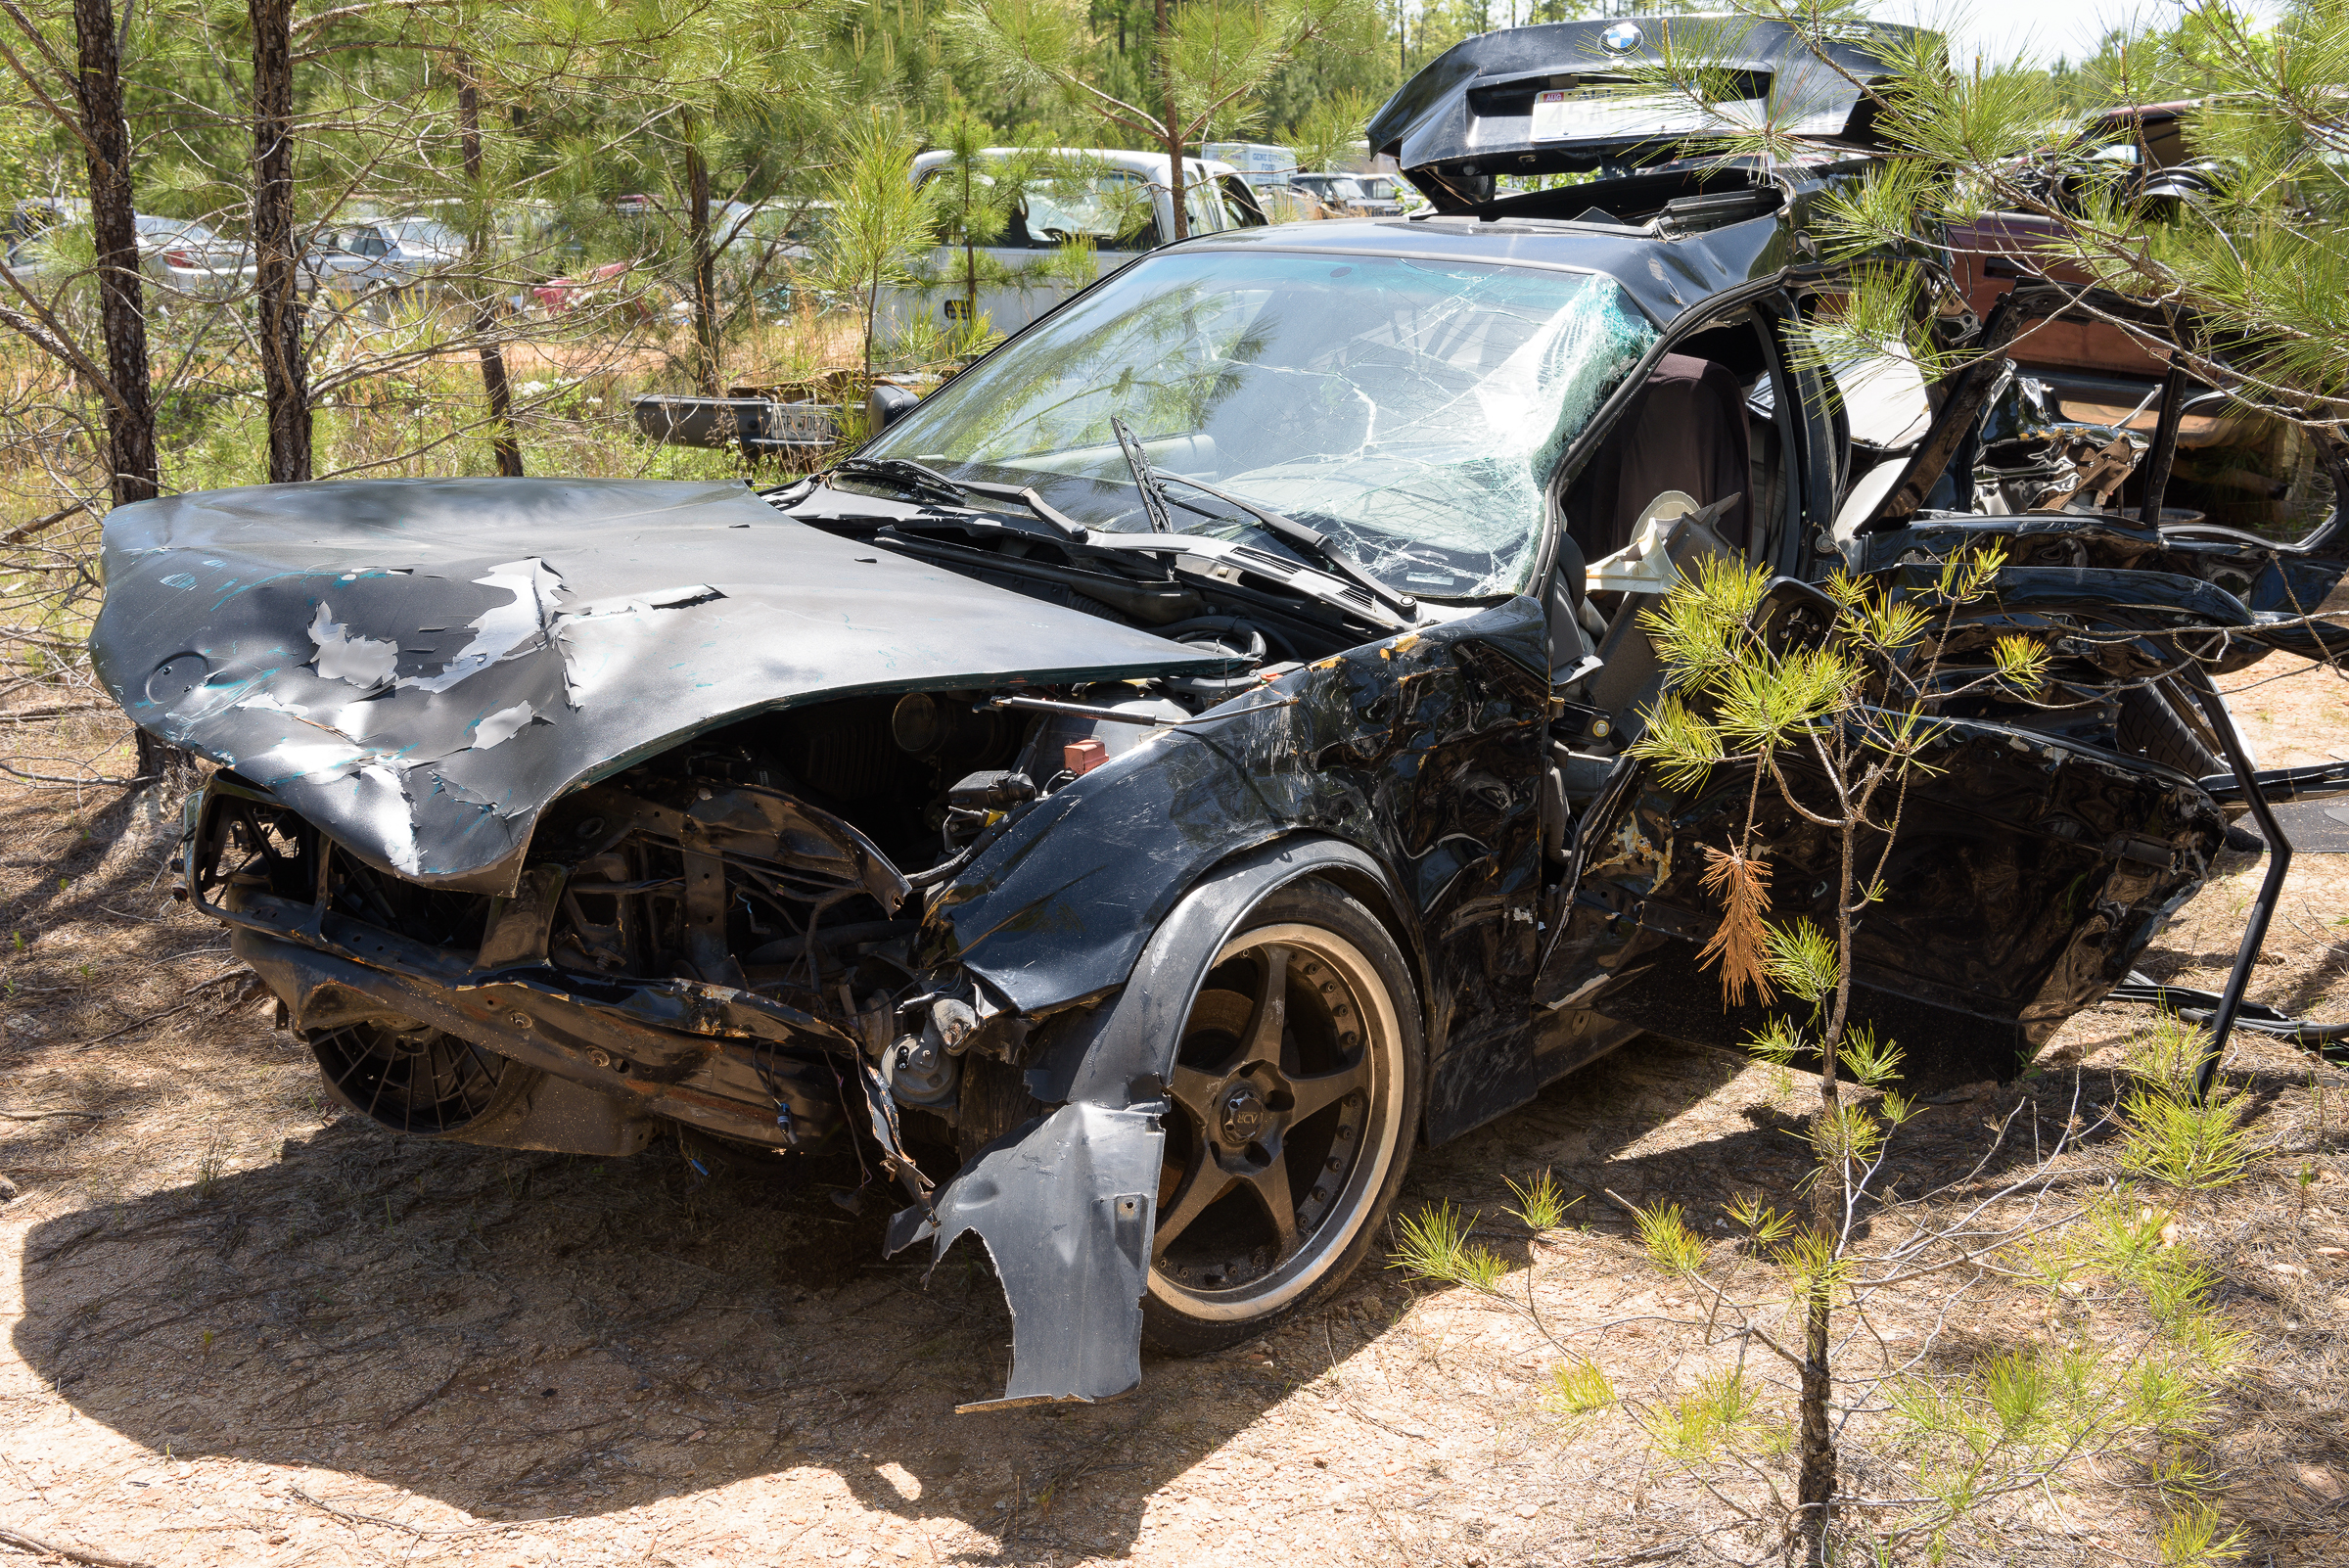
One example was a black BMW in a tow yard field on a blindingly bright day close to noon. As you can tell from the hard edge of the shadow under the car, the sun was almost directly overhead. Any details in the upper body panels were obscured by glare, while the shadows were too dark to show any details. (Click on an image to enlarge. Click on back arrow to return to post.)

BMW in sun at tow yard. No flash, no polarizer. (Nikon 24-70 mm f/2.8G lens on Nikon D810. Exposure: f/13, 1/60 sec, ISO 160.)

Even though this image was properly exposed, between the glare and the blocked shadows, you can’t get much information about the damage to the car. That defeats the purpose of even making the photo.

To counteract the glare, I used a polarizing filter and rotated it until most of the glare was gone. To open up the shadows, I added a flash in the hot shoe of the camera to create fill flash under the hood and down the left side.

BMW in sun at tow yard. Fill flash and polarizer. (Nikon 24-70 mm f/2.8G lens on Nikon D810. Exposure: f/10, 1/60 sec, ISO 160.)

This second photograph was also properly exposed, even though it was 1/3 stop darker overall—by choice. This image demonstrated that the combination of the polarizer for the glare and fill flash for the shadows yielded a much more balanced image which showed details that just couldn’t be recorded without those tools.

It should be noted that I use a one-stop polarizer. This means you only lose about one stop of light when using it. Many (most?) polarizers cost you about two stops of light.  Also note that fill flash, being fill and not the main light source, did not affect the overall exposure; it just brought out detail in the shadows.

Besides using a tripod, regular use of both a polarizer and fill flash for vehicle photos ensure you’ll consistently capture all the data you’ll need to show details in your vehicle photos.

Photography for Accident Reconstruction, Product Liability, and Testing Class Outline

From August 12 through 14, 2019, I will be teaching the third Photography for Accident Reconstruction, Product Liability, and Testing class for SAE. This time it will be at Southeast Toyota Technical Center in Jacksonville, FL. We’ll cover a lot of material in the three days, and you’ll come away making better quality, more professional photographs from that point on, regardless of the location or lighting conditions. After all, your photographs are at least as important as any other part of your work. You’re a professional, and your photographs should reflect that professionalism. After this class, they will.

Here’s a detailed outline of the class: SAE Forensic Photography Class Outline_2019-07.

Please contact me if you have any questions or would like more information about the class.

Another Example with Laowa 25 mm Ultra Macro Lens

This post shows another example image using the amazing Laowa 25 mm Ultra Macro lens. In an earlier post, I discussed what that lens is, and how to best use it. For this example, I made a 5X image of a small torn flap of rubber from a failed tire.

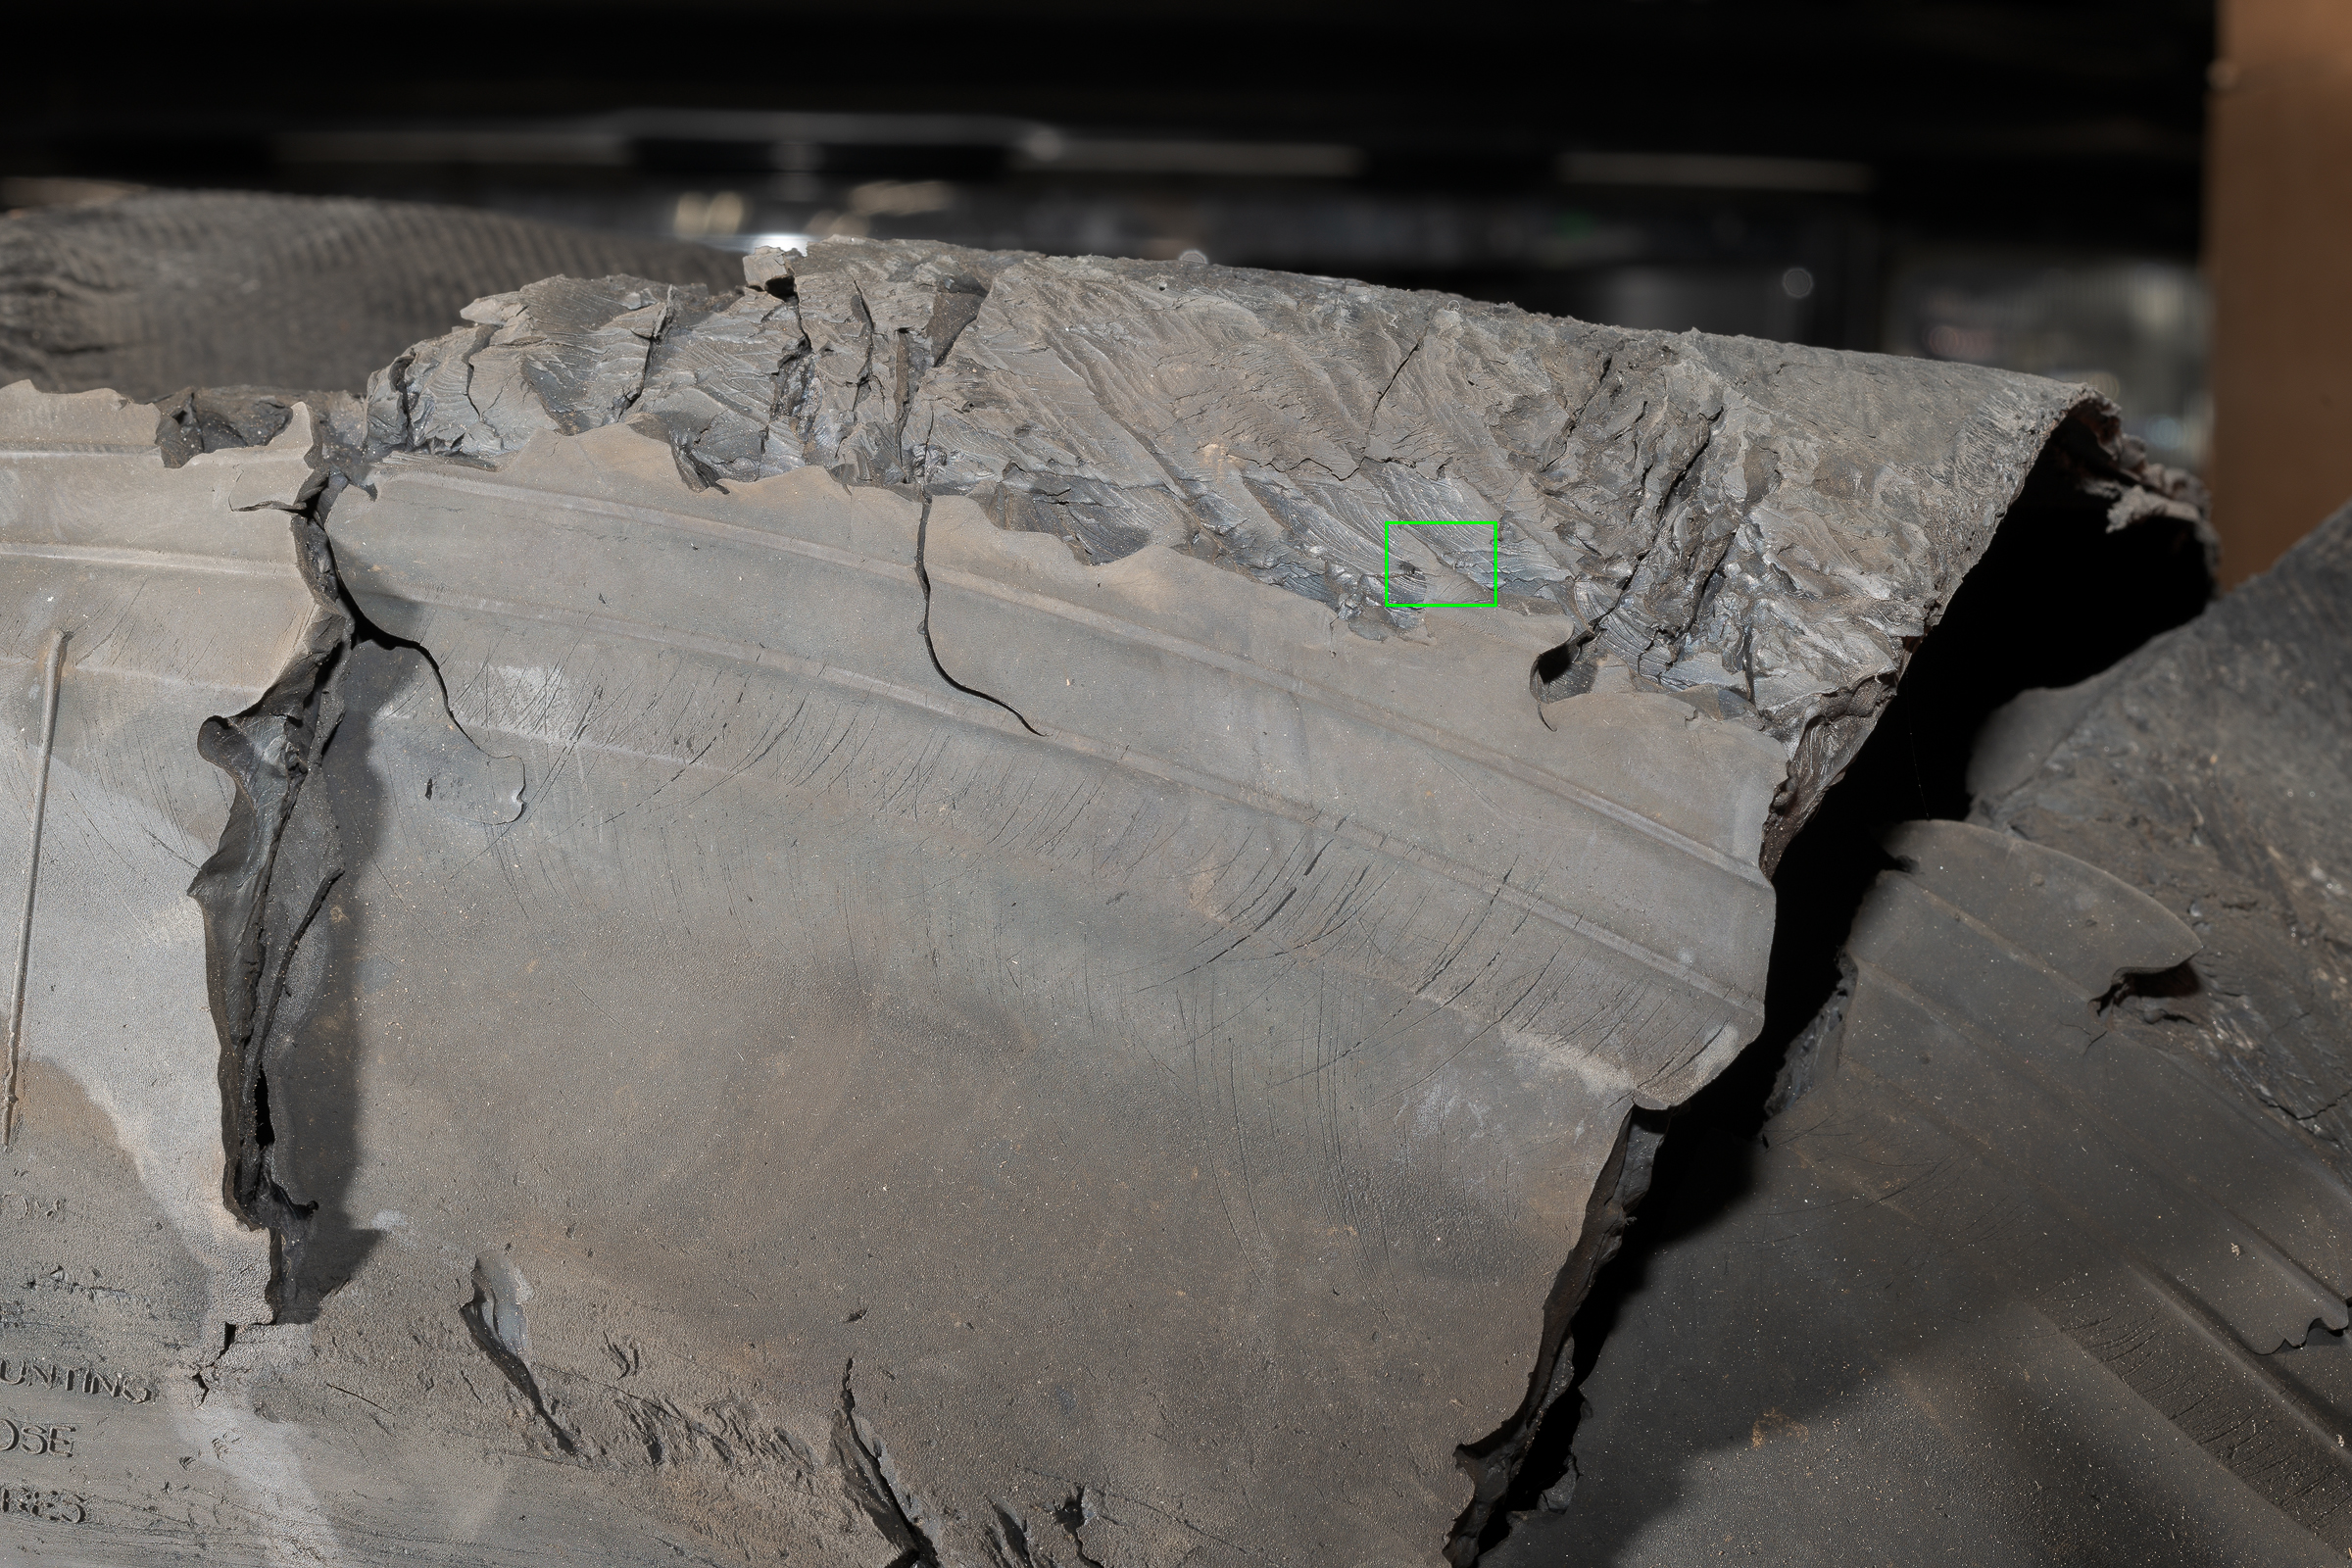
The green box in this first image highlights the tiny flap I wanted to make an extreme close-up photograph of.

Selection showing area of flap piece on tire. Made with ZEISS Milvus 50 mm macro lens on Nikon D850.

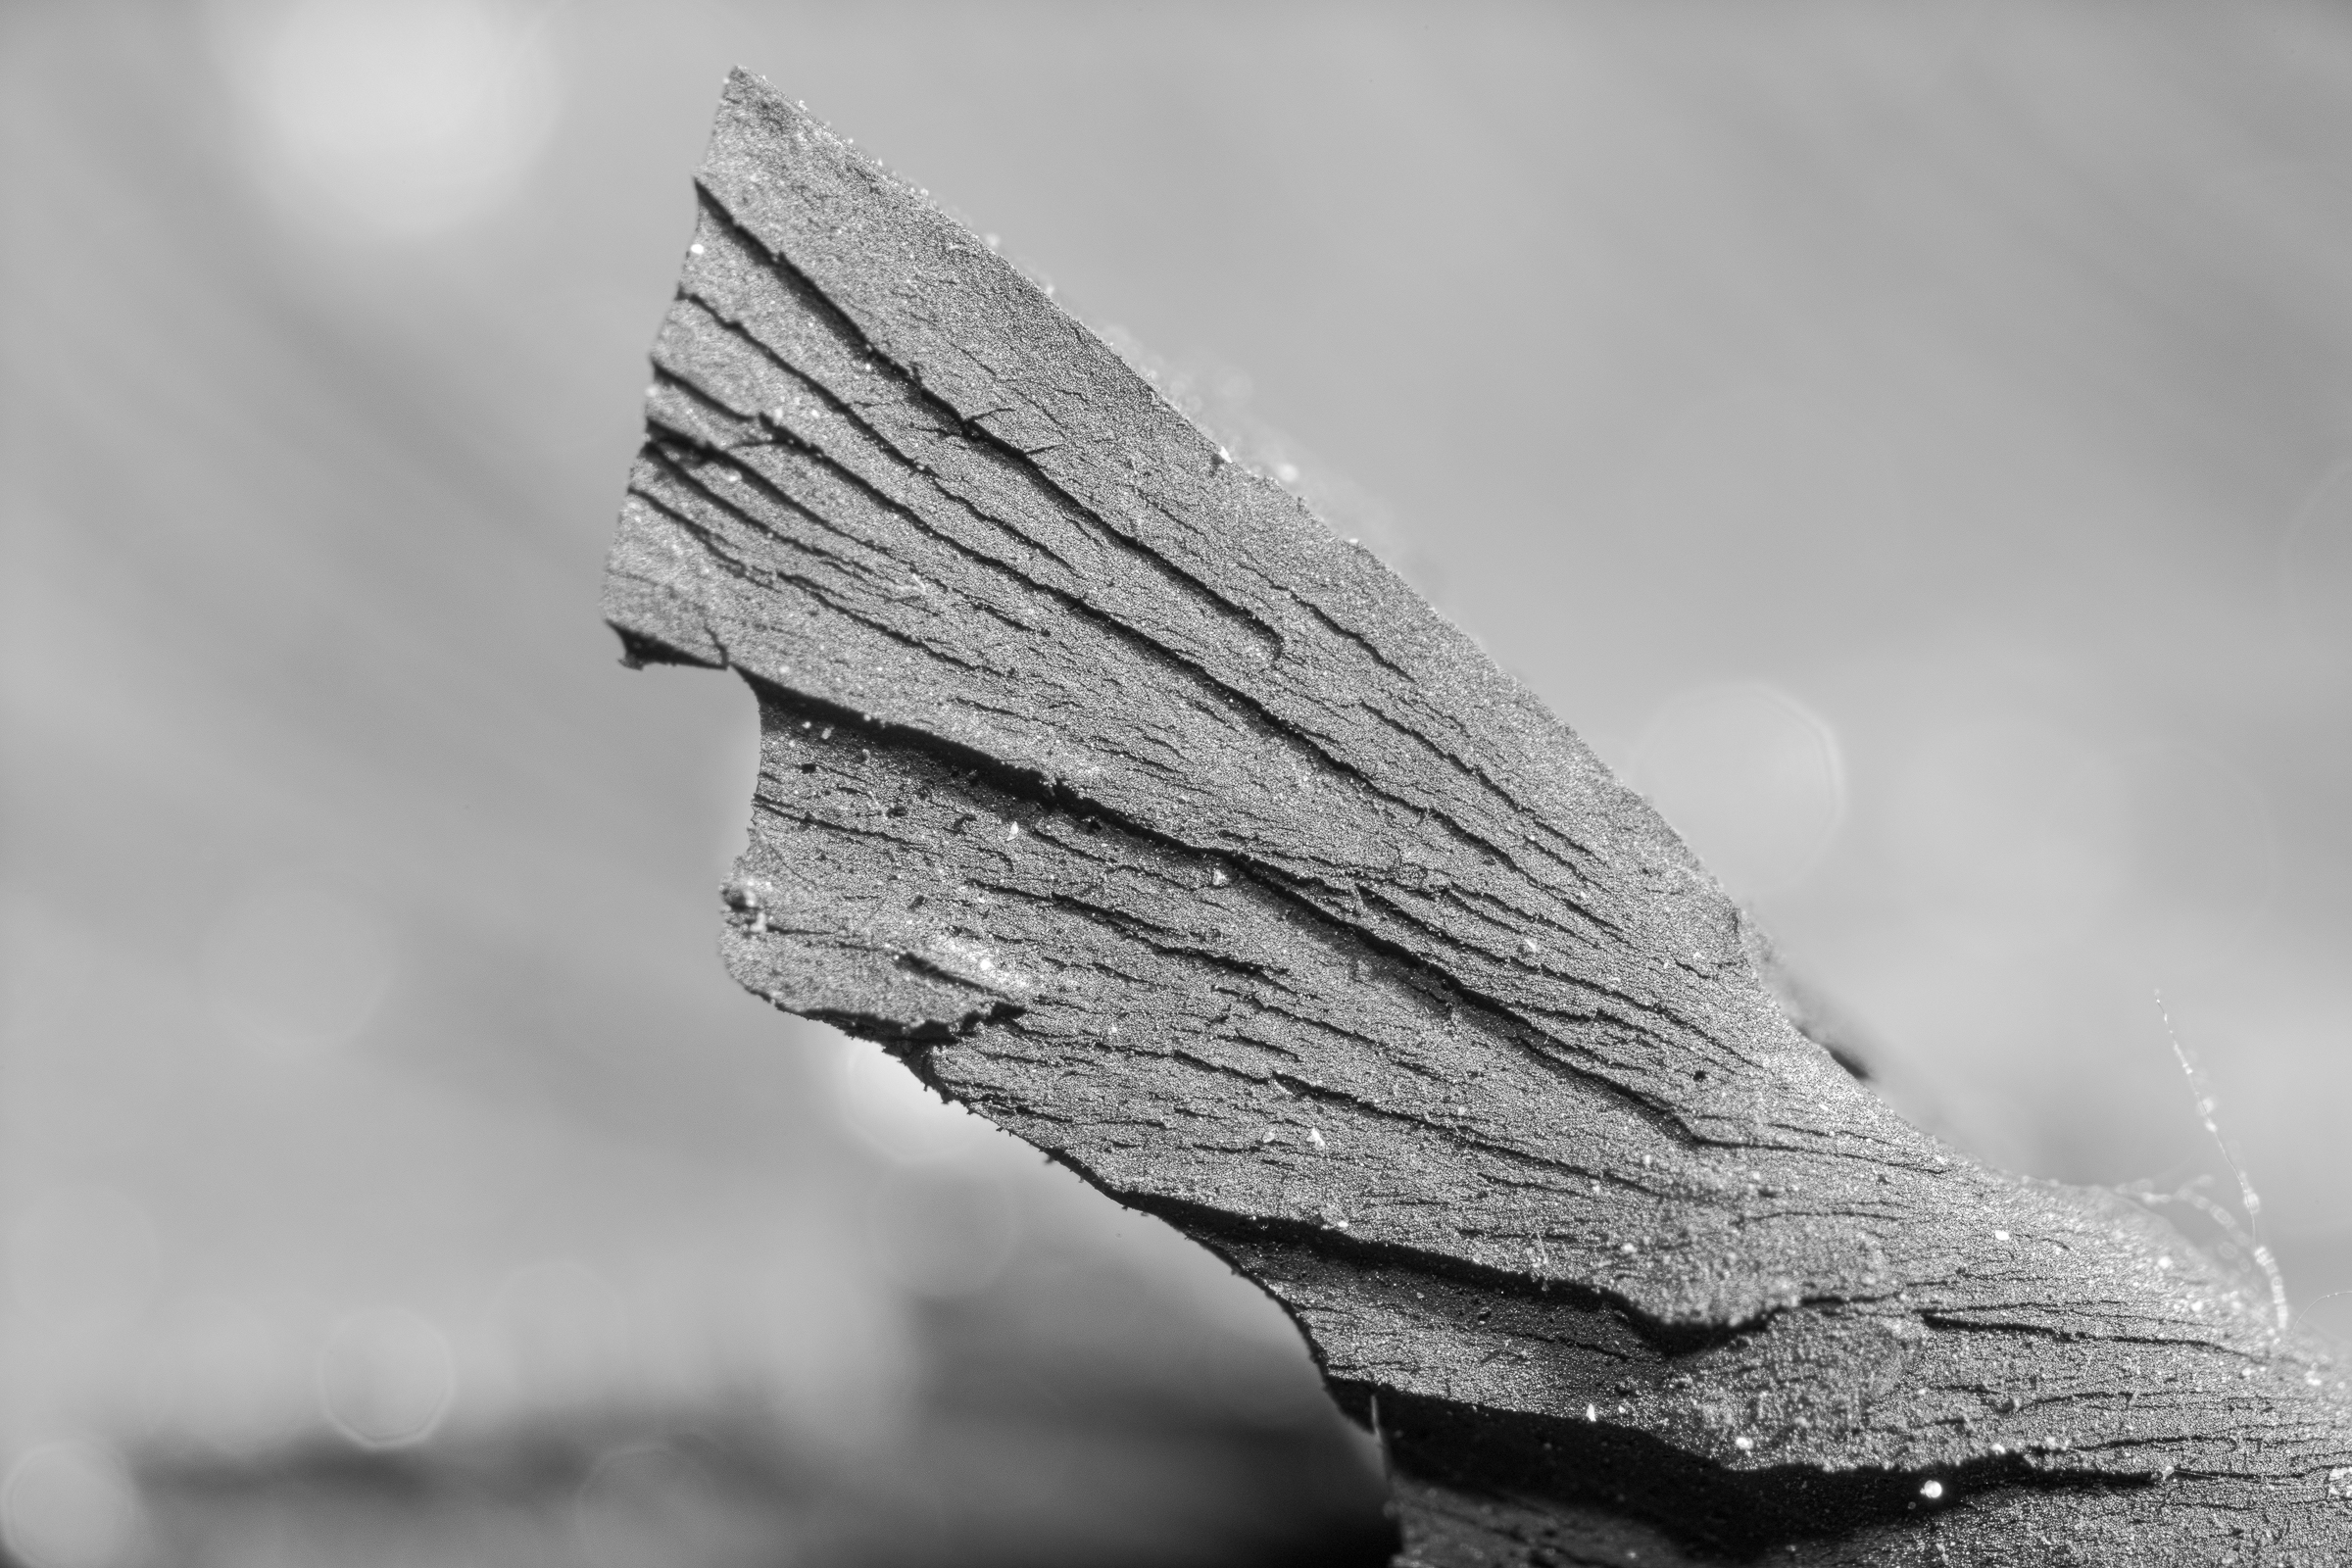
To illuminate the flap, I used a Nikon SB-910 flash mounted on my Nikon D850 camera hot shoe to control off-camera lights. I zoomed the lens all the way out to 5X magnification (5:1 reproduction ratio) to get the greatest enlargement possible. I then moved the camera on a pair of Really Right Stuff focusing rails until I was able to fill the frame with that tiny flap. Here is the result:

Close-up of flap piece on tire. Made with Laowa 25 mm Ultra Macro lens on Nikon D850 with flash.

That is the full size image; there was no cropping. The flap was covered with small dots of colors from the oils in the rubber compound. I felt these colored dots interfered with the subject, so I turned the image black & white.

You’ll notice that both the tip and the base of the flap are going out of focus. This is due to the inherent limited depth of field with such high magnification. It would have been easy to make everything appear to be in focus by taking a couple additional photographs at different focus points, then blending them together in focus stacking software such as Photoshop, Helicon Focus, or Zerene Stacker. But the purpose of this photo was to demonstrate the lens by itself.

Using this lens can’t be done on automatic, but if you align, focus, expose, and light properly, it’s an amazing performer at an amazingly low price.

Laowa 25 mm f/2.8 2.5-5X Ultra Macro Lens

Wow, that’s quite a name for a great, unique lens, and that name should make sense by the time you finish reading this.

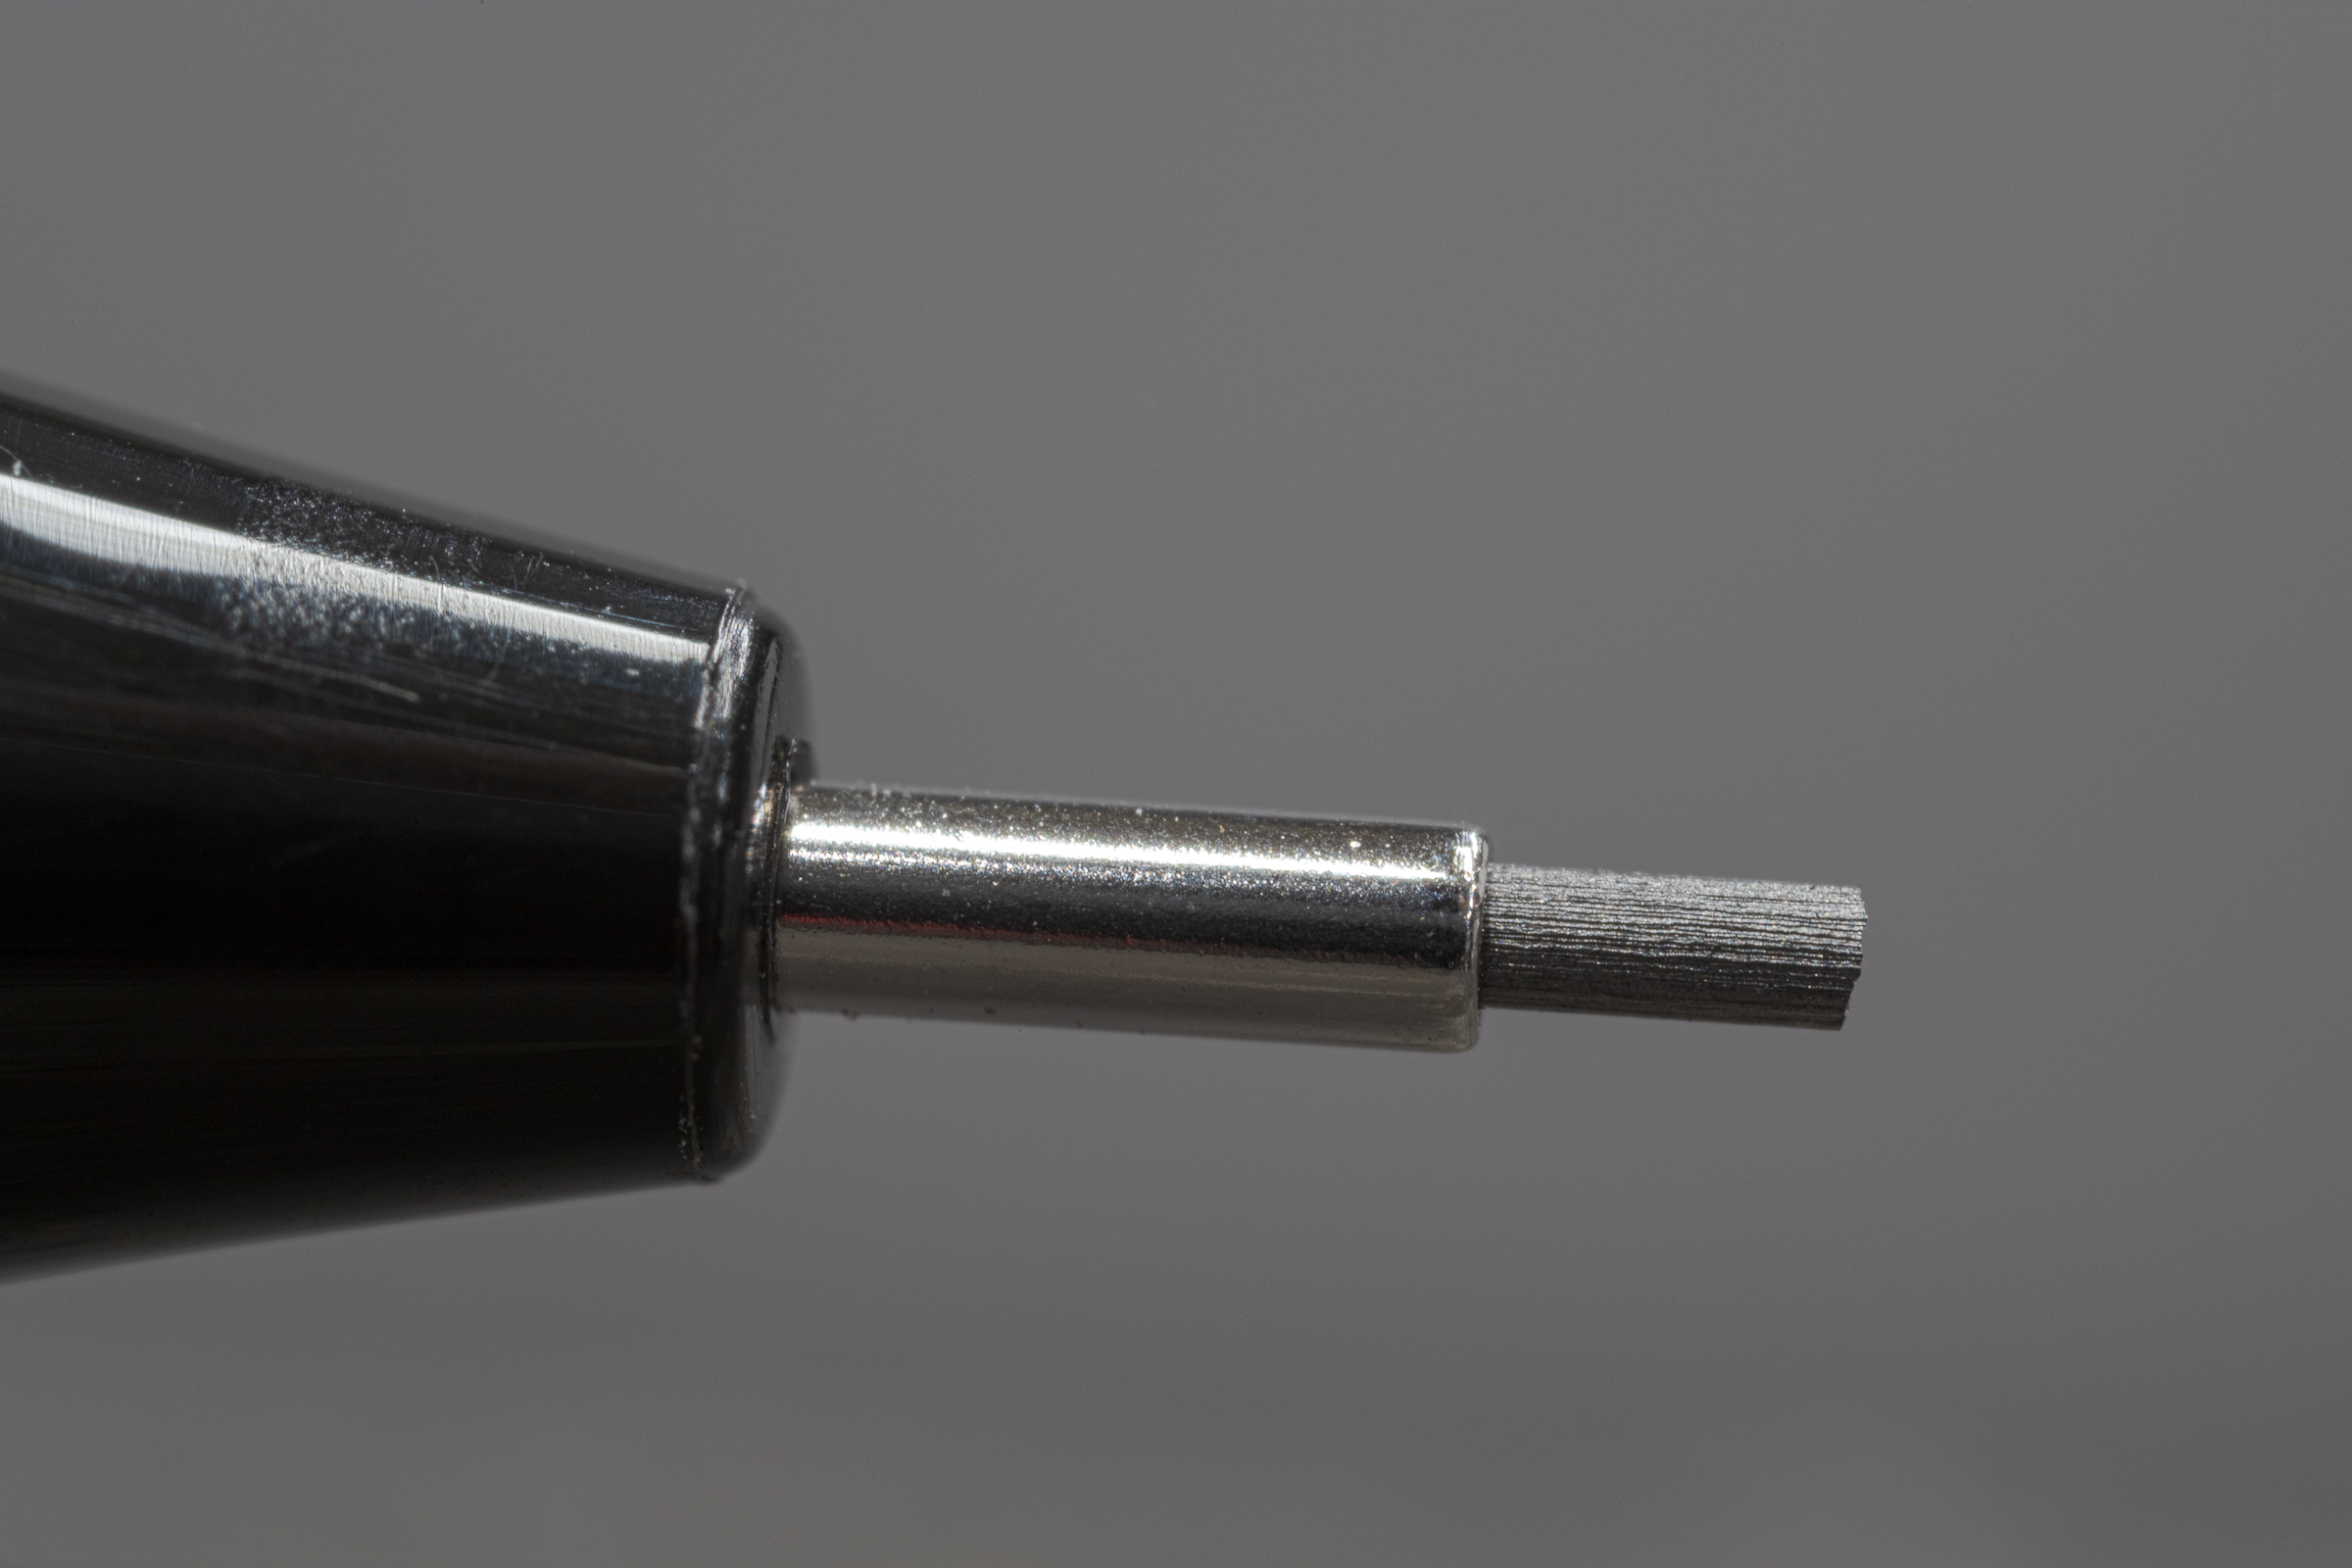
This photograph is a single shot of a 0.5 mm pencil lead at 4X magnification (4:1 reproduction ratio) made with that lens on a Nikon D850. I made it in my studio lab without using flash. The lens aperture ring was at f/11. I set the ISO at 160 and the shutter speed at 2.5 seconds. It is a full-frame image. In other words, it has not been cropped. (Click on any image to enlarge, then click back arrow to return to this post.)

0.5 mm pencil lead. Made with Laowa 25 mm Ultra Macro lens on Nikon D850.

By definition, a macro lens captures an image at 1:1 or 1X or life size, which all mean the same thing: the subject will be the same size on your sensor as it is in real life. Since a full frame sensor (FX in Nikon world) is a 1″ x 1.5″ rectangle, the subject, or piece of the subject you’re showing, would have to be no more than 1.5″ wide or 1″ high.

Most macro lenses have a reproduction ratio of either 1:1 (life size) or 1:2 (half life size). These may also be referred to as a 1X or 1/2X magnification, respectively.

My 60 mm and 105 mm Nikon macro lenses (“Micro-NIKKOR” in Nikon-speak) both have a 1:1 reproduction ratio. My usual lenses are ZEISS Milvus 50 mm and 100 mm macro lenses (ZEISS calls them Makro-Planar) have maximum reproduction ratios of only 1:2, or half life size. While either 1:1 or 1:2 is just fine for much of the photography I do, I often need greater magnification for certain details—especially for tire or other product analysis photos.

If you have a camera with a high resolution sensor, you could crop the image to just the area you want to show. But by cropping, you will be throwing away pixels and restricting the size of the image you can print or project as a trial exhibit. That negates the benefit of a high resolution camera. It’s much better to capture the image full frame without cropping so you keep all the resolution your camera can deliver.

After trying all kinds of lenses and attachments, I found the Laowa 25 mm f/2.8 2.5-5X Ultra Macro lens works incredibly well. And it’s inexpensive at only $399 (http://www.venuslens.net/product/laowa-25mm-f-2-8-2-5-5x-ultra-macro-2/) or at B&H Photo Video (https://www.bhphotovideo.com/c/product/1399602-REG/venus_optics_ve2528n_laowa_25mm_f_2_8_2_5_5x.html). This lens is available in Nikon F, Canon EF, Pentax K, and Sony FE mounts. Adapters will allow it to be used on most other DSLR and mirrorless cameras.

Laowa 25 mm f-2.8 2.5 to 5x Ultra Macro on Nikon D850. Made with ZEISS Milvus 50 mm macro lens on Nikon D850.

Now, this is not a lens that you just pop on your camera and start taking incredible macro photos with. It’s a fully manual lens that does not communicate with your camera. It also doesn’t have a focus ring. So auto exposure and autofocusing are out.

Here are some considerations to keep in mind when using this lens:

-1- You need lots of light or very long shutter speeds for any kind of macro work. And the greater the magnification, the more light you need. This can be tricky with the small working distances involved.

-2- Raising your ISO won’t often be a great option because any additional noise will destroy the fine details you’re trying to capture.

-3- With high magnification, both your subject and your camera need to be perfectly still. That often means clamping down your subject and definitely means using a good, sturdy tripod for your camera.

-4- There is no focusing ring on the Laowa lens. You focus by moving the lens closer to or further away from your subject. Handholding is completely out of the question. Even with a good tripod, it can be quite tedious. You’ll really benefit from a macro focusing rail. It works best with Live View zoomed in to 100%. You’ll also want to illuminate your subject with a flashlight while you focus.

-5- You set the aperture on the lens, then adjust the ISO and shutter speed to match your lighting. You’ll need some experimentation and practice to get your exposure correct. This will become easier with experience.

-6- While stopping down your aperture increases depth of field (DOF), it also increases diffraction, which destroys the fine details you are trying to capture. The greater the magnification, the less DOF you have at any given aperture. If you can’t get adequate DOF at a given magnification, you should consider focus stacking a series of photographs. That involves taking multiple images with varying focus points, then blending them in Photoshop, Helicon Focus, or Zerene Stacker. More on focus stacking in a later blog post.

-7- To ensure the greatest DOF in a single image, or just a few images, it is best to photograph with your camera as perpendicular to your subject as possible. The greater the angle your camera is to your subject, the shallower the DOF will appear. To keep an offset subject all in focus would require multiple shots stacked in post-processing.

Why are Full Frame DSLRs called 35mm Equivalents?

Digital single-lens reflex (DSLR) cameras have either full-frame or cropped sensors. A full-frame DSLR sensor (called FX by Nikon) yields an image size approximately 24 mm x 36 mm, just like 35mm SLR film cameras did. Crop sensor cameras are usually 1.5x (DX for Nikon) or 1.6x (APS-C for Canon), but can be 1.2x or 1.3x.

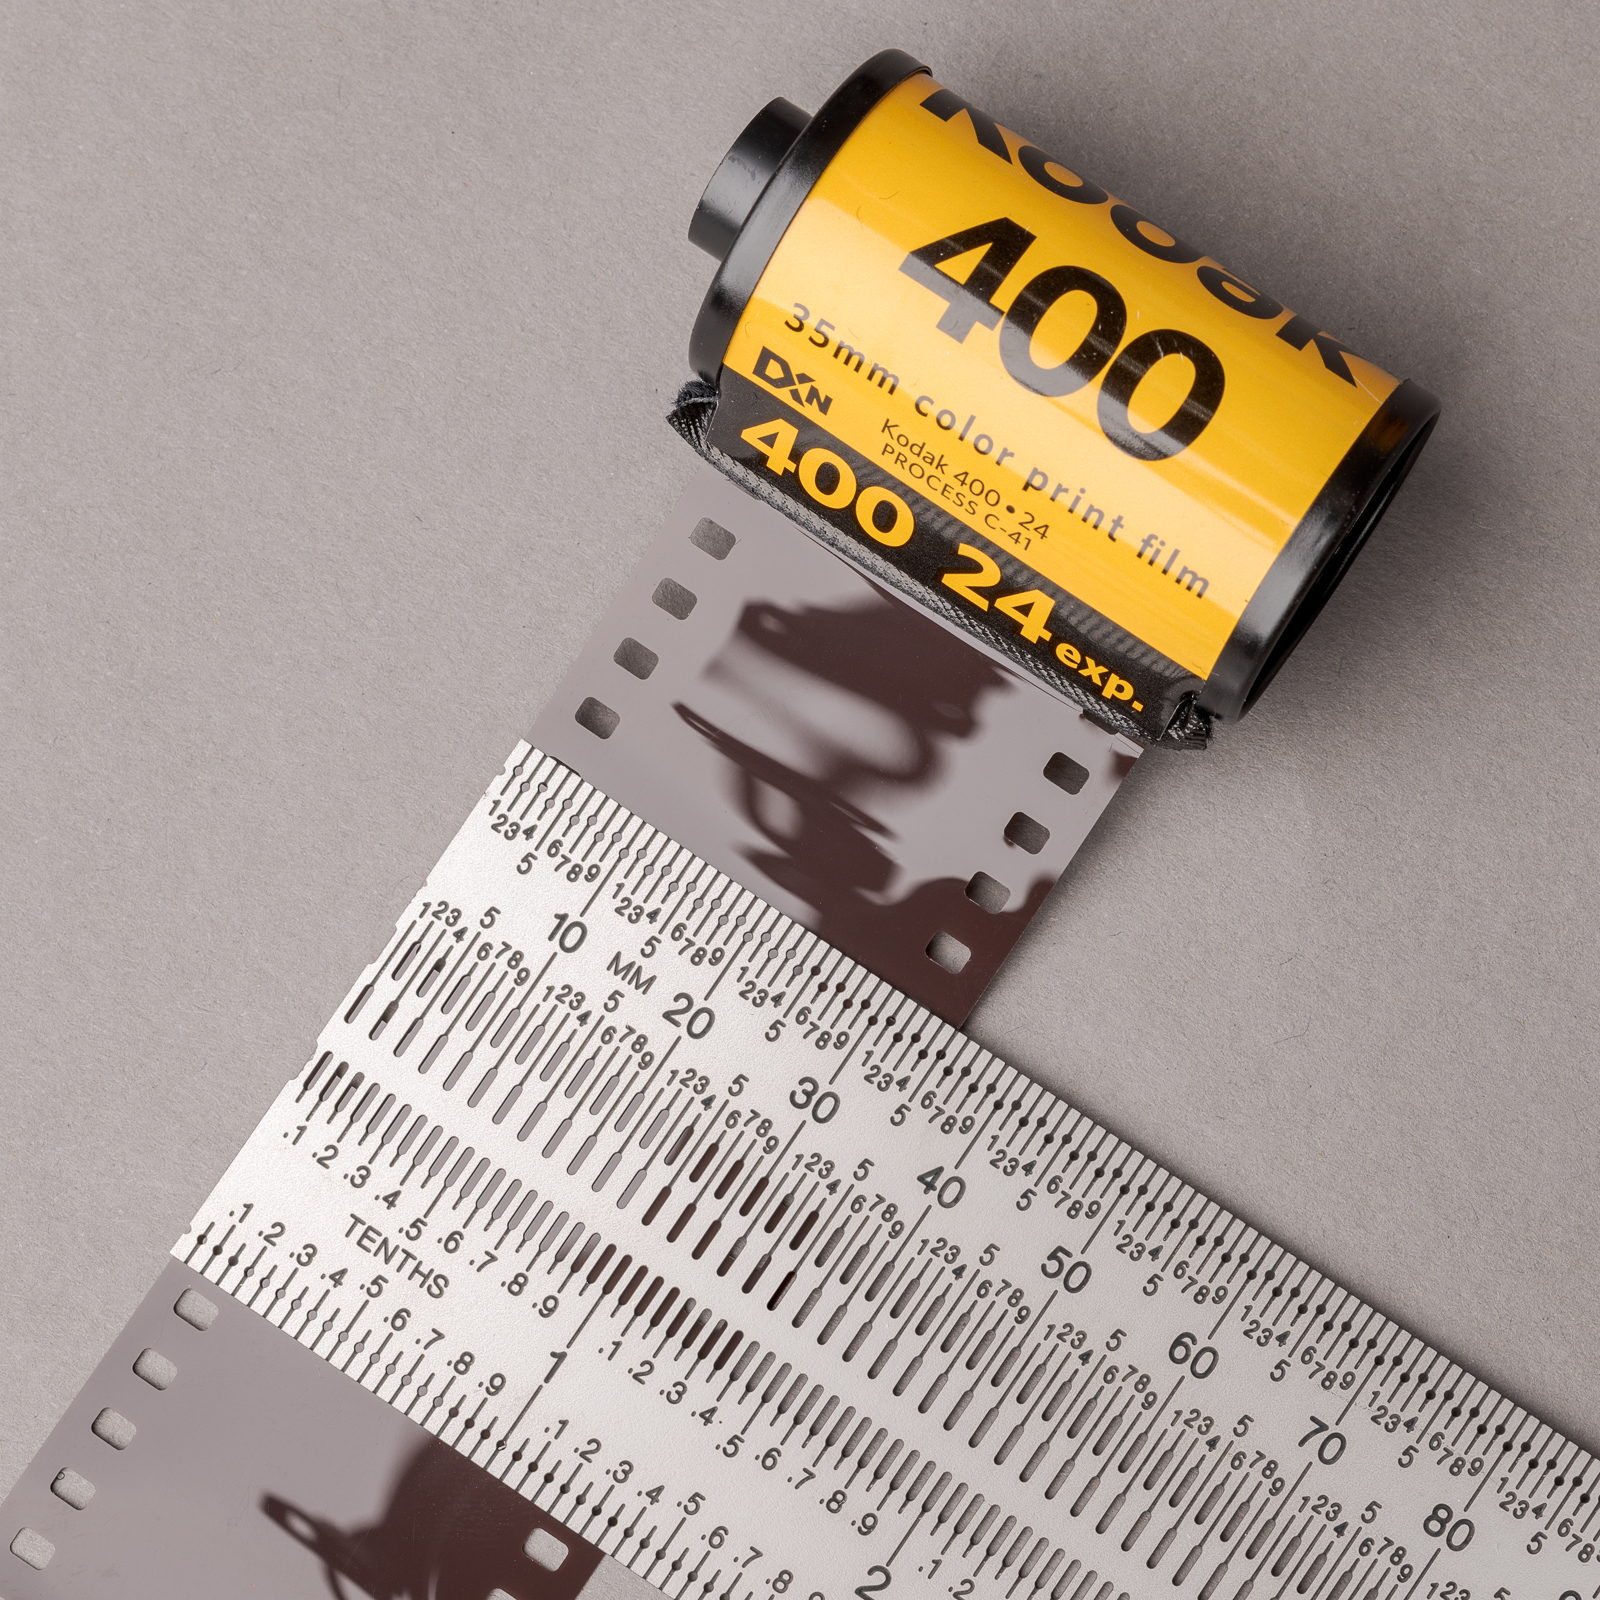
If the full-frame image size is 24 mm x 36 mm, why is it called 35mm? It’s obviously not the length of either side. The diagonal is 43.3 mm, so it’s not that either. (Click on image to enlarge, then click back arrow to return.)

35mm film width. (Made with ZEISS 50mm f/2 macro lens on Nikon D850.)
As the photograph shows, it turns out that 35 mm refers to the width of the film strip, including the sprocket holes.

While the “35 mm” designation has no direct relevance to the digital sensor size, it is still useful when referring to the focal length of lens. The diagonal, horizontal, and vertical angles of view of a given lens are the same with a full-frame digital sensor as they are on a 35 mm film camera. For example, the ZEISS Milvus 50 mm f/2 macro lens has a horizontal angle of view of 38 degrees on a full-frame digital sensor just as it does on a 35 mm film camera. The cropped sensor equivalent values will be the subject of another post.

Suggested Gear for Accident Reconstruction, Product Liability, and Testing Photography

Even before I started teaching Accident Reconstruction, Product Liability, and Testing Photography classes, I’ve often been asked about what photo gear works the best for those areas.

In response, I’ve created two wish lists at B&H Photo Video: one for Nikon Nikon Gear Wish List and one for Canon shooters Canon Gear Wish List. I’m a Nikon shooter, so most of my direct experience is with Nikon equipment. Here are some notes on the lists:

-1- I currently use the Nikon D850. It’s arguably the best all-around camera on the market, but I recommend the Nikon D750 for Nikon shooters for several reasons:
– Its files are more manageable in size, but are still plenty large.
– It still has the manageable body size and shape, and even has the really useful flip up and down LCD screen.
– It has a built-in flash to use to trigger the Nikon 4804 R1 macro flashes.
– The built-in flash isn’t terribly powerful, and can’t be rotated or removed, but can be used in a pinch.
– Right now, it is on a fantastic sale—especially with the 24-120 mm lens. You save $1,200 instantly.
– It’s been out for a while, and is tried and true.

There are similar advantages for Canon shooters with the 6D Mk II vs. the 5D Mk IV. If you have the budget, the Nikon D850 or Canon 5D Mk IV can’t be recommended highly enough. But they are not necessary for the work we do.

-2- The lists show both the ZEISS Milvus 50 mm and either Nikon 60 mm or Canon 100 mm macro lenses. I use the ZEISS, but also have the Nikon. I use my ZEISS Milvus 50 mm lens for most of my work photography, since it has a normal perspective. I also use the ZEISS Milvus 100 mm lens when I need to fill the frame with a macro shot, but can’t get close enough.
Advantages of the ZEISS are: Precise manual focus; amazing micro contrast; and, 50 mm is accepted “normal” lens that I use for almost everything.
Disadvantages of the ZEISS are: Manual focus only (but that is my preference); and, only enlarges to 1:2 (or half life-size).
Advantages of the Nikon: 1:1 (life-size macro); autofocus (but see note below); close enough to “normal” focal length; and, less expensive.
Disadvantages of Nikon: Not as easy to manually focus.
Note: When shooting macro images, you’ll most likely have to manually focus anyway, so having a more precise manual focusing ring is a real benefit.

Speaking of ZEISS lenses, four ZEISS manual focus prime lenses make up my work kit: the classic ZEISS 25 mm f/2 Distagon; the ZEISS Milvus 35 mm f/2; the ZEISS Milvus 100 mm f/2 macro; and, the aforementioned ZEISS Milvus 50 mm f/2 macro. I use the latter for 90 percent of my work. ZEISS makes lenses for Nikon, Canon, and Sony mounts. They have unrivaled sharpness and micro-contrast, and such smooth and accurate manual focusing that you’ll forget autofocus exists! Continue reading “Suggested Gear for Accident Reconstruction, Product Liability, and Testing Photography”