Fill Flash helps bring out details in the shadowed area of high-contrast subjects. This first photo of the left front of a truck tractor without flash doesn’t have much detail under the fender. [Click on image to enlarge, then click on back arrow to return.]
To bring out some detail, a flash was added at a reduced power output for this second image. (It’s more noticeable in an enlarged image.) Fill flash isn’t intended to light the entire image frame, but only to lighten very dark areas. [Click on image to enlarge, then click on back arrow to return.]
While there was a little more detail in the suspension and frame, raising the flash power added even more light under the fender. Again, it’s best to enlarge the image to see the effect. [Click on image to enlarge, then click on back arrow to return.]
Note that all three photographs were made at the same exposure of f/10, 1/50 second, and ISO 64. The images differ because the amount of fill flash was different. This showed the flash was supplemental or “fill” meaning flash filled in the shadows without altering the overall exposure.
Before you make any photograph, look for areas that are too dark to show details you may want. By varying the power of the flash, you can bring out as much detail as you choose, without affecting the overall exposure.
Two takeaways:
-1- Fill flash adds light in the shadows without affecting the overall exposure, which stays the same.
-2- You can control the amount of shadow detail you want to show by changing the output of your flash, or its flash power.
Note: This is an updated and enhanced version of a post originally made in July 2018.
After having four of the five classes canceled last year, I’m really happy to announce the return of my SAE automotive and product photography class: https://www.sae.org/learn/content/c1729/. I’m glad to be returning to the site of my first class in 2018 at the great facilities of Mecanica Scientific Services in Oxnard, CA: https://www.mecanicacorp.com/. Many thanks to John Steiner, CEO and Principal Scientist of Mecanica, for hosting this upcoming class from August 30 through September 1, 2021.
Whether your primary job is accident reconstruction, product analysis, vehicle or component testing, or other technical area, you will need consistent, quality photographs to both document and analyze your subjects. These photos need to be made regardless of ambient lighting or conditions. Your camera on Auto isn’t going to do that. [Click on image to enlarge in new window, then click back arrow to return to post.]
Not only are good photos essential for documentation and useful for analysis, they can be critical for use in lawsuits, insurance claims, recalls, and design and testing evaluations. Both in-house analysts and independent consultants will be counted on to routinely produce accurate and reliable photographs as part of their professional work. Did I mention that your camera on Auto isn’t going to do that? [Click on image to enlarge in new window, then click back arrow to return to post.]
This class is designed to give you the tools and knowledge you’ll need to consistently create professional photographs by proper use of focus, depth of field, composition, lighting, polarizers, tripods, and close-up/macro tools. You’ll see how flash is essential for capturing all the data, and how it’s not as intimidating as many believe. We’ll also cover the two types of night photography as well. [Click on image to enlarge in new window, then click back arrow to return to post.]
There will be more hands-on sessions than in previous classes, so make sure to bring your camera, lenses, polarizer, tripod, and flash. Course information and registration are available through the link in the first paragraph, but if you have any questions or need more information, please feel free to e-mail or call me directly.
Where you place your camera determines the relative positions of objects in your frame. It’s important to be aware of any unintended impressions by the juxtaposition of the objects you are showing. This is best avoided by making photographs from enough different angles to give a complete and accurate representation of the positions of all the elements.
The subject of these photographs was a disused flatbed semi-trailer. It was in a rural field with a number of other discarded vehicles . None could be moved.
All of these photographs were made with the same 50 mm lens on the same full frame sensor camera so there was no variation in the field of view between the images. As mentioned, neither the trailer nor the car were moved. My camera was on a tripod (as always) so all the photos were made from the same camera height.
In the first photo, how far under the trailer do you think the rear of the gold car was? Was its rear bumper against the left landing leg of the trailer? (Click on the image to enlarge, then click on the back arrow to return to the post.)
Moving the camera to the right showed the car’s rear bumper was not against the landing leg, but can you estimate how far the trunk lid was under the side of the trailer? (Click on the image to enlarge, then click on the back arrow to return to the post.)
Further right, looking directly at the front of the trailer, the car’s rear bumper was actually quite far from the trailer’s landing leg, and its trunk lid doesn’t look nearly as far under the trailer as in the two previous photos. (Click on the image to enlarge, then click on the back arrow to return to the post.)
Moving even farther to the right, you can now see that none of the rear of the car was under the side of the trailer. Again, neither vehicle was moved during this sequence. (Click on the image to enlarge, then click on the back arrow to return to the post.)
Three takeaways:
-1- Be aware of possible deception from a single photograph, both when making the photos yourself, and when evaluating photos provided to you. If the first image had been from a wreck scene, you certainly don’t want to opine that the rear of the car ended up under the trailer!
-2- Take multiple images from different camera positions to give a complete and accurate depiction of your subjects and their relationships to other objects in the frame.
-3- As mentioned in previous posts, using a tripod for every image not only insures a sharp image, but allows careful framing and a consistent look between images all made at the same height.
On Thursday, April 1, 2021 (and, no, it wasn’t an April Fools joke), I had the honor of being interviewed by Eugene Liscio of ai2-3D for his Forensics Talks YouTube channel.
For almost an hour, we talked about a wide range of topics related to tire, vehicle, and accident reconstruction photography. Among the subjects we discussed were the importance and use of a tripod, a polarizer, and flash. We also touched on both kinds of night photography and on post-processing.
I hope you will find the information we discussed useful. The interview also gives an idea of a couple of the topics which we demonstrate and discuss in depth in my SAE class which, by the way, will be resuming as in-person classes this year.
Here’s a link to that class: SAE C1729. I’ll post the dates of the new classes as soon as we finalize them.
Most accident reconstructionists and product liability engineers have had to photograph a vehicle, vehicle component, or other product in a dark area such as a warehouse, storage facility, lab, or even an office. Conditions can be even worse for building or fire investigators, especially if the power is out. By definition, what is missing in any of these situations is light!
But despite the lack of light, you might only get this one chance to inspect the evidence. You’ve got to come back with well-exposed, well-lit professional photographs—photos that accurately portray what you saw, represent you well to your clients, and reflect the quality standards of your work, especially during depositions and trials.
Unless you are trying to capture a low light scene as it is (which is a completely different discussion), you have several options to make a photo in low light.
One is light painting by moving a flashlight over your subject during a long exposure. This is tedious and time-consuming, especially if you have to make more than one or two images. It is also hit-and-miss, even if you are experienced with it. Of course you need a sturdy tripod for every shot, since the exposures are long. These long exposures also risk generating noise. So light painting might be good in an emergency, and it’s sometimes necessary for illuminating vehicles at nighttime accident scenes.
It can work, as shown below, but it’s not recommended for making inspection photographs. This photograph of a rental car was made at dusk with no lights on in the garage. The only light came from when I walked around the vehicle constantly moving a flashlight, painting both the car and the garage bay. Note how the long (74 second) exposure made the outdoors look brighter than it was. (Click on image to enlarge, then click back arrow to return to this post.)
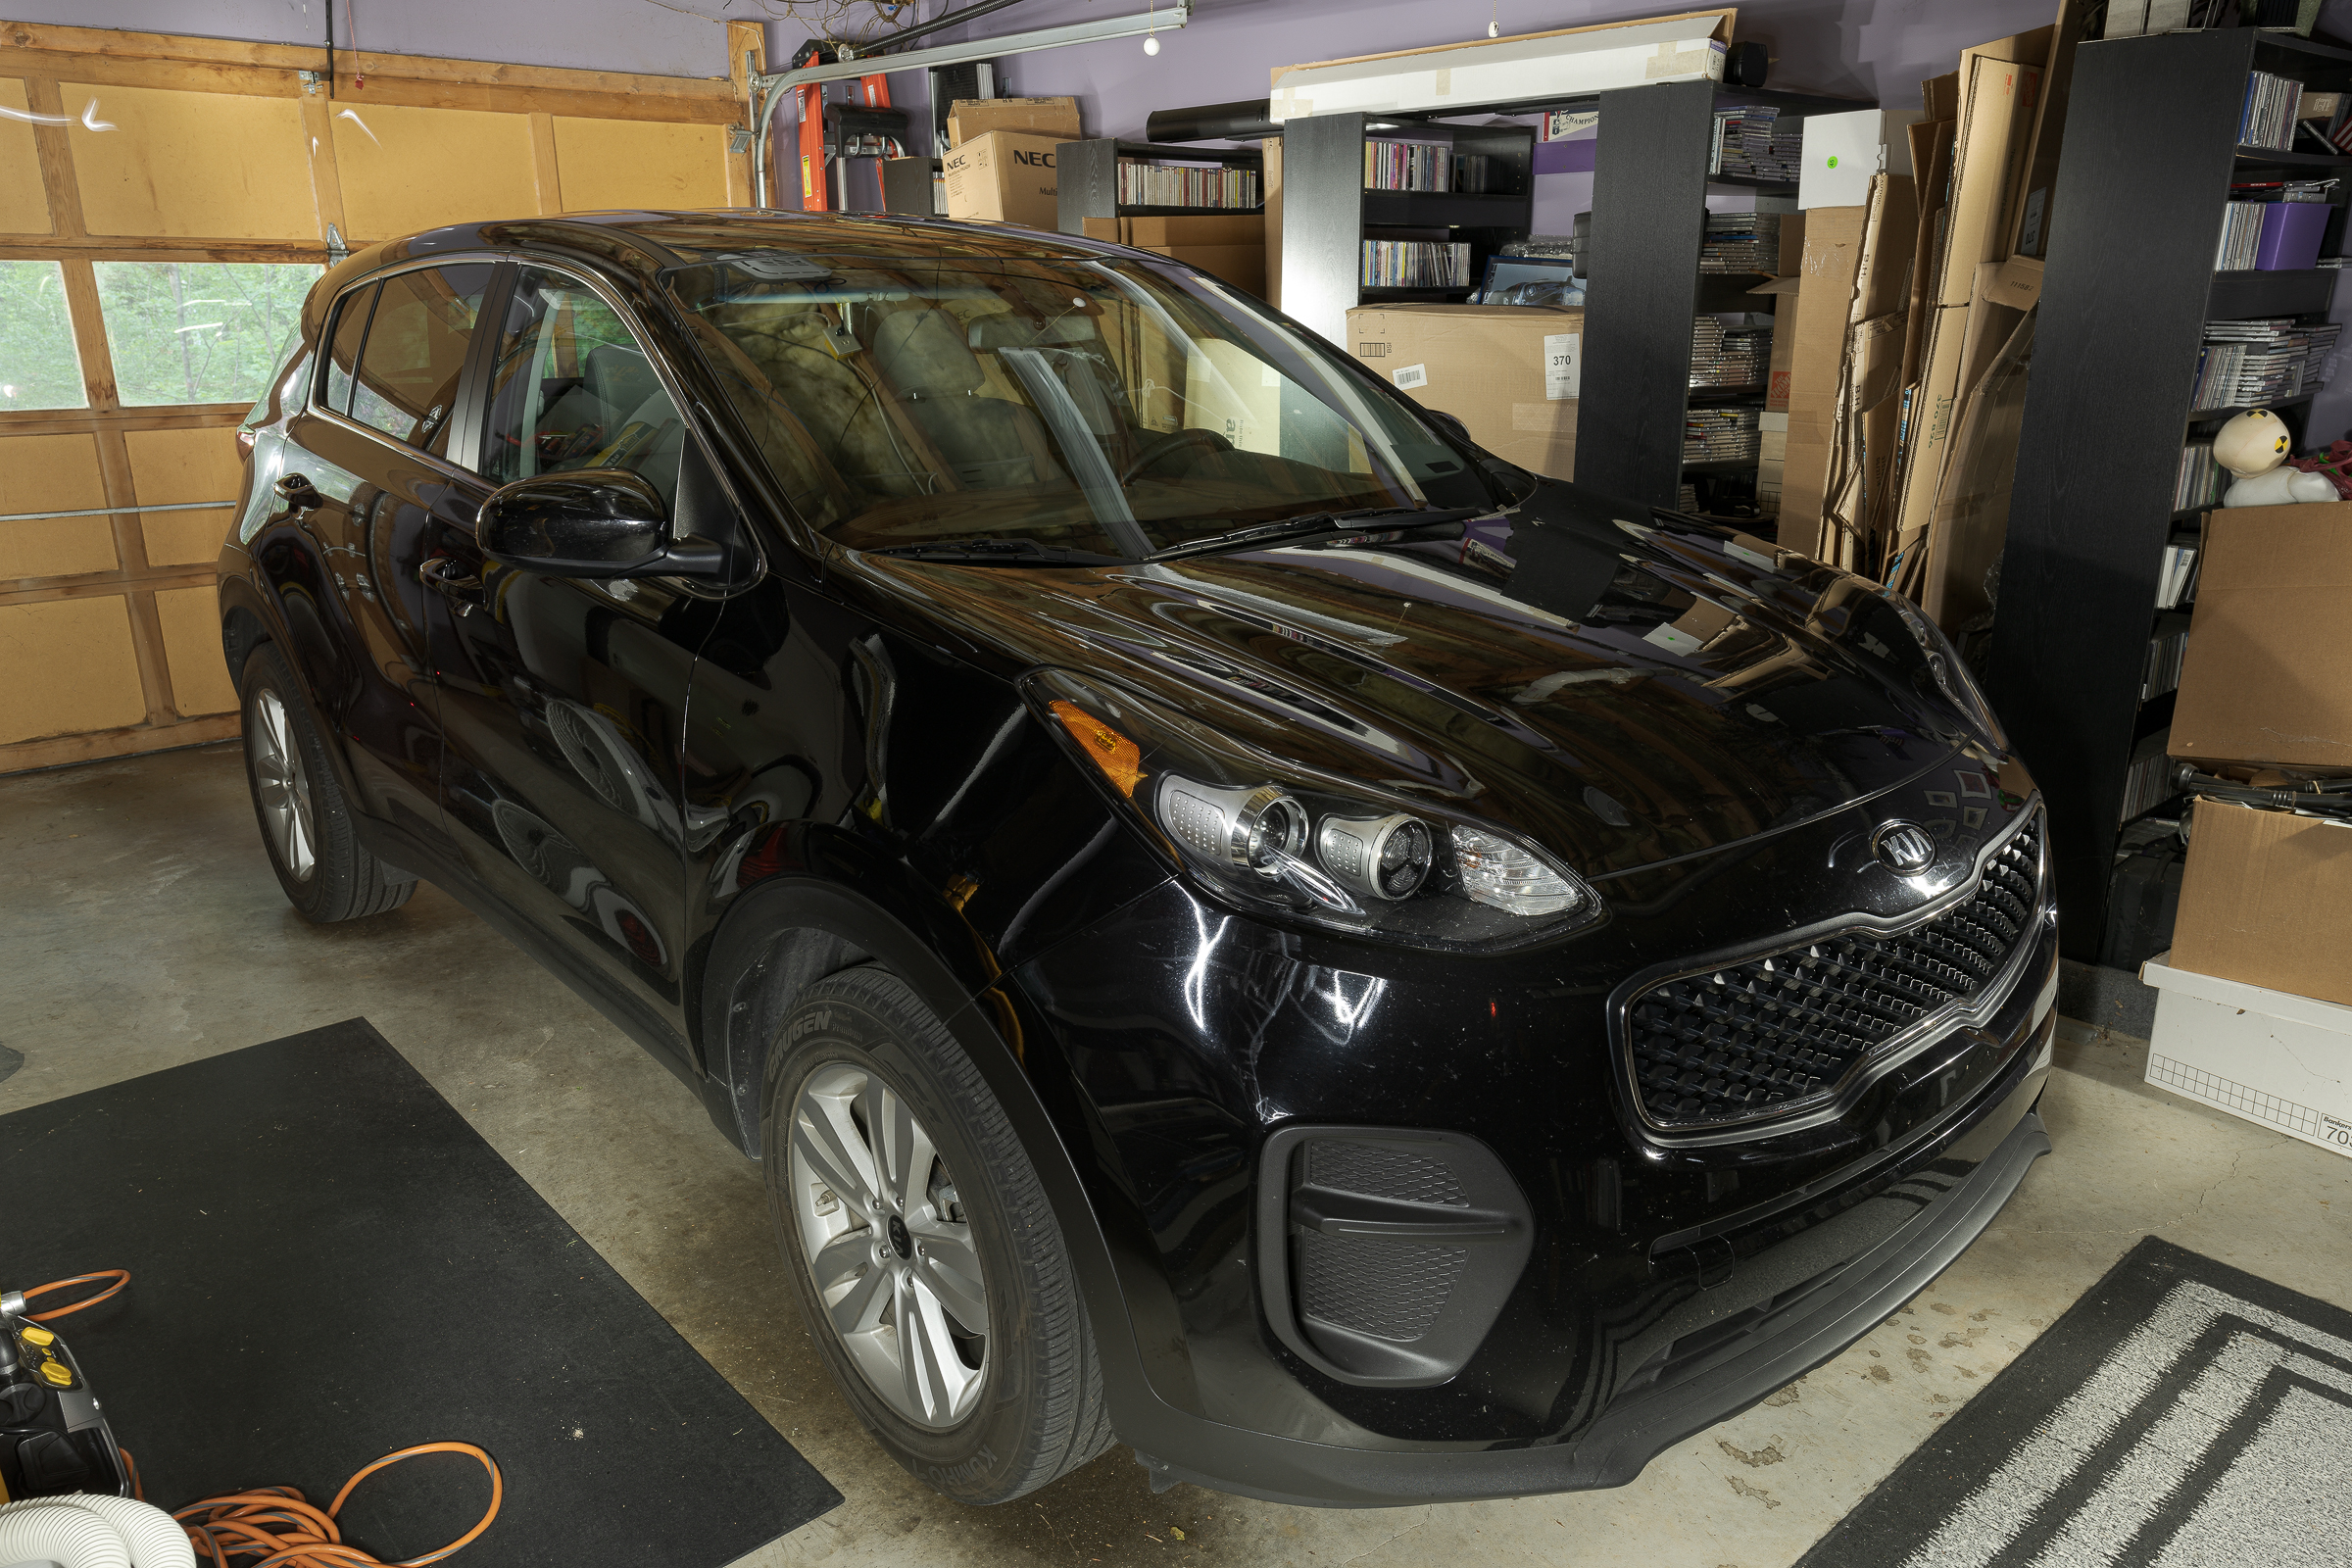
Another option is use high ISO sensitivities. On all digital cameras, the higher the ISO, the more noise and less dynamic range there is. With newer cameras, neither the increased noise nor the dynamic range loss are obtrusive until the middle or higher ISO values (say ISO 800 or even 1600). Here’s an example made at ISO 200,000 and cropped from the full frame. (Click on image to enlarge, then click back arrow to return to this post.)
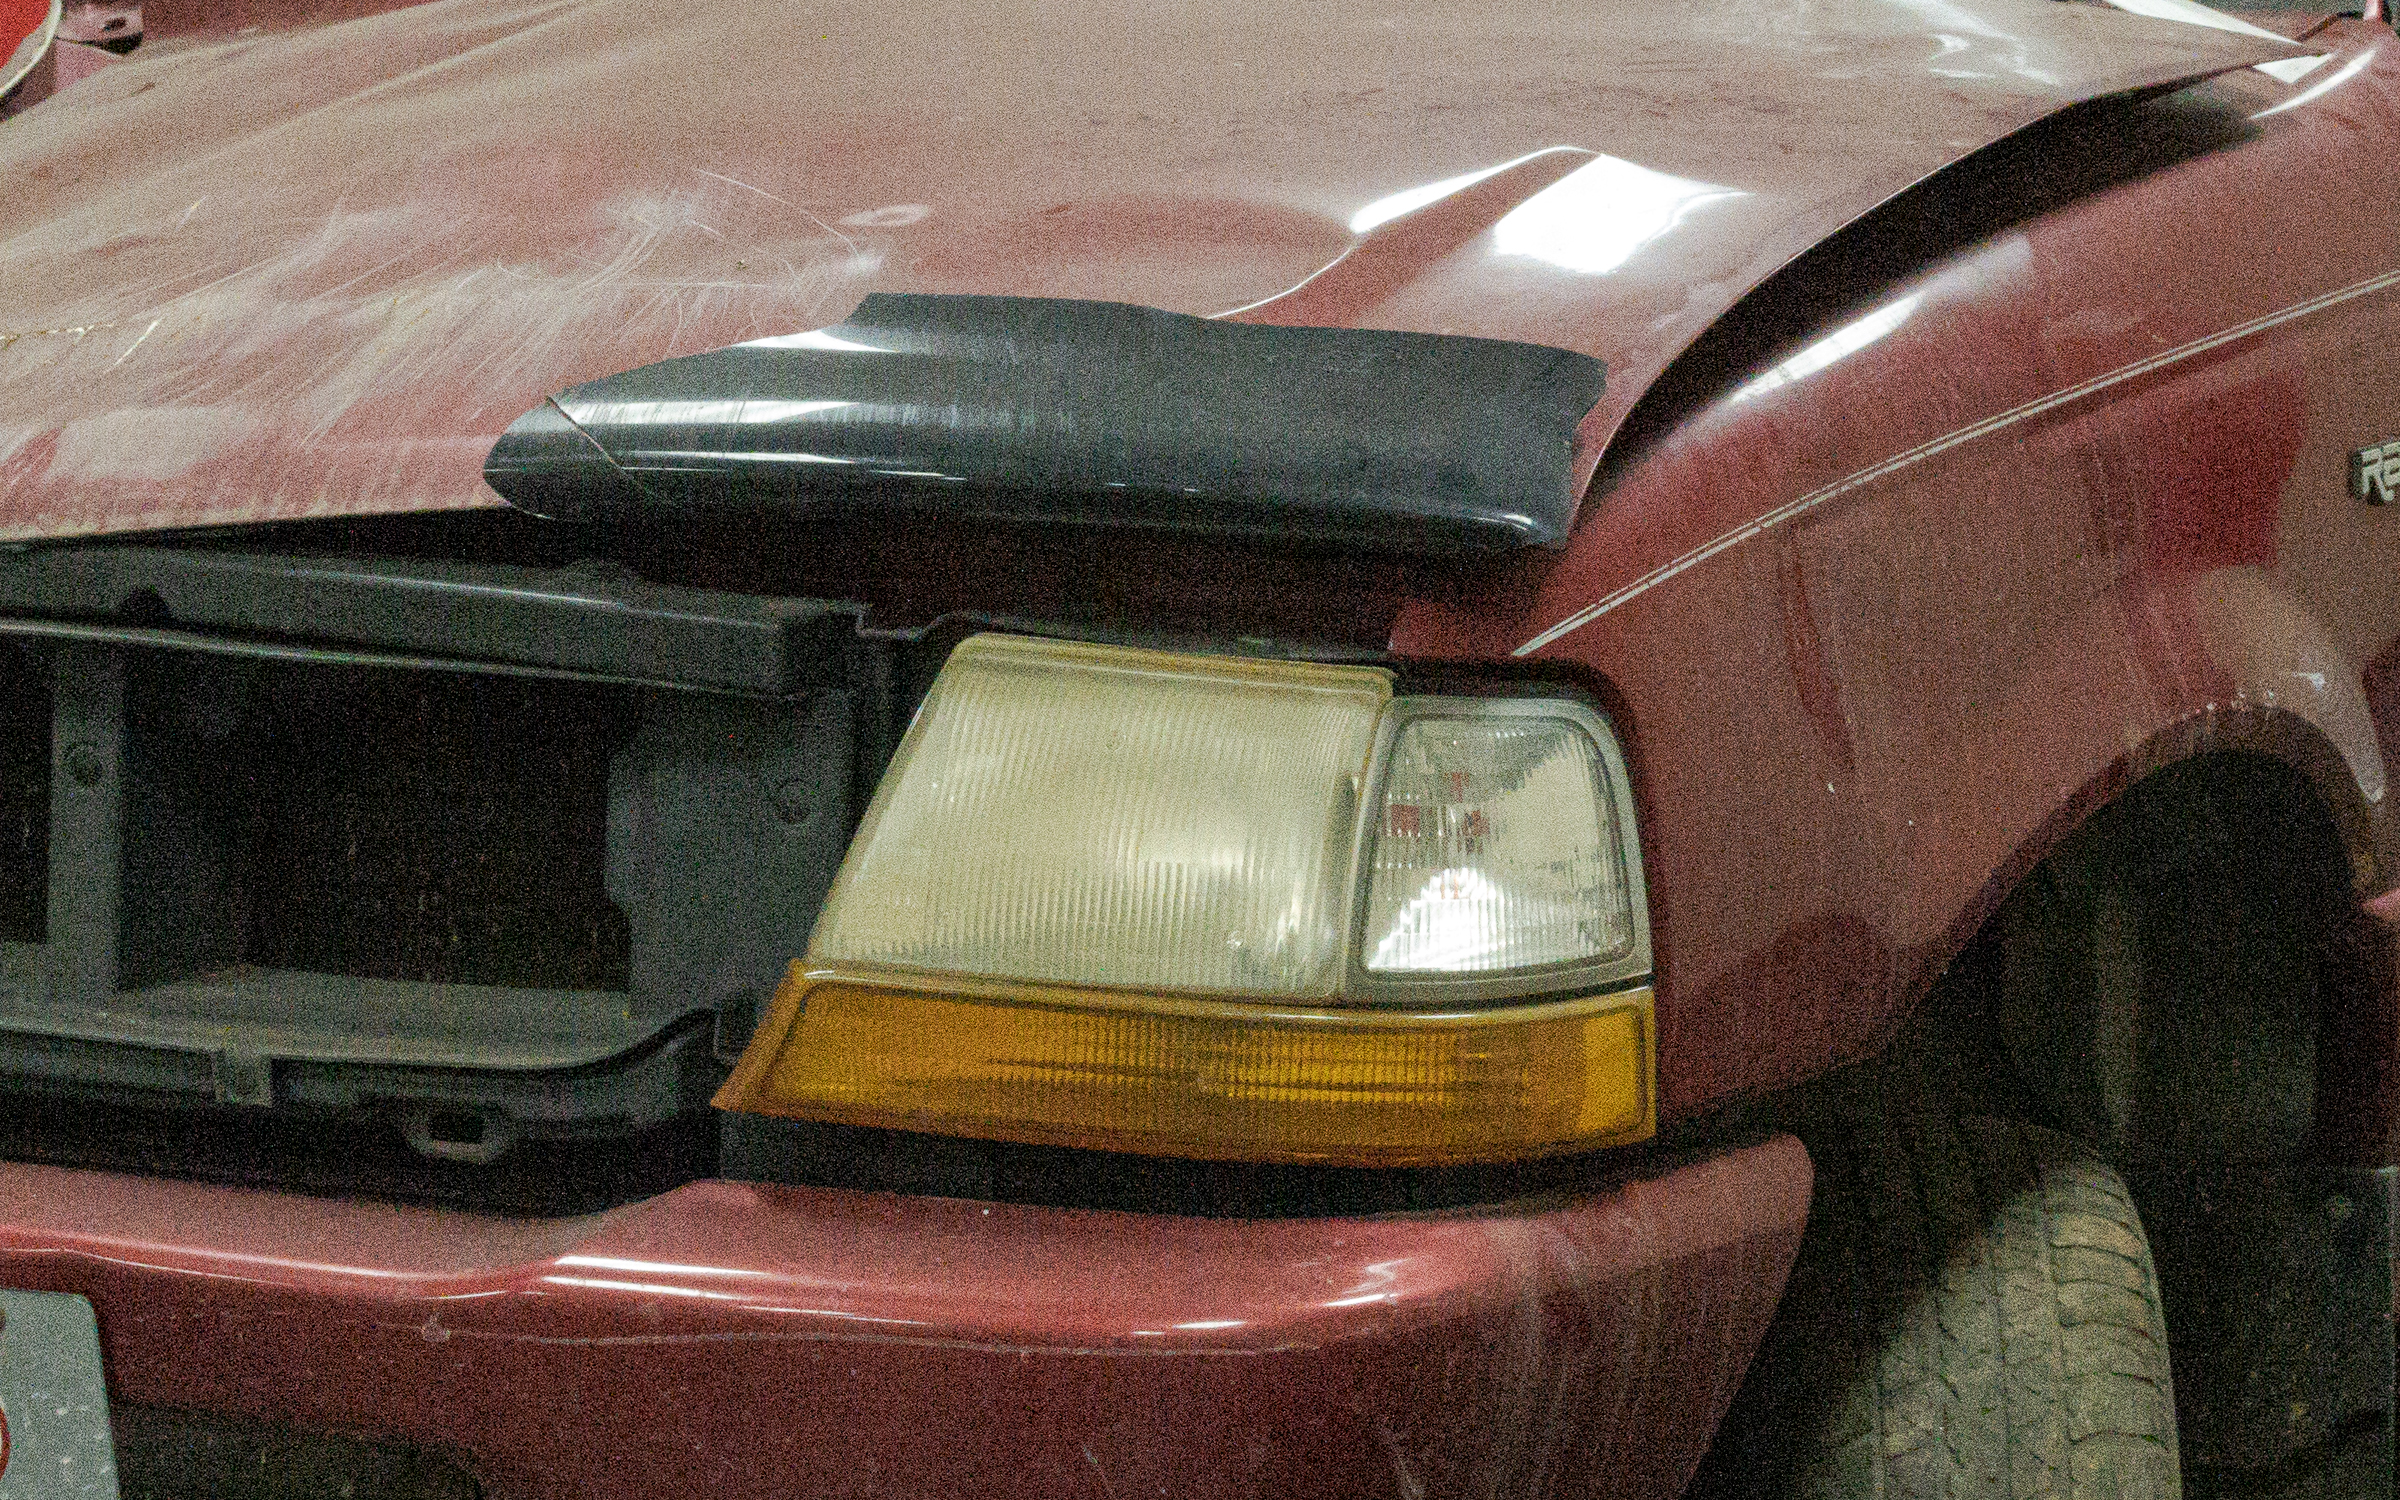
As a third option, continuous light sources are better than nothing, but none are bright enough to avoid having to use a long shutter speed and/or to raise your ISO. Most fluorescent lights flicker and have an undesirable color cast. Halogen shop lights get hot and have a very warm color cast. Quality LED lights have good color control, but still aren’t bright enough. Even the larger LED panels made for photo studios don’t put out enough light, plus the brighter ones are big and unwieldy to transport and setup. Again, none of them put out enough light to allow a low ISO and a shorter shutter speed.
Flash is your best option, by far. But the tiny built-in flash on a point-and-shoot, the popup flash on a DSLR or mirrorless, or even a professional flash in your camera’s hot shoe won’t always be sufficient. You’ll need additional light.
There is a learning curve to using flash, since you can’t see the effect of the light until after you’ve made the photograph. But as long as you think about where and about how much light you need, it’s something you’ll pick up with a little practice.
Since I shoot Nikon, I always carry three Nikon Speedlights (flashes) with me. (You don’t need flashes made by your camera manufacturer, but those will always work with your camera, and are usually quite robust.) One flash goes in the camera’s hot shoe, and I put the other two where needed. I usually carry two small, lightweight, travel light stands with me so I can place the lights where they will do the most good, but I will often just prop them up on something nearby. (Within the next couple days, I will write a post about the gear I mention in this post.)
Since I do a lot of tire analysis, I often need even more light than the Speedlights can put out. Besides, Speedlights can take a long time to recharge their capacitors between shots.
Especially for tires, I use Profoto B10 battery-powered studio flashes on the road and battery-powered Profoto B1x studio flashes in my Studio Lab. Again, more on these in a post later this week.
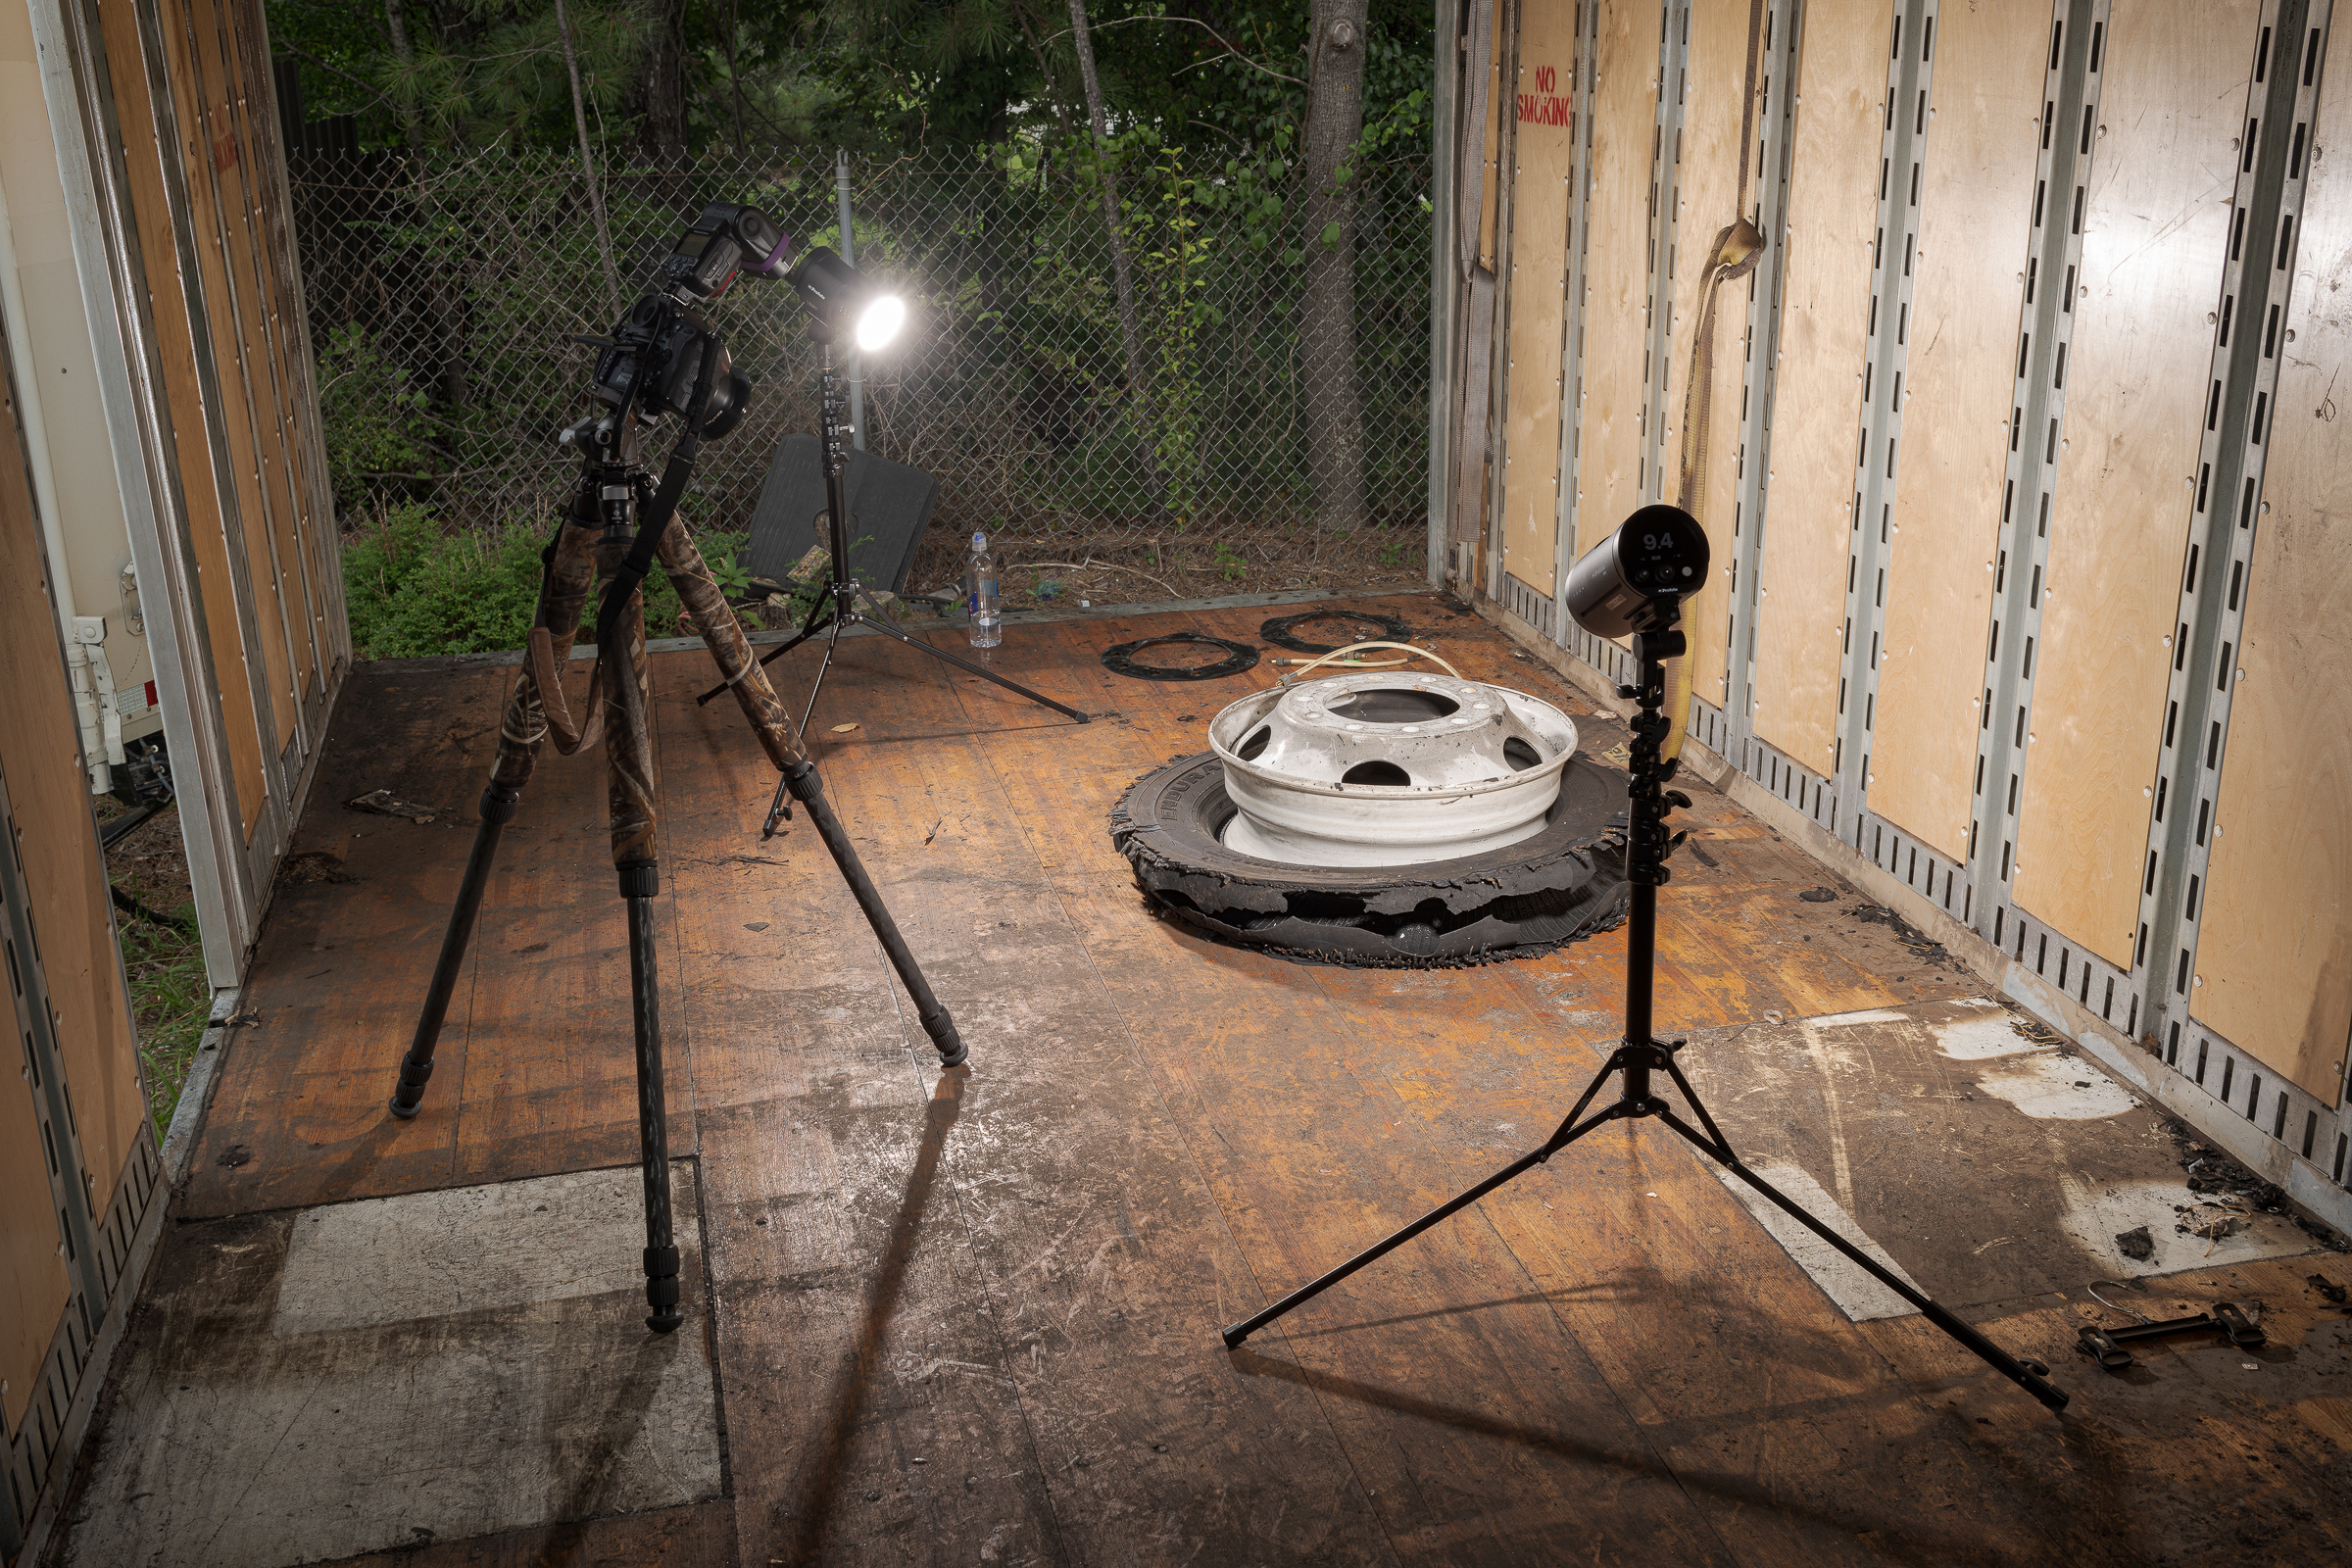
Recently, I had to inspect tires and wheels inside a semi-trailer. Even though my inspection was close to noon on a sunny day, and the trailer had a couple side doors I could open, I knew it would be pretty dark inside the trailer for photography. I set up my two Profoto B10 flashes on my travel light stands. They were fired by a Nikon SB-910 flash in my camera hot shoe. Exposure and flash powers were all set manually. (Click on image to enlarge, then click back arrow to return to this post.)
Here is a resulting image from that setup. (Click on image to enlarge, then click back arrow to return to this post.)
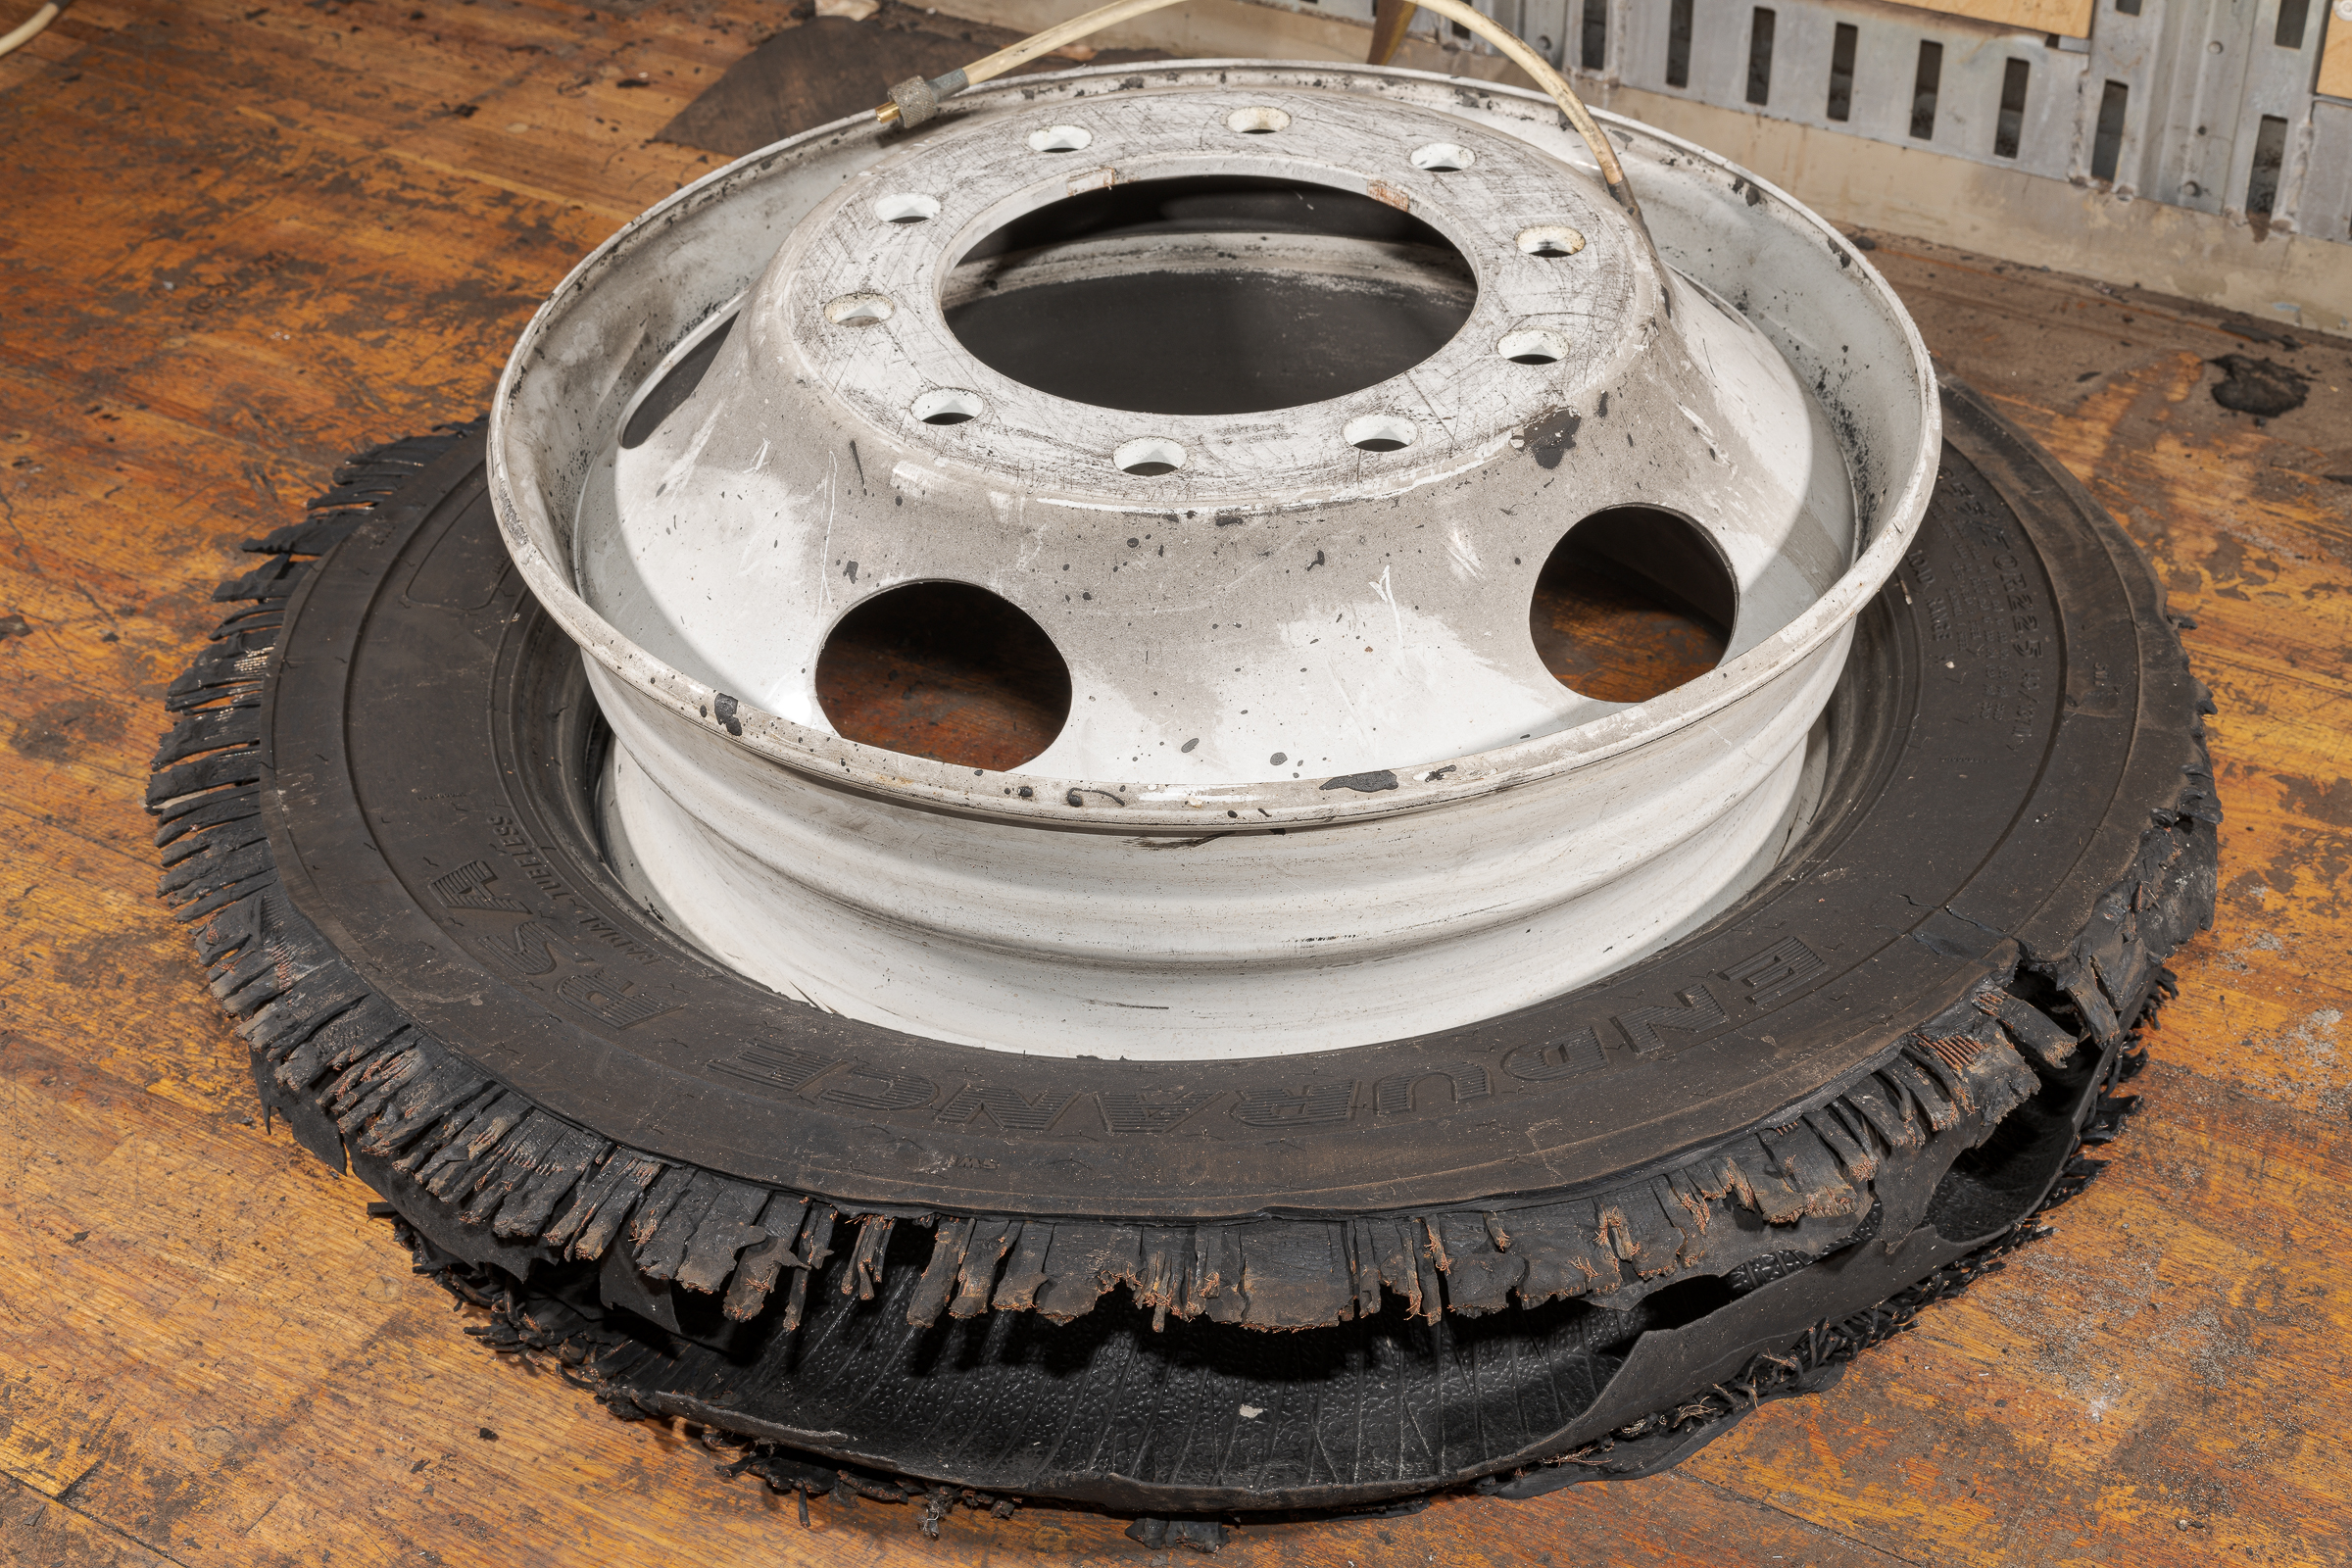
A single flash on the camera—even Nikon’s most powerful Speedlight—could never have provided enough light to evenly illuminate this tire and wheel. The Speedlight and battery-powered strobes not only provided nice even lighting, but allowed me to shoot at ISO 64, which is the lowest on a Nikon D850. This minimized the noise and maximized the dynamic range to show the most detail possible.
A couple posts ago, I showed examples of bringing out textures in a sponge by creating shadows using an off-camera flash. Here is an example with the type of photography subject we are more likely to encounter.
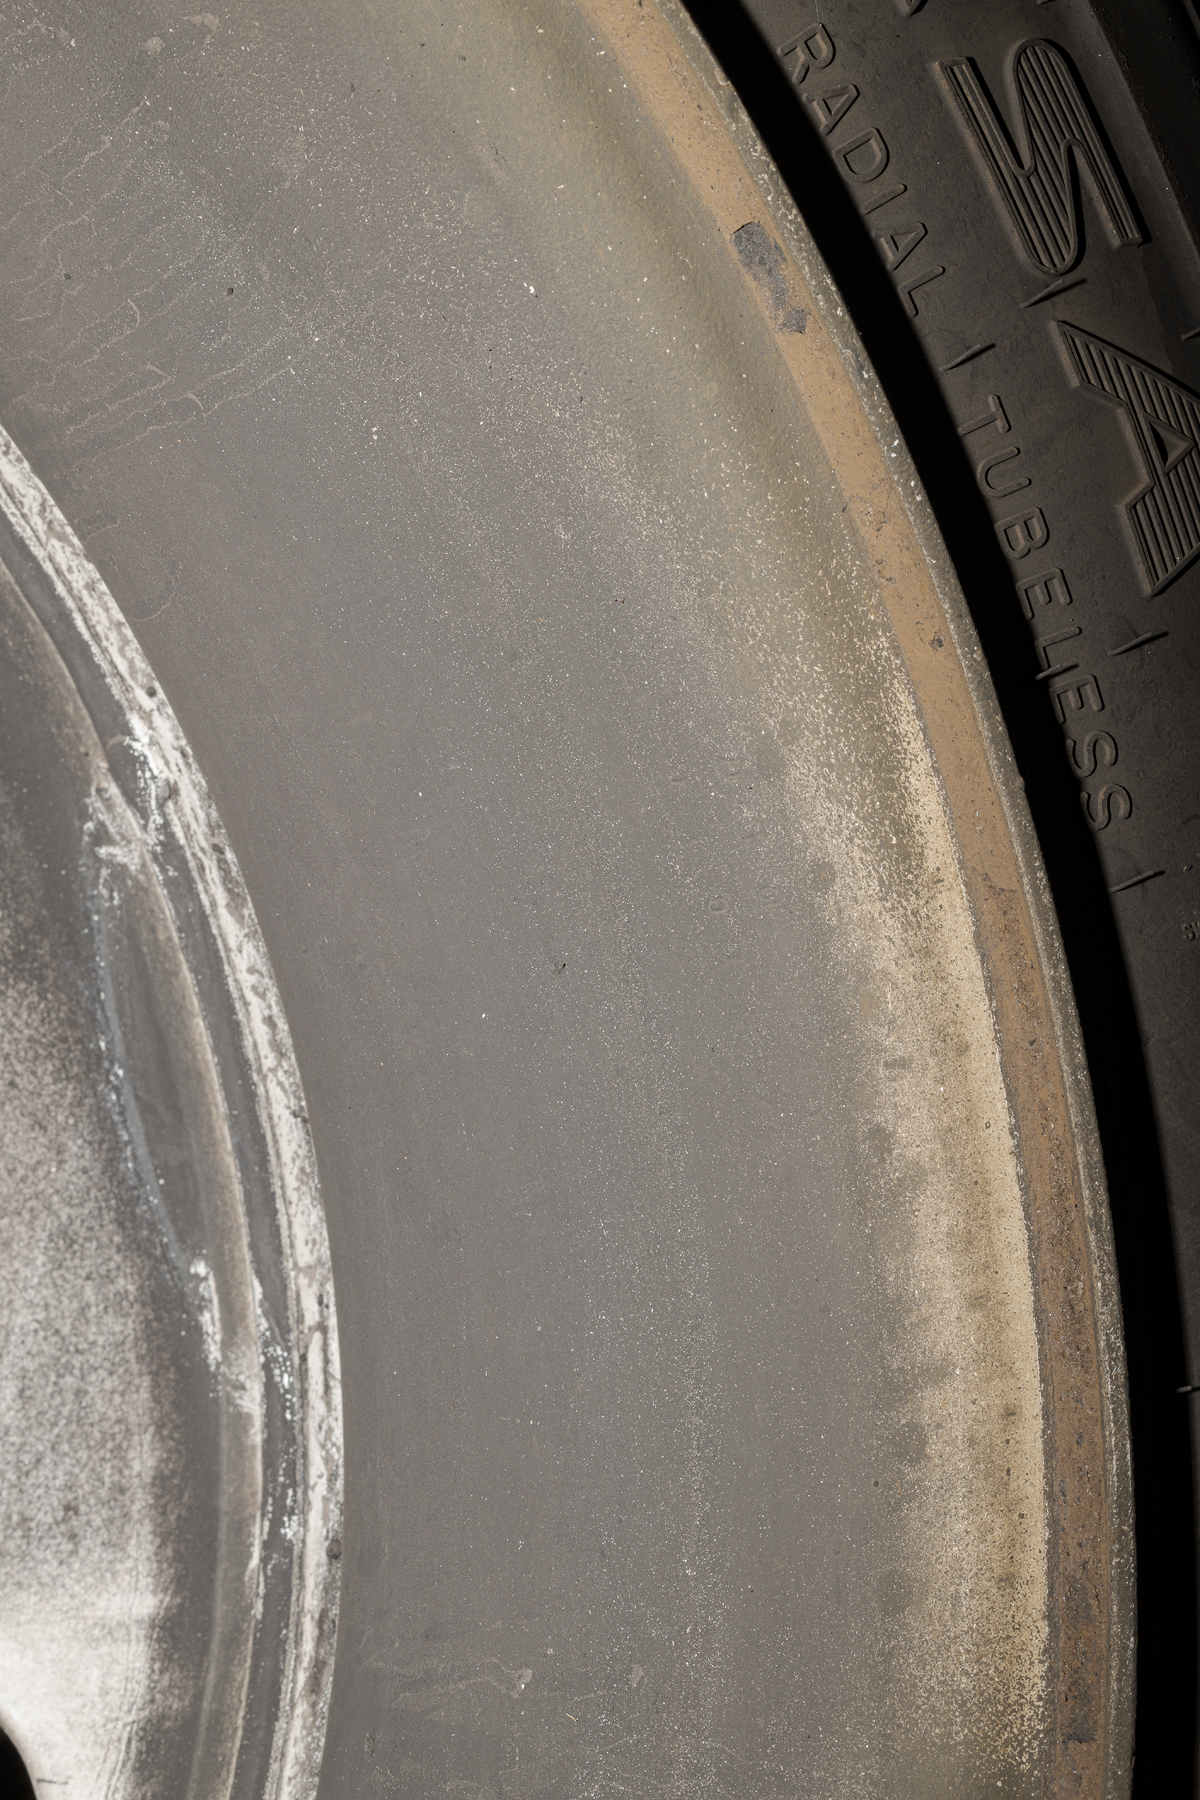
Vehicle wheels and other components are often stamped with model and serial numbers, along with with dates of manufacture. If you use a built-in flash or a flash mounted in the camera’s hot shoe, those stampings will often be invisible in your photograph. (Click on image to enlarge, then click on back arrow to return to this post.)
This photo is properly exposed, but is useless in documenting the wheel. The key is to get the light at an oblique angle so it skims across the surface to create both light and shadow, just like we did with the sponge. (Click on image to enlarge, then click on back arrow to return to this post.)
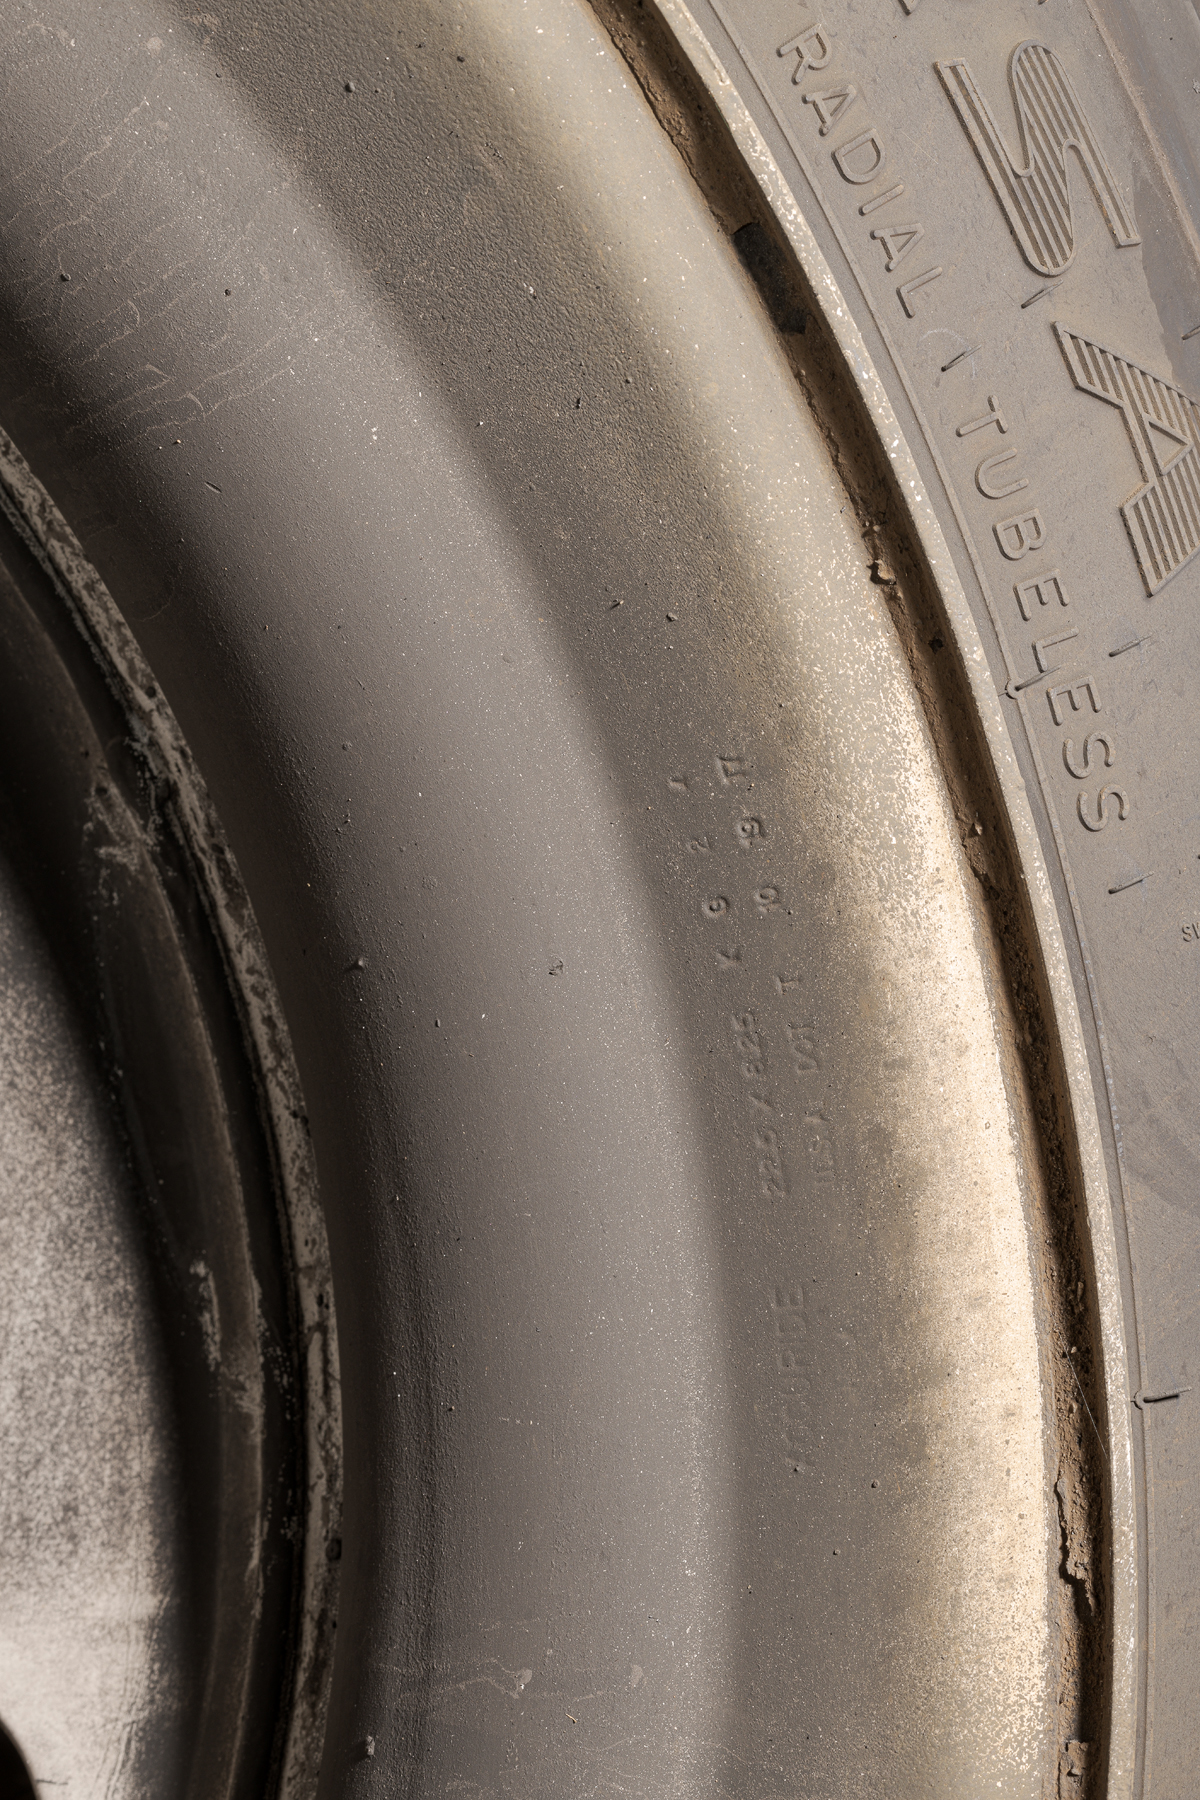
For this second photograph, I used a Profoto B10 strobe to the camera’s right, almost perpendicular to the stamping. I fired that strobe with the flash in my camera hot shoe, but I made sure the hot shoe flash did not affect the exposure. I used a B10, but could just as easily used another Nikon flash to get the exact same effect. I had already been using the B10 for other shots, so I just used that. In fact, it would have been even easier with second Nikon flash, since I could set the hot shoe flash to Master with no light output while the other flash would be set to Remote with either manual or TTL flash.
This second image is also properly exposed, but now the direction of the light makes this photo useful. Now you can see it is a 22.5 x 8.25 Accuride wheel manufactured 10/19/17.
The point is that you need to consider both the amount and direction of light to properly illuminate a subject. Light illuminates your subject, but the shadows give it definition. Shadows are essential in a 2-D depiction of a 3-D subject, especially when you need to show textures or depth.
Retroreflective tape is designed to reflect light directly back toward the light source. It is most effective when the light source is perpendicular to the tape. The amount of light reflected drops off as the angle between the light source and the tape becomes more oblique.
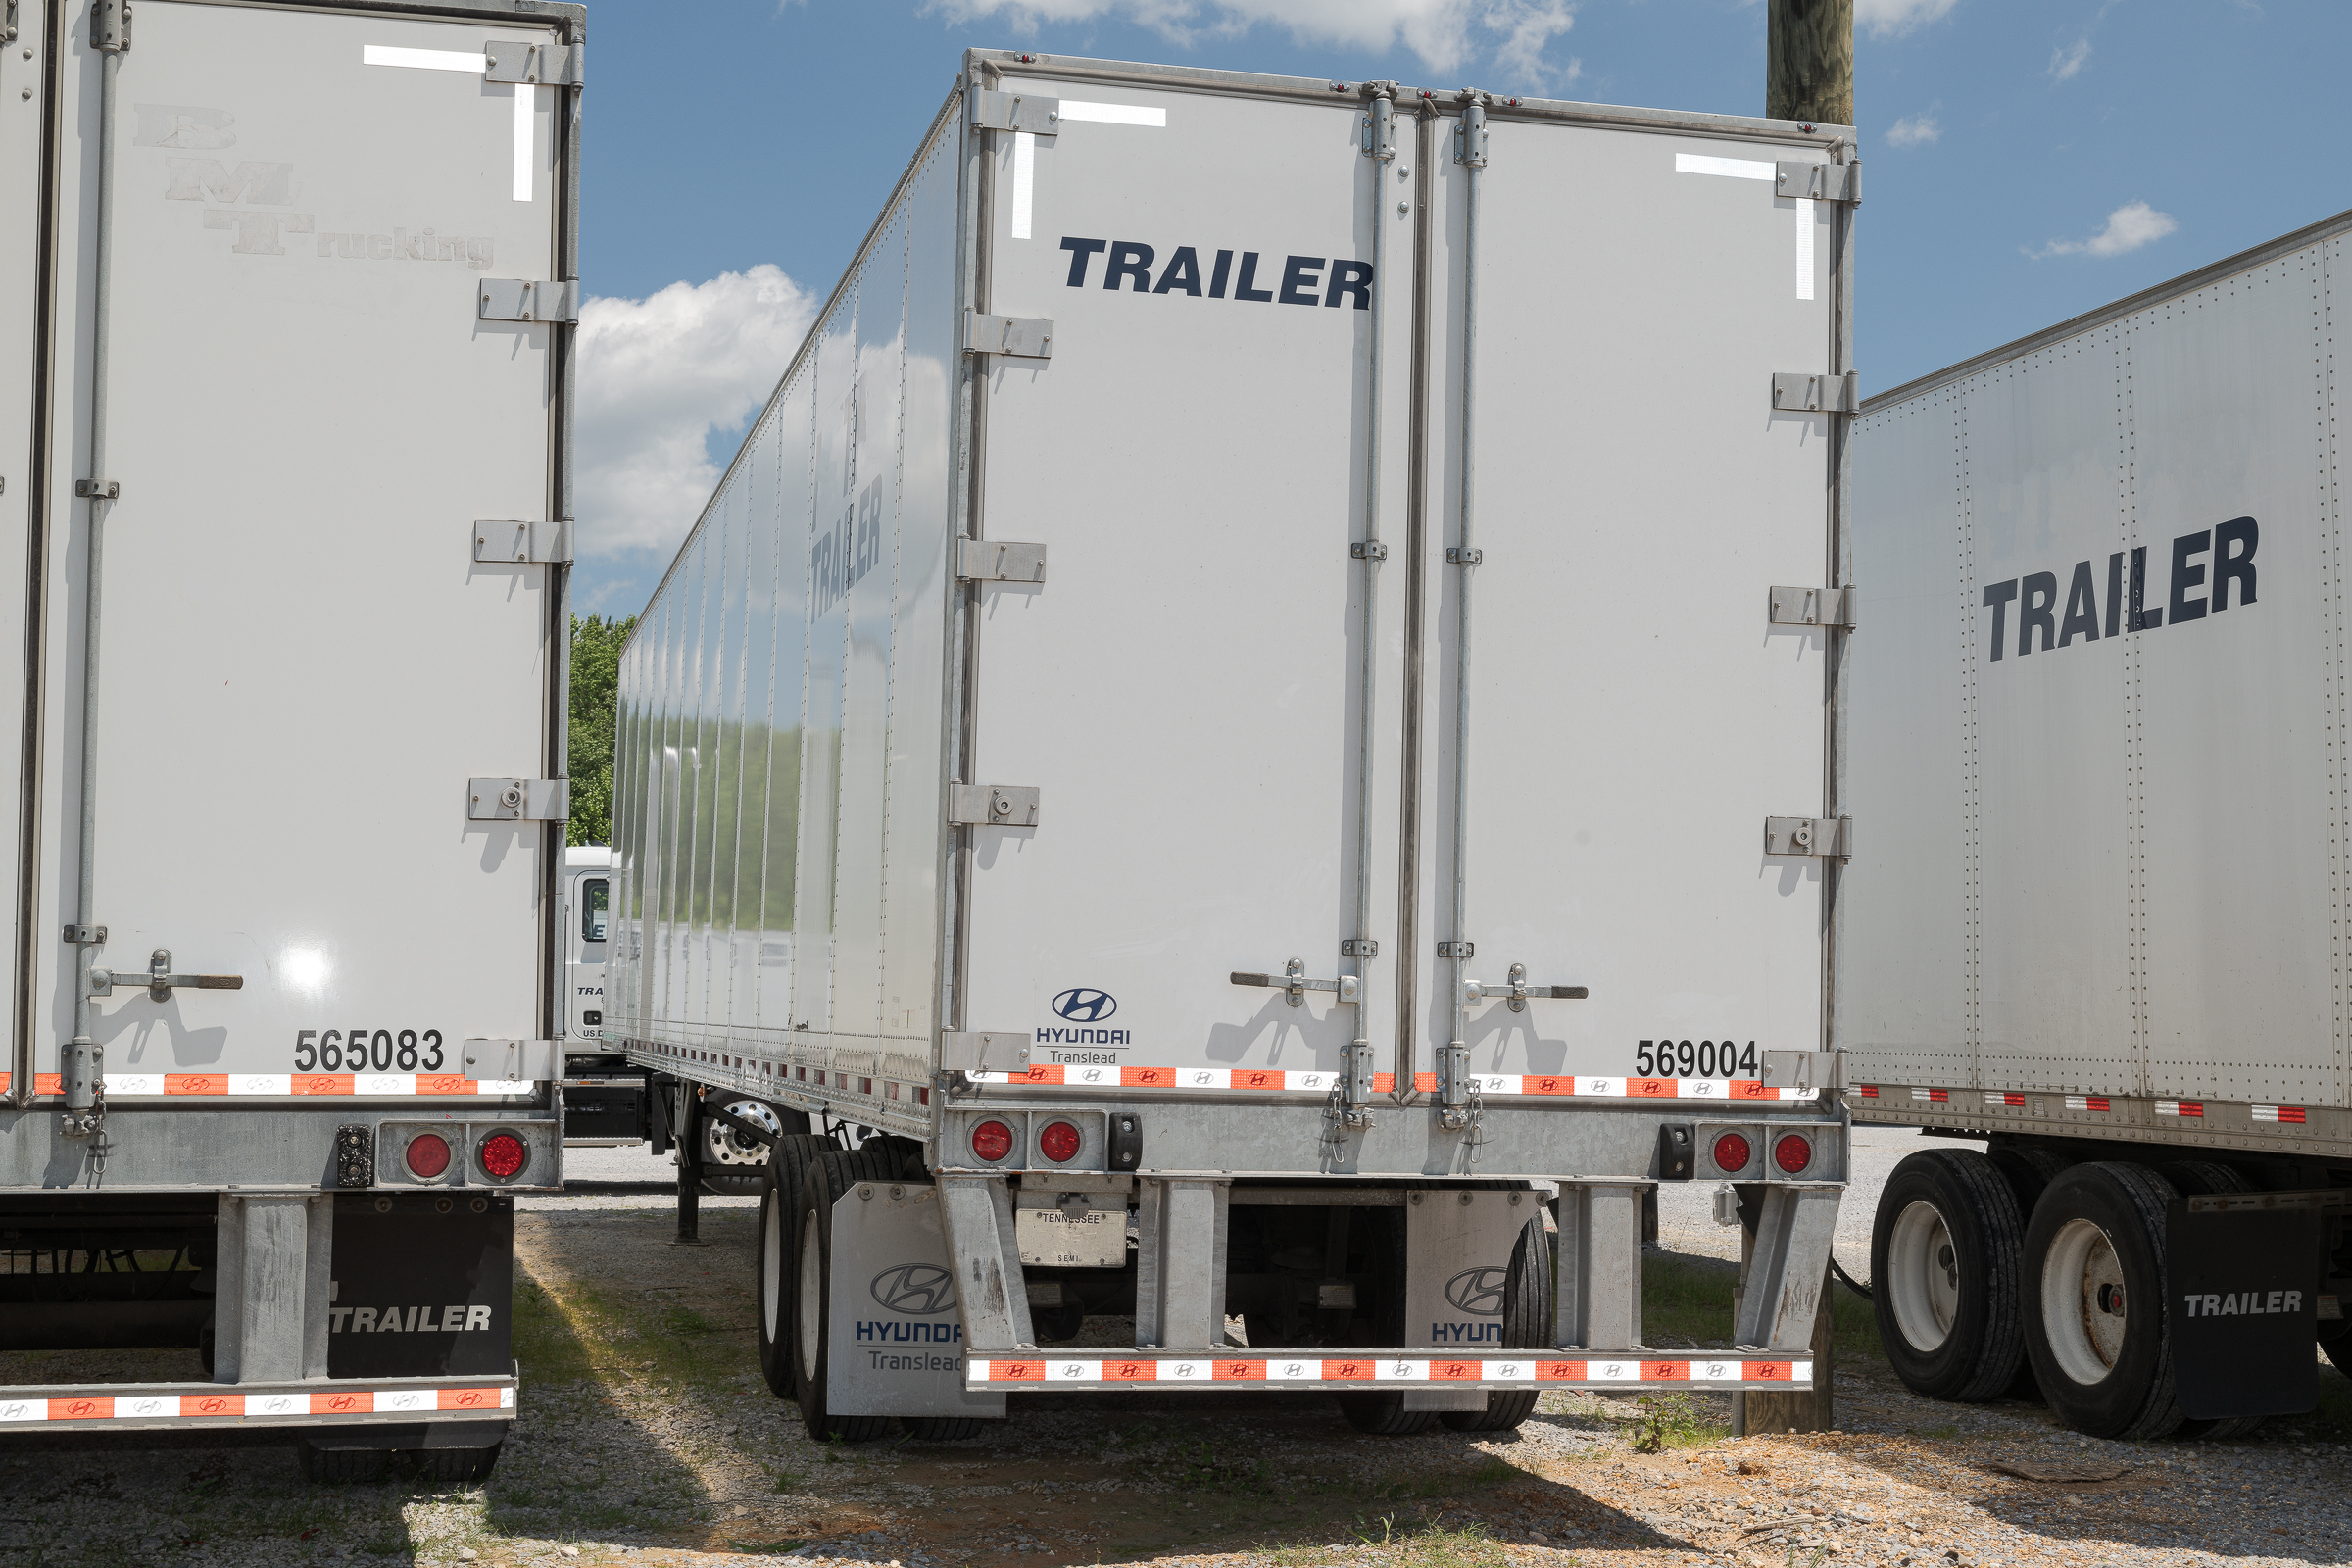
As required by Federal law, most trucks and trailers have retroreflective tape to enhance conspicuity at night. I’m sure you’ve seen the red and white pattern on the sides and rear of trailers.
Because I always use fill flash when photographing vehicles outdoors, light from the flash will reflect off the retroreflective tape even during the day. This effect can be seen on the rear of the trailers in this photo. [Click on the image to enlarge, then click on the back arrow to return to this post.]
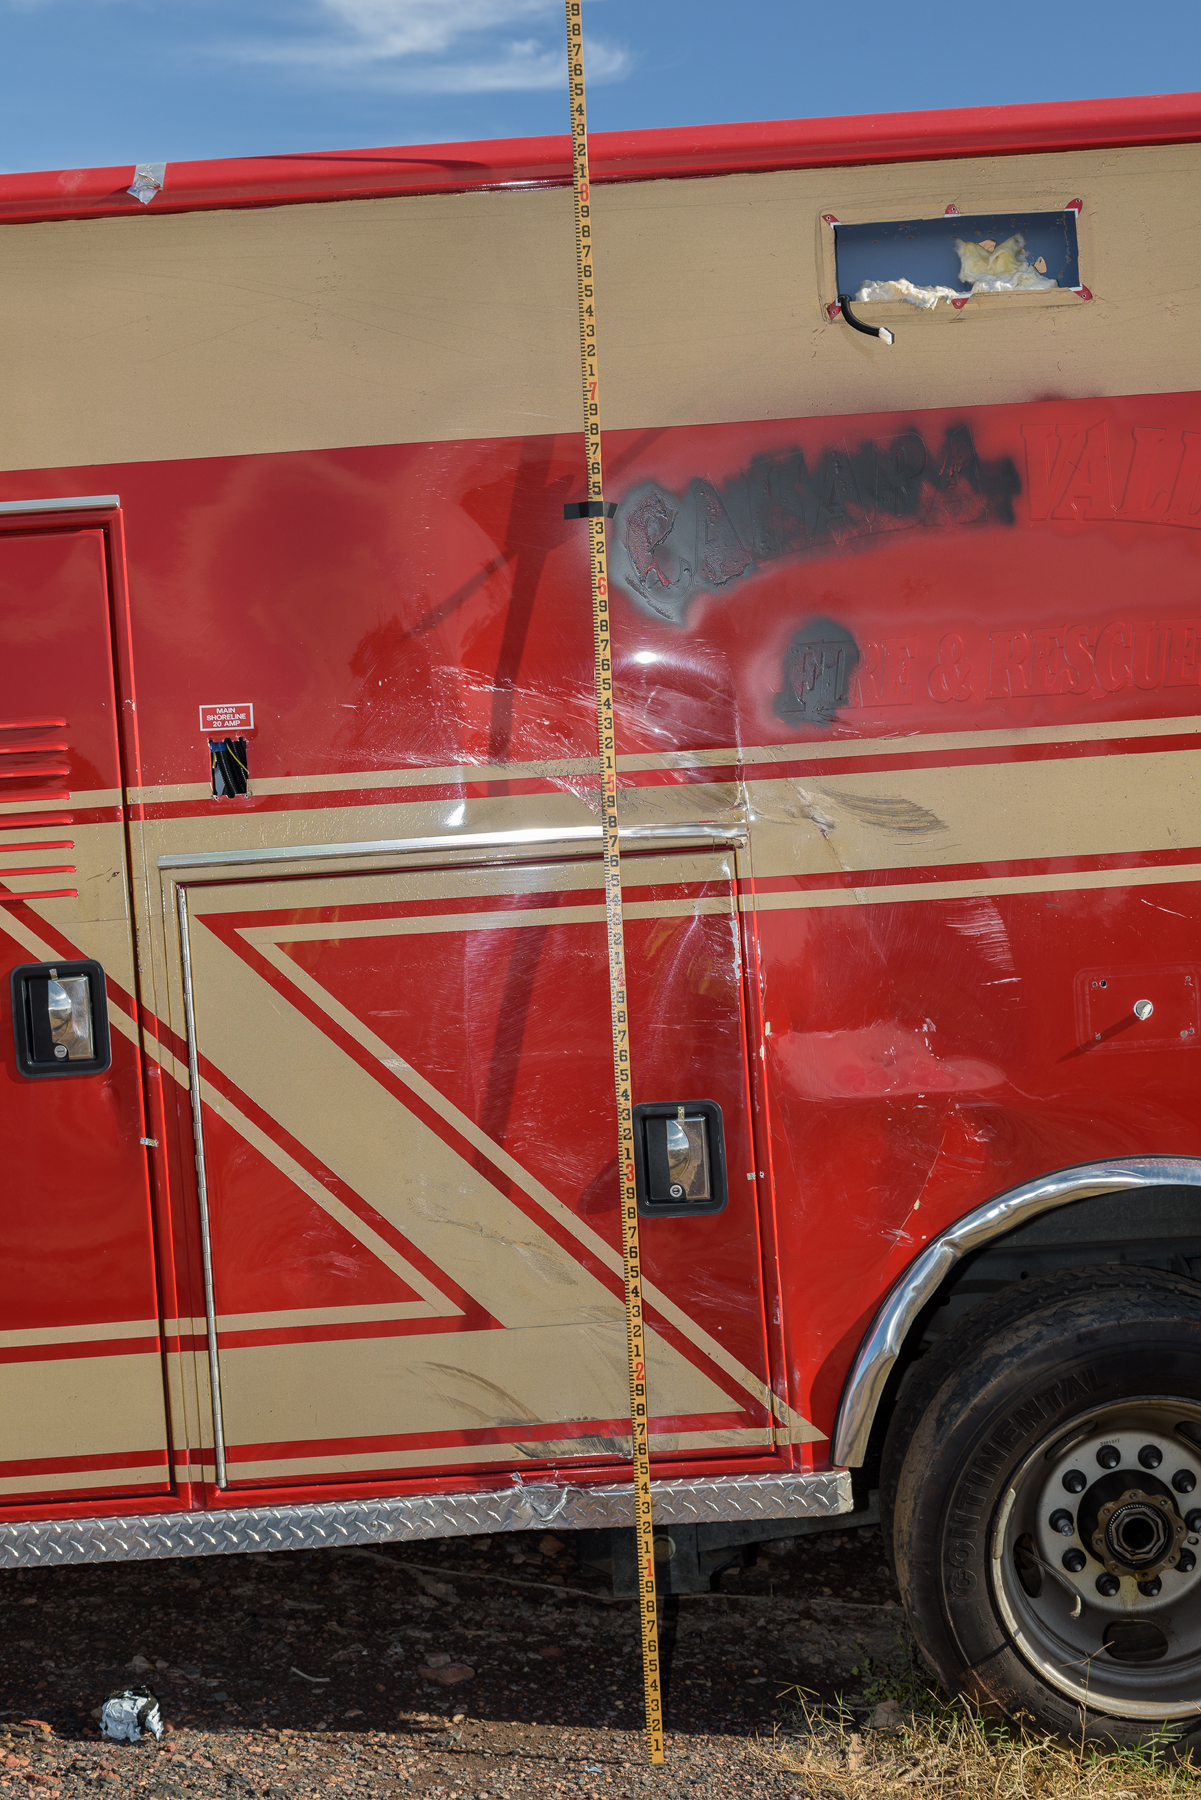
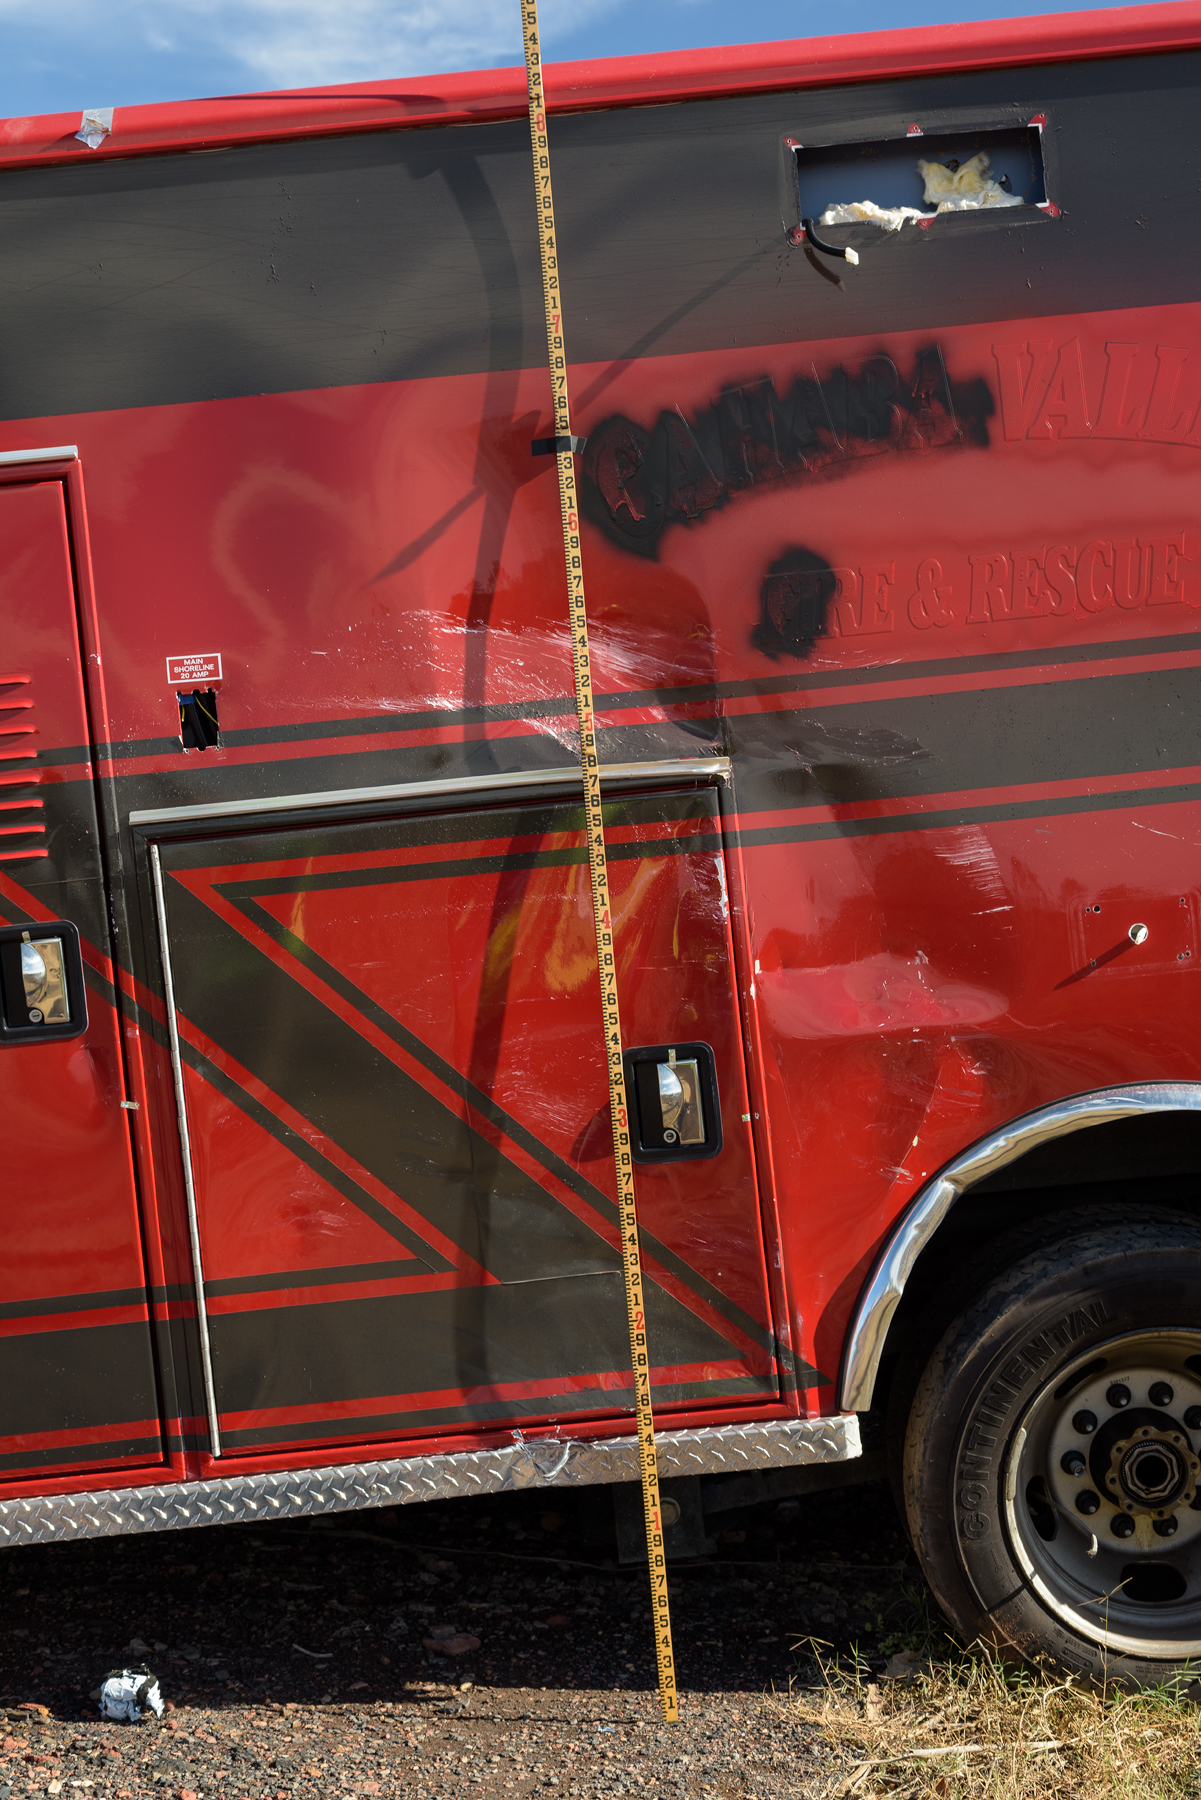
Here was the surprise. Several years ago, I was inspecting a red ambulance with black stripes using my usual polarizer and fill flash. When I checked out one image on the camera’s LCD, I thought either the camera malfunctioned, or I had inadvertently changed some setting. Instead of the black stripes I was seeing on the ambulance, they appeared gold in the photo I just made. [Click on the image to enlarge, then click on the back arrow to return to this post.]
I took a second shot, and it looked the same. Strangely, everything but the stripes looked normal in both photos, so it couldn’t be a camera setting.
I turned the flash off and made another photograph. With the fill flash turned off, the stripes looked just as I was seeing them with my eyes. [Click on the image to enlarge, then click on the back arrow to return to this post.]
Turns out it was black retroreflective tape that turned gold when light hit it. I had never seen or heard of that before. I ended up going back and making another set of images of the ambulance without flash. I sent both sets to my client.
Two takeaways here:
-1- Always check your images before you leave an inspection site. I typically review them during my inspections, particularly if the lighting is tricky or changing. It’s also a good idea to run through all of them quickly before leaving to ensure you haven’t missed anything. This is particularly true at inspections when clients or other experts are present. It’s easy to get distracted and forget to document something.
-2- It’s often best to make two (or more) sets of images if changes in lighting dictate.
I’m sure you’ve seen many photos like the one below. [Click on image to enlarge, then click back arrow to return to this post.]
What is the subject? The tire and wheel? The intruding part at the upper right (which was actually from an unrelated truck)? The gravel? Is there something important that I should be seeing in the gravel?
It was actually the tire and wheel. But if you draw a vertical line down the middle of the photo, almost the entire right half of it is unrelated to the subject.
In the image below, the tire and wheel are still featured, but now you can see how they relate to part of the truck’s frame rail and steering system, too. [Click on image to enlarge, then click back arrow to return to this post.]
This photo makes more sense and eliminates unnecessary and confusing elements. It’s easy to pay so much attention to your subject that you forget what it looks like in the frame. Make sure you haven’t included too much empty space or too many unrelated elements that are not only distracting and confusing, but look sloppy, careless, and unprofessional.
I posted an example earlier illustrating the effects of using a polarizer and a fill flash on a car in a junk yard. In this post, you’ll see the effect of a polarizer on a large, slab-sided vehicle like a trailer or an RV.
Many people believe that polarizers are only effective on sunny days, and when the sun is at a 90° to the camera lens. But as these examples will show, a polarizer is just as effective in multiple directions on a heavy overcast day.
These images will also show that, just as on sunny days, the polarizer eliminated different amounts of reflected glare depending on the angle of the camera to the RV. As you will see when you look through and rotate a polarizer, the glare effectively moves around the scene. It’s up to you to decide what is the most important part of your image, and to rotate the polarizer until you eliminate the glare or get it just where you want it.
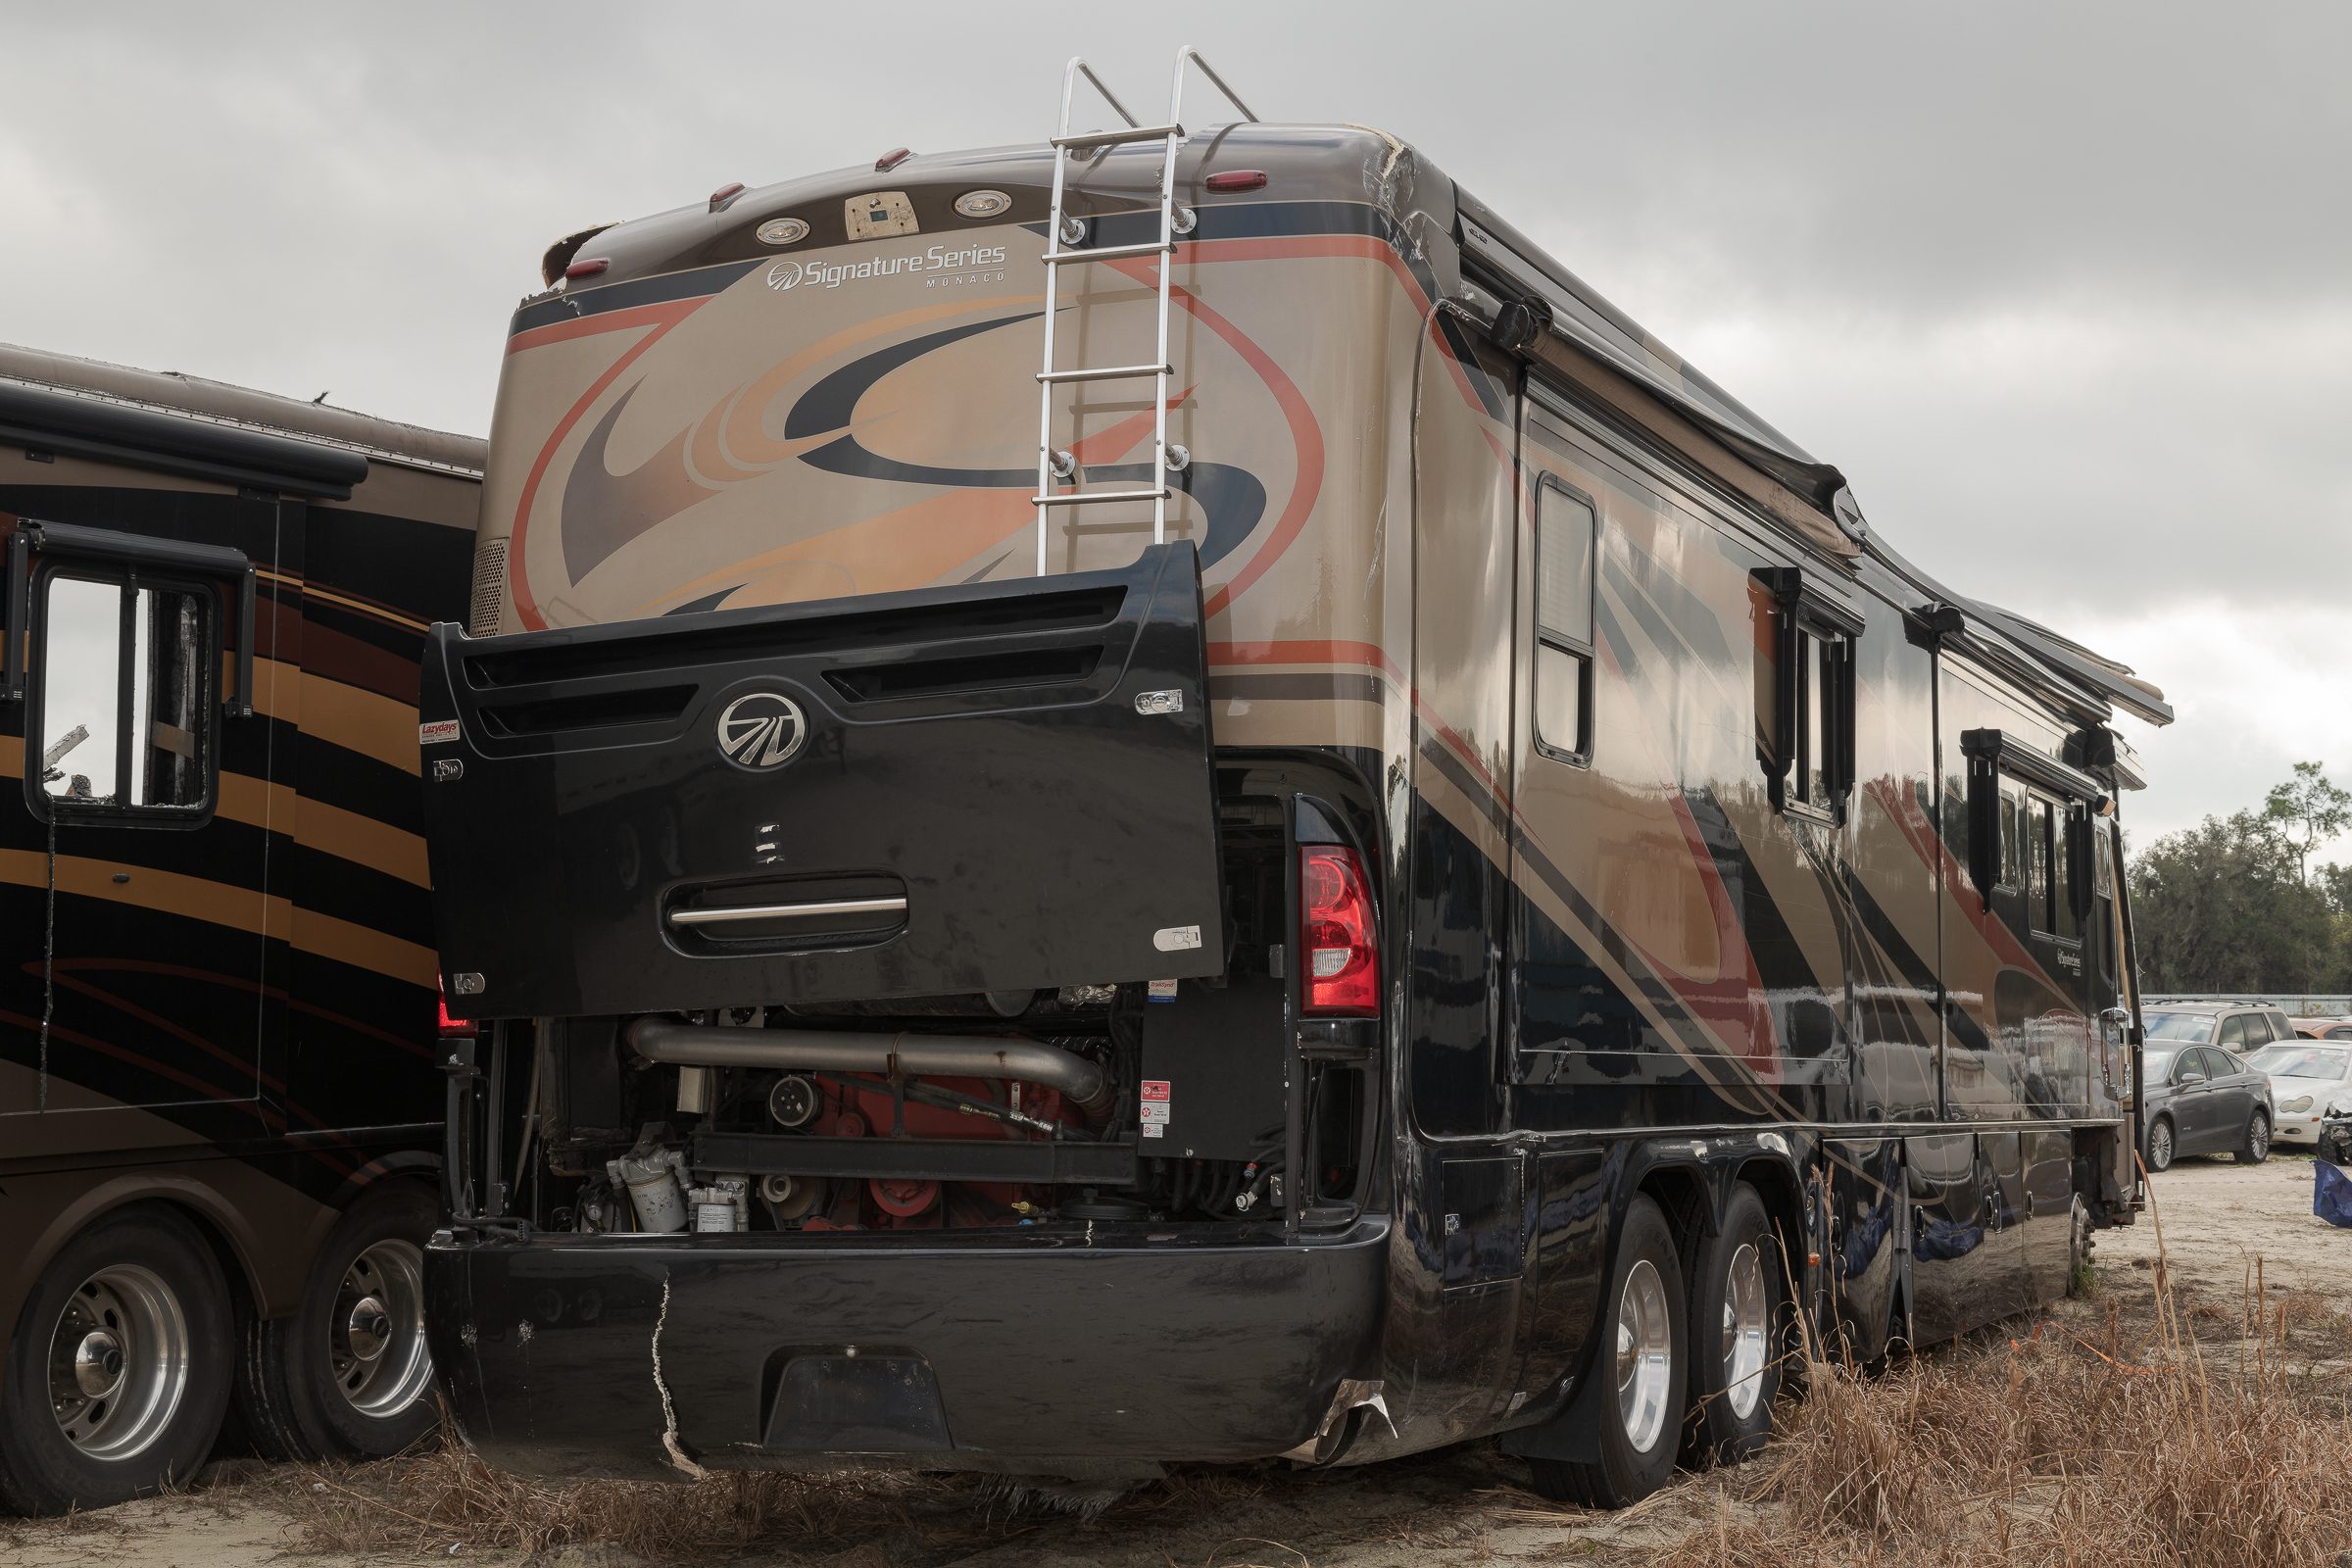
I inspected this RV in a salvage yard in Florida on a very cloudy day. [Click on the image to enlarge it, then click on the back arrow to return to the post.]
As with all of my vehicle photos, I used both a polarizer and a fill flash. In this image, you can see the thick overcast sky and the bright glare reflected on the side of the RV. I had the polarizer on my lens, but for illustration, I rotated it to minimize its effect. That’s what the RV looked like to the naked eye.
Keeping the camera and fill flash settings the same, I rotated the polarizer while looking through the viewfinder until I reduced the glare as I wanted. [Click on the image to enlarge it, then click on the back arrow to return to the post.]
As you can see, there was very little glare left along the side of the RV, which allowed its true colors to show through.
Moving around toward the 3/4 right rear position, I made another pair of photographs to illustrate the effect from a different angle. First the polarizer is minimized. Again, notice the reflections and the glare. [Click on the image to enlarge it, then click on the back arrow to return to the post.]
From this angle, I could not completely eliminate the glare regardless of how much I rotated the polarizer, so I chose the area where I wanted to eliminate the glare, and set it there. [Click on the image to enlarge it, then click on the back arrow to return to the post.]
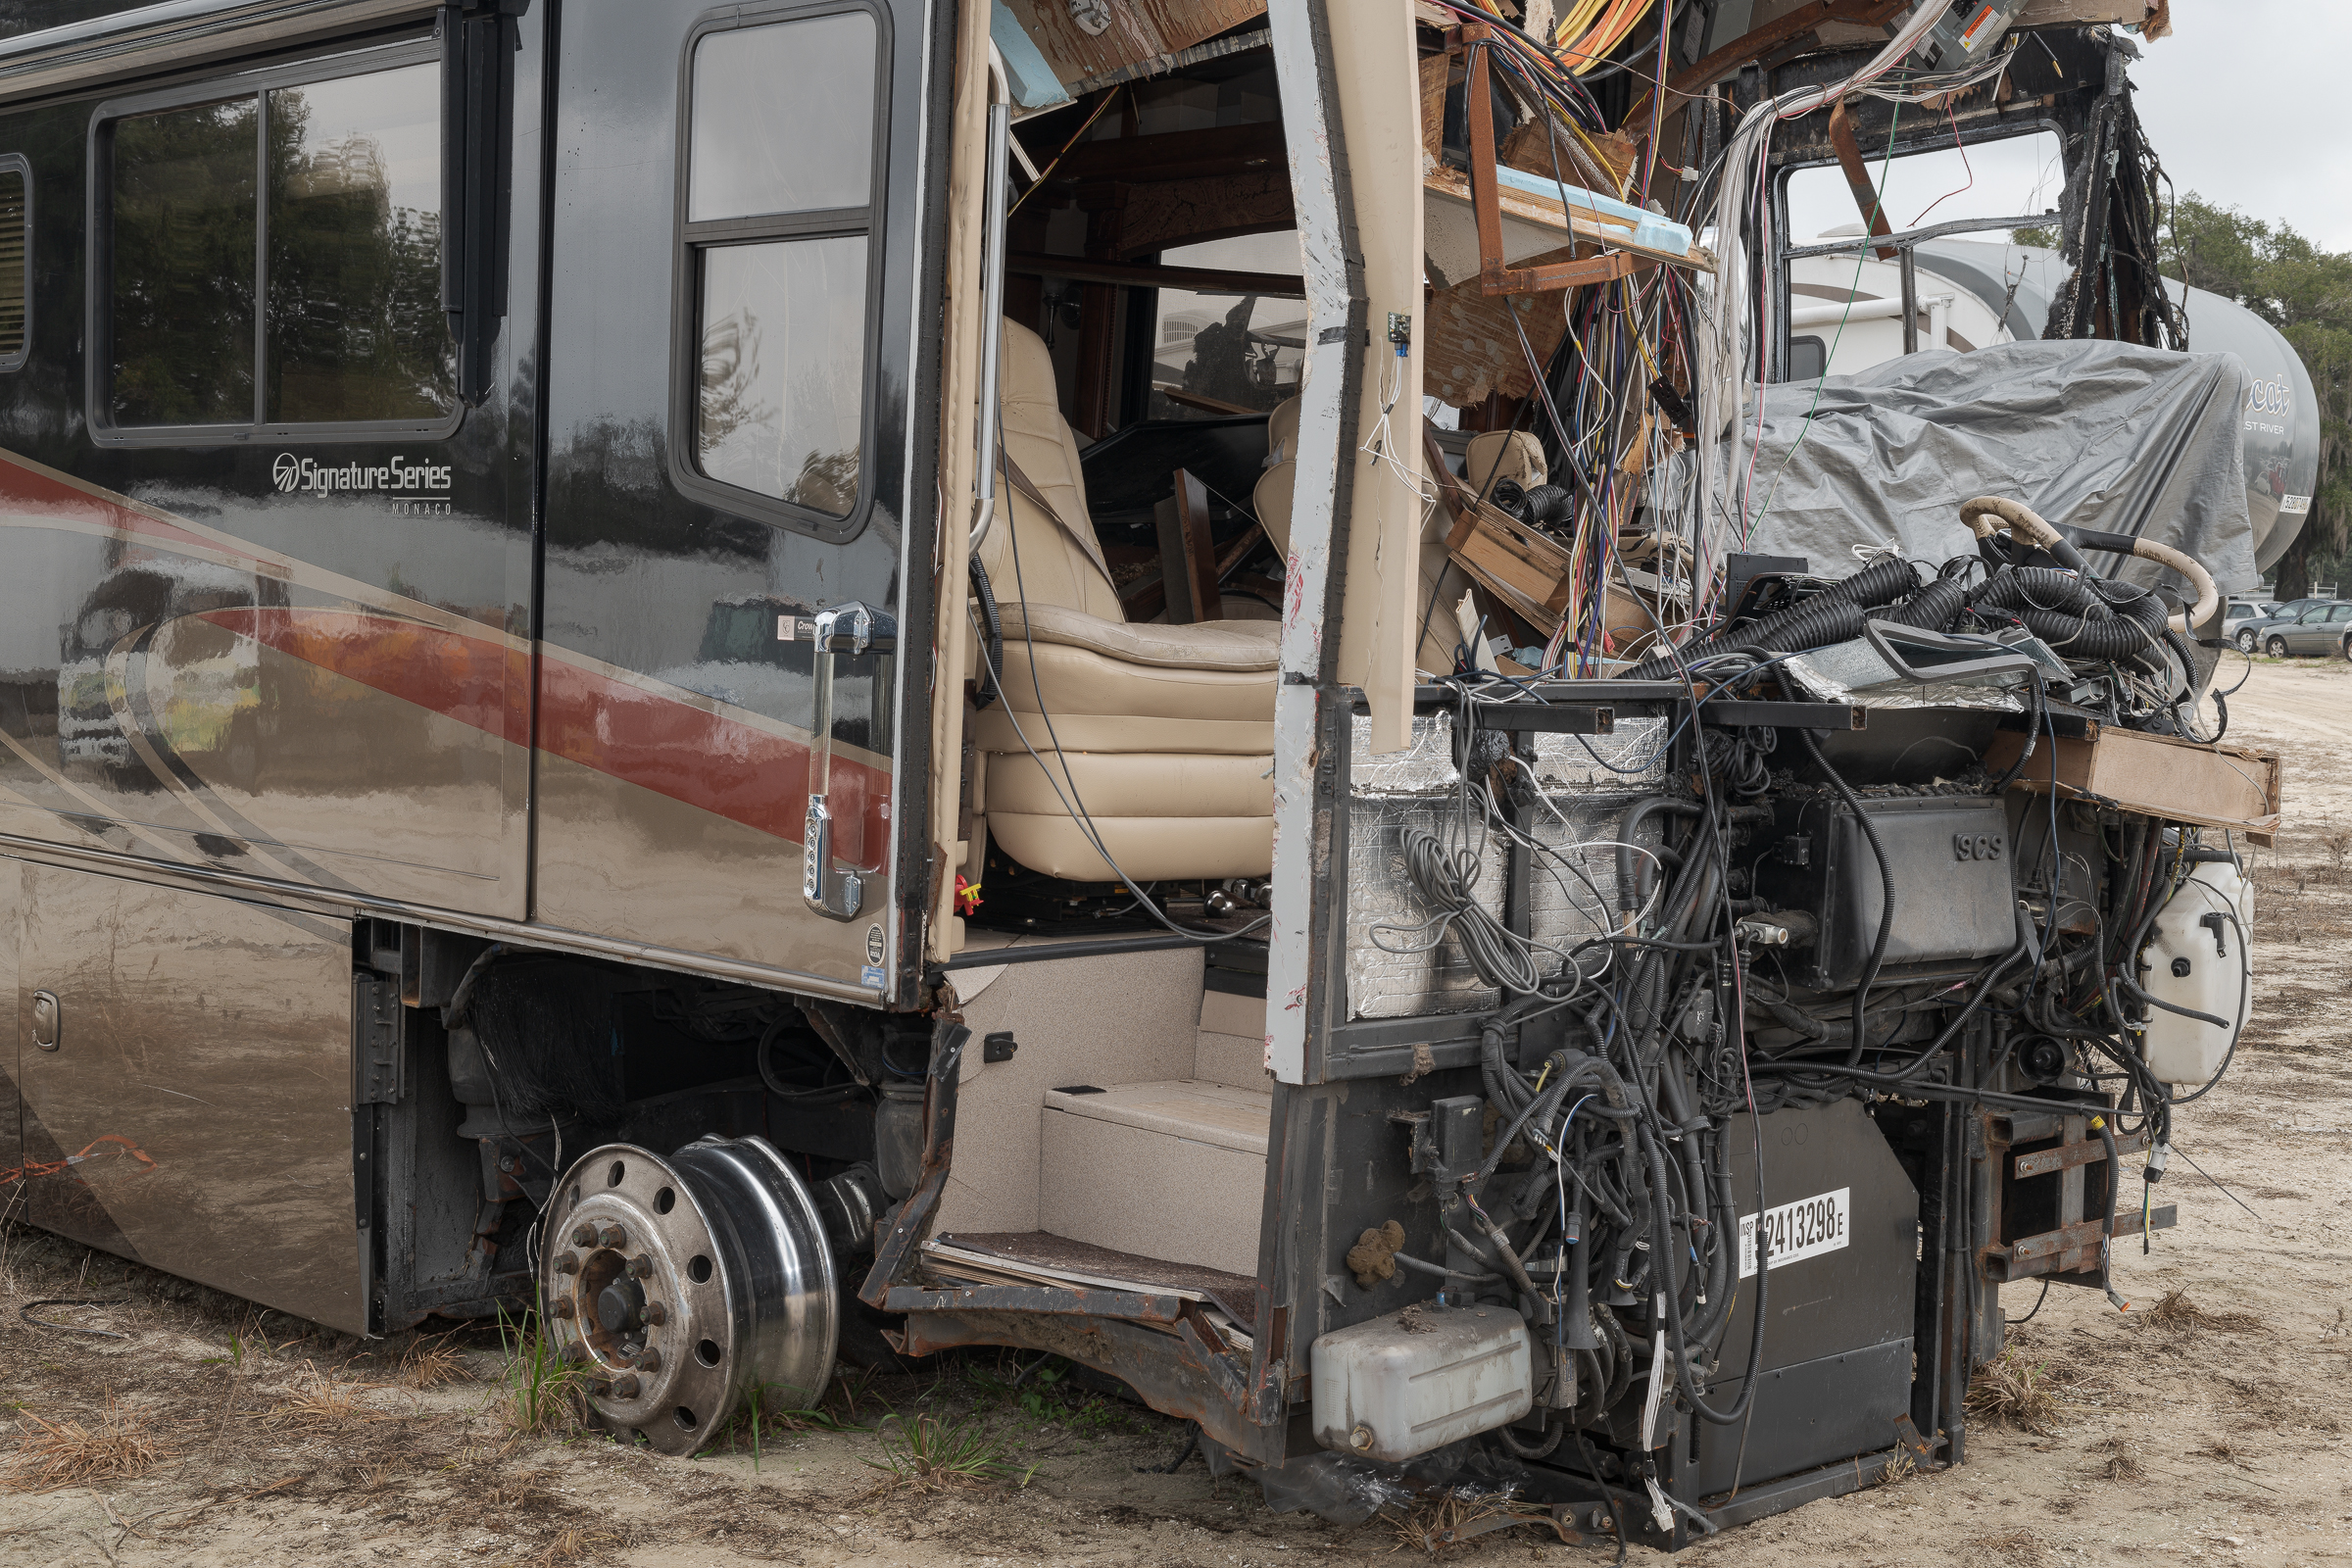
From the right front, the side of the RV was again partially obscured by glare. [Click on the image to enlarge it, then click on the back arrow to return to the post.]
From this angle, I was able to rotate the polarizer into a position that eliminated the glare on both the right side and the front end. Notice how you can even see through the side windows now. [Click on the image to enlarge it, then click on the back arrow to return to the post.]
Here are the takeaways:
-1- Use a polarizer when you want to eliminate reflected glare off of vehicles.
-2- Use fill flash with a polarizer to bring out detail in vehicle photos.
-3- Polarizers are effective on overcast days when light is scattered everywhere. Polarizers are not just for sunny days.
-4- Polarizers can be effective at angles other than 90° to the light source.
-5- The only way to determine the best setting for a polarizer is to rotate it until it gives you the effect you want.
-6- Last but most important, you MUST rotate your polarizer before each shot to get the desired effects.
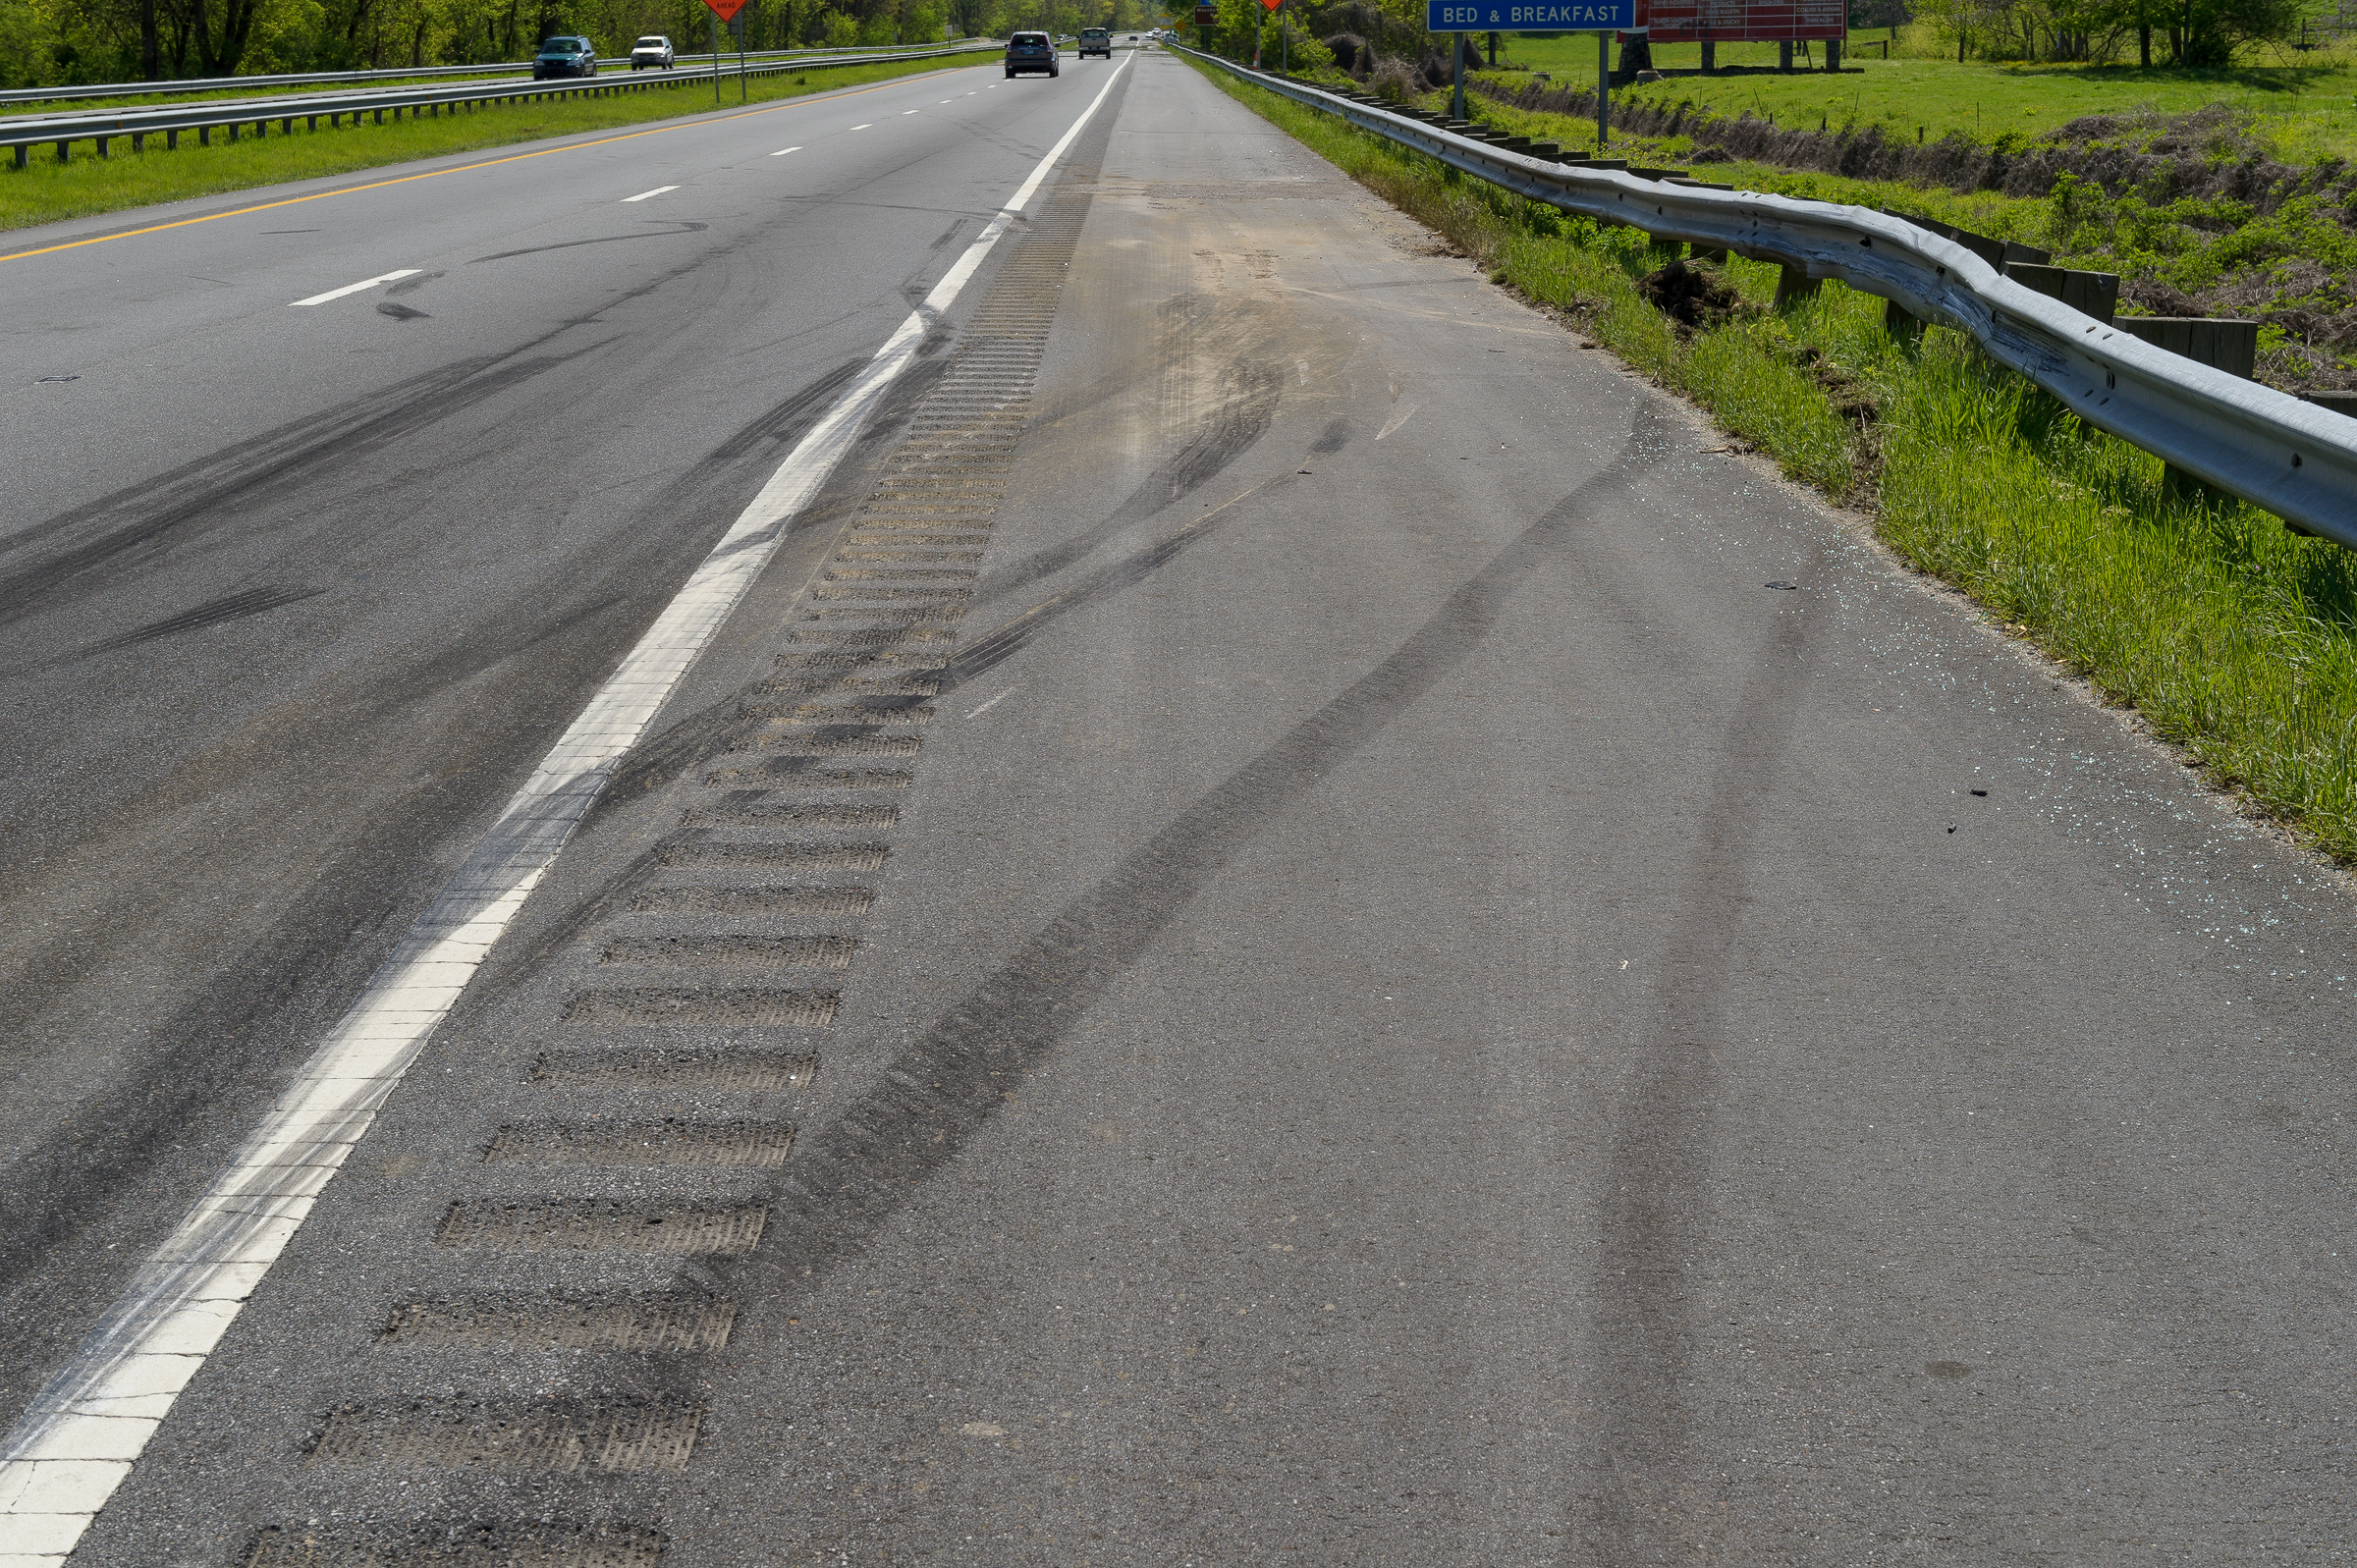
In a post last year, I showed an example illustrating the importance of using a polarizing filter when photographing skidmarks at a wreck site. As you rotate a polarizer while looking through it, you can watch the glare either move or disappear entirely, depending on the subject and the angles involved.
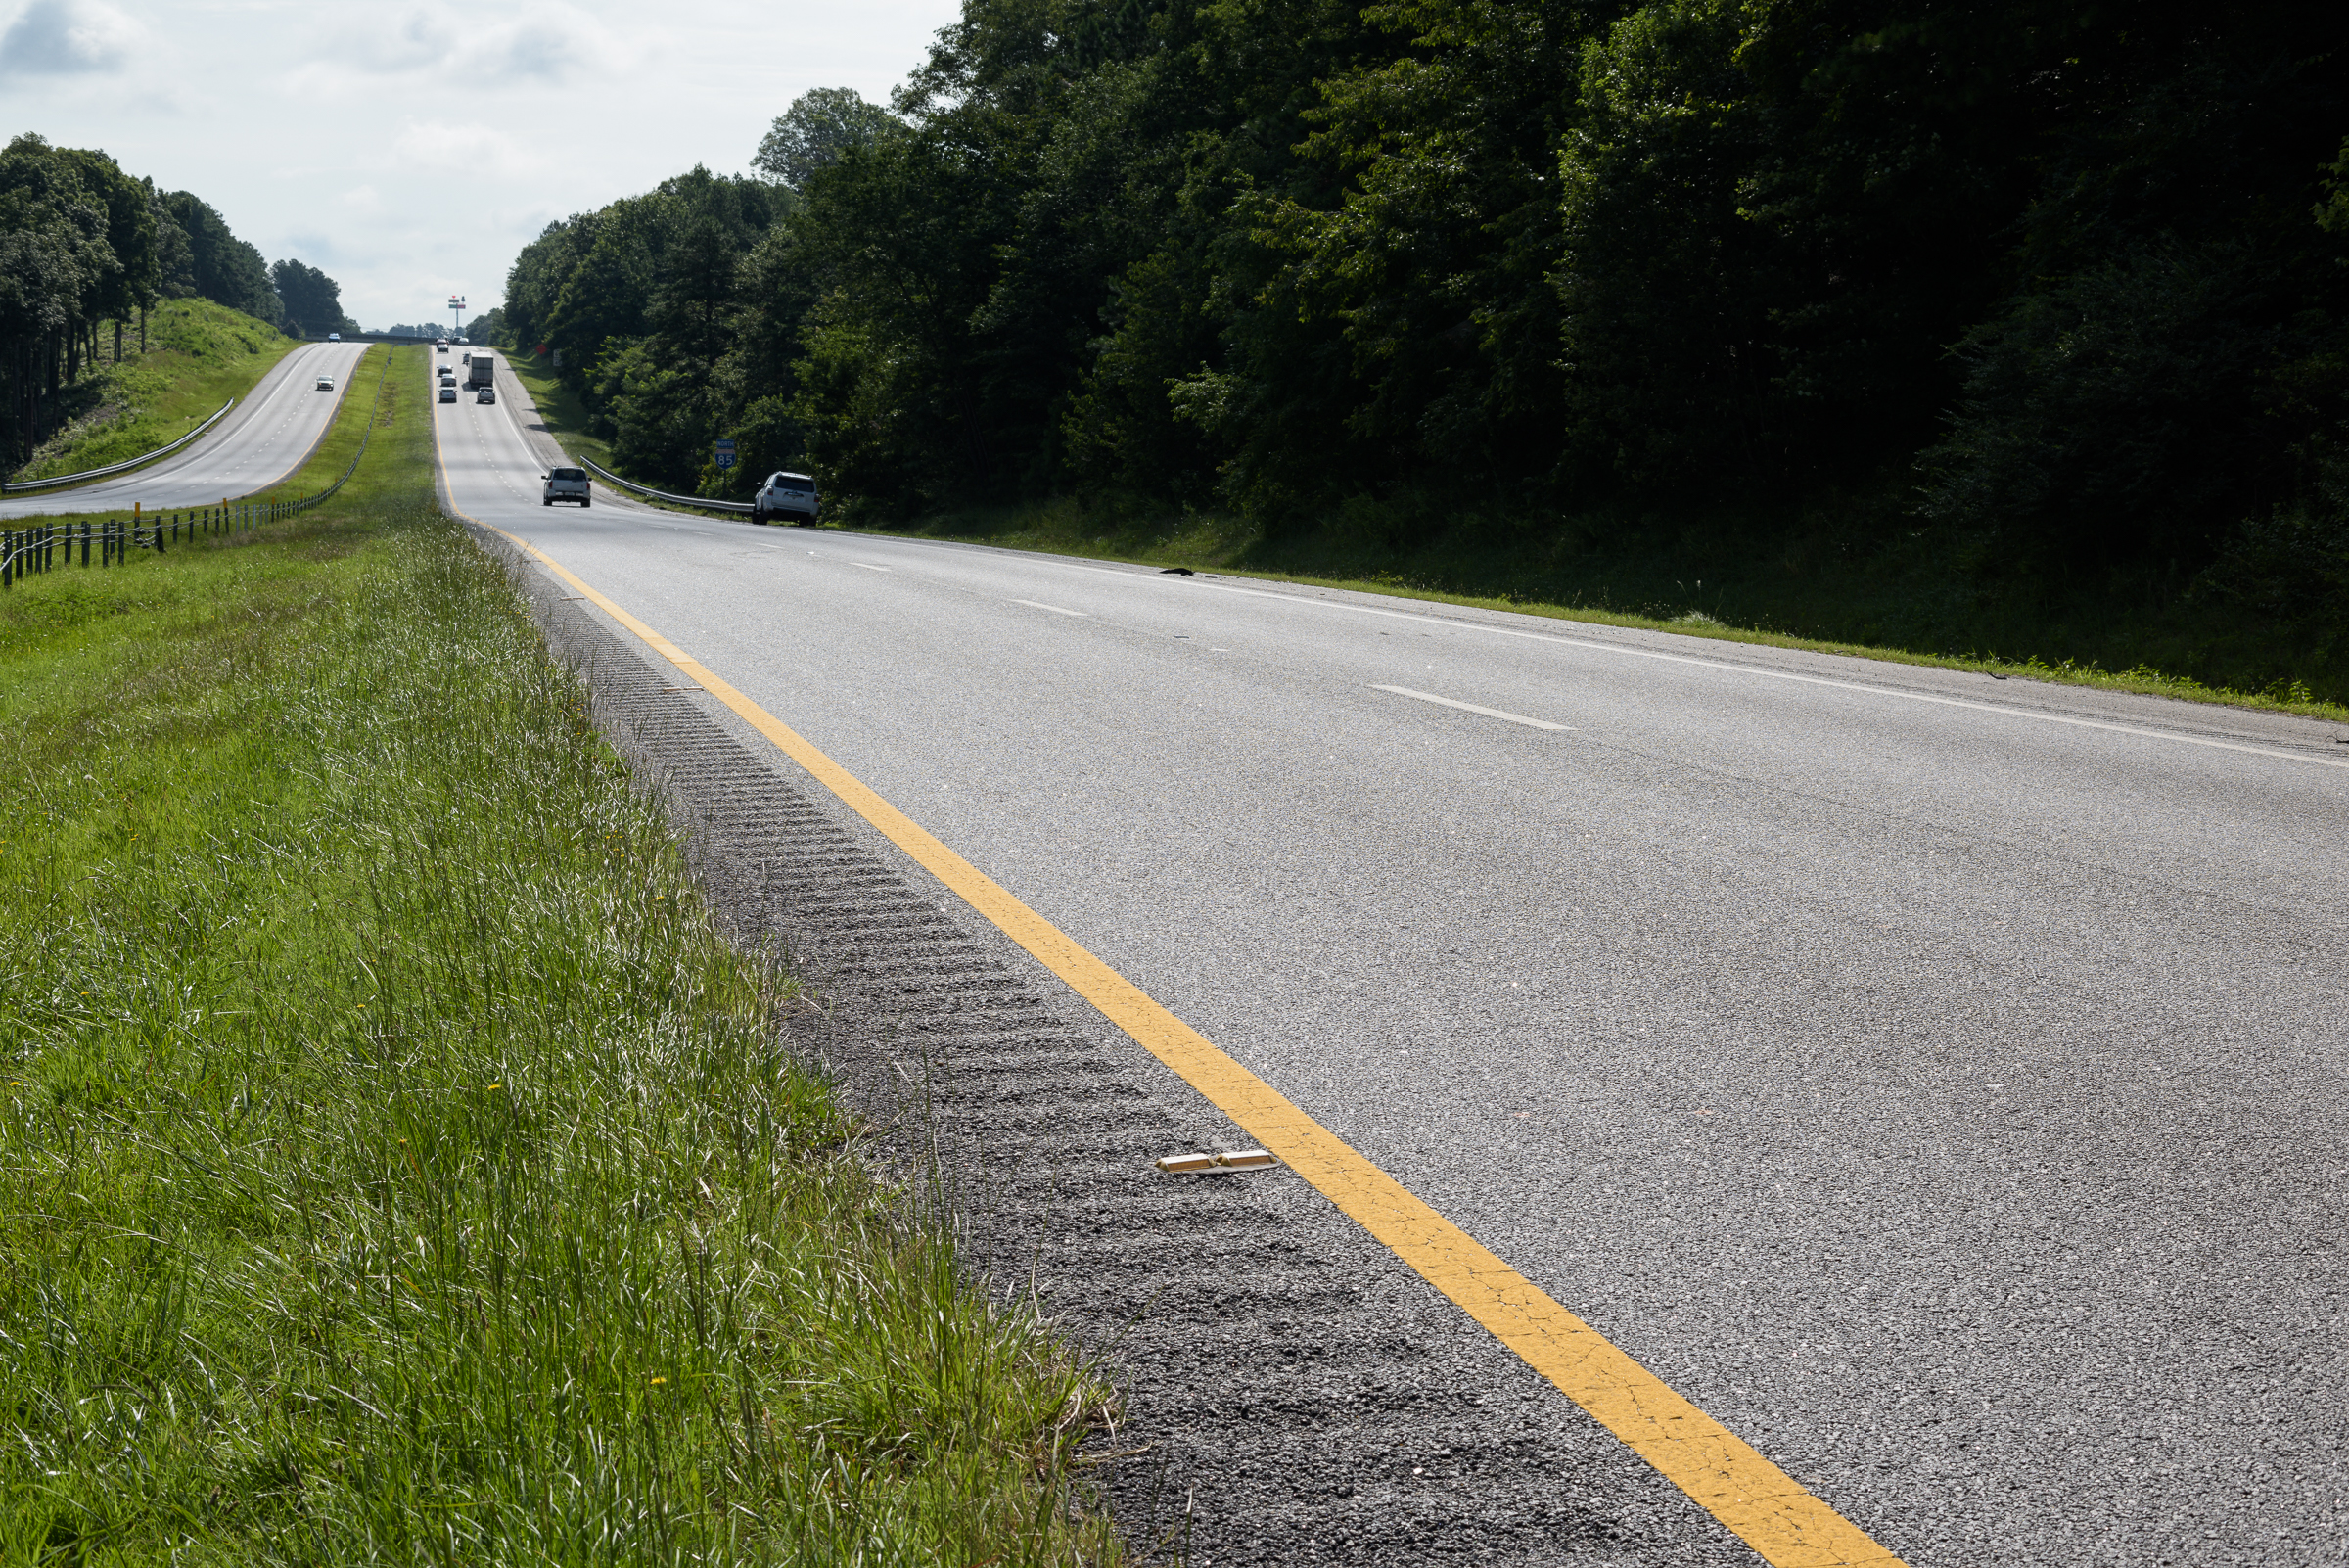
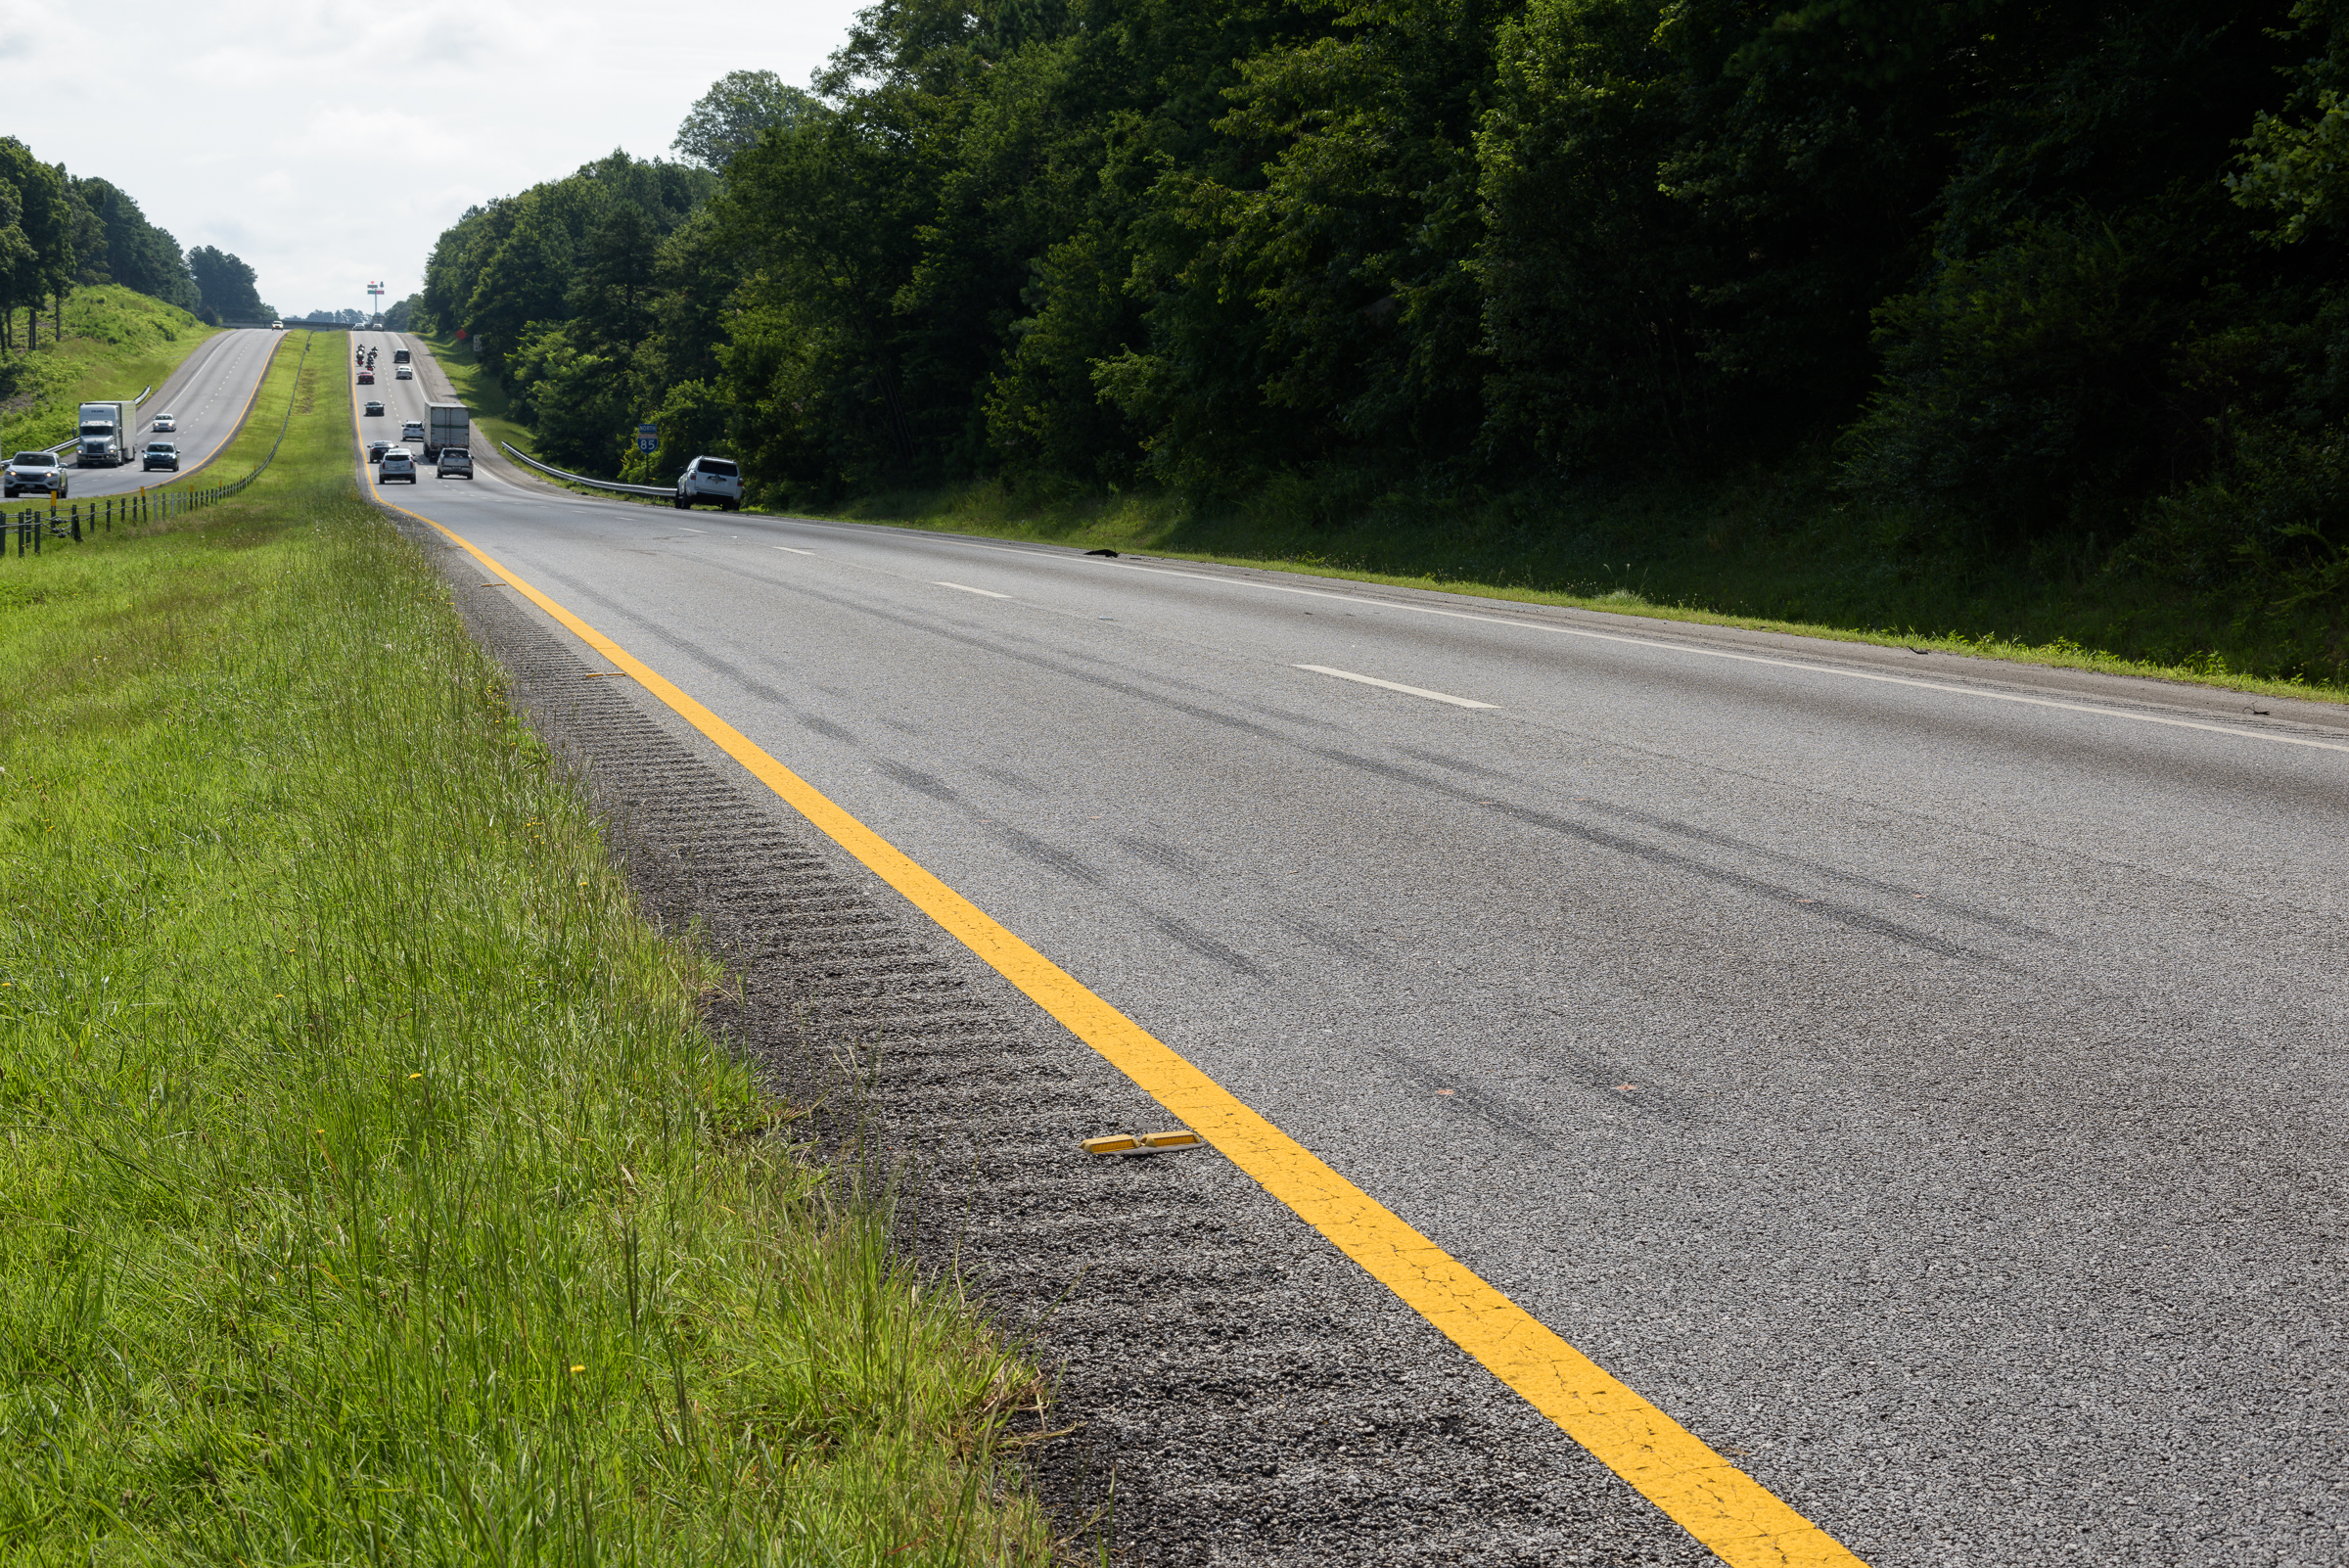
Below is a photograph of two lanes on an Interstate that don’t appear to have any tire marks. (Click on photo to enlarge, then click back arrow to return to post.)
No tire marks were visible to the naked eye either, but they could be seen through polarized sunglasses.
Just adding a polarizer on a lens might not have any effect until it is rotated. It cannot be said enough: You must rotate a polarizer before every shot if you’ve moved the camera even a little bit. Fortunately, the effect is easy to see looking through the filter before putting on to your lens, or through the viewfinder or when using Live View once it’s on the lens.
Here is the same view using a polarizer rotated for maximum effect (Click on photo to enlarge, then click back arrow to return to post.):
In this example, if I hadn’t used a polarizer, I couldn’t have captured the skidmarks shown here. Also notice there is now enough contrast that you can see the police paint marks in the tire marks.
Most polarizers lose between one and two stops of light.Because polarizers are dark filters—like polarized sunglasses—you must compensate for that loss of light by increasing your exposure by opening your aperture (losing depth of field) or slowing your shutter speed (making it harder to handhold) or raising your ISO sensitivity (adding noise and reducing dynamic range). A one-stop polarizer costs more money, but it is money well spent—especially when light levels are low (like on overcast days and near sunrise or sunset). Note that since I always use a tripod, I always choose a slower shutter speed, since the camera will remain steady no matter how slow the shutter speed is.
Next to a camera and lens, a tripod and a polarizer are your two most important tools for outdoor photography, especially accident sites and buildings.