Unwanted Color Cast When Shooting Through A Windshield

Photographing through a windshield for a driver’s eye view or for an accident site drive-through usually results in an unwanted color cast in the resulting images, regardless of your white balance (WB) setting. It can be most noticeable in Auto WB. This is due to the tint of the windshield. (Click on the images to enlarge, then click on the back arrow to return to the post.)

Auto Sun White Balance with Overcast Skies (ZEISS 50mm f/2 Macro with polarizer on Nikon D850.)
If you shoot raw files, you can correct this in your raw processor if there is a neutral-colored item in the scene. But if you’re shooting in JPEG, or if you’re taking a series of images while driving through a scene, you’ll want to get it right in the camera. WB can be difficult to adjust later, especially if there is no neutral tone in your image.

Setting a custom white balance, called Preset white balance on Nikon, varies from camera to camera, but is usually pretty straightforward. On Nikon, you enter the Preset white balance menu, point your camera toward a white or neutral source, and push the WB button. A custom WB is now set until you change it. With Canon, there is an extra step. After entering the custom white balance menu, you take and save a photograph of your neutral source. You then tell the camera to use that photograph for your WB for subsequent images.

If you’re shooting through any glass, your white or neutral source needs to be on the other side of the glass from your camera, and generally in the same light as the scene you’re about to photograph. This can be tricky when you’re by yourself or alongside a busy road.

Both my trucks are white, so I point my Nikon toward their hoods (as long as they’re roughly in the same light as the scene I’m shooting), and press the WB button in PRE mode to save the new preset. Now I have correct colors for my scene. I can then drive down the road, and all the images I capture will have a consistent, correct white balance.

Preset WB Off White Hood with Overcast Skies (ZEISS 50mm f/2 Macro with polarizer on Nikon D850.)
What if you’re vehicle isn’t white? In a case like the scene shown here, you can set your custom white balance using the road (or a nearby sidewalk), as long as you can fill a good part of the frame with it. You might have to use a telephoto lens or zoom to isolate sections of your neutral source, but that will still give you a good custom WB.

Four more tips:
-1- DON’T DO THIS WHILE YOU’RE DRIVING!!! Like shown in these photos, set your custom WB from the shoulder of the road or even from a nearby parking lot.
-2- If you are using a polarizer, make sure you put the polarizer on and rotate it to get the effect you want before you set your custom WB.
-3- Don’t set your custom WB while you’re standing outside of a vehicle, then get in and start shooting through the windshield. The WB won’t be correct, and you’ll be back to your original problem.
-4- Don’t forget to change your WB after you’re done shooting through your windshield, or your subsequent images will have an undesirable color cast.

Here are examples in full sun:

Auto Sun WB in Full Sun (ZEISS 50mm f/2 Macro with polarizer on Nikon D850.)
Preset WB in Full Sun (ZEISS 50mm f/2 Macro with polarizer on Nikon D850.)
Like everything in photography (and in life, for that matter), it may take a little practice before this becomes second nature. Make sure you practice setting your custom WB through your own vehicle’s windshield before trying it for the first time at an accident site.

Enhancing Faded Police Paint Marks at Accident Sites

At times, when you get to an accident site, the paint marks made by investigating officers have faded such that they don’t readily show up in photographs. [Click on image to enlarge, then click back arrow to return.]

Police Paint Marks as Found. (ZEISS Milvus 50mm macro on Nikon D850.)

While these can still be documented and measured, it would be helpful to show them more distinctly in your photographs.

You can easily enhance paint marks in Photoshop using a mask on a Hue Saturation layer:
-1- Make a loose selection around the marks with the lasso tool.
-2- Feather the selection.
-3- Select the paint color using the Targeted Adjustment Tool.
-4- Increase saturation until the paint marks are distinct. In this case, I increased the saturation of the red channel to 100%. [Click on image to enlarge, then click back arrow to return.]

Police Paint Marks – Enhanced. (ZEISS Milvus 50mm macro on Nikon D850.)

To ensure I didn’t enhance the yellow lane stripes, I added them to the mask by simply painting out areas I didn’t want enhanced using a feathered black brush.

I only shoot raw images, so I can’t save over my original image. When making adjustments with layers, like these localized saturation enhancements, I save the image with all its layers and masks as a native Photoshop PSD file. That way, I always have the original image I made, and can document that I have only enhanced, and not altered, the photograph.

Before Safety Standards – Steering Column

In November 2017, I returned to a photographer’s and car enthusiast’s paradise: Old Car City USA in White, GA: Old Car City USA. It’s a sprawling former junkyard through trees and pine needles with about 4,000 cars and nearly seven miles of trails. They no longer sell parts there, but it now exists as an outdoor museum to old, discarded, sometimes wrecked cars, trucks, and buses. As an automotive engineer who has spent more than 35 years dealing with tires and automotive safety systems, Old Car City USA is a gold mine for experiencing the history of automobiles. As a photographer, Old Car City USA is a never-ending source of vehicle, abstract, and macro detail shots. The ever-changing light through the trees keeps the photography interesting and challenging throughout the day.

We all know about steering columns that collapse and move so they don’t impale the driver. But that wasn’t always the case. Here’s an example of a steering wheel and steering column that would have pinned the driver in position before impaling him or her as the column was driven rearward in a frontal collision. (Click on image to enlarge, then on back arrow to return to post.)

Steering Column Spear at Old Car City USA, White, GA. (ZEISS Milvus 25mm f/1.4 on Nikon D850.)
Thank goodness for the current designs!

This photo also shows a tire inflation plate for 5.0×15 tires showing recommended air pressures of 15 psi front and 23 psi rear. Even for those old bias tires, those pressures seem unbelievably low compared to what we see today. Here is that plate more closely. (Click to enlarge, back arrow to return.)

Tire Pressure Plate at Old Car City USA. (ZEISS Milvus 100mm f/2 macro on Nikon D850.)

A Dark Cover-up

When I travel for a work or a personal photography trip, I either drive my Toyota 4Runner TRD Pro or rent an SUV so I can easily access my gear in the field. Years ago, my friend and mentor Bruce Dale suggested a cheap, easy way to keep prying eyes from cargo and luggage in the back. It’s a black flat bed sheet. I bought two of them at Walmart; one for my 4Runner and one to keep packed in my travel bag. They’ve become the black sheets of my family. (Sorry, couldn’t resist.) (Click to enlarge, then back arrow to return.)

Cover your gear.
If I’m going to be parking any distance from the inspection site, I try not to keep valuables in my vehicle, if possible. But I’ll still cover even extra jackets, water, snacks, or empty camera bags or luggage. I find the black sheet most useful when going to and from my shooting or working location, at airports, restaurants, and hotels, and when stopping at any store or gas station. It’s cheap, simple deterrence. I even use it day-to-day when I’m at home.

Effects of Wide Angle Lens on Vehicle Photo

Often, a vehicle we need to photograph will be crammed in between other vehicles or in a small garage or storage area. I’ve encountered the same problem when trying to photograph a whole tire in a small conference room. A wide angle lens then becomes necessary to capture an overall photo in a single frame. But doing so will inevitably cause the vehicle or tire to appear distorted. (Click on image to enlarge, then click on back arrow to return.)

Van with Normal 50 mm Lens. (ZEISS 50 mm f/2 macro lens on Nikon D810.)
Van with Wide Angle Lens. (ZEISS 25 mm f/2 lens on Nikon D810.)
These two images show the same van, but the top one was made with a ZEISS 50 mm lens, while the bottom one was with a ZEISS 25 mm lens. To fill the frame with the van, I made the photo with the 25 mm lens much closer to the van than with the 50 mm lens. The photograph made with the 25 mm lens looks like the van was the long wheelbase version while the 50 mm photo looks like it had the short wheelbase. This closer distance to the subject caused the wide angle lens to stretch the appearance of the van.

The best solution is to try to capture as much of the subject as possible with a lens as close to a 50 mm “normal” lens as possible. This might entail getting a higher vantage point, or shooting between obstacles. When that’s not possible, take the wide angle shot, then normal lens shots of parts of your subject.

Other effects of using wide, telephoto, and normal focal lengths for vehicles, accident sites, and for tires will be discussed in future posts.

Out of Service (OOS) Brake Defects and Brake Force Calculations

Various CVSA (Commercial Vehicle Safety Alliance) Out of Service (OOS) violations may be found when inspecting heavy trucks. These can be maintenance or safety items that fail to meet the criteria in Appendix G of Subchapter B of the FMCSR (Federal Motor Carrier Safety Regulations) (40 CFR §396.17). This post will focus on brake issues only.

CVSA uses the term “defective” to denote a brake condition that does not meet specific criteria. CVSA declares a vehicle OOS if twenty percent of the brakes are defective. A common three axle tractor with a two axle semi-trailer will have ten brakes total. Twenty percent of ten brakes means the truck would be put OOS if two brake defects were found. (Click on image to enlarge, then click on back arrow to return.)


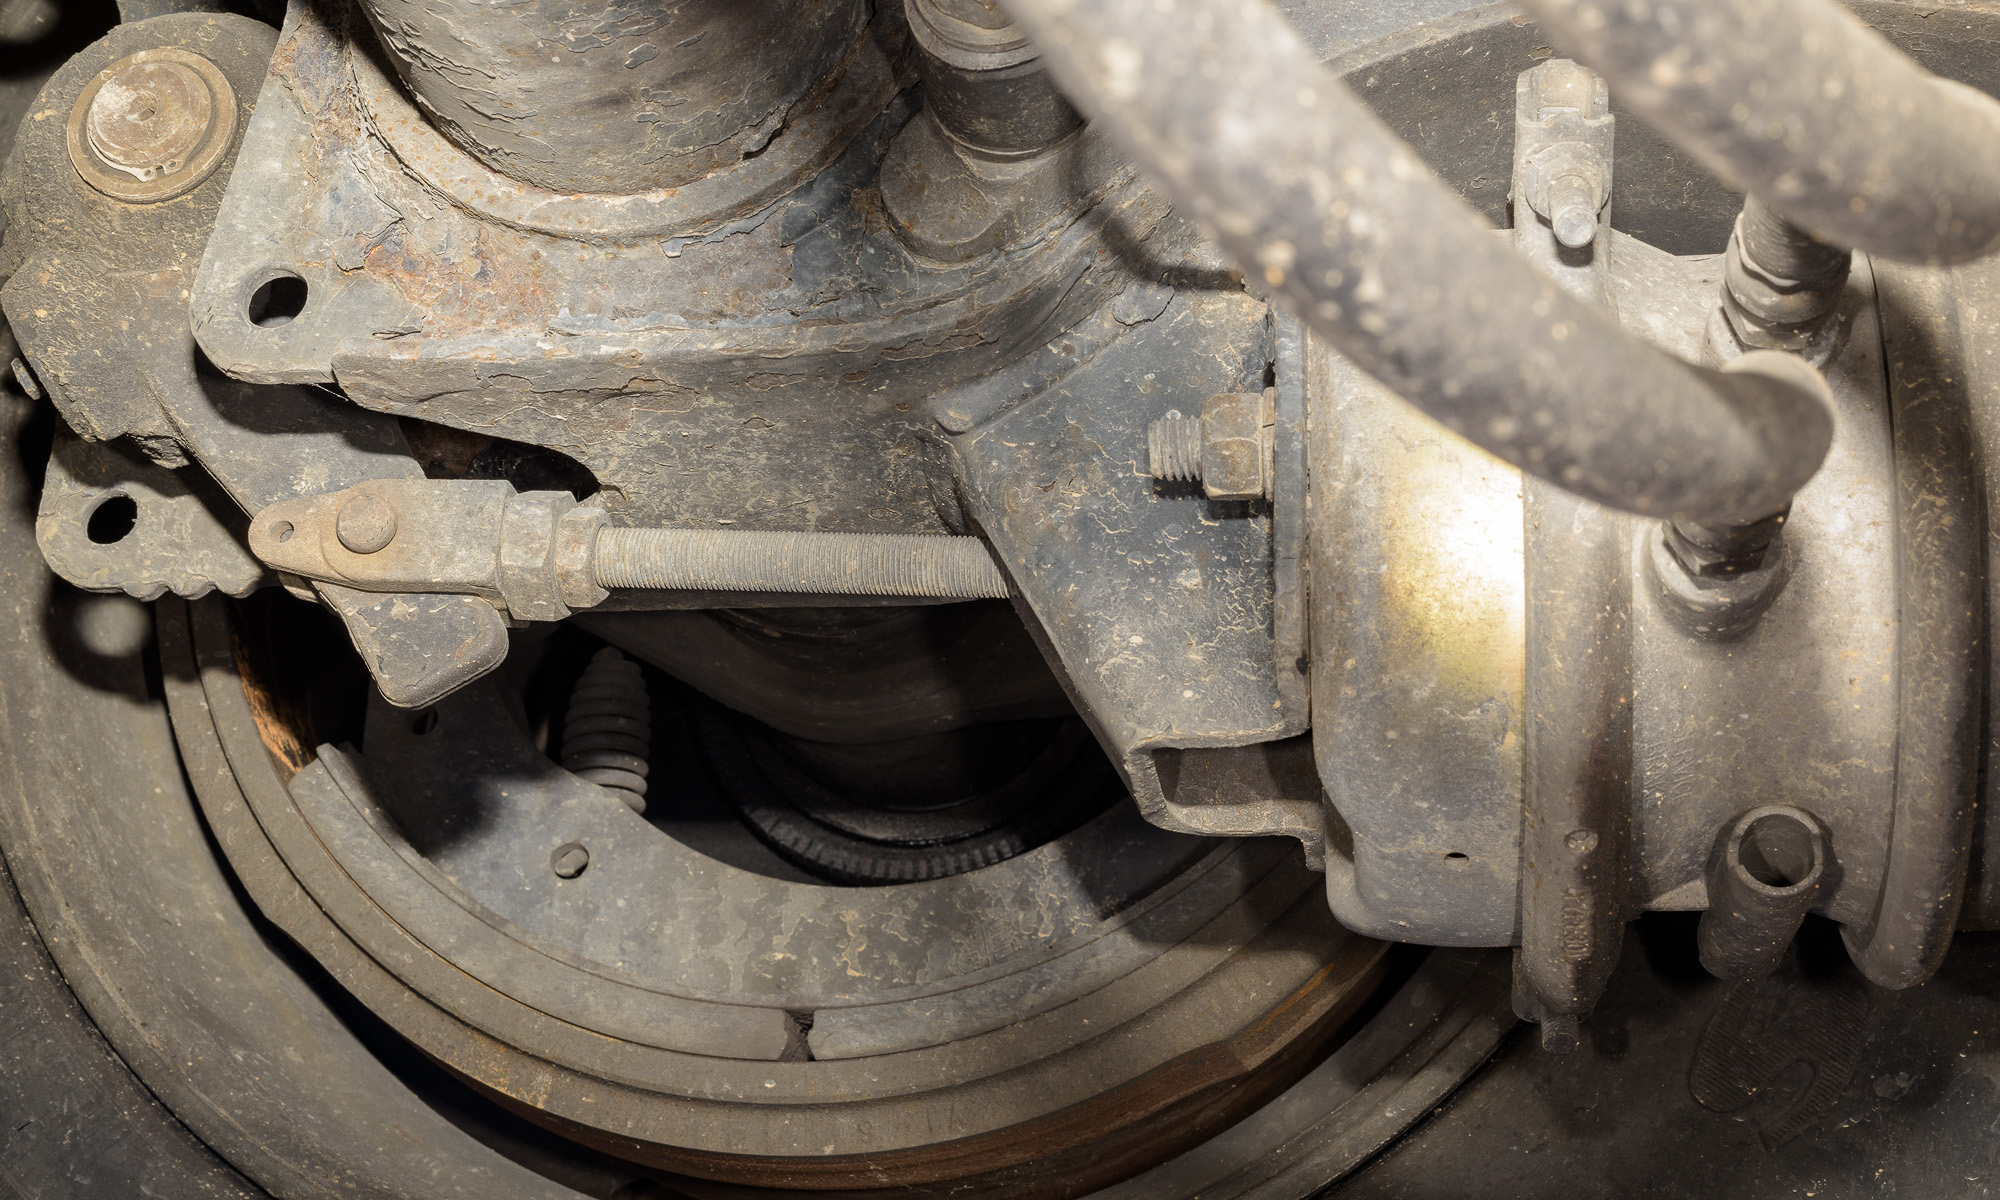
CVSA brake defects often result from inadequate maintenance. One important purpose of a CVSA inspection is to catch maintenance issues before they adversely affect the stopping ability of the truck. While it is essential to properly maintain vehicles for safe operation, the presence of one or more OOS brake defects does not necessarily mean the braking ability of the truck was compromised at the time of the accident. So there are two separate, but related issues: -1- Were there any problems with the truck? -2- Did any of those problems affect the truck’s ability to stop during this particular incident? Continue reading “Out of Service (OOS) Brake Defects and Brake Force Calculations”