Photographing into the Abyss with the Laowa Probe Lens

Well, maybe not the abyss, but into a recess….

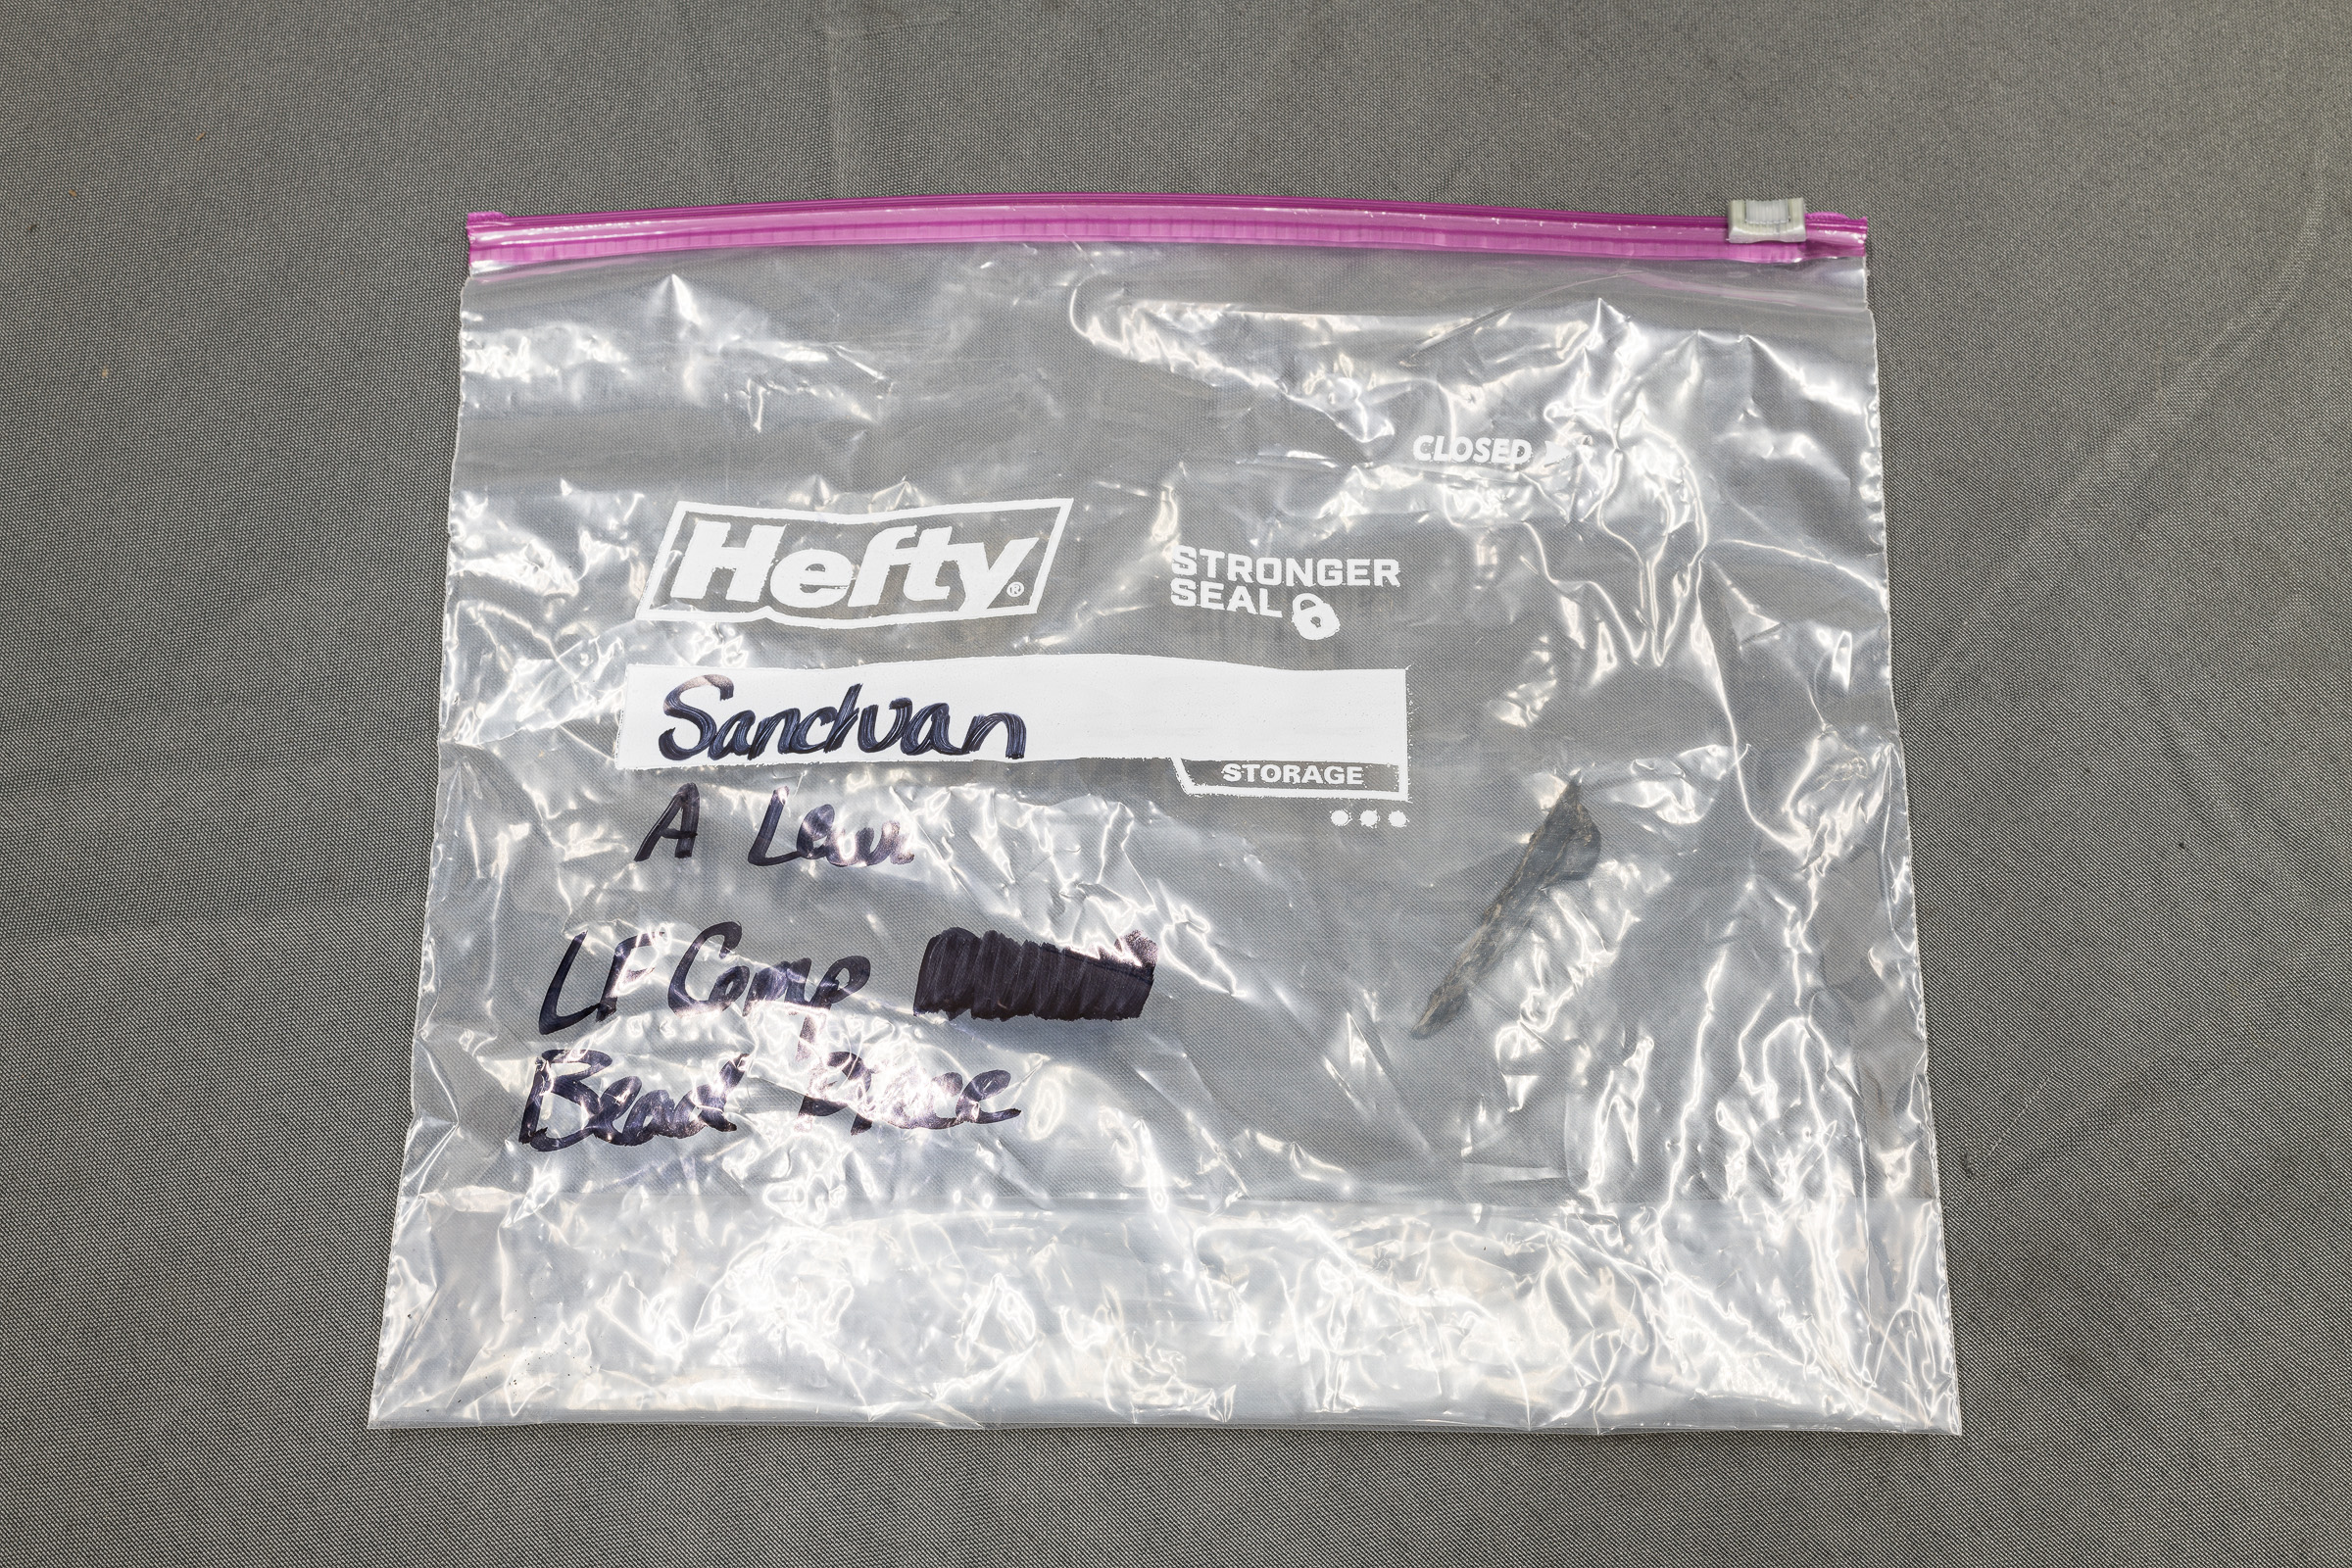
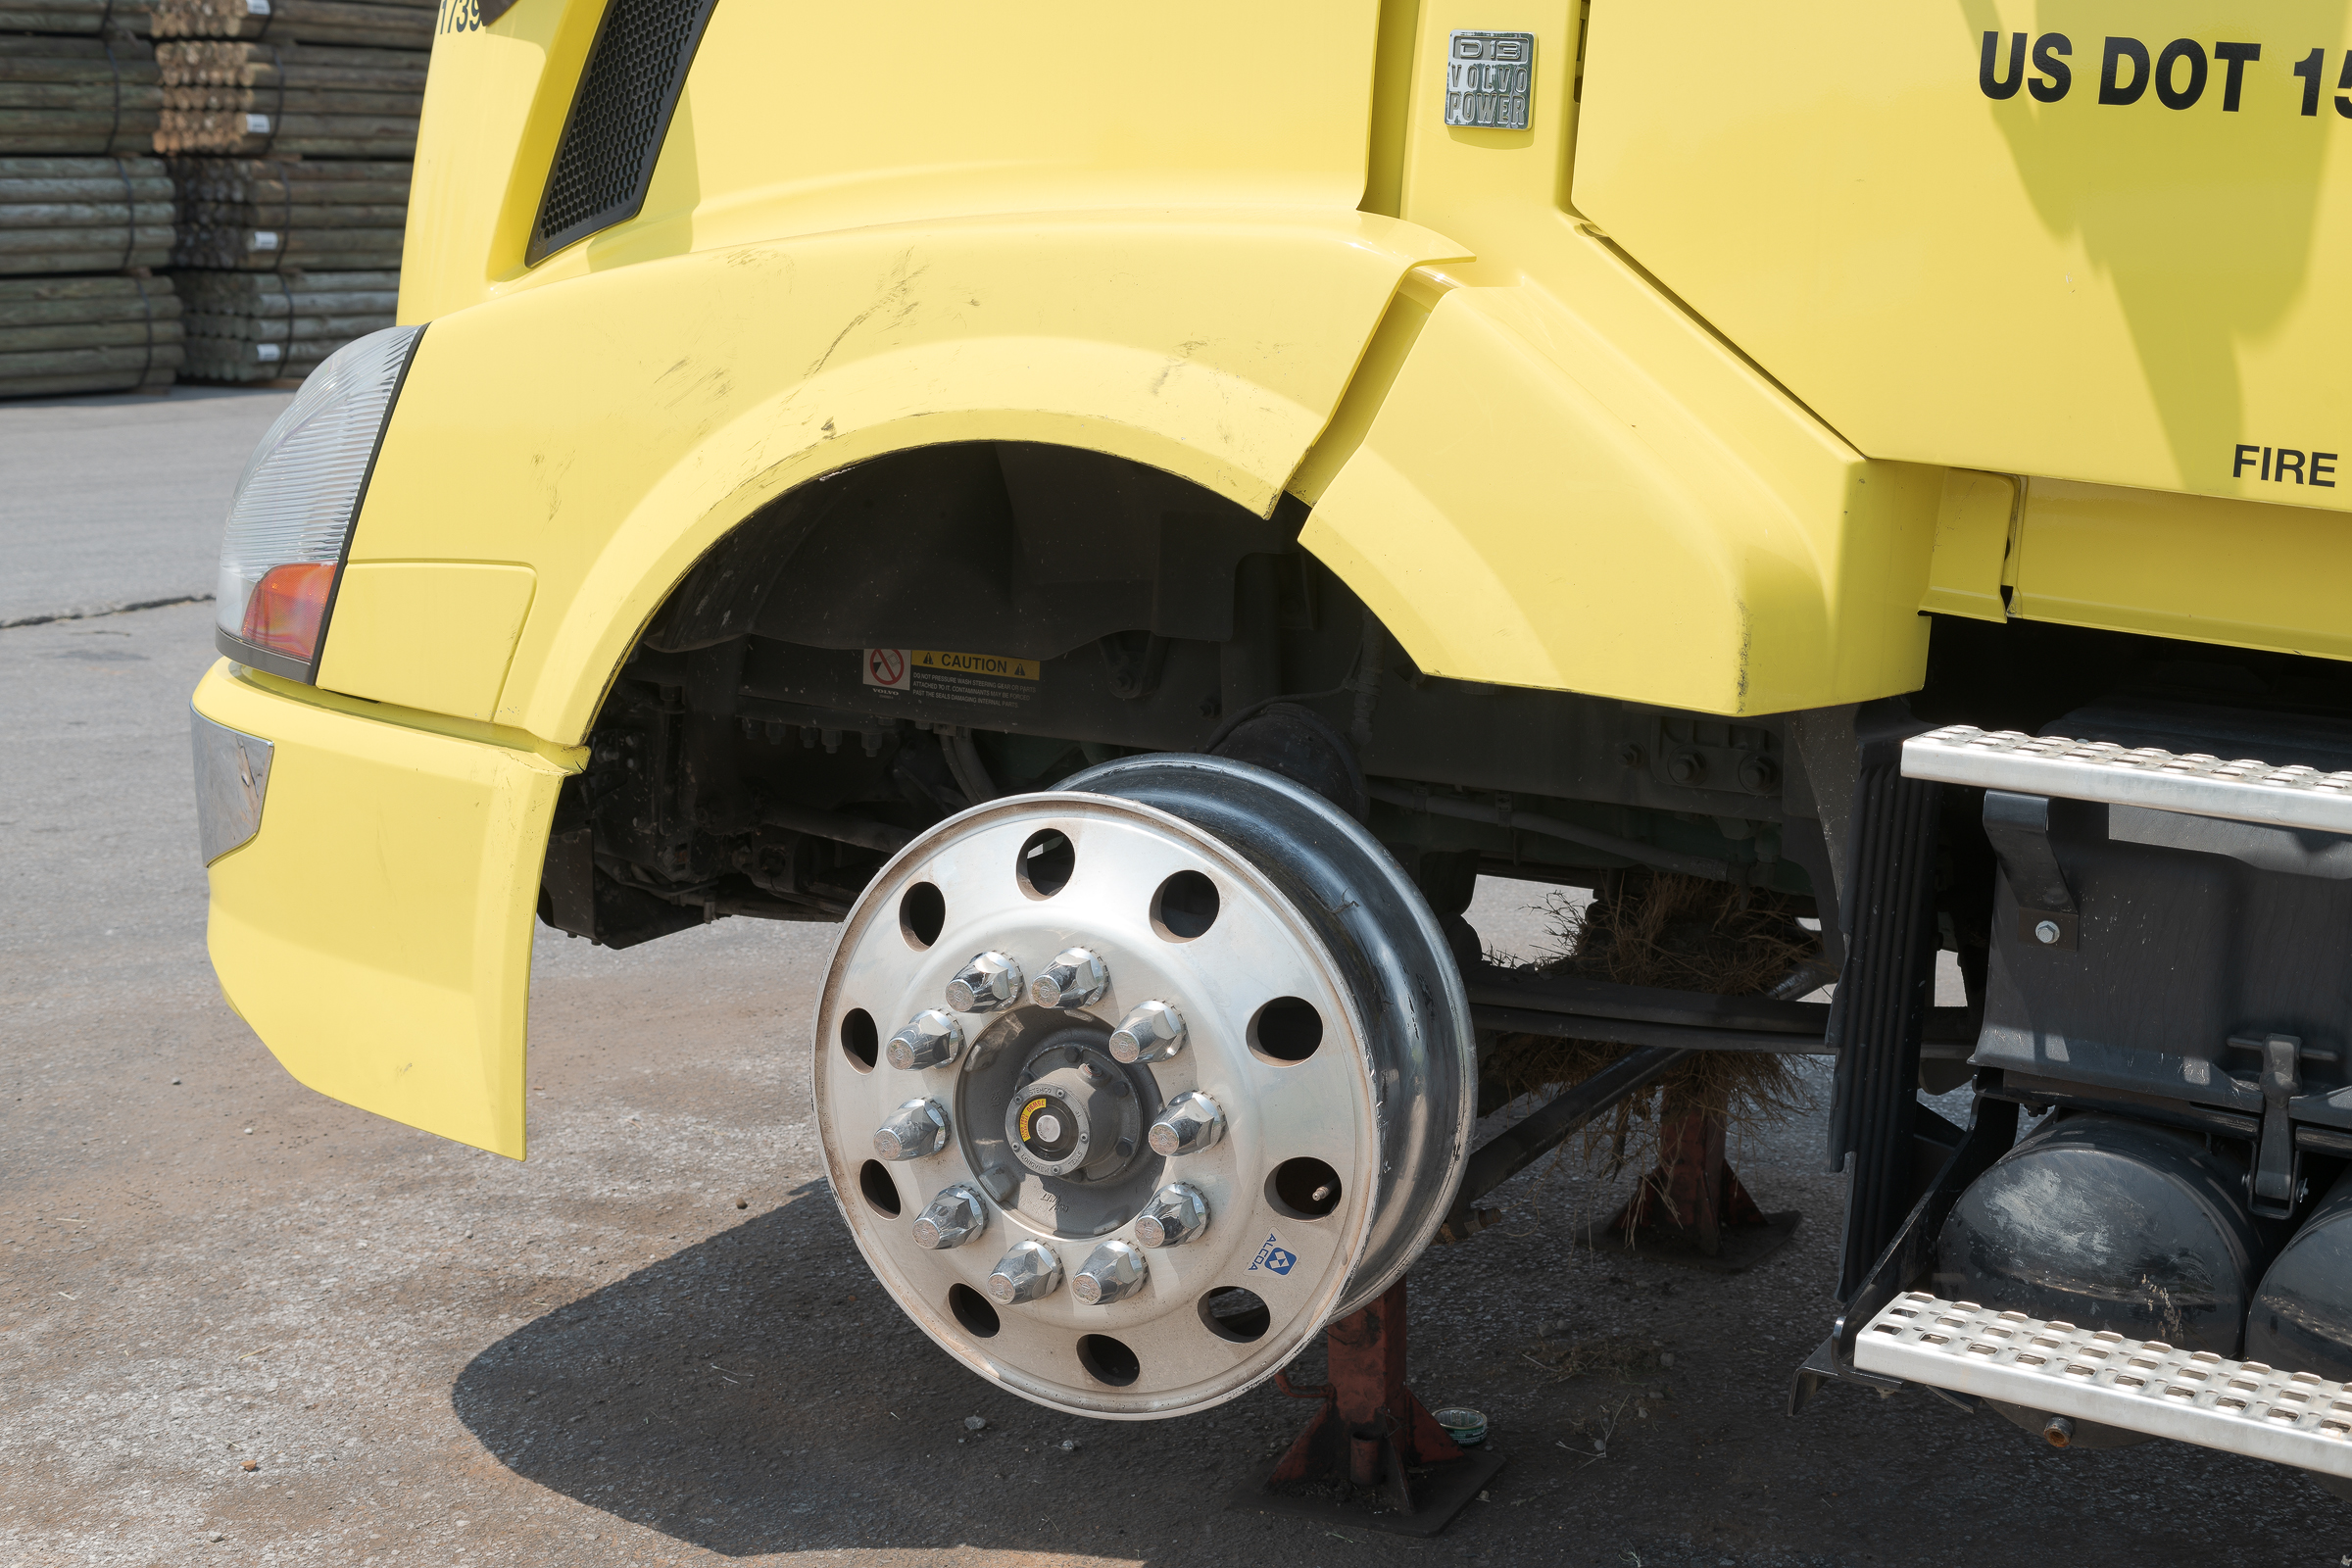
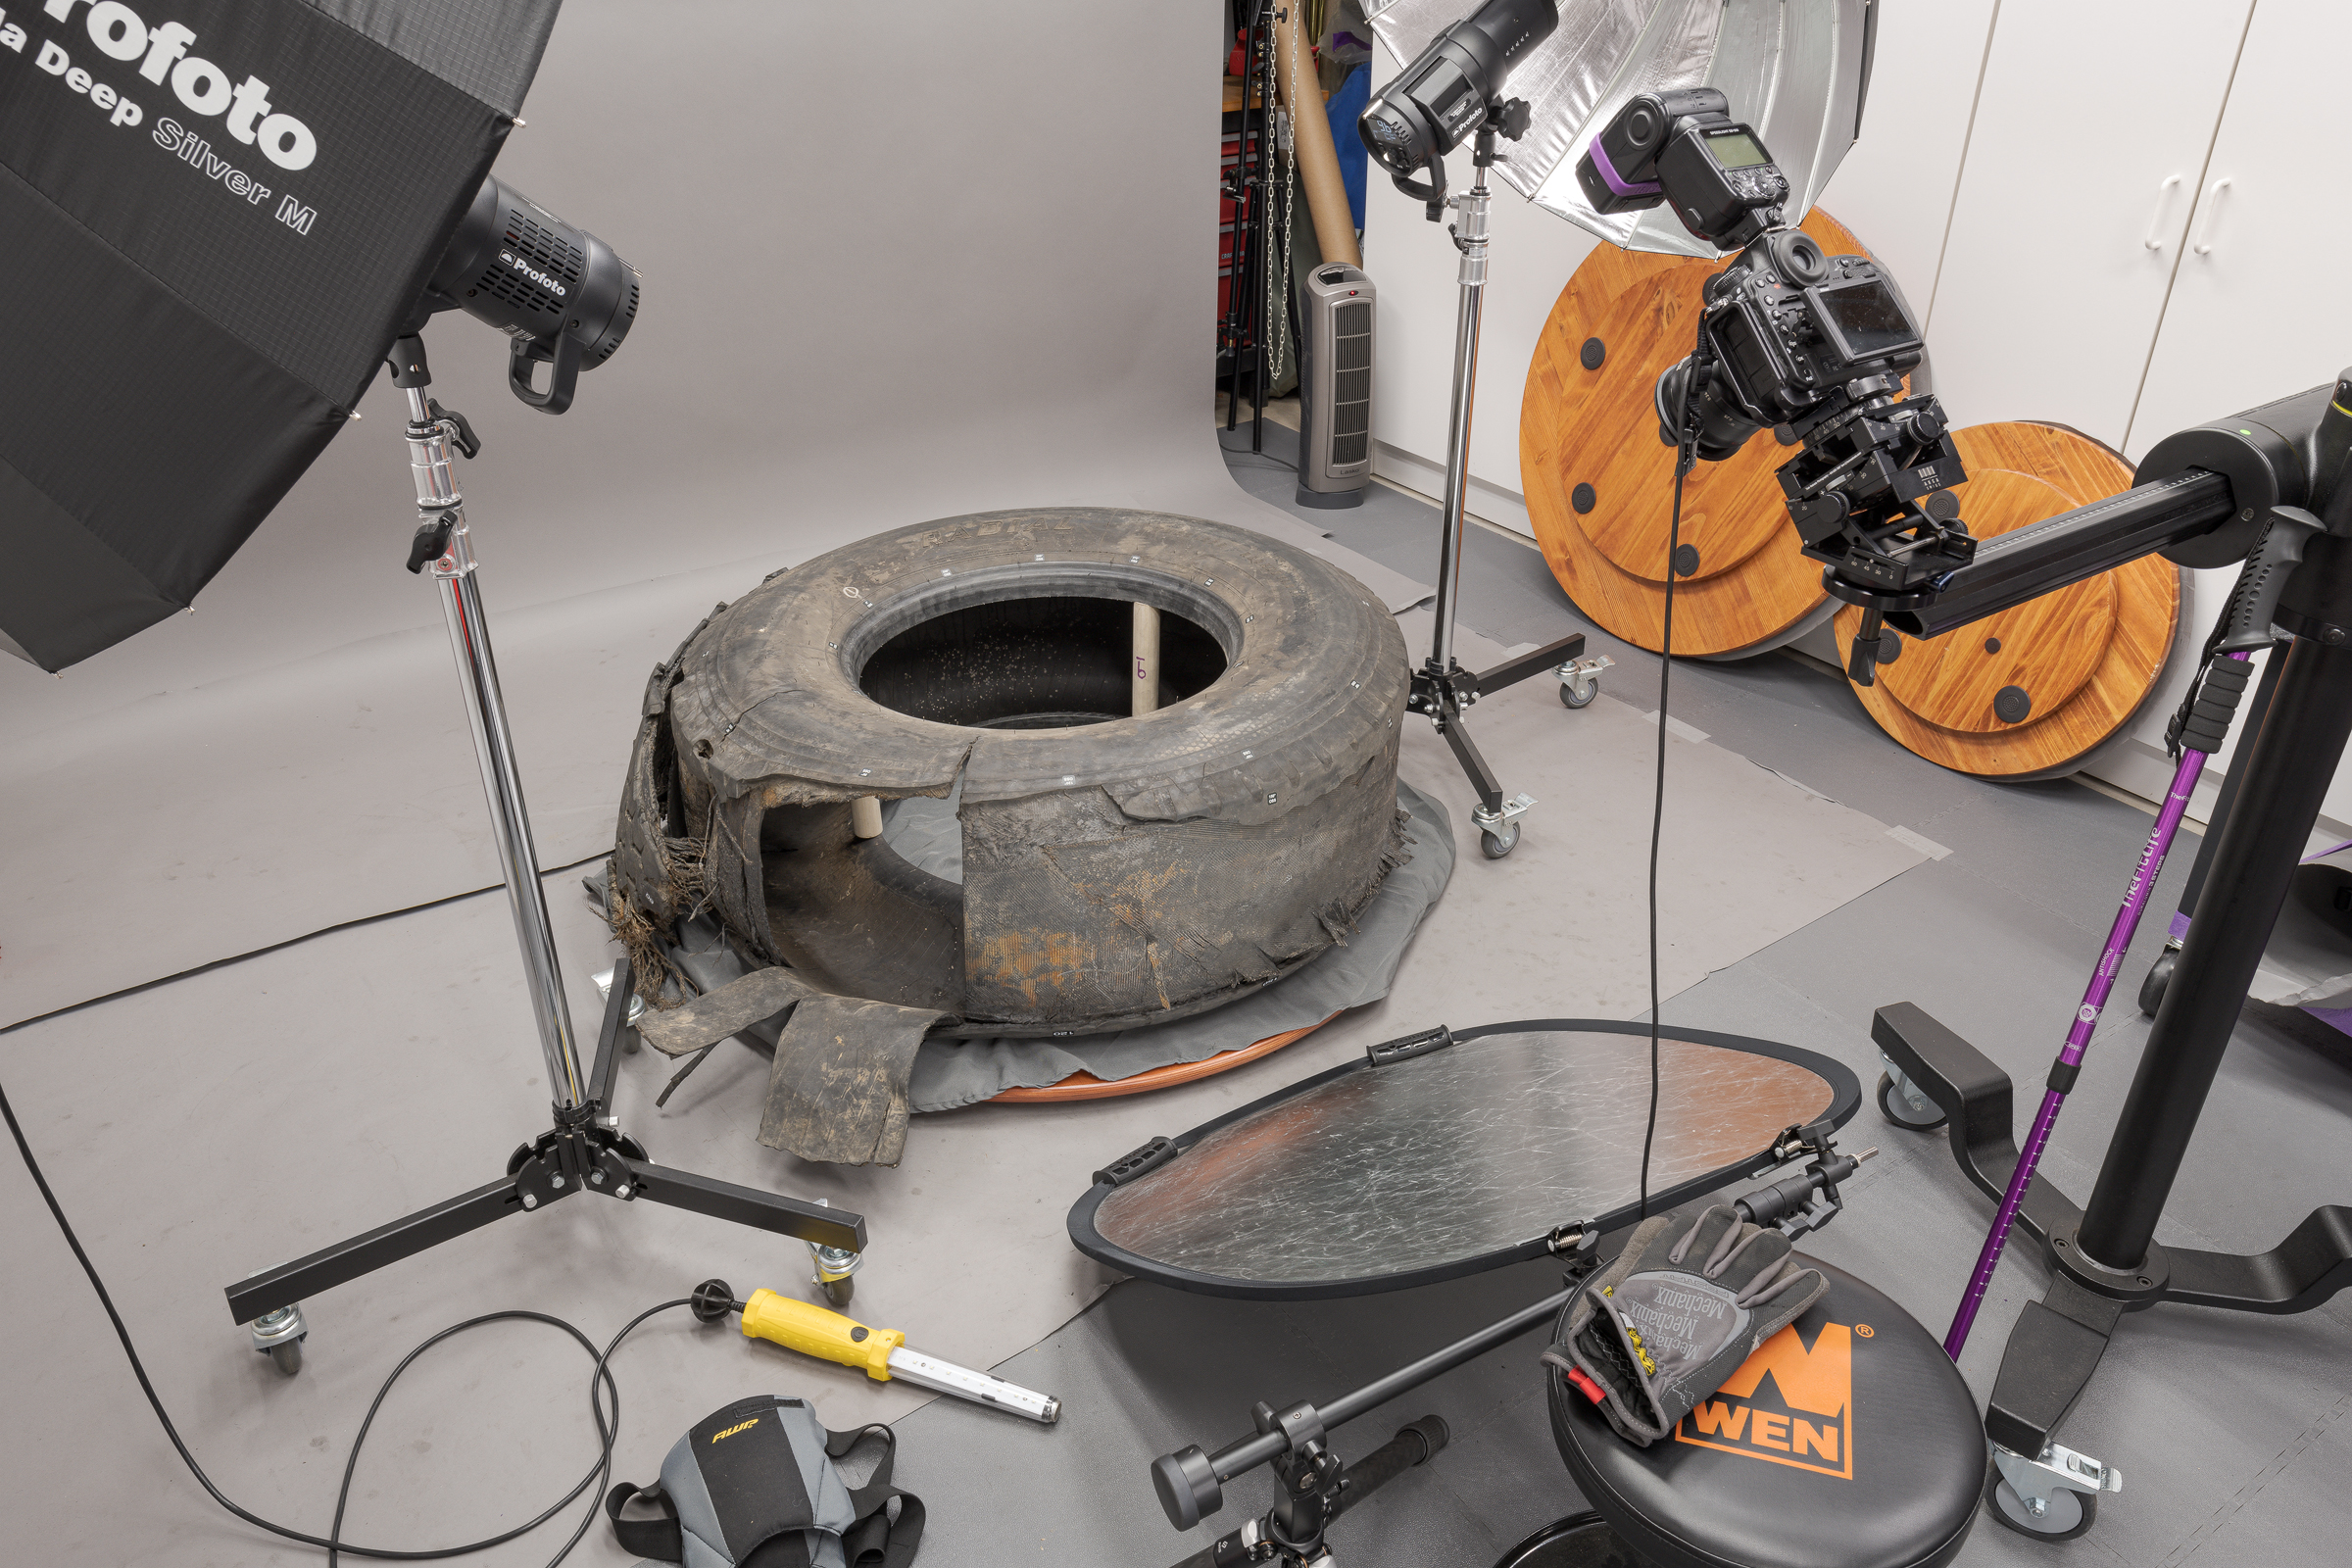
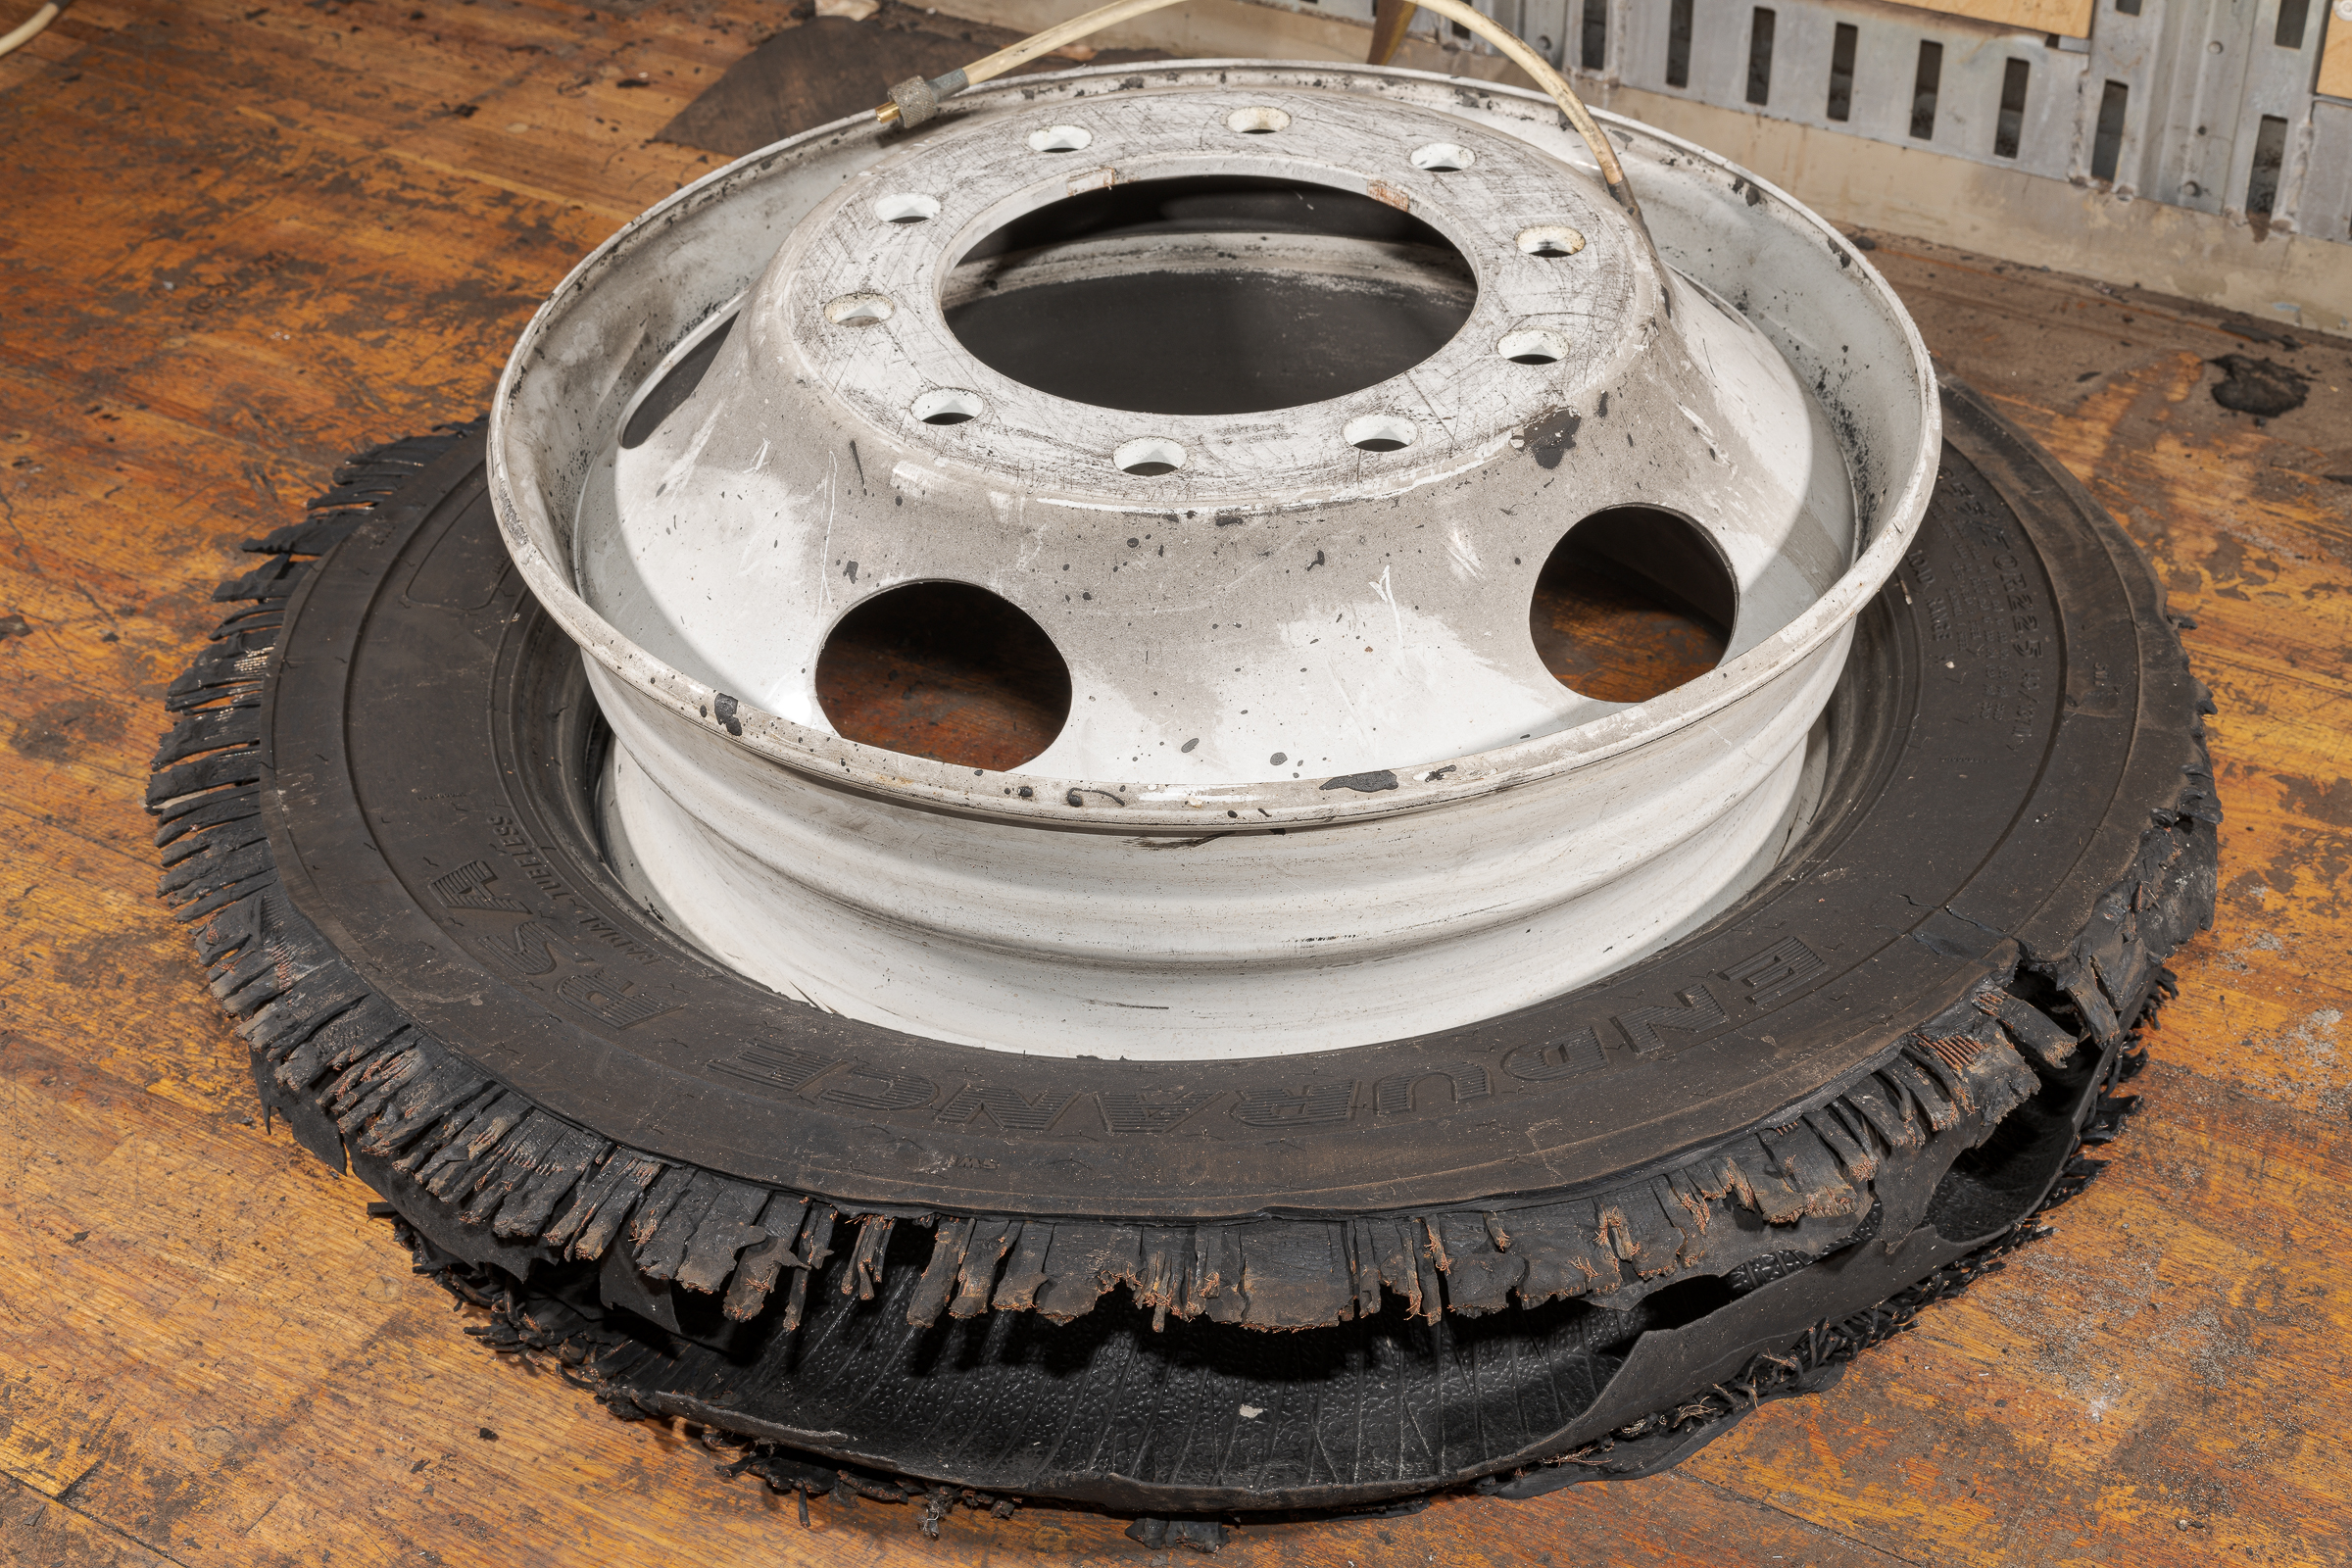
I needed to document the bolt holes on a wheel that came off the front of a pickup to show whether or not the wheel had been loose on its studs.

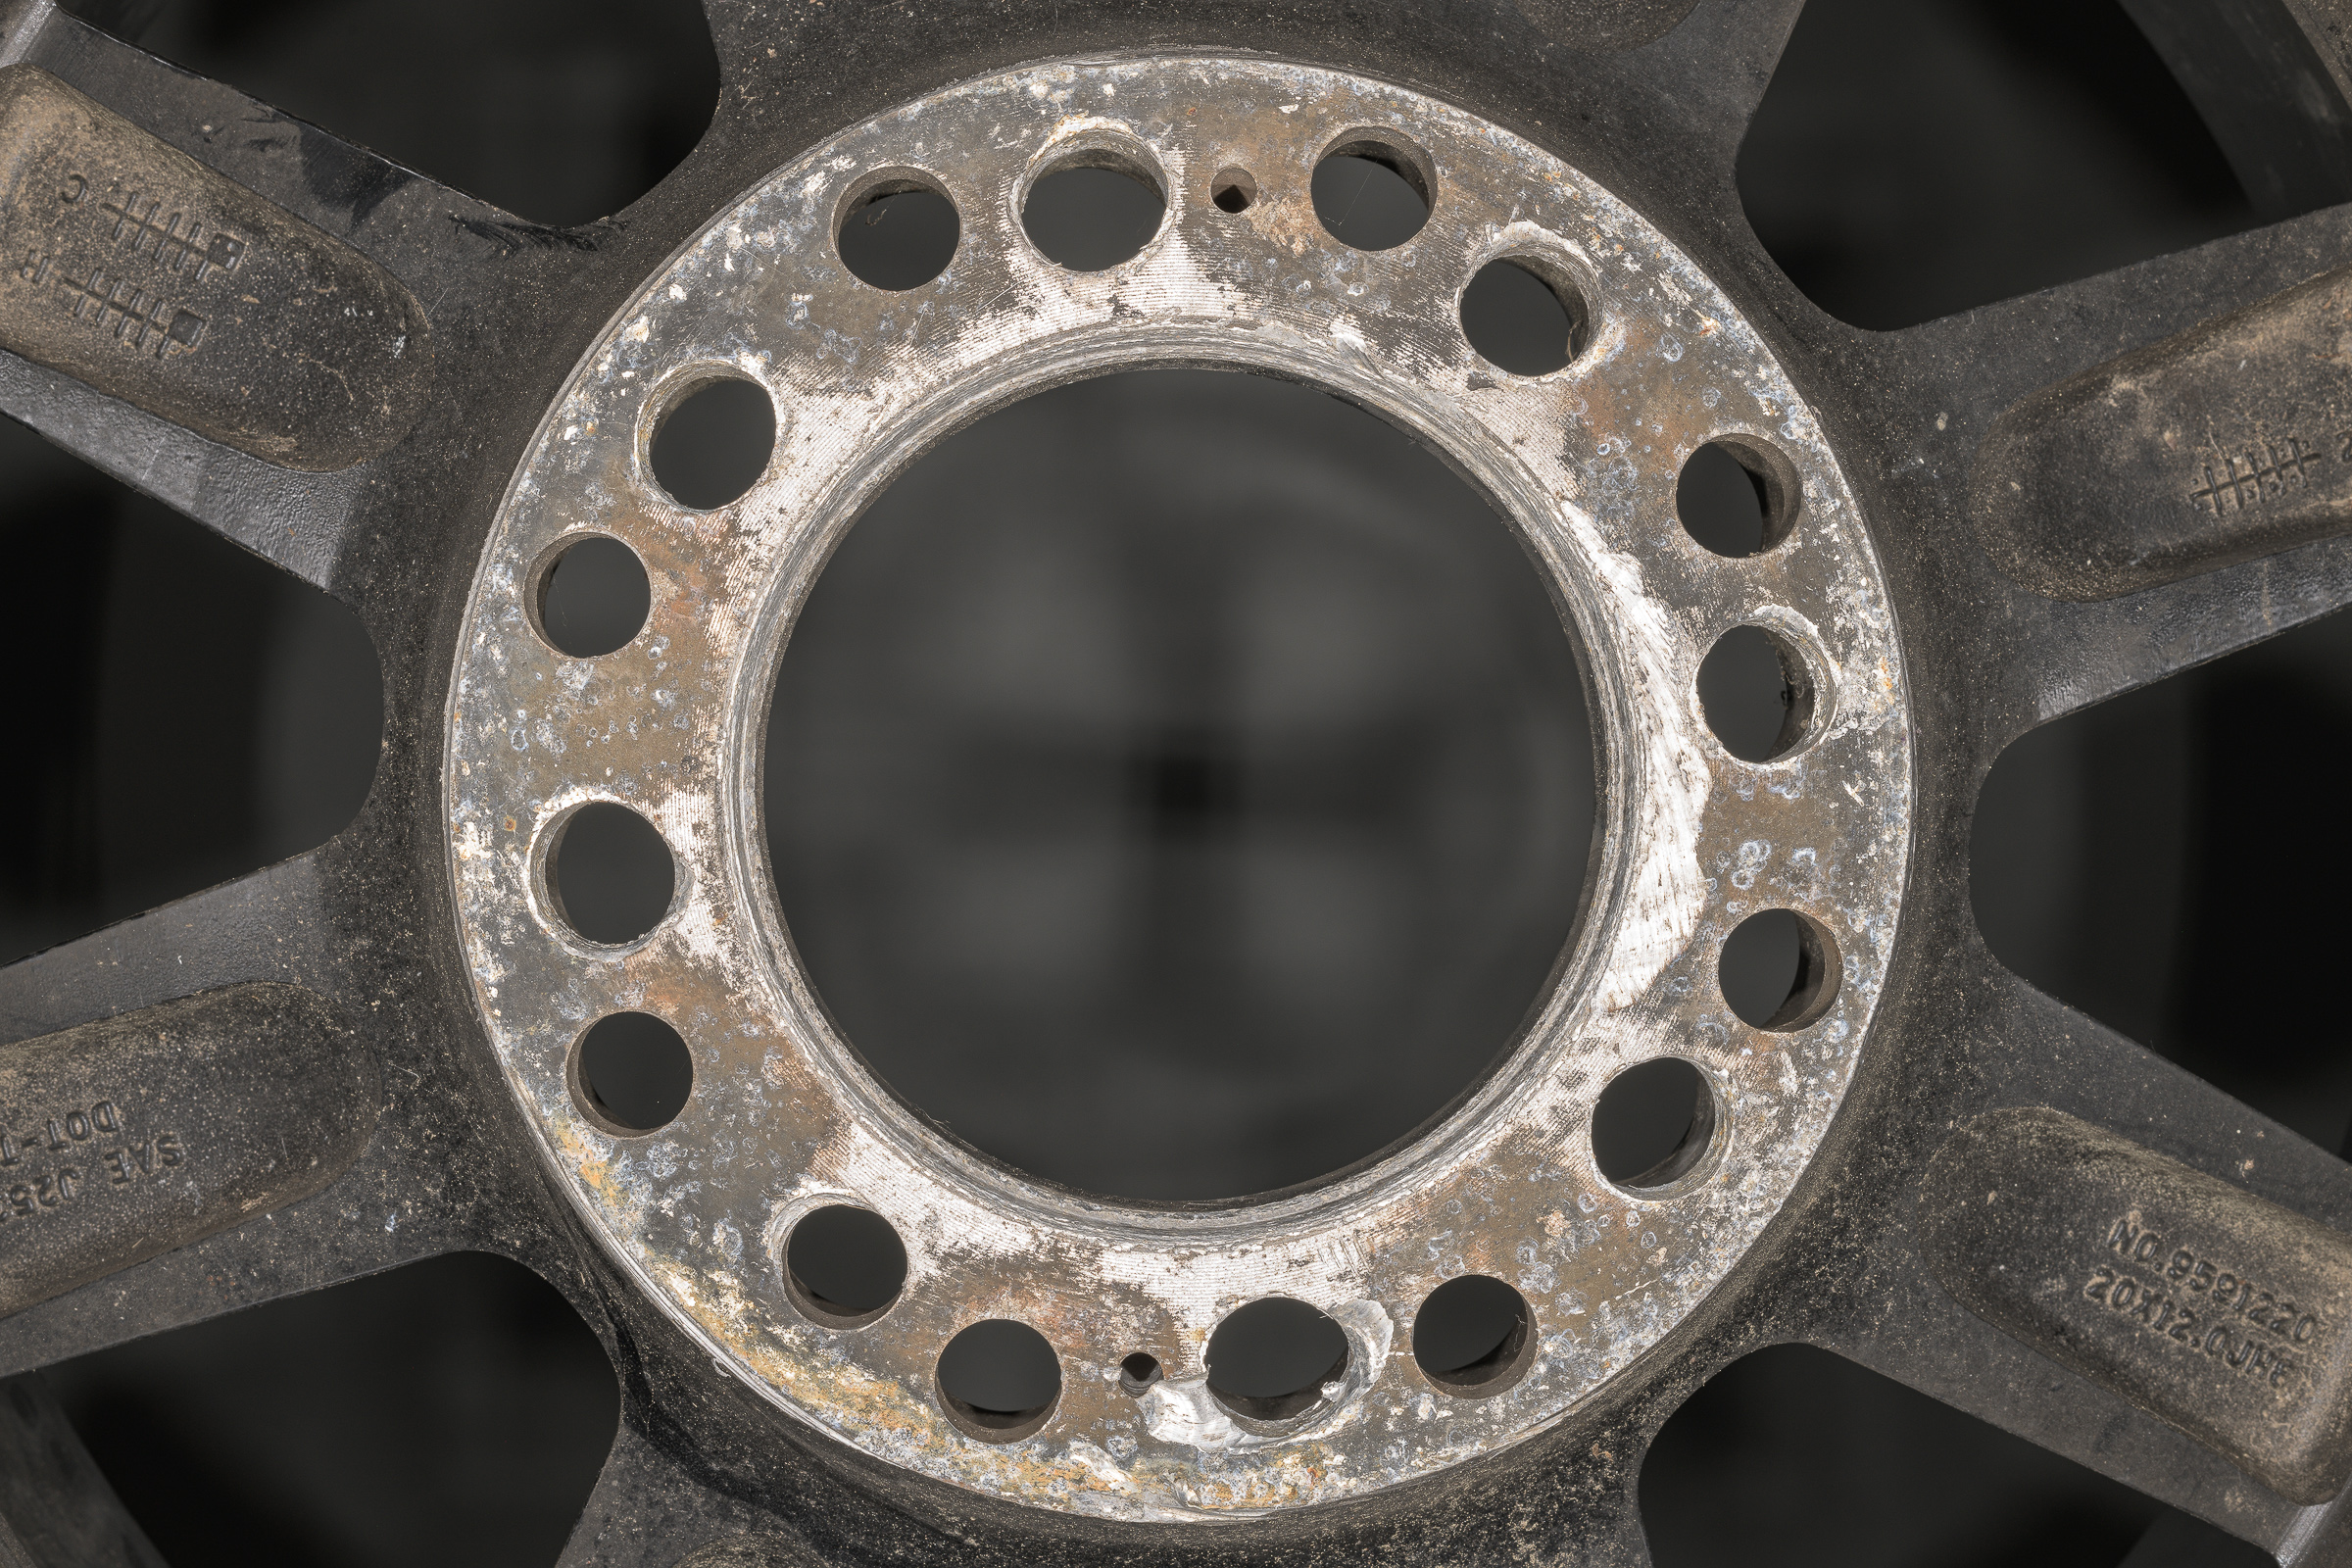
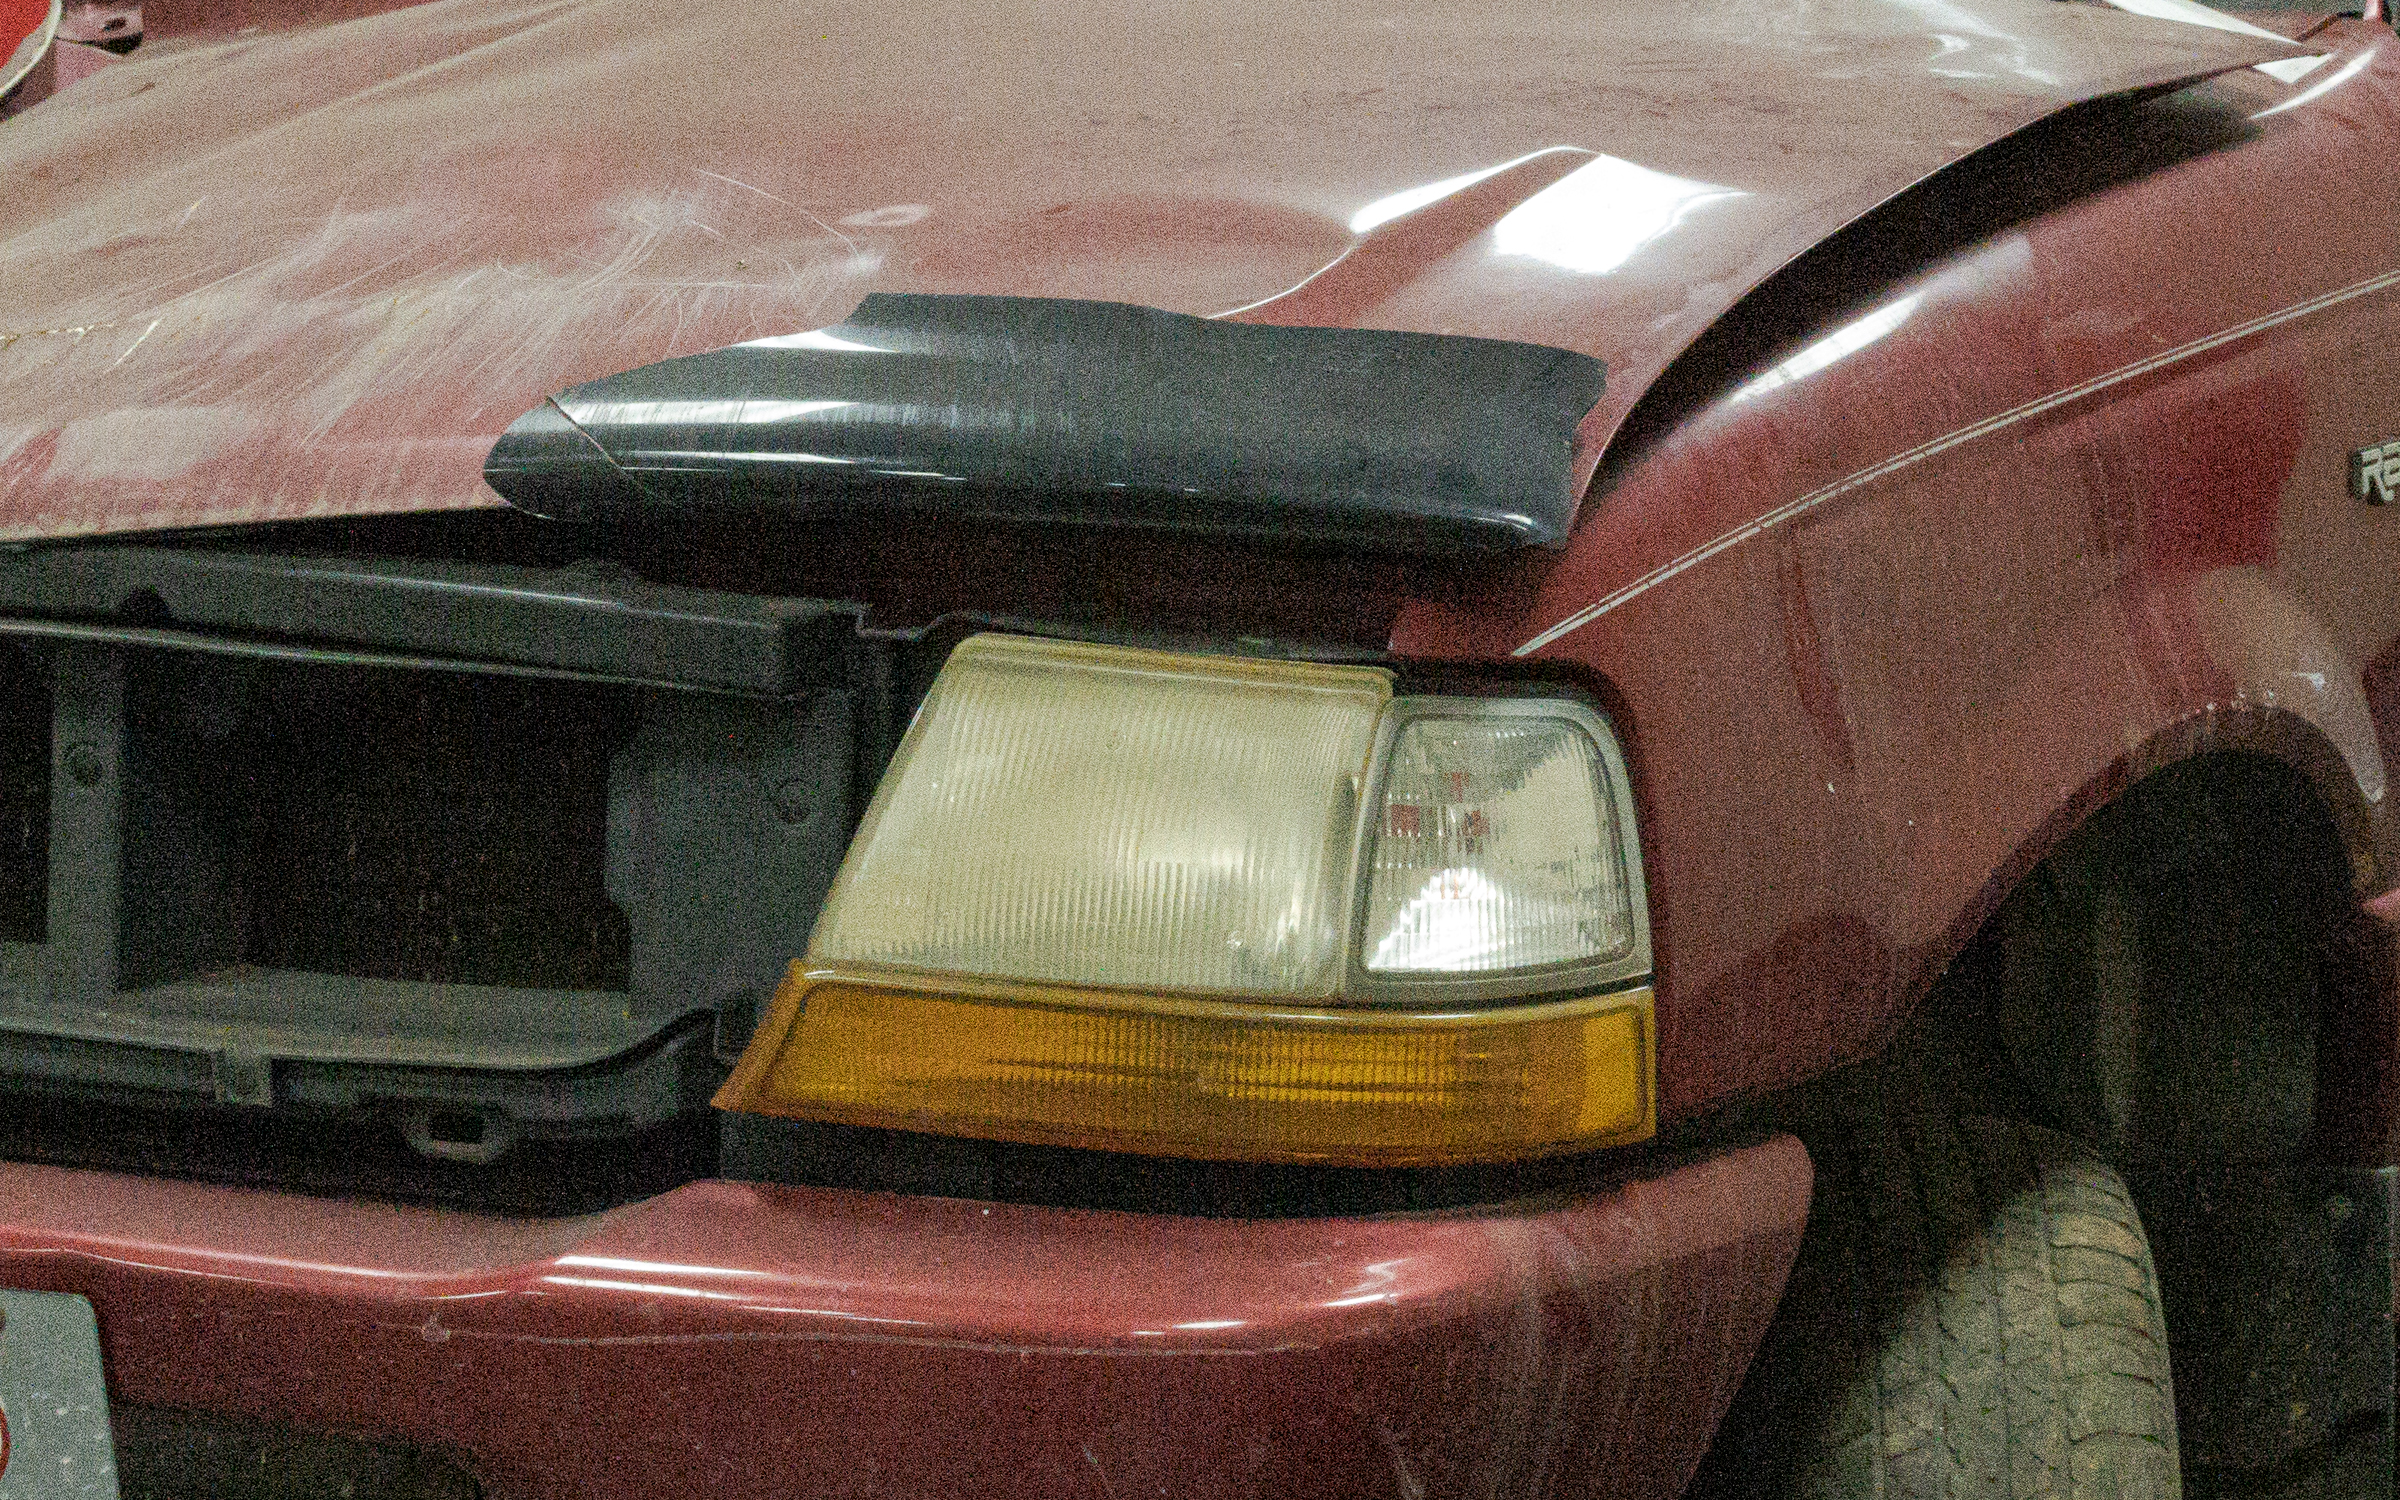
After making overall photos of the wheel and tire assembly, I made close-ups of the mounting surface and bolt holes from the back of the wheel. But on the outside of the wheel, the bolt holes were too deeply recessed to use a standard macro lens.

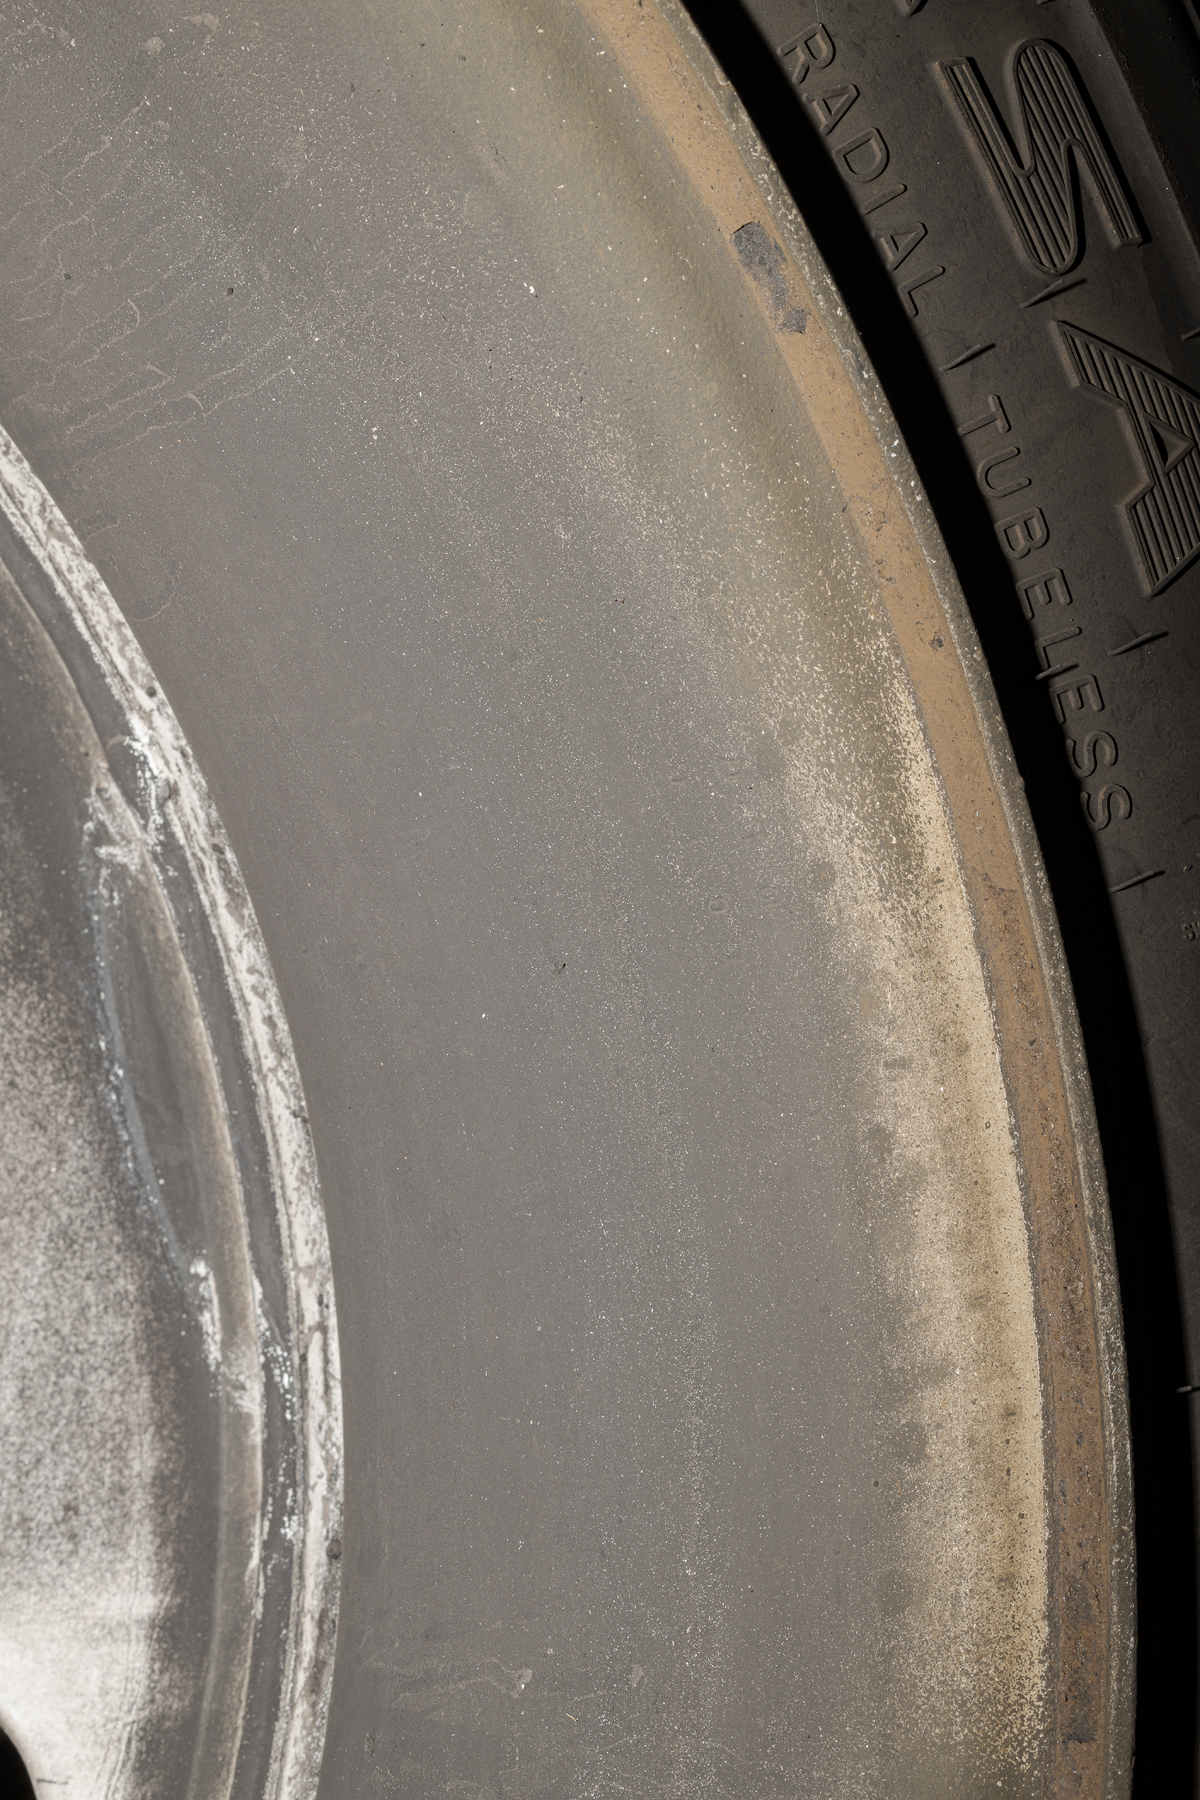
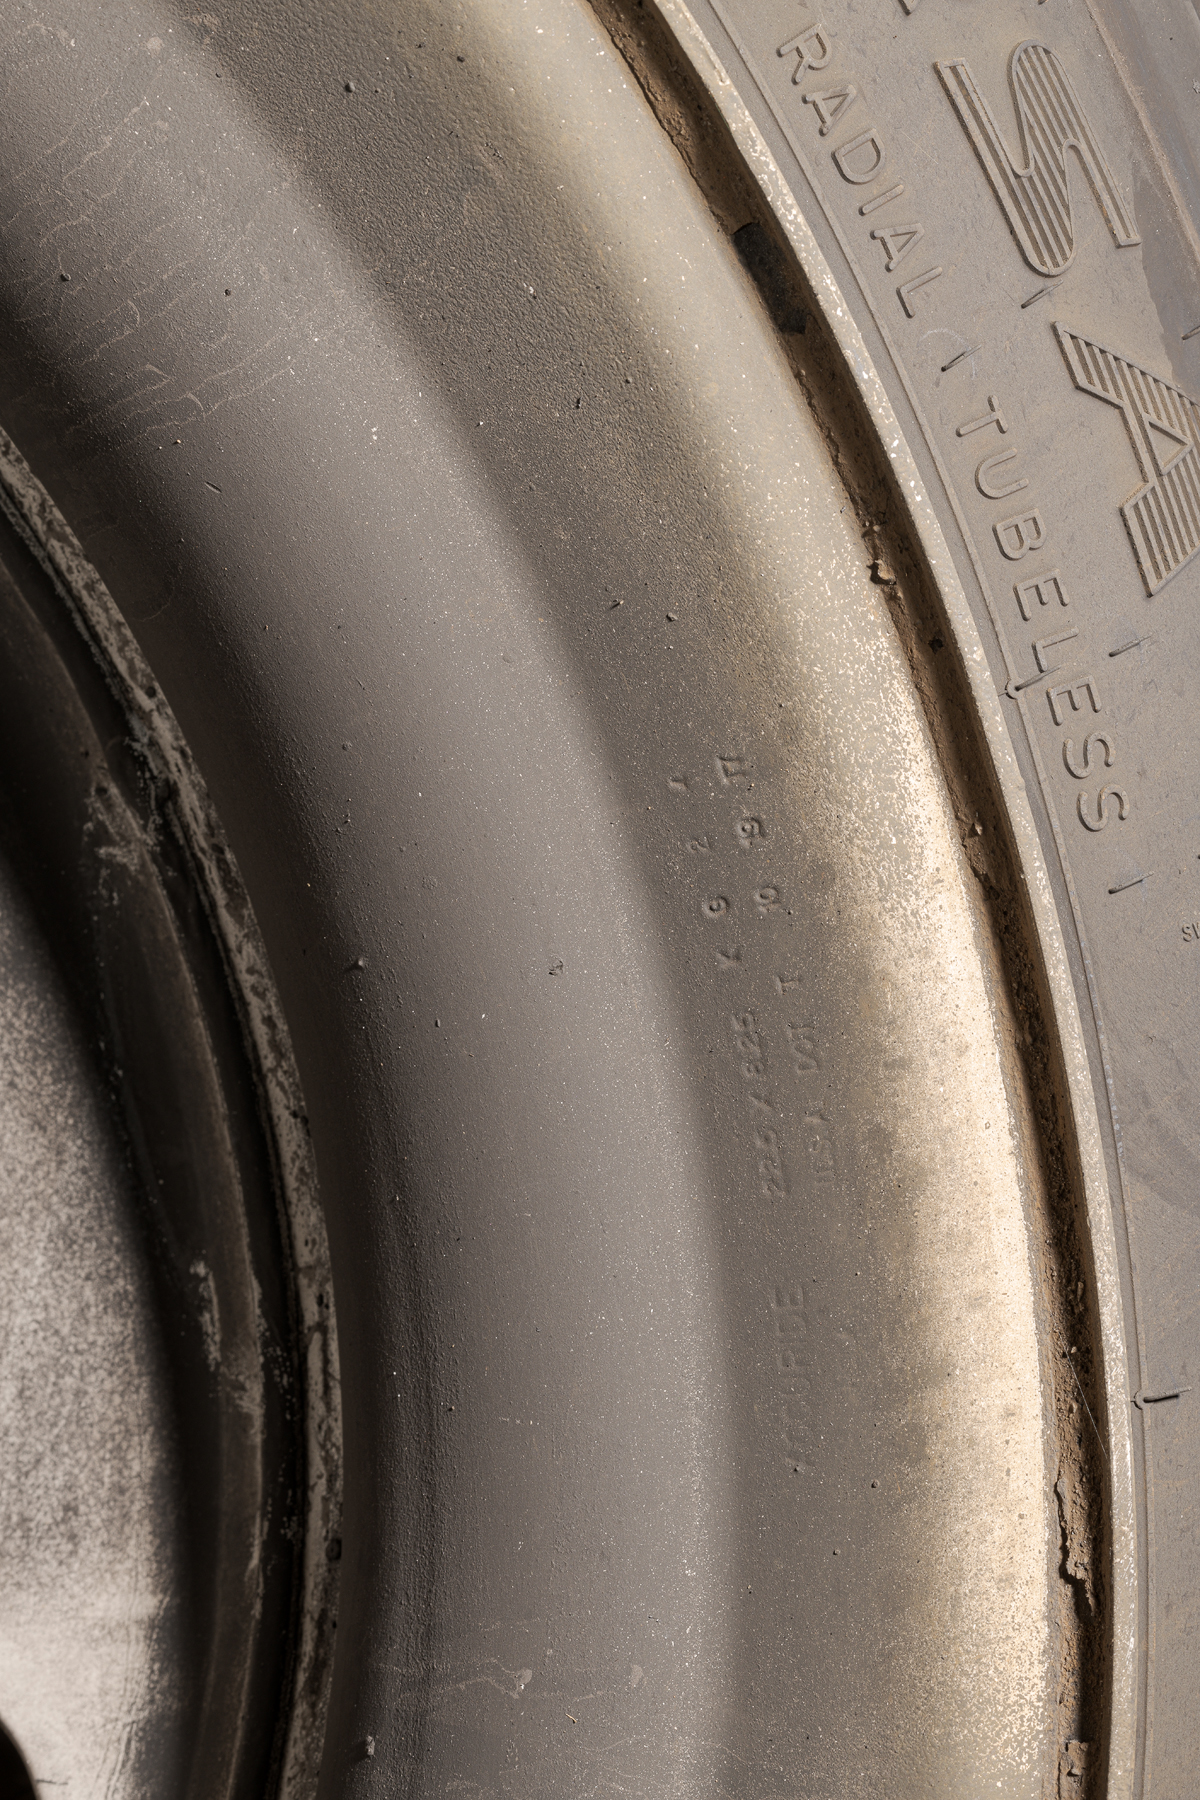
It was important to photograph the lug nut mating surface at the bottom of each recess, but it was nearly impossible both to get light down each recess and to fill the image frame with each hole. I wanted to get sharp, detailed, full frame images of the mating surface—not images cropped from a larger view.

The solution was the unique Laowa Probe lens. (I have previously discussed another unique Laowa super macro lens. I’ve found Laowa lenses to be well made and optically excellent.)

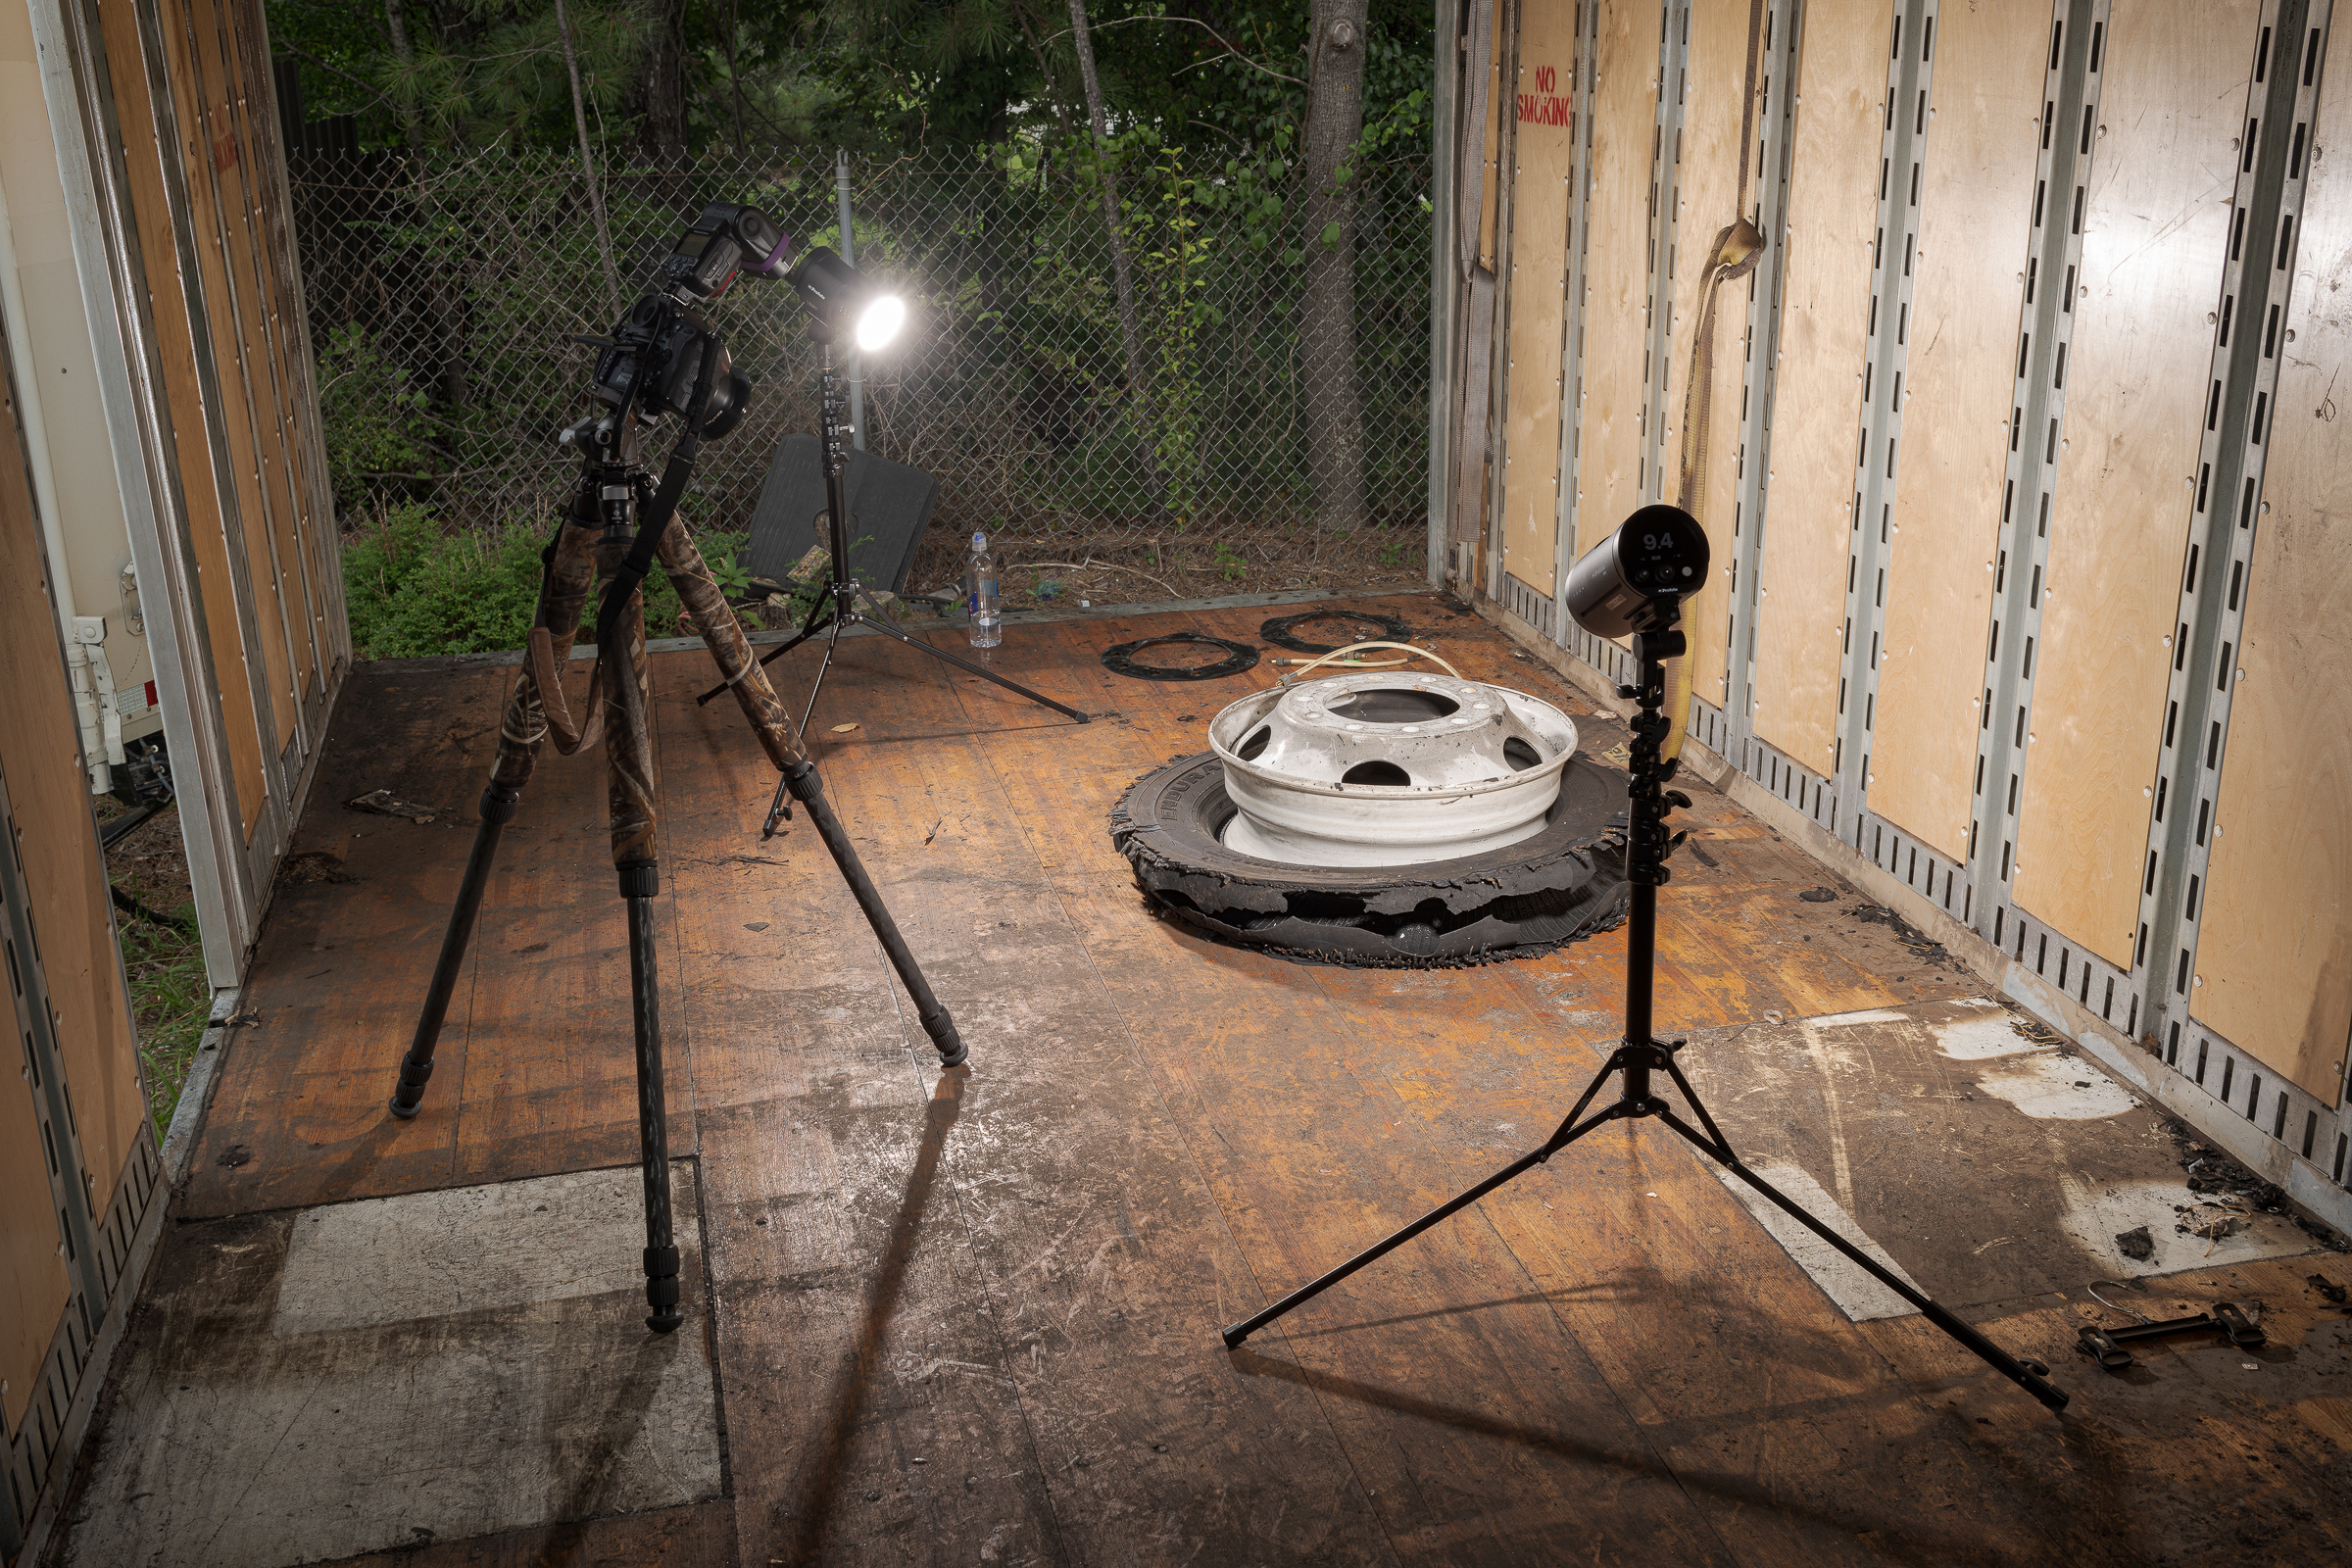
As the photo below shows, the Probe is a 16-inch long tube with a small diameter 24 mm lens surrounded by tiny LED lights at its end. You use a small USB power brick to power those LED lights. Laowa supplies a USB cable with a built-in dimmer switch, but you must supply the power brick. [Click on photo to enlarge, then click on back arrow to return to this post.]

Nikon D850 with Laowa 24mm f/14 2X Macro Probe macro lens made with Nikon Z 7II with Nikon Z 24-70 mm f/2.8 lens and two Profoto B1x studio flashes. f/16, 1/200 sec, ISO 200.

Laowa offers the Probe with several different mounts for many popular DSLR and mirrorless cameras. I used the Nikon F-mount version of the Probe lens on my Nikon D850. Note that all versions of the Probe require manual focusing and exposure; there are no electronic connections between the Probe and any camera.

Fortunately, the lens barrel fit perfectly into the recessed bolt hole, allowing me to get a full frame image of the mounting surface at the bottom. All I had to do was to adjust the intensity of the LEDs, adjust the exposure, and click the shutter. [Click on photo to enlarge, then click on back arrow to return to this post.]

Nikon D850 with Laowa 24mm f/14 2X Macro Probe macro lens made with Nikon Z 7II with Nikon Z 24-70 mm f/2.8 lens and two Profoto B1x studio flashes. f/16, 1/200 sec, ISO 200.

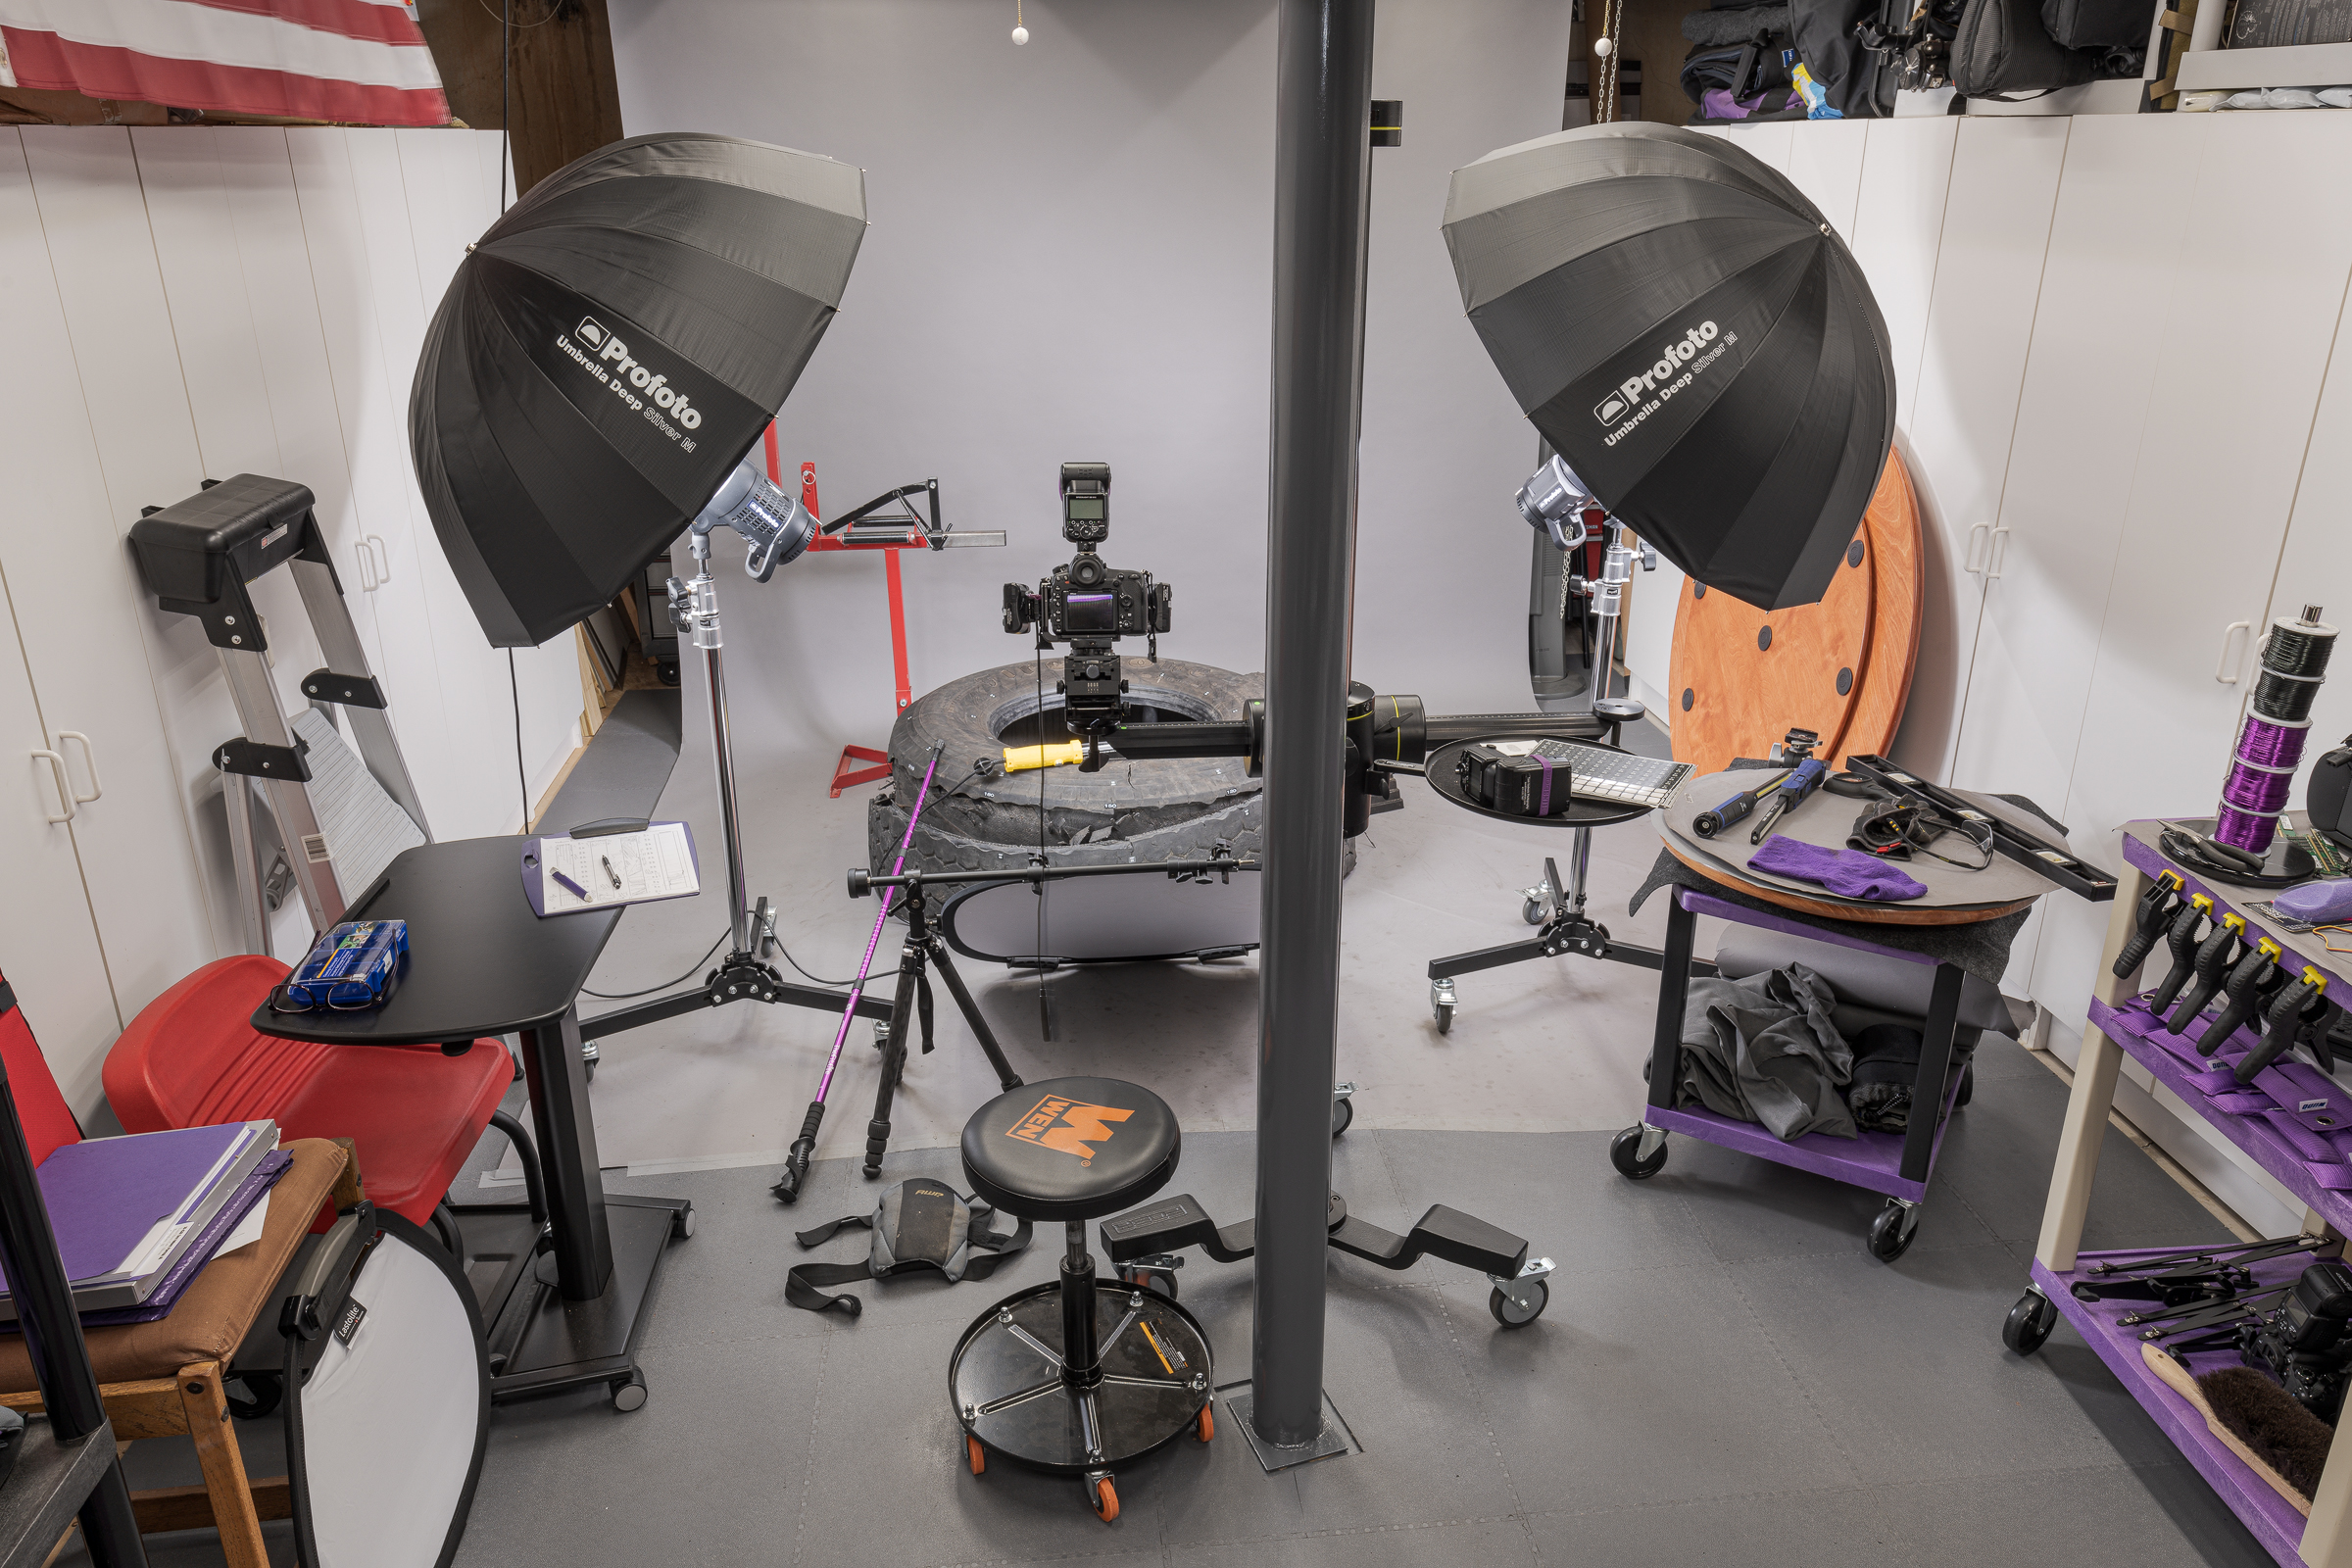
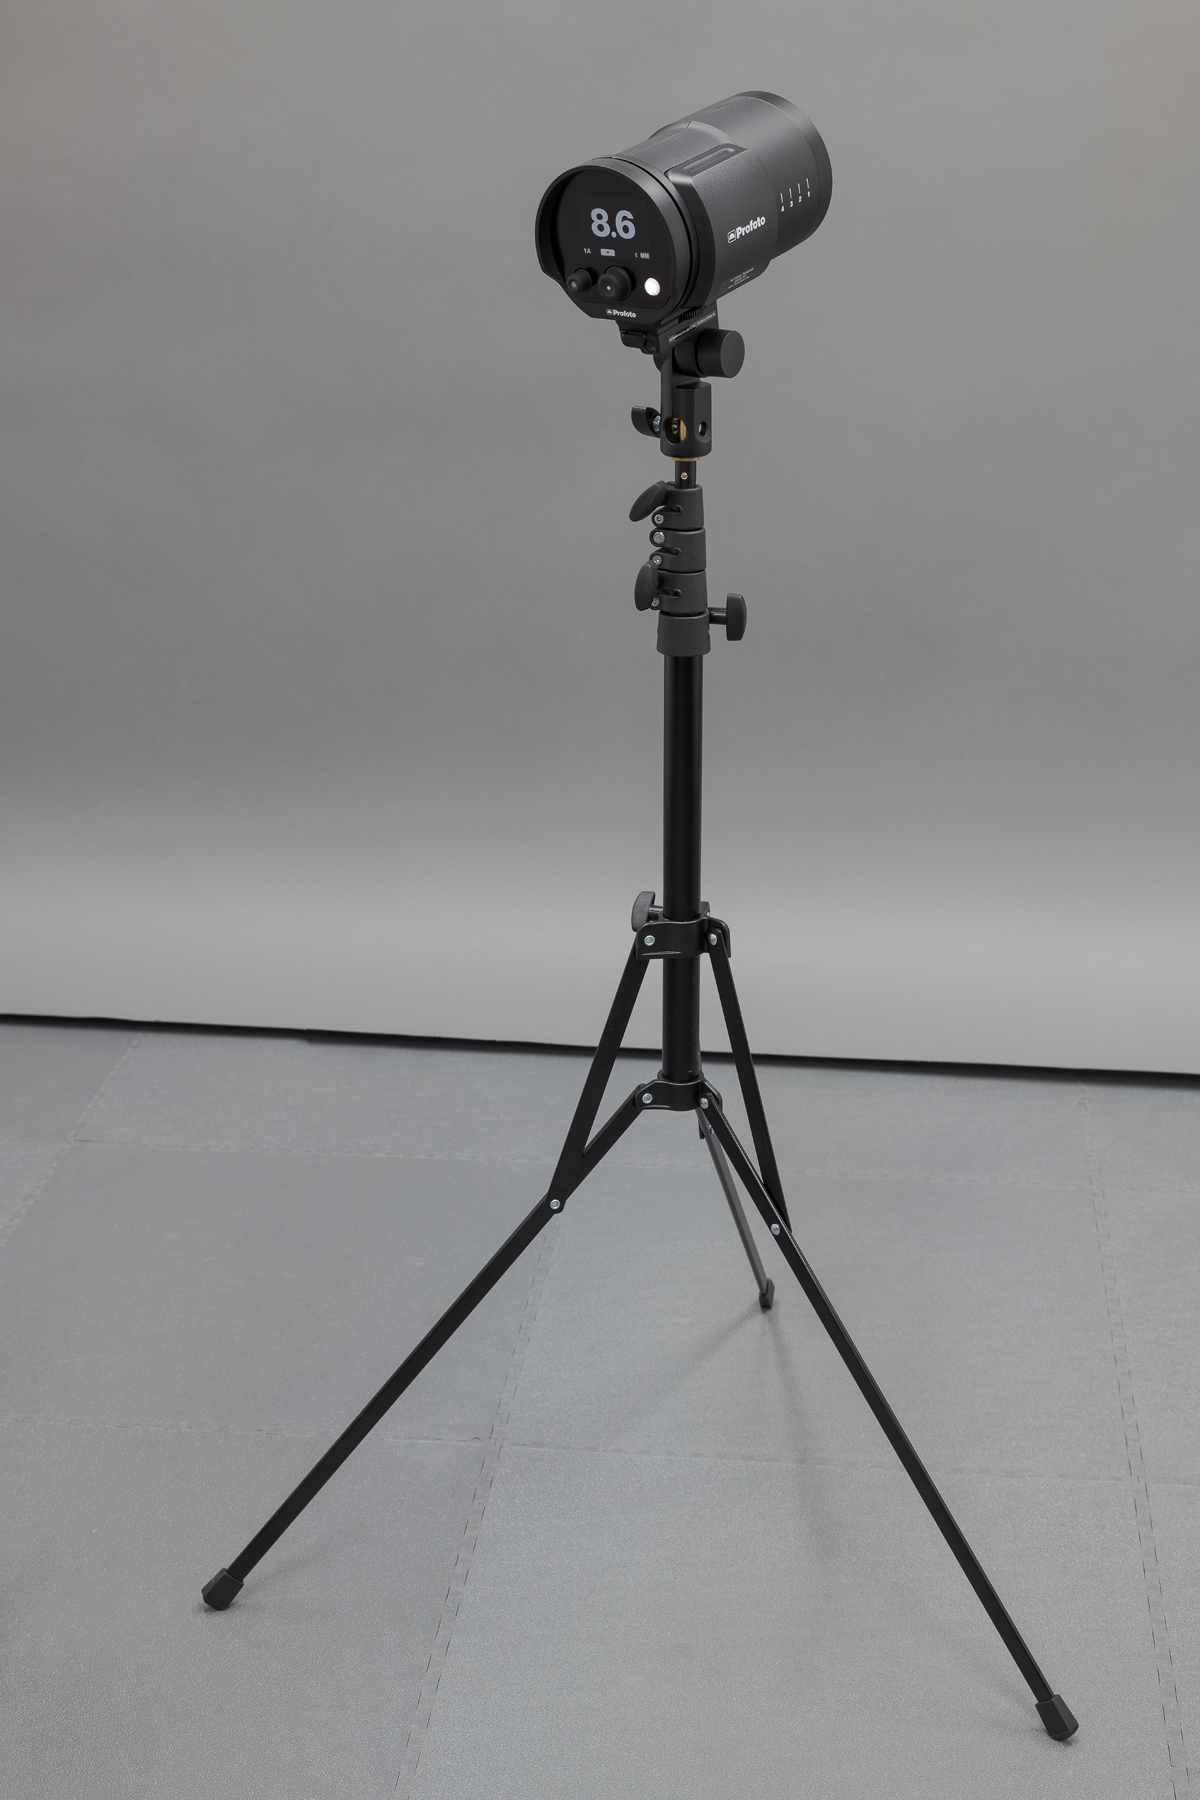
To steady the lens, manually focus, and keep the lens perpendicular to the bottom of the recess, I had the camera mounted on my rolling studio camera stand, which acted like an easily-adjusted tripod on wheels.

As you’ll see, the next two images made with the Probe lens required 0.5 and 0.3 second exposure times, respectively. That range of shutter speeds required that the camera  be secured on a tripod to eliminate camera shake. Raising ISO to get handholdable shutter speeds would introduce noise, reduce detail, and reduce dynamic range. That would defeat the whole purpose of using the Probe to get sharp, detailed full frame images.

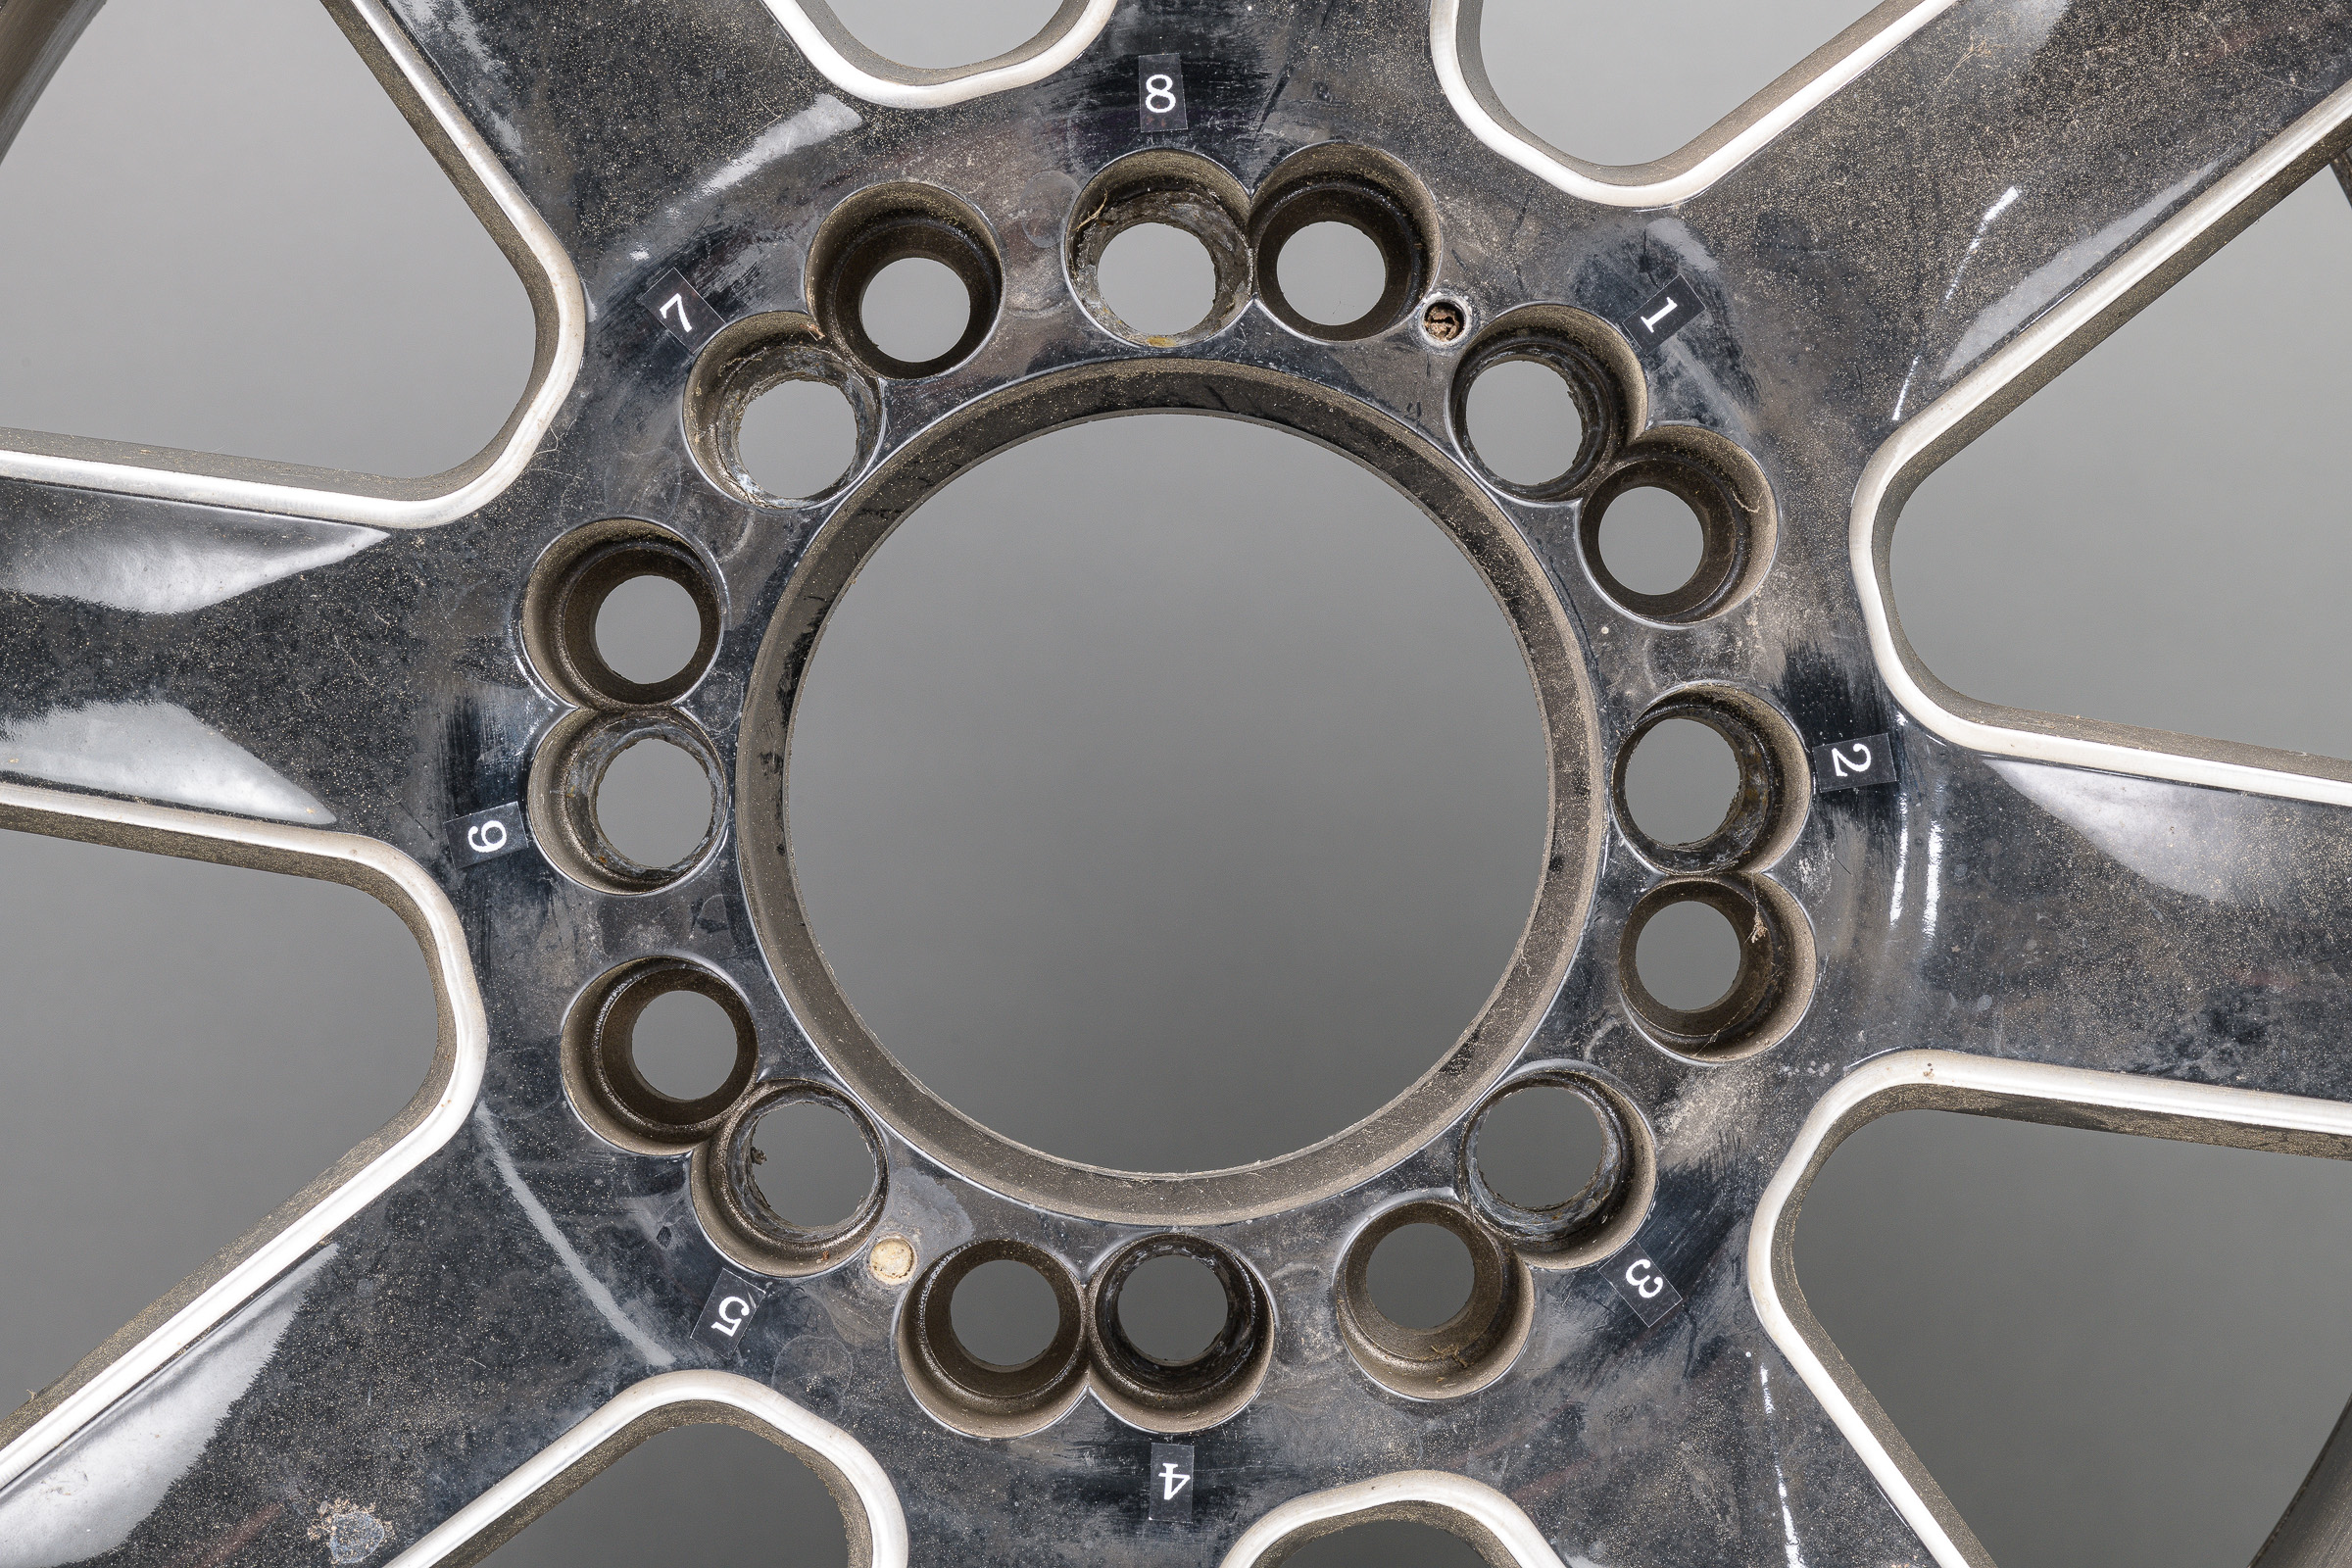
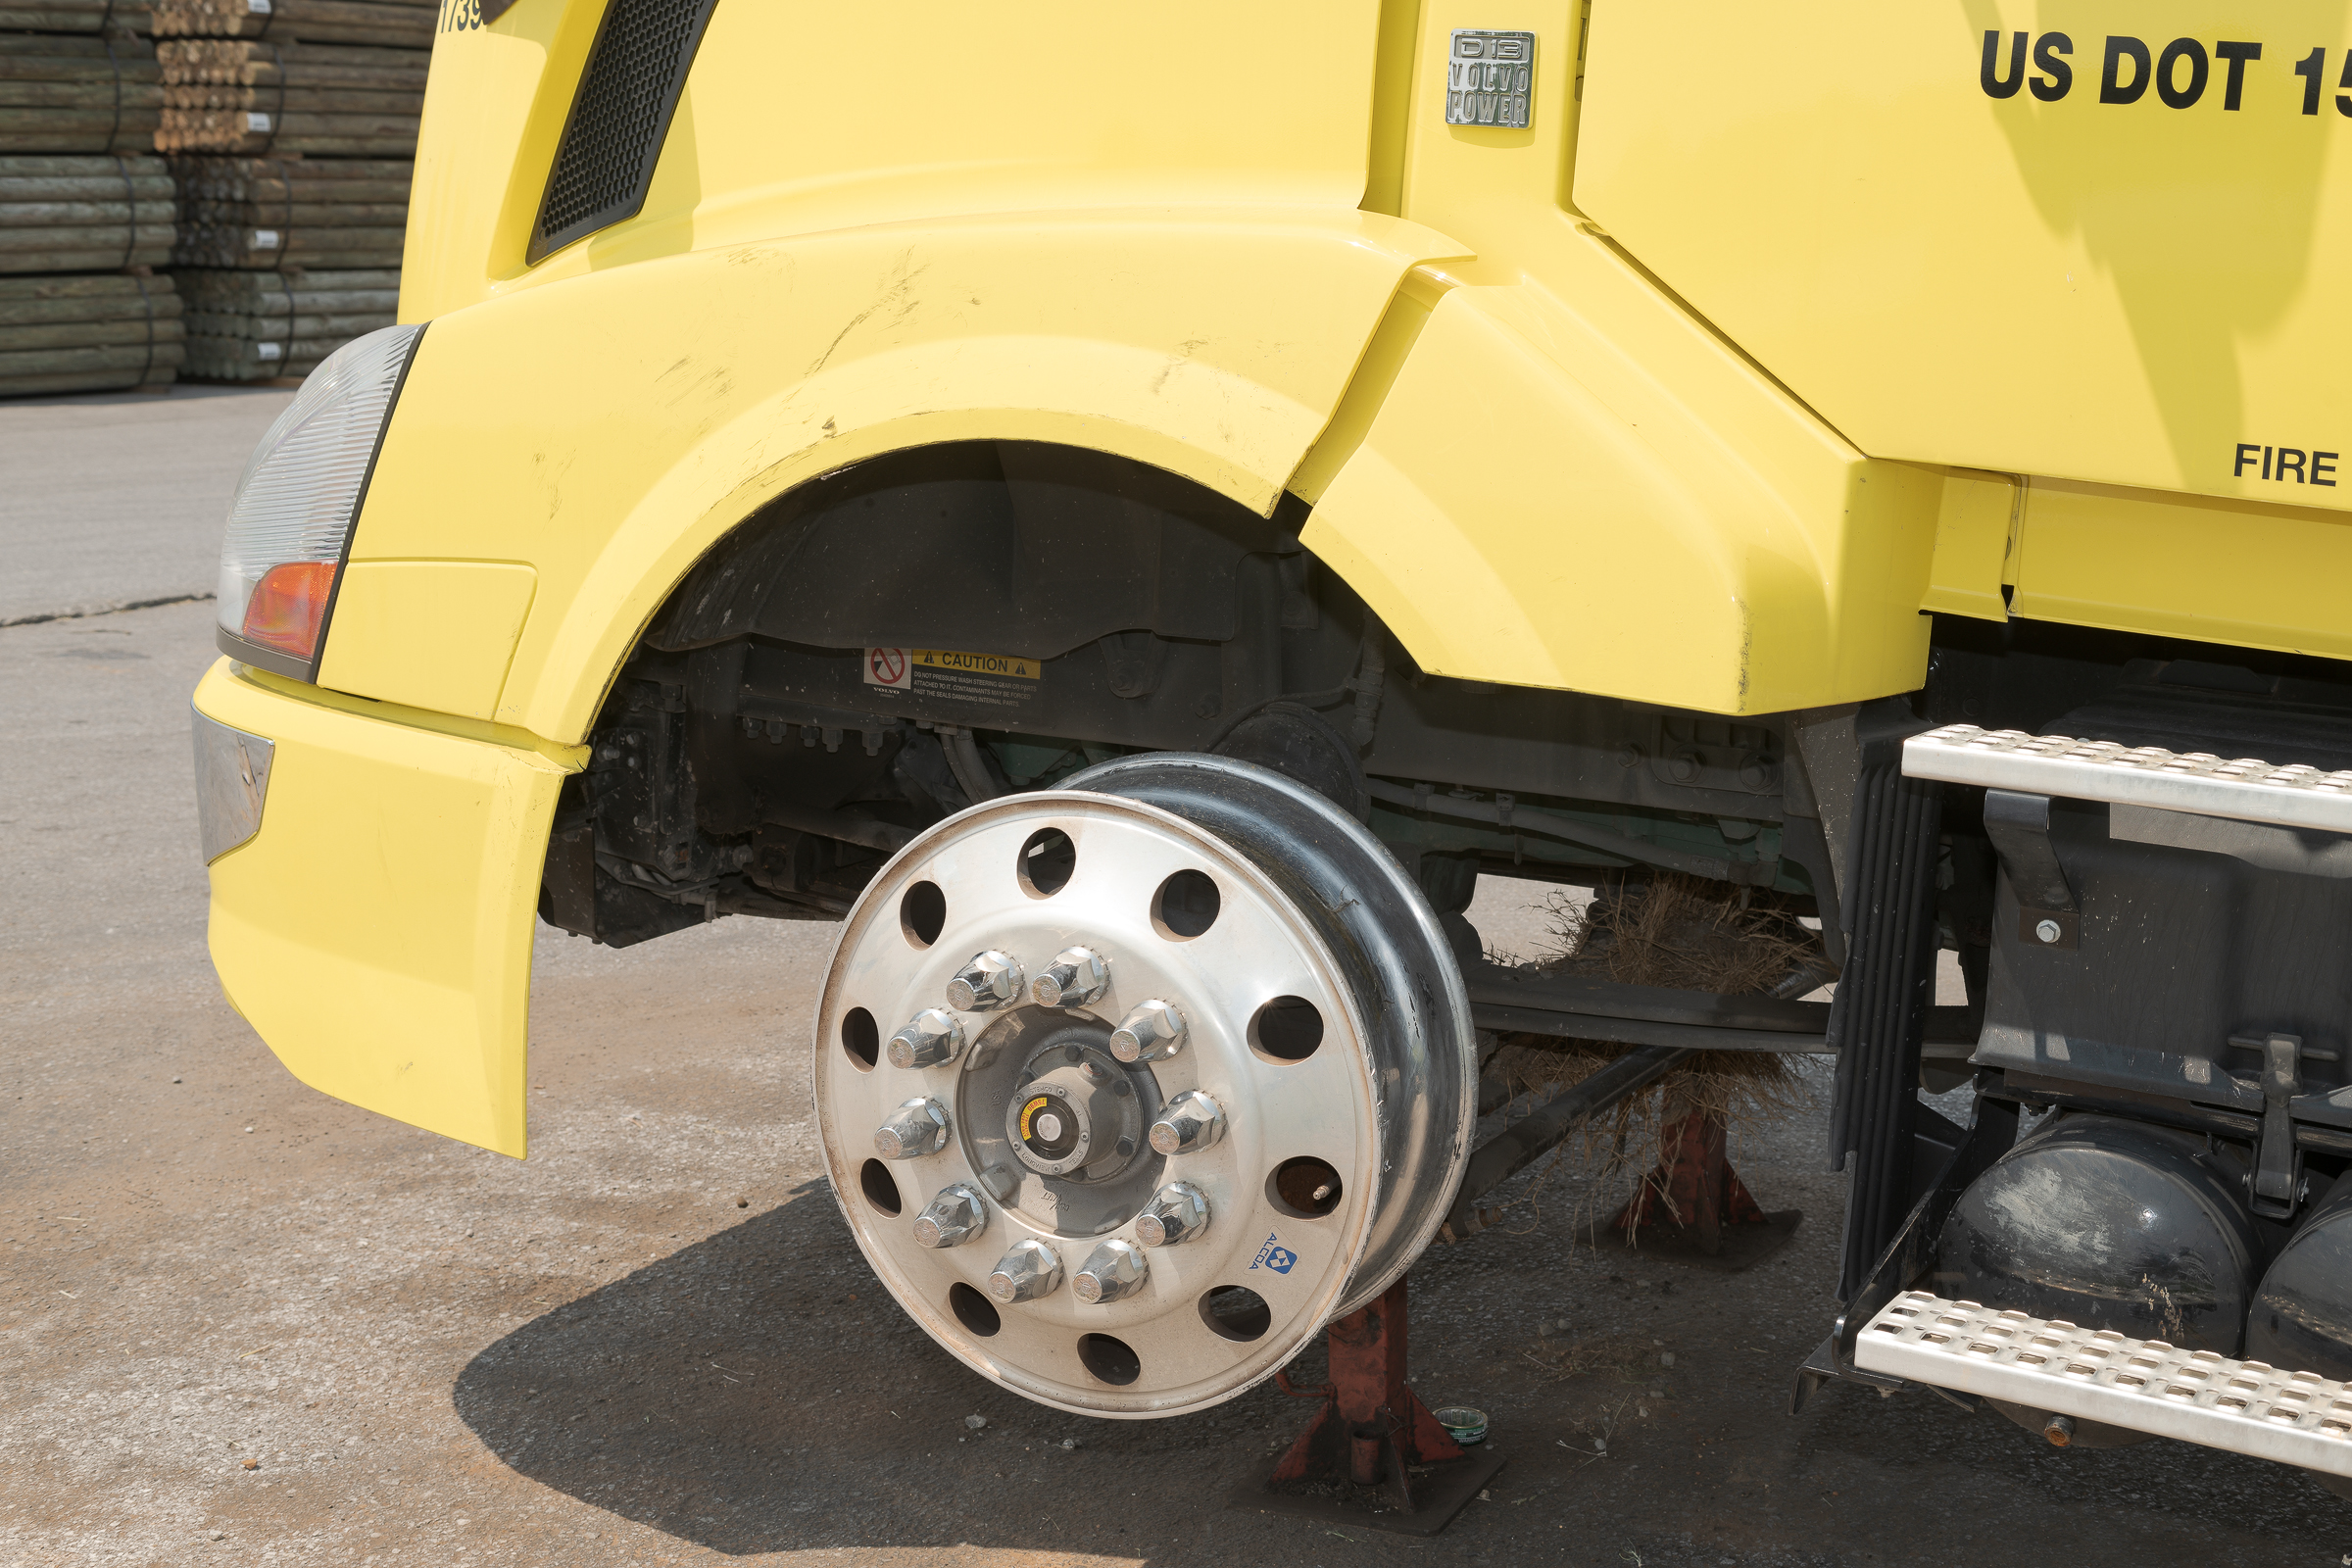
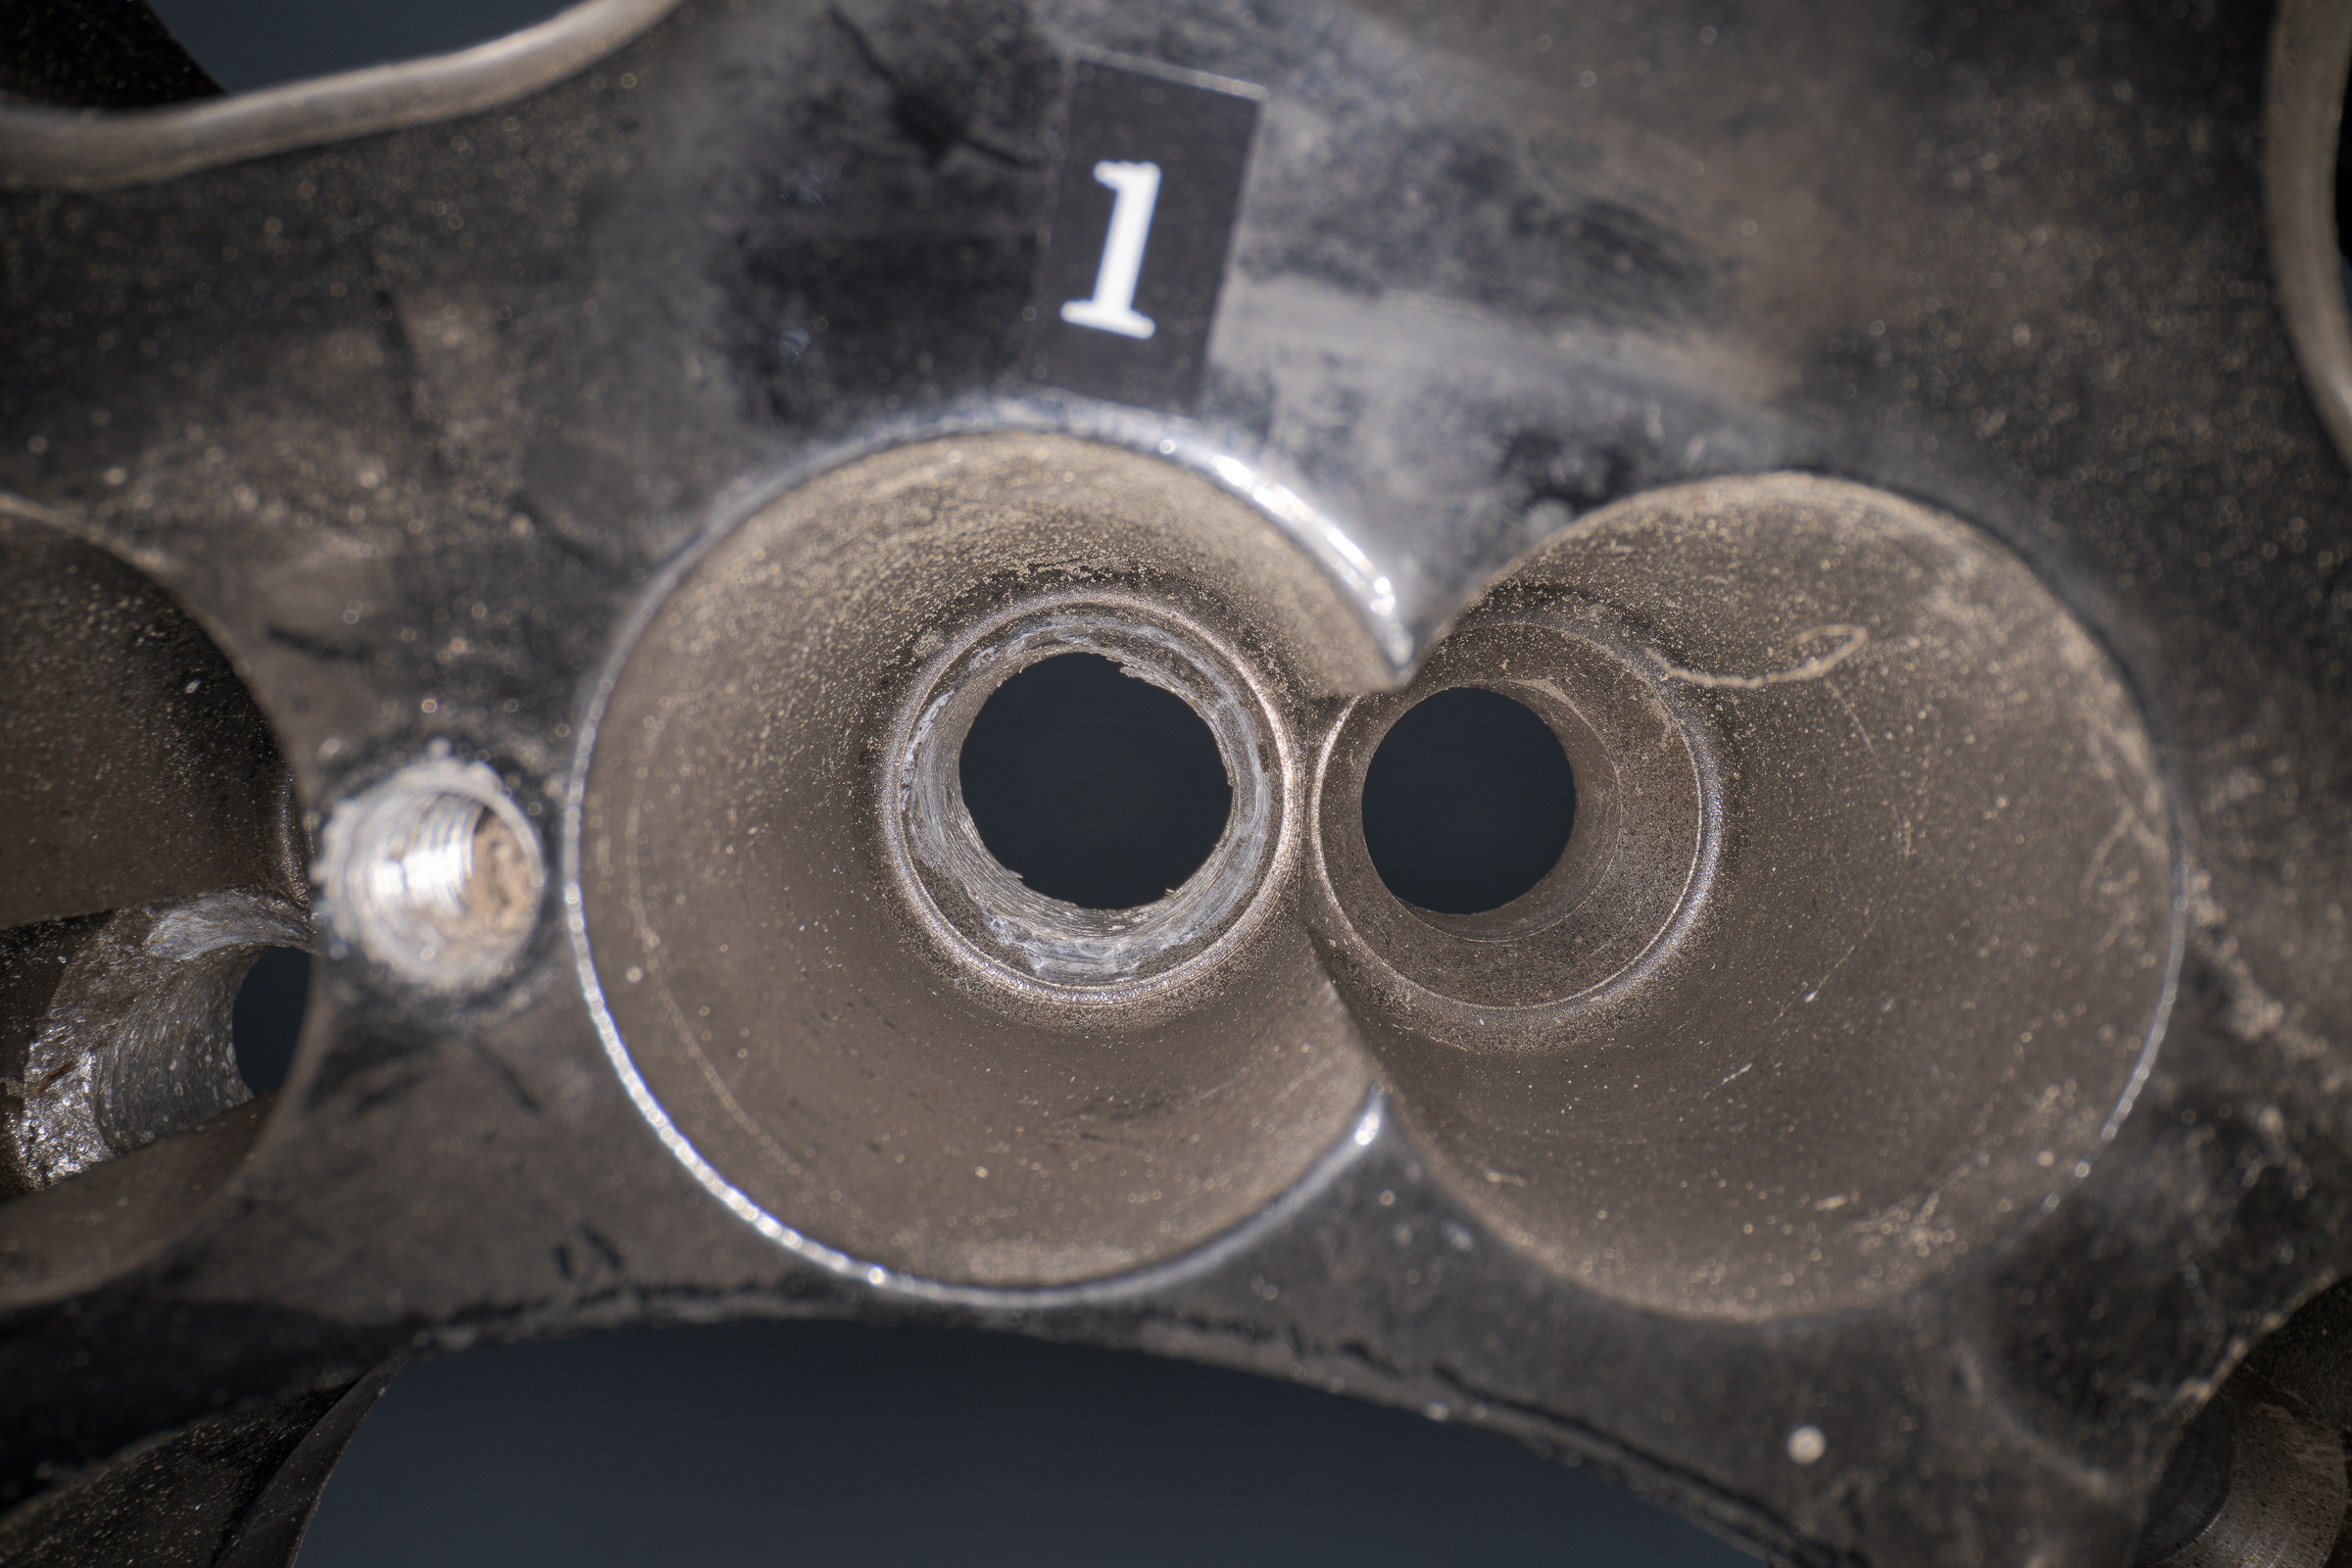
The first image I made for each paired hole (the wheel was drilled for two bolt patterns) was to show the bolt hole pair, while concentrating on the appropriate bolt hole. [Click on photo to enlarge, then click on back arrow to return to this post.]

Nikon D850 with Laowa 24mm f/14 2X Macro Probe. f/unrecorded, 0.5 sec, ISO 64.

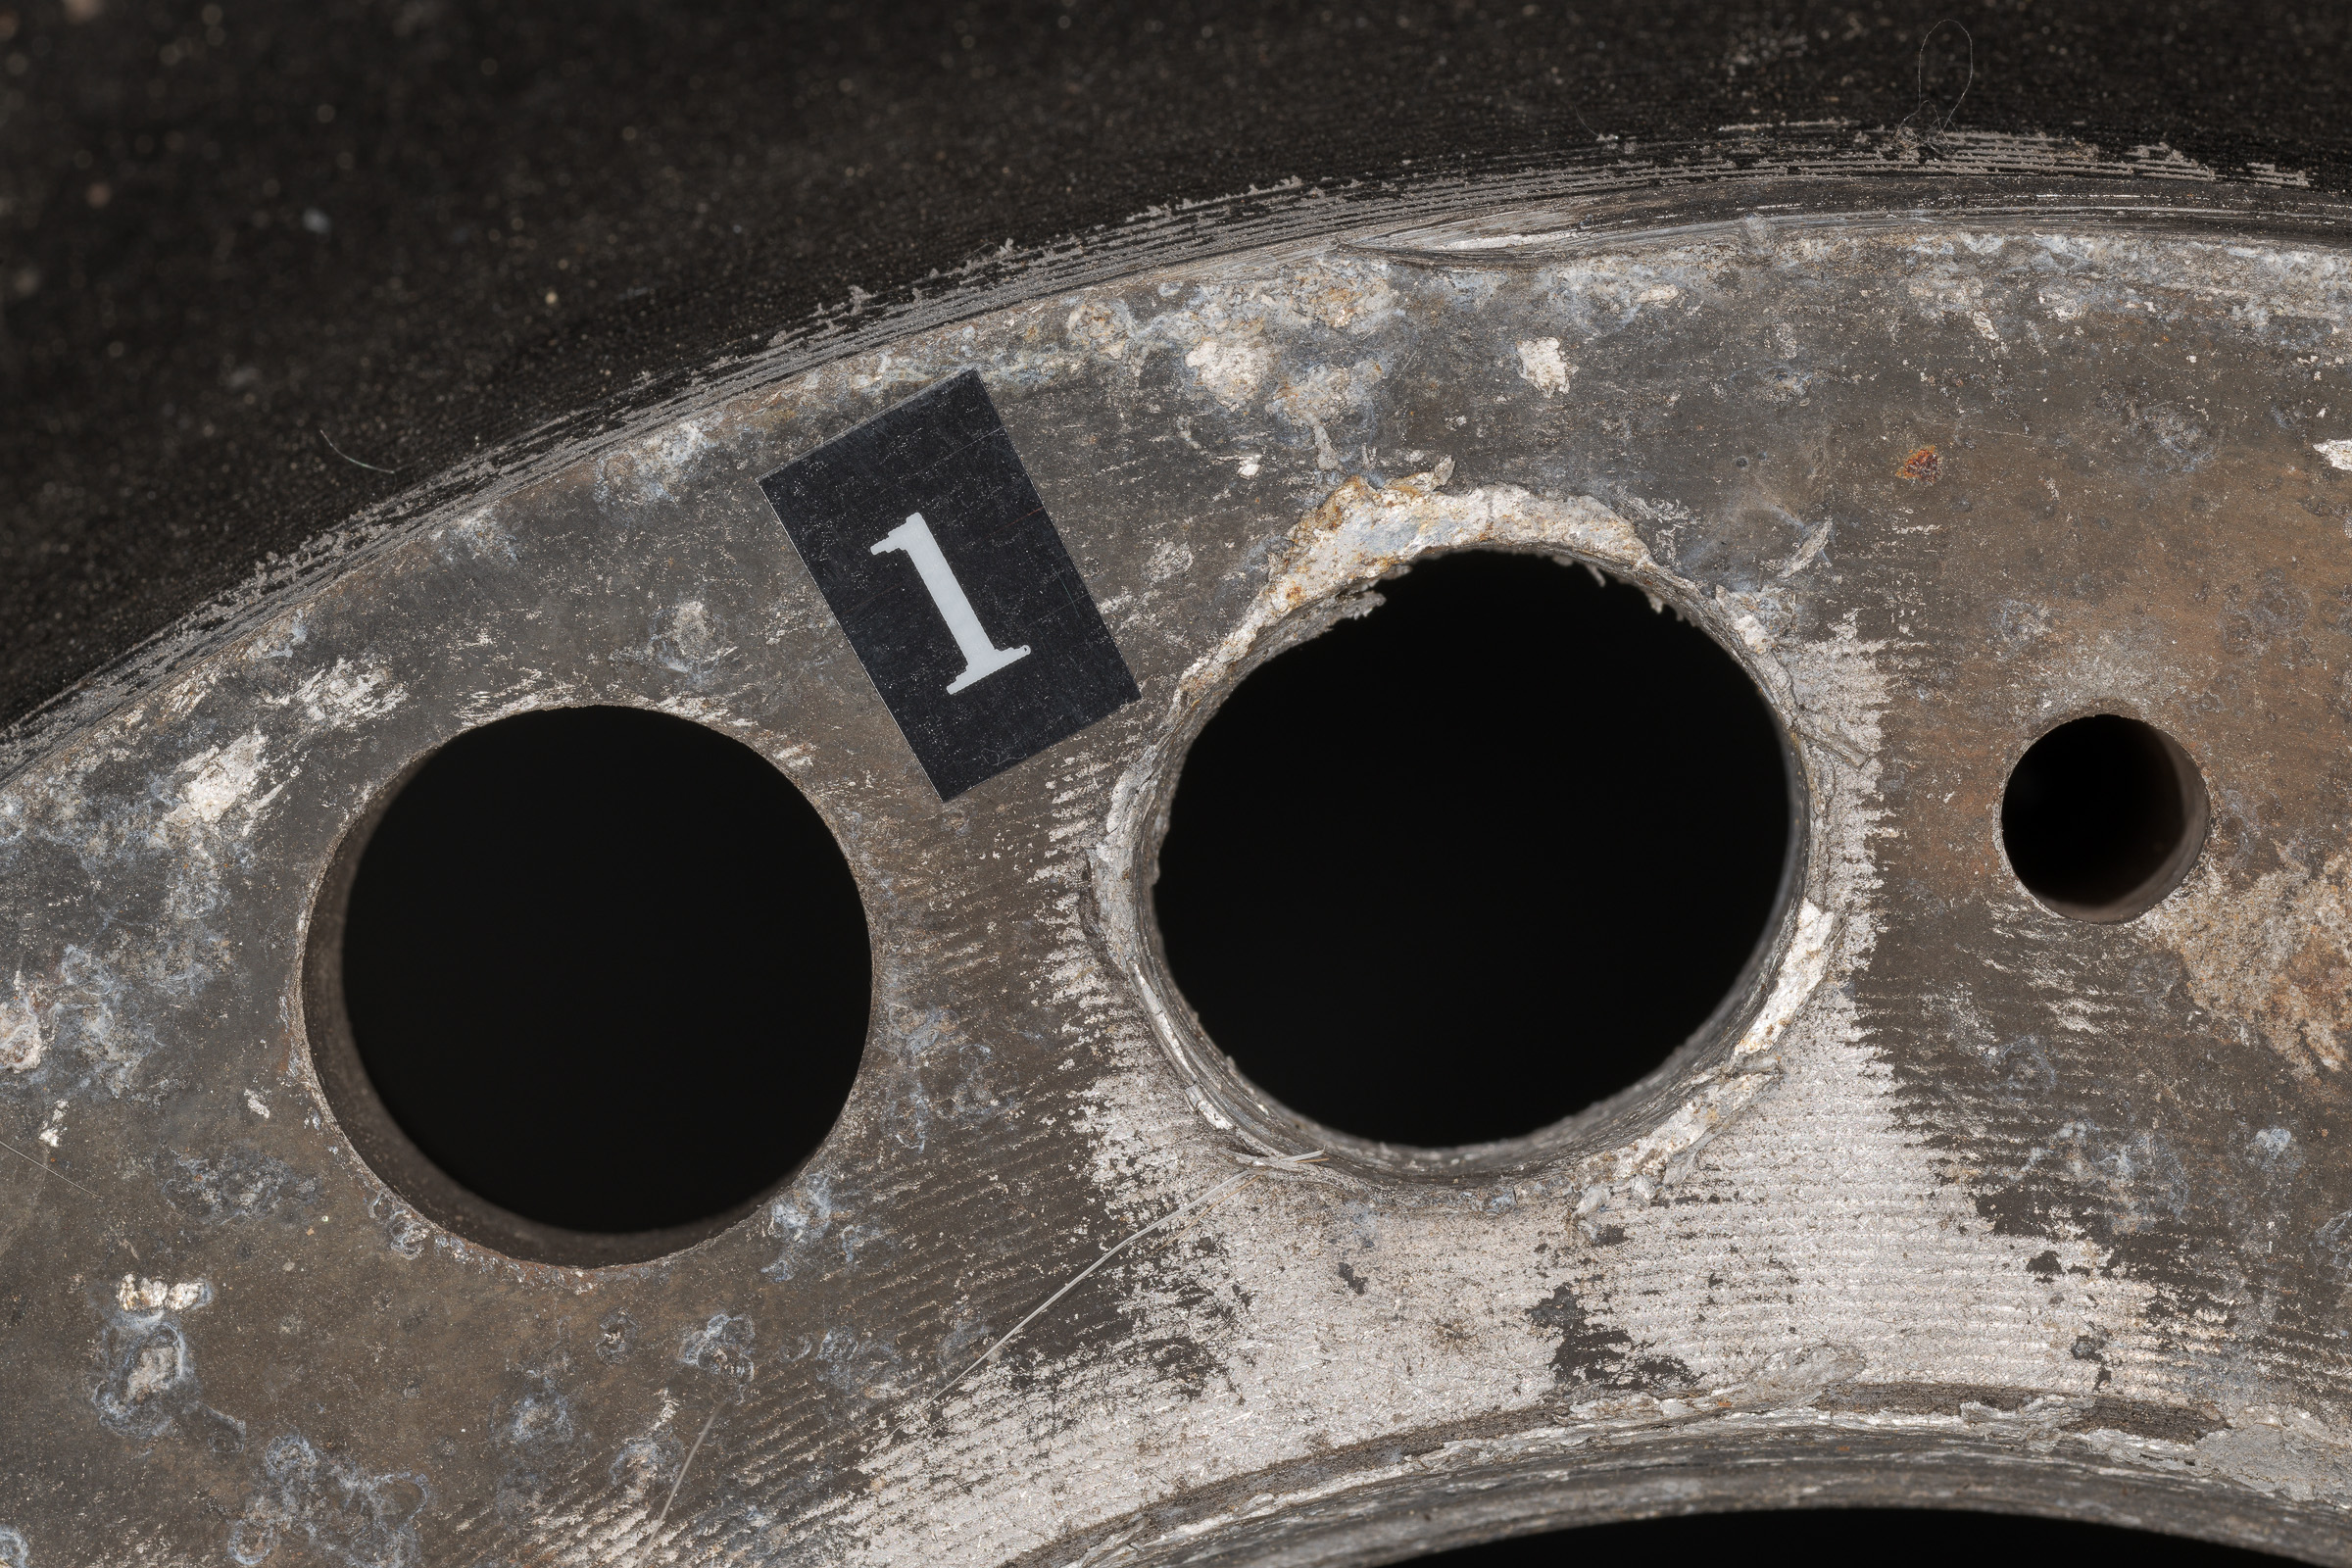
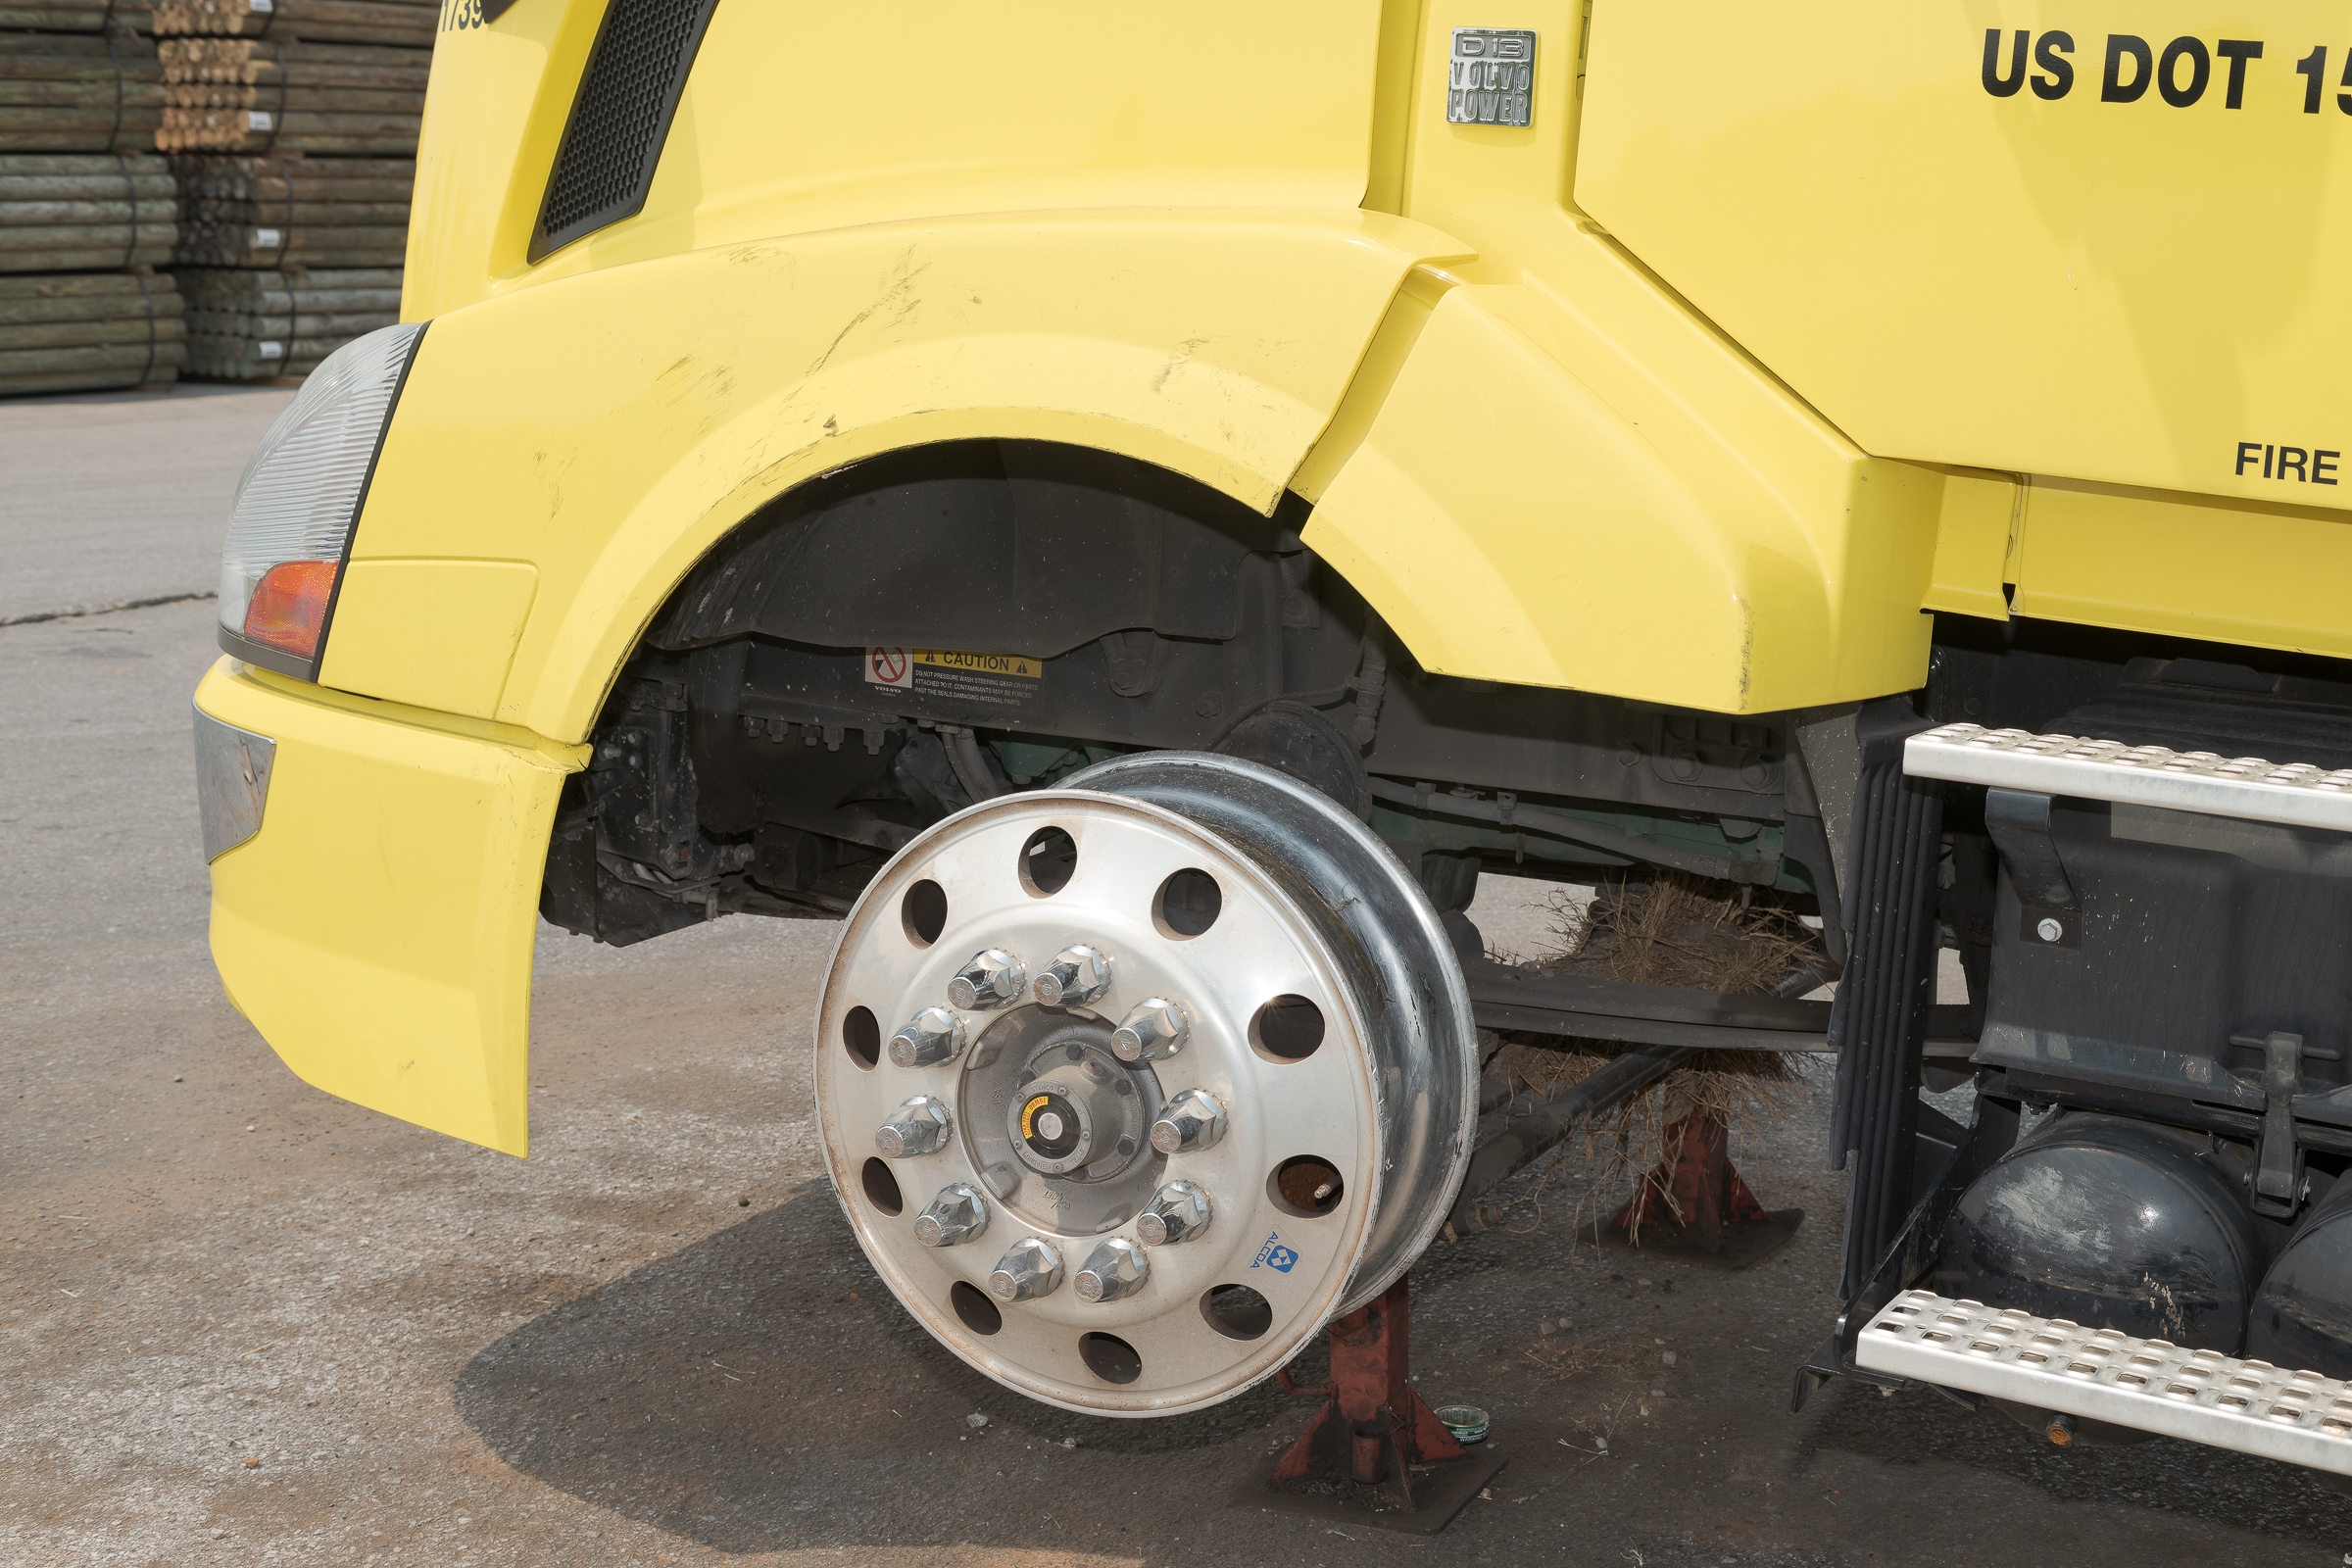
I then slid the end of the Probe deeper into the recess to fill the frame with details of the mounting surface. [Click on photo to enlarge, then click on back arrow to return to this post.]

Nikon D850 with Laowa 24mm f/14 2X Macro Probe. f/unrecorded, 0.3 sec, ISO 64.

I know of no other way to have attained this image without significant cropping and the inherent loss of detail and resolution.

Although it’s not a lens I use all that often, I’ve found the Probe unmatched for photographing inaccessible labels, fasteners, or other components, too. The built-in LED lights around the lens make it a really useful tool.

If you have (or anticipate) a singular need for it, you can rent one in just a day or two from someone like LensRentals.com at: https://www.lensrentals.com/catalog_search?q=laowa+probe.

Takeaways:

-1- The Laowa Probe (along with the more recent Peri-Probe) lens is a unique, specialized macro lens that can allow you to photograph areas that are otherwise inaccessible.

-2- The Laowa Probe lens allows you to capture all the resolution and detail of full frame images that would be lost with a significant crop.

-3- If you are stymied about how to photograph a challenging subject, you might be able to find a commercially available specialized solution.

-4- While it is preferable to have specialized lenses at your disposal, you can always rent lenses (or other photography gear) for infrequently encountered situations. Of course, you might find yourself using even seemingly specialized lenses more often if you own them and have them readily available.


Using Flash to Remove Glare from Reflective Surfaces

Often, evidence is stored in plastic bags or containers with shiny surfaces that result in reflective glare when photographed. This glare can obscure both the content and any markings on the bag or container.

As an example, a small piece of the bead toe from a tire was placed in a plastic bag, which was labeled with a black magic marker. (The writing on the bags in the images below has been intentionally altered to preserve anonymity.)

This first image was made in my Studio Lab using just the overhead LED lights. [Click on image to enlarge, then click on left arrow to return to this post.]

Plastic Evidence Bag without Flashes (Made with ZEISS Milvus 50 mm f/2 Macro lens on Nikon D850 at f/16, 1 sec, ISO 64.)

Even though the image is properly exposed, the overhead LED lights resulted in so much glare that it is difficult to make out the tiny tire piece inside or the writing on the outside of the bag.

To show both the contents and the writing, I kept the overhead LED lights on, but added a Profoto B1x studio flash on the right and on the left side of the bag. (Note: any remote flashes or speedlights can be used for the same effect.) [Click on image to enlarge, then click on left arrow to return to this post.]

Plastic Evidence Bag with Flashes (Made with ZEISS Milvus 50 mm f/2 Macro lens on Nikon D850 at f/16, 1/200 sec, ISO 64. One Profoto B1x strobe to each side triggered by a Godox TT685N II flash in the camera’s hot shoe.)

Wait, how did adding even more light eliminate the glare? Two things combined to make that work.

First, the added light from the flashes allowed me to significantly reduce the overall exposure. In this case, for both images I kept the aperture at f/16 for depth of field, and the ISO at 64 for lowest noise/highest dynamic range.

In the original image using the overhead LED lights only, the shutter speed was 1 second. When I added the flashes, I reduced the shutter speed down to 1/200 second. This faster shutter speed prevented the overhead LED lights—and their reflections—from recording at all. If I turned off the flashes, the image would have been black, even though the overhead LED lights were on.

Second, the light that reflected from each flash bounced away from its respective flash, and not into the camera lens. Hence, their reflections were not recorded by the camera.

Takeaways:

-1- To reduce or eliminate glare from overhead lights, reduce the exposure enough to cause the image to go black, or nearly so.

-2- Add one or more flashes positioned (usually to the sides) such that any reflections bounce away from the lens, not into it.

-3- Adjust the power of the flash(es) to properly light the subject at the new exposure.

-4- Note: With curved or irregularly shaped objects (like plastic bags), some localized reflections may remain. These may or may not be moved or eliminated by changing the positions of the camera or the flash(es).

Labeling Evidence for Product Photography

When your subject has multiple similar features, you’ll need to mark each of them to distinguish among them in your photographs. These markings must be repeated on the other side of your subject, too, if applicable.

Since you are dealing with evidence, you should never make permanent marks unless agreed to by all parties involved beforehand. Instead, it’s best to use removable stickers or labels.

Before applying any labels, photograph the subject as you received it. This will ensure no part of the evidence is masked. As an example, here is a photograph of the mounting surface of an eight-bolt wheel with sixteen holes so it can be used with more than one bolt circle. (Click on image to enlarge, then click on the back arrow to return to this post.)

Nikon D850 with ZEISS Milvus 50 mm macro lens and Nikon R1C1 macro flashes. f/16, 1/200 sec, ISO 64.

Using a Brother P-touch labeler, I made one long label with two strings of numbers from 1 through 8, then cut between each number to create small labels of each individual number. The goal was to make the labels as small—yet as legible—as possible so they would mask the least amount of the evidence.

Choose a font with legible numbers, and set the font style to bold. Depending on the color of evidence, I usually use either white on black or black on white labels. On rare occasions, I have used black on clear labels. It’s advantageous to have all three label tapes available.

A label maker creates labels that are more legible and more professional looking than writing numbers by hand on torn pieces of tape.

For this wheel, I numbered the holes in pairs. Note that the numbers are counterclockwise on the inside so they will correspond with the same numbers on the outside of the wheel, which were clockwise. (Click on image to enlarge, then click on the back arrow to return to this post.)

Nikon D850 with ZEISS Milvus 50 mm macro lens and Nikon R1C1 macro flashes. f/16, 1/200 sec, ISO 64.

Here is the outside of the wheel showing the clockwise bolt hole pair labels. (Click on image to enlarge, then click on the back arrow to return to this post.)

Nikon D850 with ZEISS Milvus 50 mm macro lens with two Profoto B1x in diffused silver umbrellas. f/16, 1/200 sec, ISO 64.

Now close-ups of every hole will be easily identified whether on the inside…

Nikon D850 with ZEISS Milvus 100 mm macro lens and Nikon R1C1 macro flashes. f/16, 1/200 sec, ISO 64.

…or the outside of the wheel. Note that the labels are a good size in the close-ups without overwhelming the subject. Also note that the label is still effective even if it is out of the depth of field of the subject and is slightly out of focus.

Nikon D850 with Laowa 24mm f/14 2X Macro Probe. f/unrecorded, 0.5 sec, ISO 64.

Takeaways:

-1- After photographing evidence as found or received, mark repetitive features on any sides that will be photographed.

-2- Do not make permanent marks on evidence.

-3- Mark evidence with small, legible, and removable labels instead of handwritten numbers on torn pieces of tape.

-4- While labels should be included in close-ups, they do not have to be within the depth of field of the subject as long as they are still discernible.

-5- After making each close-up image with its label, you may want to remove the label and take another photograph without it. Having your camera on a tripod will allow you to made identical shots both with and without the label.

SAE Photography Class — July 12-14, 2022

With live classes now returning to SAE, I’m excited to announce that my next Photography for Accident Reconstruction, Product Liability, and Testing class will be July 12-14, 2022 at Mecanica Scientific Services’s fantastic classroom facilities in Oxnard, CA. Special thanks to Mecanica’s John Steiner for hosting this class for the third time!

Here’s a link for more information and to register: SAE Photography Class July 2022.

The class has ten major subject modules that build upon each other. We’ll explore in-depth about gear, light, camera fundamentals, settings, post-processing, and much, much more. You’ll come away not just knowing about, but actually understanding how to make better, more consistent, and more useful photographs during all your inspections and analyses, regardless of lighting conditions.

Please call or e-mail me directly if you have any questions or need more information.

I hope to see you there!

Forensic Photography Symposium – January 17-20, 2022

Eugene Liscio, 3D Forensic Analyst and founder of ai2-3D, has assembled the first virtual Forensic Photography Symposium to be held January 17-20, 2022. There are many intriguing and helpful sessions each day with ideas and solutions to many problems often encountered in many areas of forensic photography. Here’s a link to the schedule and registration: Forensic Photography Symposium Schedule & Registration

I’ve been honored to have been asked by Eugene to present a session on the three most essential photography tools besides your camera and lens. They are: tripods, polarizer filters, and flashes. Most forensic photographers know what those tools are, but this presentation is designed to explore and show examples of how their regular use can drastically improve the quality and usefulness of your images. Using these tools, you will be able to consistently capture and present more data in each of your images, which is the whole point of making forensic photographs!

Screenshot from YouTube Intro for Forensic Photography Symposium January 17-20, 2022.

Here is a brief introduction video with Eugene: YouTube Introduction

Make sure you check out all the great sessions. I can’t wait to see them.

Hope to “see” you there!

More on Fill Flash

Fill Flash helps bring out details in the shadowed area of high-contrast subjects. This first photo of the left front of a truck tractor without flash doesn’t have much detail under the fender. [Click on image to enlarge, then click on back arrow to return.]

Left Front of Truck with No Flash (ZEISS Milvus 50 mm macro lens on Nikon D850 at f/10, 1/50 sec, ISO 64.)

To bring out some detail, a flash was added at a reduced power output for this second image. (It’s more noticeable in an enlarged image.) Fill flash isn’t intended to light the entire image frame, but only to lighten very dark areas. [Click on image to enlarge, then click on back arrow to return.]

Left Front of Truck with Medium Fill Flash (ZEISS Milvus 50 mm macro lens on Nikon D850 with Nikon SB-910 flash at f/10, 1/50 sec, ISO 64.)

While there was a little more detail in the suspension and frame, raising the flash power added even more light under the fender. Again, it’s best to enlarge the image to see the effect. [Click on image to enlarge, then click on back arrow to return.]

Left Front of Truck with More Fill Flash (ZEISS Milvus 50 mm macro lens on Nikon D850 with Nikon SB-910 flash at f/10, 1/50 sec, ISO 64.)

Note that all three photographs were made at the same exposure of f/10, 1/50 second, and ISO 64. The images differ because the amount of fill flash was different. This showed the flash was supplemental or “fill” meaning flash filled in the shadows without altering the overall exposure.

Before you make any photograph, look for areas that are too dark to show details you may want. By varying the power of the flash, you can bring out as much detail as you choose, without affecting the overall exposure.

Two takeaways:

-1- Fill flash adds light in the shadows without affecting the overall exposure, which stays the same.

-2- You can control the amount of shadow detail you want to show by changing the output of your flash, or its flash power.

Note: This is an updated and enhanced version of a post originally made in July 2018.

New SAE Photography for Accident Reconstruction, Product Liability, and Testing Class Scheduled!

After having four of the five classes canceled last year, I’m really happy to announce the return of my SAE automotive and product photography class: https://www.sae.org/learn/content/c1729/. I’m glad to be returning to the site of my first class in 2018 at the great facilities of Mecanica Scientific Services in Oxnard, CA:  https://www.mecanicacorp.com/. Many thanks to John Steiner, CEO and Principal Scientist of Mecanica, for hosting this upcoming class from August 30 through September 1, 2021.

Important note: This class is an elective choice for the SAE Accident Reconstruction Certification (https://www.sae.org/learn/professional-development/certifications/accident-reconstruction-certificate/courses). It also qualifies for PE continuting educational requirements and ACTAR credits. Best of all, what you learn in this class can be applied immediately, and every single time you’re doing an inspection afterward.

Whether your primary job is accident reconstruction, product analysis, vehicle or component testing, or other technical area, you will need consistent, quality photographs to both document and analyze your subjects. These photos need to be made regardless of ambient lighting or conditions. Your camera on Auto isn’t going to do that. [Click on image to enlarge in new window, then click back arrow to return to post.]

Photo made by panning with vehicle moving at 55 mph during tire testing. (Made with Nikon 300 mm f/2.8 lens on Nikon D800E at f/6.3, 1/640 sec, ISO 400.)

Not only are good photos essential for documentation and useful for analysis, they can be critical for use in lawsuits, insurance claims, recalls, and design and testing evaluations. Both in-house analysts and independent consultants will be counted on to routinely produce accurate and reliable photographs as part of their professional work. Did I mention that your camera on Auto isn’t going to do that? [Click on image to enlarge in new window, then click back arrow to return to post.]

BMW in sun at tow yard. Fill flash and polarizer. (Nikon 24-70 mm f/2.8G lens on Nikon D810. Exposure: f/10, 1/60 sec, ISO 160.)

This class is designed to give you the tools and knowledge you’ll need to consistently create professional photographs by proper use of focus, depth of field, composition, lighting, polarizers, tripods, and close-up/macro tools. You’ll see how flash is essential for capturing all the data, and how it’s not as intimidating as many believe. We’ll also cover the two types of night photography as well. [Click on image to enlarge in new window, then click back arrow to return to post.]

Night photo of intersection with traffic light. (Made with ZEISS Milvus 50 mm f/2 macro lens on Nikon D850, at f/6.3, 1/60 second, ISO 1600.)

There will be more hands-on sessions than in previous classes, so make sure to bring your camera, lenses, polarizer, tripod, and flash. Course information and registration are available through the link in the first paragraph, but if you have any questions or need more information, please feel free to e-mail or call me directly.

My YouTube Interview about Automotive Forensic Photography

On Thursday, April 1, 2021 (and, no, it wasn’t an April Fools joke), I had the honor of being interviewed by Eugene Liscio of ai2-3D  for his Forensics Talks YouTube channel.

Forensics Talks YouTube interview by Eugene Liscio

Here’s a link to the interview: Forensics Talks with Tom Vadnais.

For almost an hour, we talked about a wide range of topics related to tire, vehicle, and accident reconstruction photography. Among the subjects we discussed were the importance and use of a tripod, a polarizer, and flash. We also touched on both kinds of night photography and on post-processing.

I hope you will find the information we discussed useful. The interview also gives an idea of a couple of the topics which we demonstrate and discuss in depth in my SAE class which, by the way, will be resuming as in-person classes this year.

Here’s a link to that class: SAE C1729. I’ll post the dates of the new classes as soon as we finalize them.

Vadnais Engineering Studio Lab

To facilitate my tire, wheel, and product analysis and photography, I set up my Studio Lab in my basement. Although it continues to evolve, it had fortuitously been set up and in use for nine years before the COVID-19 pandemic of 2020 brought most travel and meetings to a halt. In fact, even before the pandemic, I have preferred having tires, wheels, and other products shipped to me for analysis and/or photography in my Studio Lab rather than traveling to where they might be stored.

In my Studio Lab, I have all the inspection and photography equipment I need to do a complete analysis and documentation, regardless of what I encounter. Besides, I can leave any setup in place for several days if needed. (Click on an image to enlarge it. Then click back arrow to return to this post.)

Tire analysis setup includes camera with flash on studio stand, two studio strobes into silver umbrellas, silver reflector, and gray background paper with tire on lazy susan. (Made with ZEISS Milvus 25 mm f/1.4 lens on Nikon D850 with SB-910 flash firing the two studio strobes, f/16, 0.5 sec, ISO 64.)

Although it is partly obscured by the support pole in the photograph above, I mount a camera on one end of the sliding arm of a Foba rolling studio stand. One of my favorite pieces of gear, a studio stand is much faster to adjust and move than a tripod. The arm rotates around, slides back and forth on, and moves up and down on a solid pole mounted to a base with three lockable wheels. These adjustments allow a camera to be brought and held in the exact position needed—both rapidly and securely.

I then mount as many lights as required on rolling light stands, floor stands, C-stands, or clamps. Having the camera and lights on rolling stands makes it quick and easy to change their positions. My large collection of reflectors and reference scales can be held in position with a variety of clamps, as needed.

I also use one of three wooden or four plastic lazy susans, depending on the size of the tire, wheel, or product. I cover the lazy susans with gray paper or cloth, and use a neutral gray background paper from a large ceiling-mounted roll.

Because tires and wheels are usually neutral in color—shades of black, gray, silver, or white—the neutral gray background neither clashes nor contaminates the subjects. With other products, I may use gray, black, or white backgrounds.

I’ve installed so many LED shop lights overhead that a couple visitors have described the area as bright as an operating room. Even with this much light, I still use a number of LED drop lights during inspections, and to assist with composition and focusing while photographing. (Click on an image to enlarge it. Then click back arrow to return to this post.)

Tire analysis setup includes camera with flash on studio stand, two studio strobes into silver umbrellas, silver reflector, and gray background paper with tire on largest lazy susan. (Made with ZEISS Milvus 25 mm f/1.4 lens on Nikon D850 with SB-910 flash, f/16, 0.6 sec, ISO 160.)

I will describe lighting for specific items in future posts, but for tires, I generally use two Profoto B1x 500 W/s studio strobes firing into Profoto Medium Deep Silver umbrellas—both mounted on rolling light stands. A Nikon SB-910 flash affixed to the hot shoe a Nikon D850 DSLR  camera triggers both studio strobes, and adds its light on the subject, too. A silver Profoto reflector bounces light onto the tread or belt surface.

If you’re wondering, I use the purple trekking pole to rotate a tire while I’m sitting on the Wen mechanic’s rolling seat behind the camera. Using that pole allows me to look at the image through the grid in Live View on the camera’s LCD while I precisely line up the position stickers on the tire with the gridlines.

The cable hanging from the camera is the remote shutter release. With this, I can trip the shutter without touching the camera to insure there is no motion blur in the photo.

I will share more of the techniques and gear I use in future posts.

Lighting Equipment Used for the Previous Low Light Blog Post

In the last post, I showed some lighting solutions to use when your subject is in low light. In this post, I will briefly describe some of the supports and the lights I referred to. Flash is a big and interesting subject, and I have an entire module on flash photography in the photography class I teach for SAE (SAE C1729). Or, I should say, will resume teaching once this pandemic eases.

I will expand on each of these in future posts, but wanted to give the basics here. First and foremost is using a good tripod. There is nothing better you can do to improve your photographs than to use a tripod. I use a tripod in any kind of light for almost every image of any subject, including accident sites, vehicles, tires, and other products. A good tripod is even more essential when the light levels are low.

It used to be unusual to see someone with a tripod at an inspection. But with so many scanners now being used, tripods have become quite common. So there goes one excuse for not carrying and using one!

I have a post all about tripods in the works, but for now I’ll just mention the Really Right Stuff (RRS) TVC-24L with a RRS BH-40 ball head that I use for all inspections out of my Studio Lab. It is compact and lightweight, yet it extends quite high, which is essential. All of my tripods have LensCoat LegWraps for insulation (from both hot sun and freezing temperatures) and for comfort in carrying. (Click on image to enlarge, then click on back arrow to return to this post.)

Really Right Stuff (RRS) TVC-24L tripod with RRS BH-40 ball head. (Made using Nikon D850 with ZEISS Milvus 50 mm macro lens. Lit with two Profoto B1x strobes firing into silver umbrellas.)

While future posts (and classes) will discuss flash techniques in detail, in this post I will focus on the equipment I used in the previous post.

Flashes that fit in your camera’s hot shoe are generically called speedlights or flashes. In fact, Nikon calls their flashes Speedlights while Canon calls theirs Speedlites. Larger studio-type flashes are referred to as strobes. Here are some examples from the front. All are battery powered. (Click on image to enlarge, then click on back arrow to return to this post.)

(L to R) Profoto B1x, Canon 430EX III-RT, Nikon SB-910, and Profoto B10. (Made using Nikon D850 with ZEISS Milvus 50 mm macro lens.)

And here they are from the rear. Note that the speedlight flashes can be mounted in a camera hot shoe or on a light stand. (Click on image to enlarge, then click on back arrow to return to this post.)

(L to R) Profoto B1x, Canon 430EX III-RT, Nikon SB-910, and Profoto B10. (Made using Nikon D850 with ZEISS Milvus 50 mm macro lens.)

In the photograph of the lighting setup in the previous post, there was a Nikon SB-910 Speedlight in the camera hot shoe and two Profoto B10 strobes on Manfrotto 5002-M travel light stands. These stands are lightweight and fold up small, yet are quite sturdy. (Click on image to enlarge, then click on back arrow to return to this post.)

Manfrotto travel light stands 5002-M (top) and 5001 (bottom). (Made using Nikon D850 with ZEISS Milvus 50 mm macro lens. Lit by two Profoto B1x strobes firing into silver umbrellas with diffusers.)

This final image shows a Profoto B10 mounted on a Manfrotto 5001, which is slightly smaller and slightly less sturdy (though still sufficient) than a 5002-M. (Click on image to enlarge, then click on back arrow to return to this post.)

Profoto B10 on Manfrotto 5001 travel light stand. (Made using Nikon D850 with ZEISS Milvus 50 mm macro lens. Lit with two Profoto B1x strobes firing into silver umbrellas.)

In the previous post, the two B10’s were fired through their infrared slave sensors when they sensed light from the on-camera Nikon flash. All three flashes and the camera’s exposure settings were all manually set.

Why use strobes when you can use speedlights? Power is the answer. Mid-to-high end speedlights typically have power outputs between 60 and 150 Watt-seconds (Ws), while the Profoto B10 and B1x are 250 and 500 Ws, respectively. This means you’d need two-to-eight speedlights to equal one Profoto strobe. For example, you’d need sixteen 60 Ws mid-range flashes to equal the power output of the two 500 Ws strobes I use for tire photos in my Studio Lab. Not only would those be unwieldy to set up, but think of how many AA batteries you’d need!

Why is flash power important? Every one stop increase in exposure requires doubling of the light power. For forensic or testing photographs, you want to minimize noise by using the lowest ISO you can, and you want a deep depth of field by using a smaller (higher number) aperture. Both a lower ISO and a smaller aperture result in less light reaching the sensor. Consequently, the flash has to be powerful enough to ensure a proper exposure without raising ISO or opening up your aperture.

Future posts will go deeper into exposure both with and without flash. We will be using this equipment throughout.