Deprecated: Function WP_Dependencies->add_data() was called with an argument that is deprecated since version 6.9.0! IE conditional comments are ignored by all supported browsers. in /home/vadnaise/public_html/wp-includes/functions.php on line 6131
Deprecated: Function WP_Dependencies->add_data() was called with an argument that is deprecated since version 6.9.0! IE conditional comments are ignored by all supported browsers. in /home/vadnaise/public_html/wp-includes/functions.php on line 6131
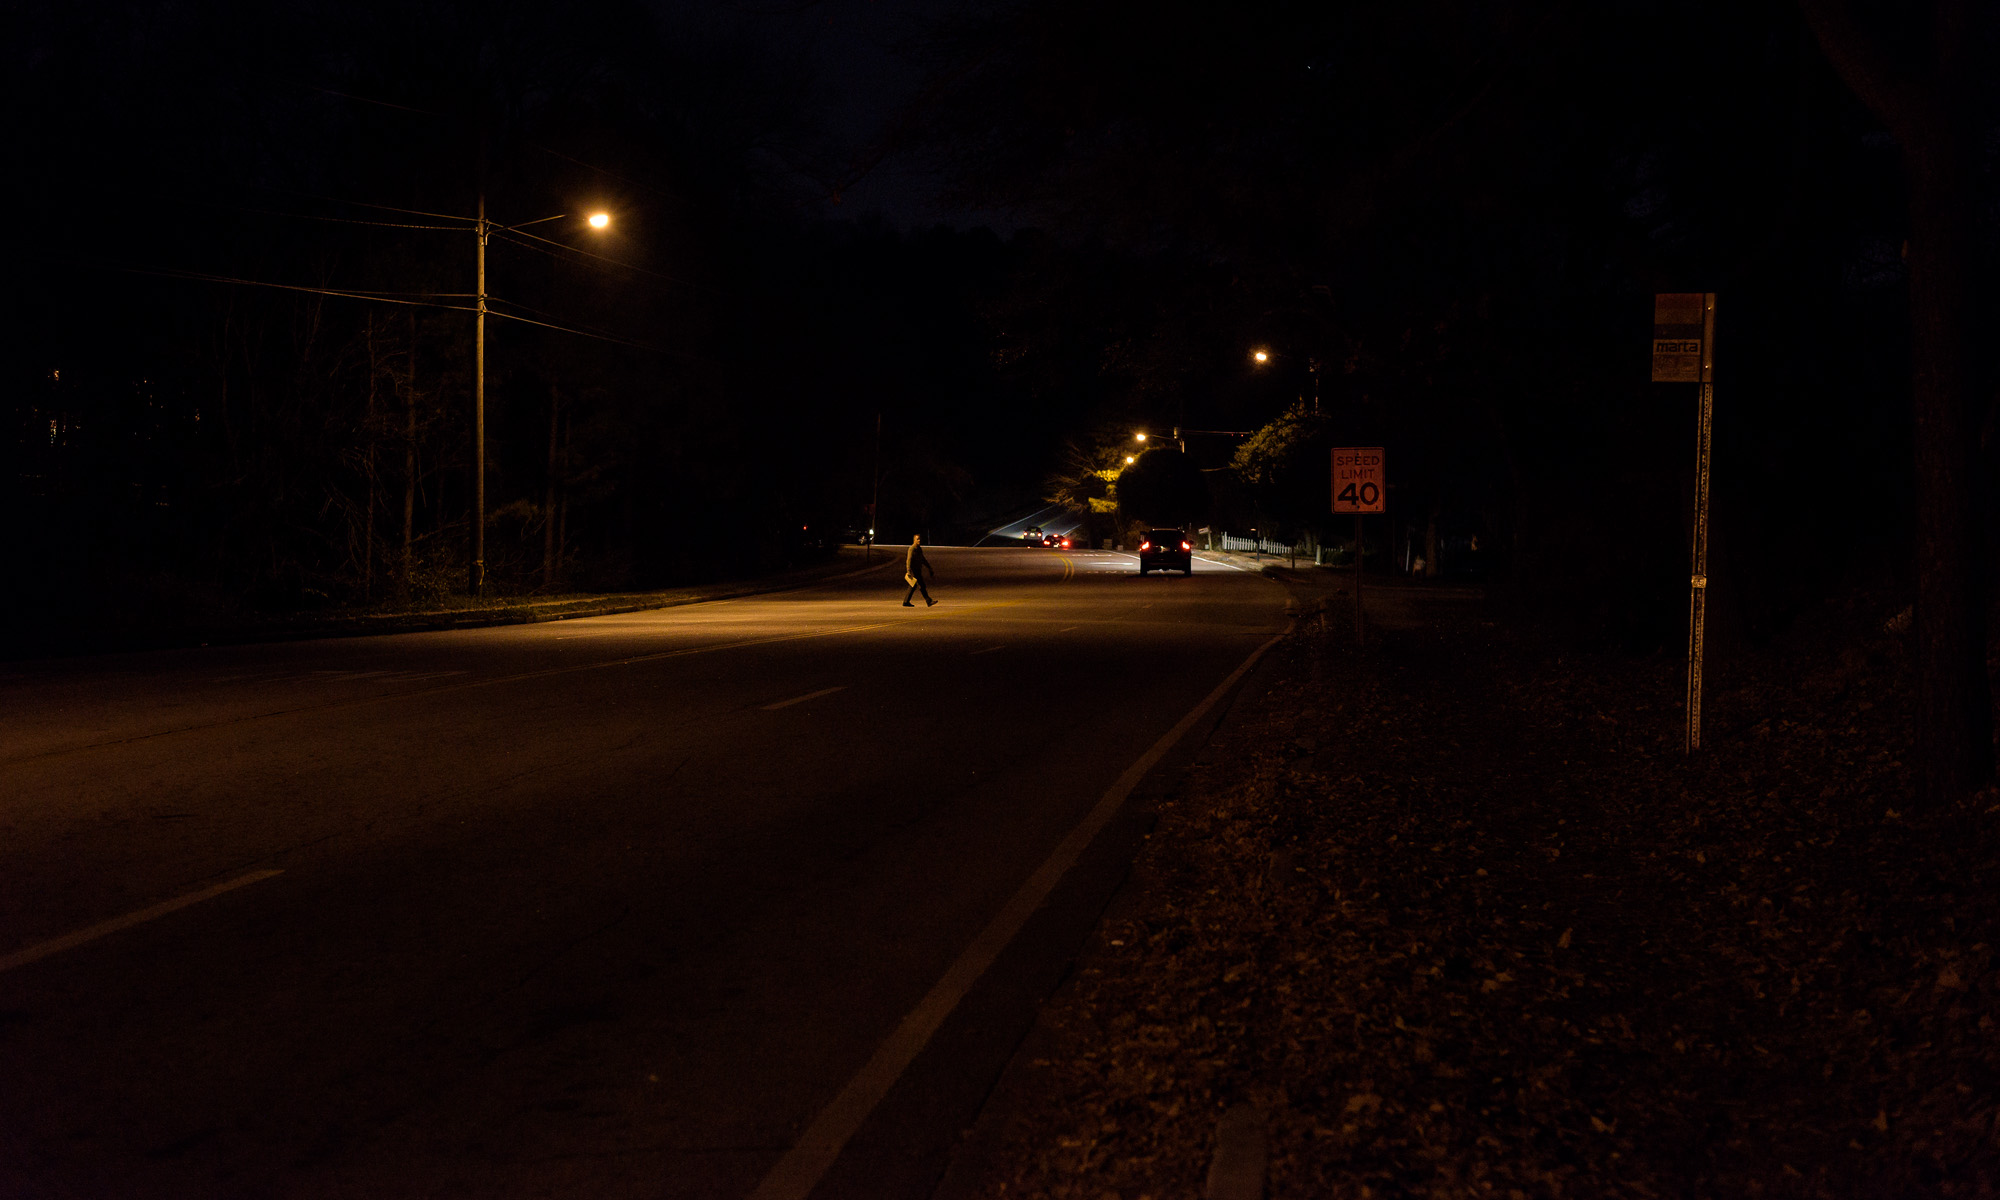
When using flash, you can control how bright or dark the background by controlling your ambient exposure. A lot of people are afraid of flash, but it’s just another source of light. And it’s light you control.
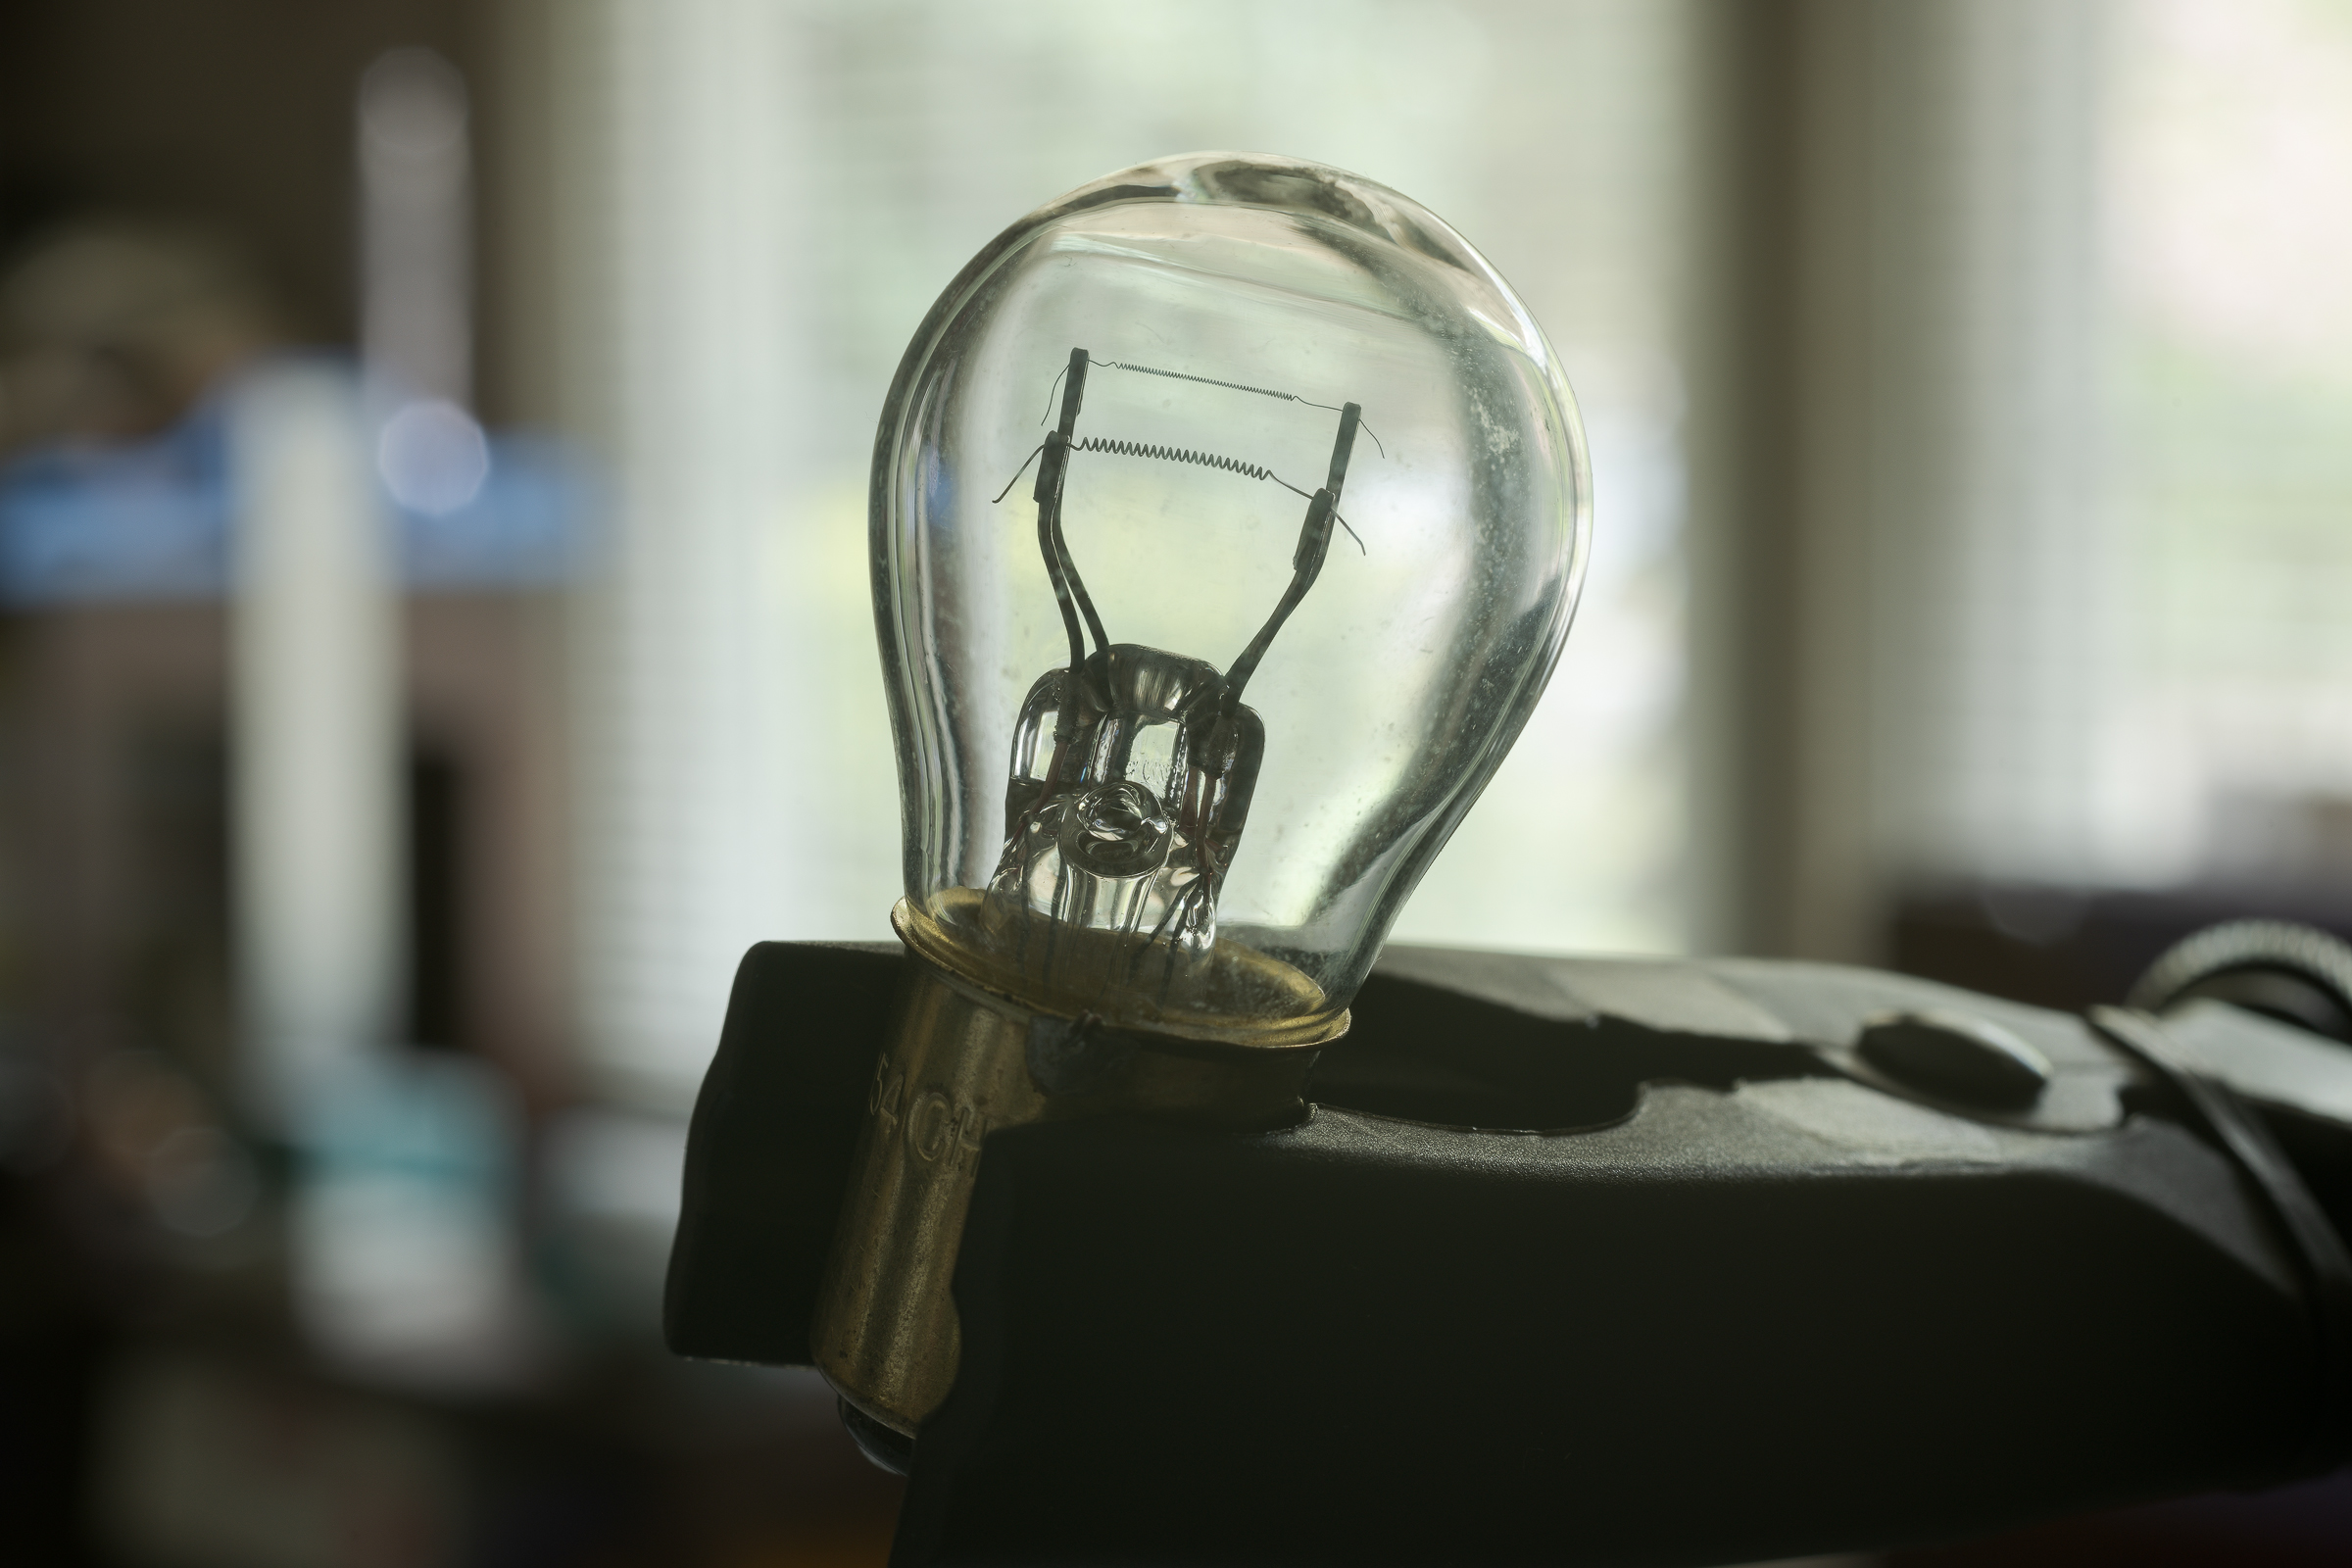
As an example, while you’d never choose this busy background, let’s assume you need to shoot a light bulb indoors with a window in the background. Start with an ambient light shot like this. (Click on image to enlarge, then click on back arrow to return.)Bulb in ambient light with no flash. Exposure f/14, 2.0 sec, ISO 64. (Made with ZEISS 50mm macro on Nikon D850.)The scene out the window in the background is bright, but properly exposed. As a result, the bulb is almost in silhouette.
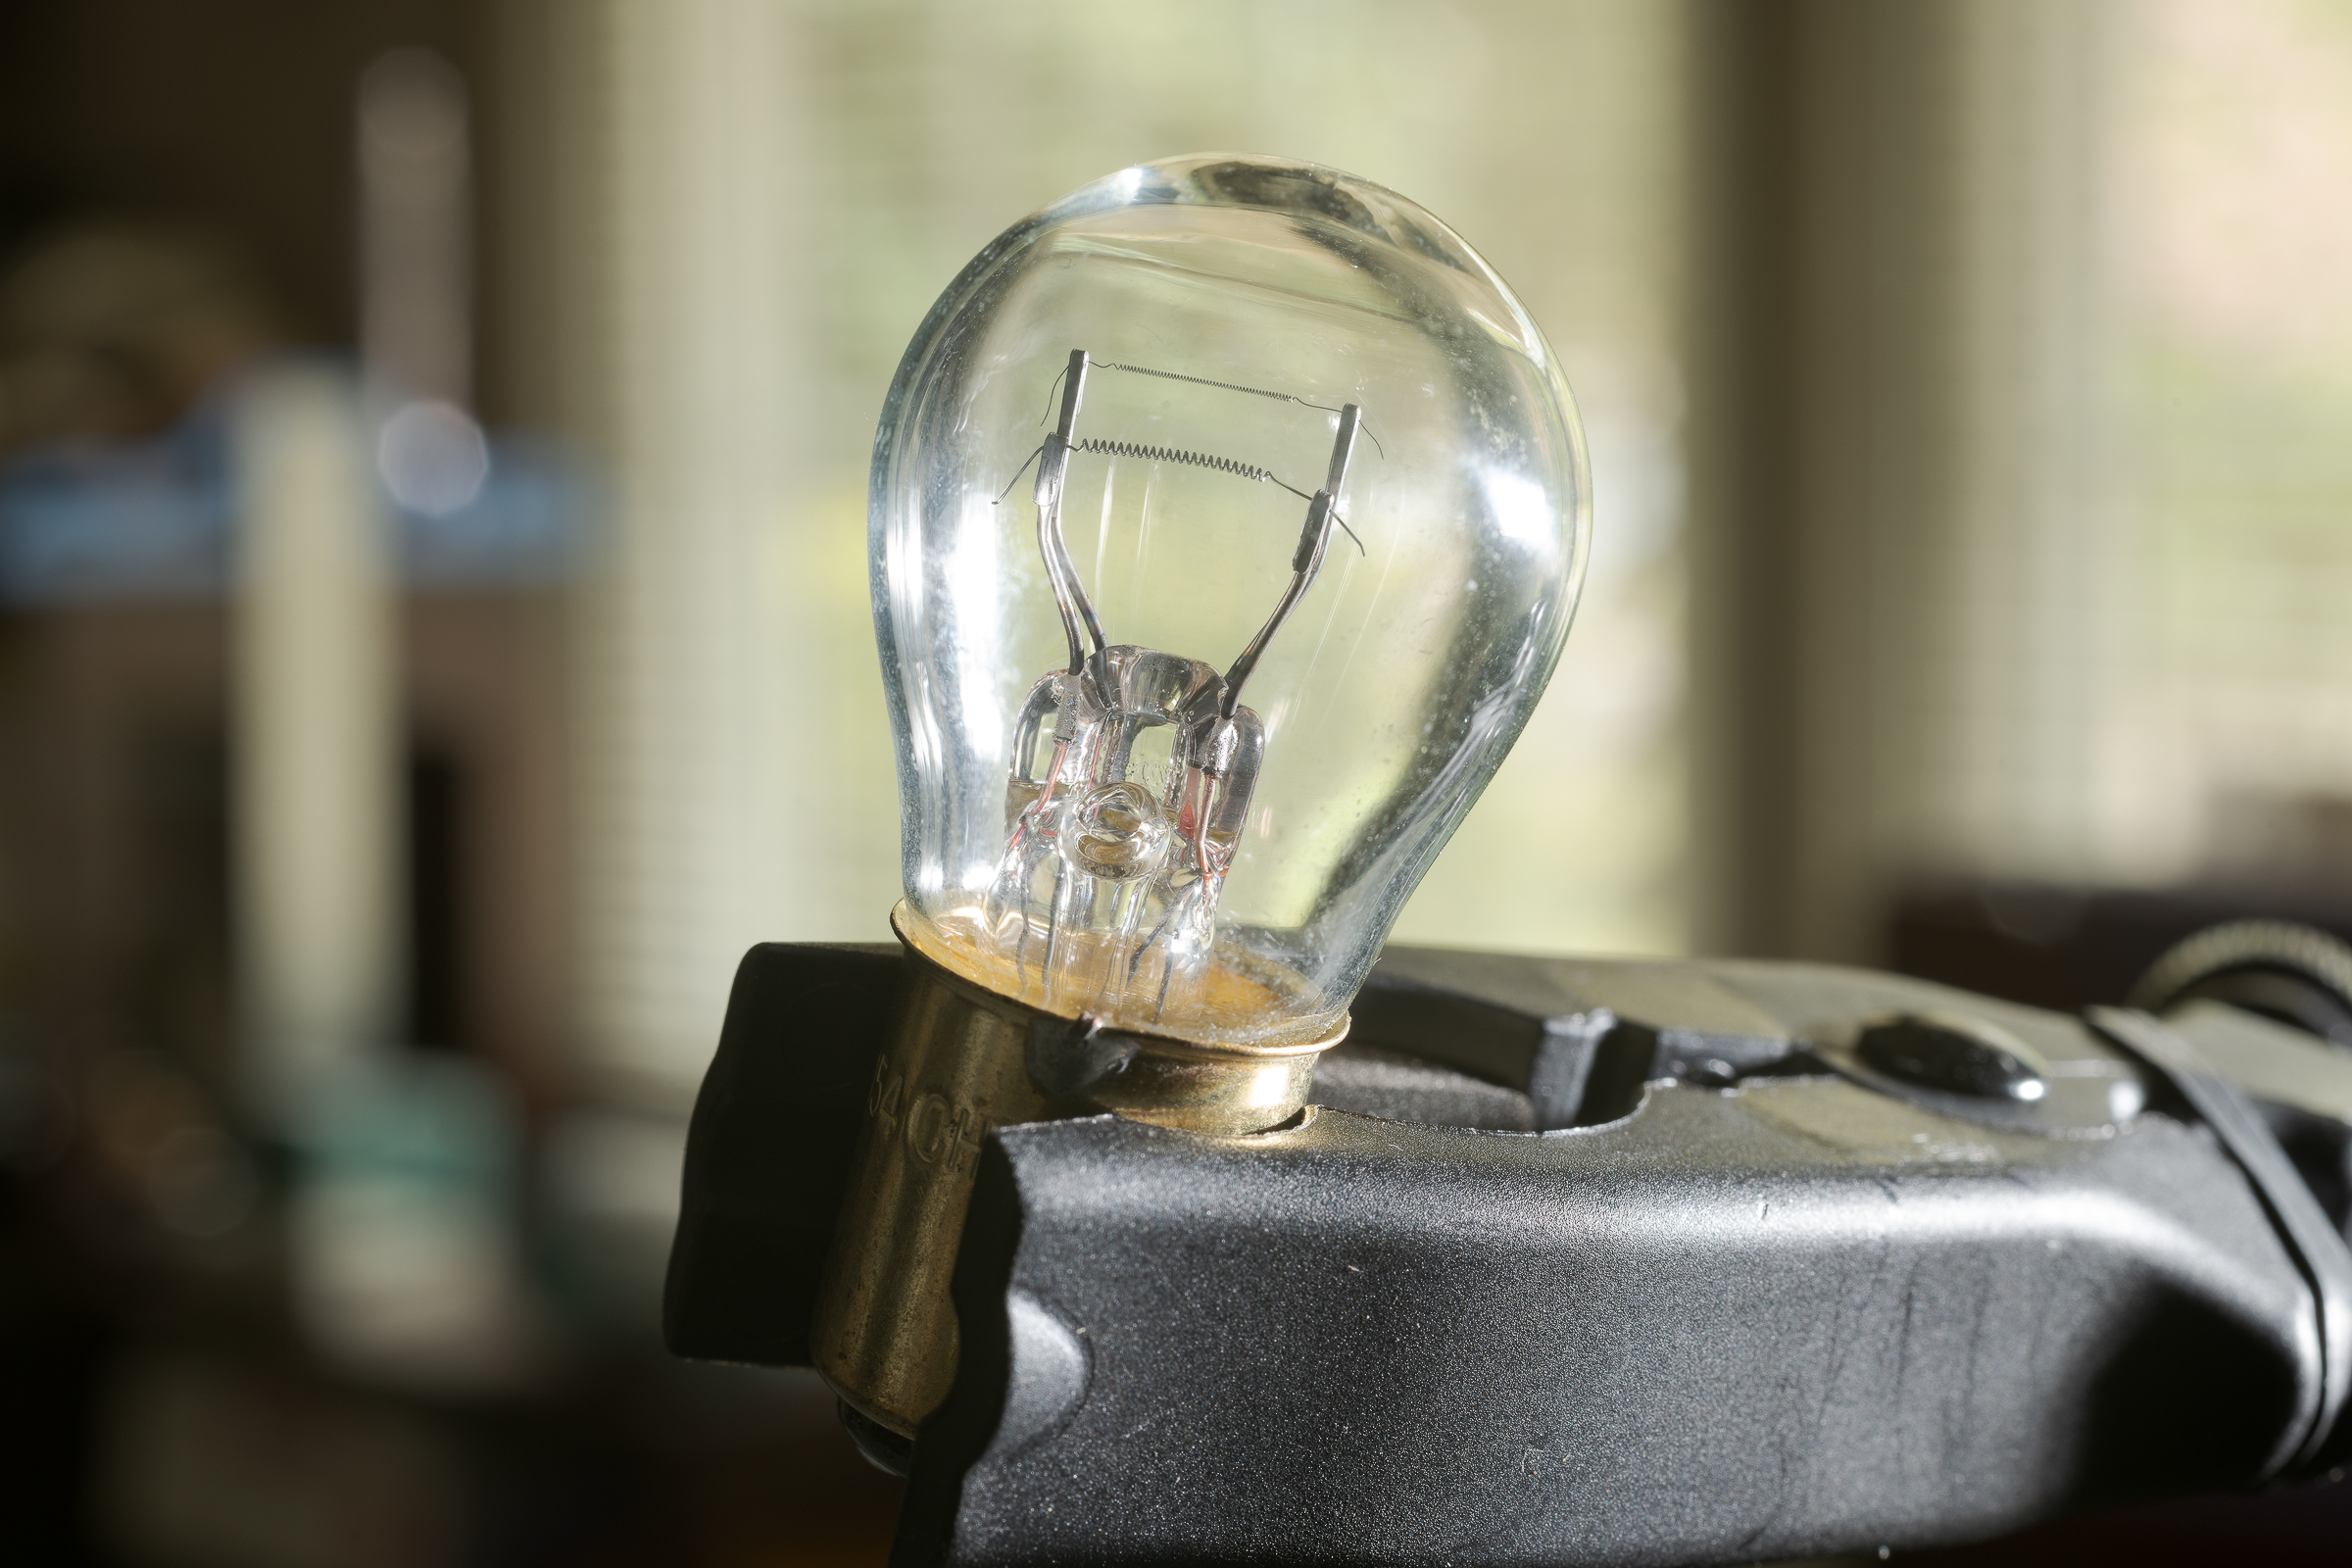
To bring out detail in the bulb, add a flash at 1/8 power in manual mode off camera to the right. Note this is the same exposure as the first image. The only change is the added fill flash.Bulb with flash at 1/8 power. Exposure f/14, 2.0 sec, ISO 64. (Made with ZEISS 50mm macro on Nikon D850 with Nikon SB-910.)This brings out details in the bulb, but the bright background remains distracting.
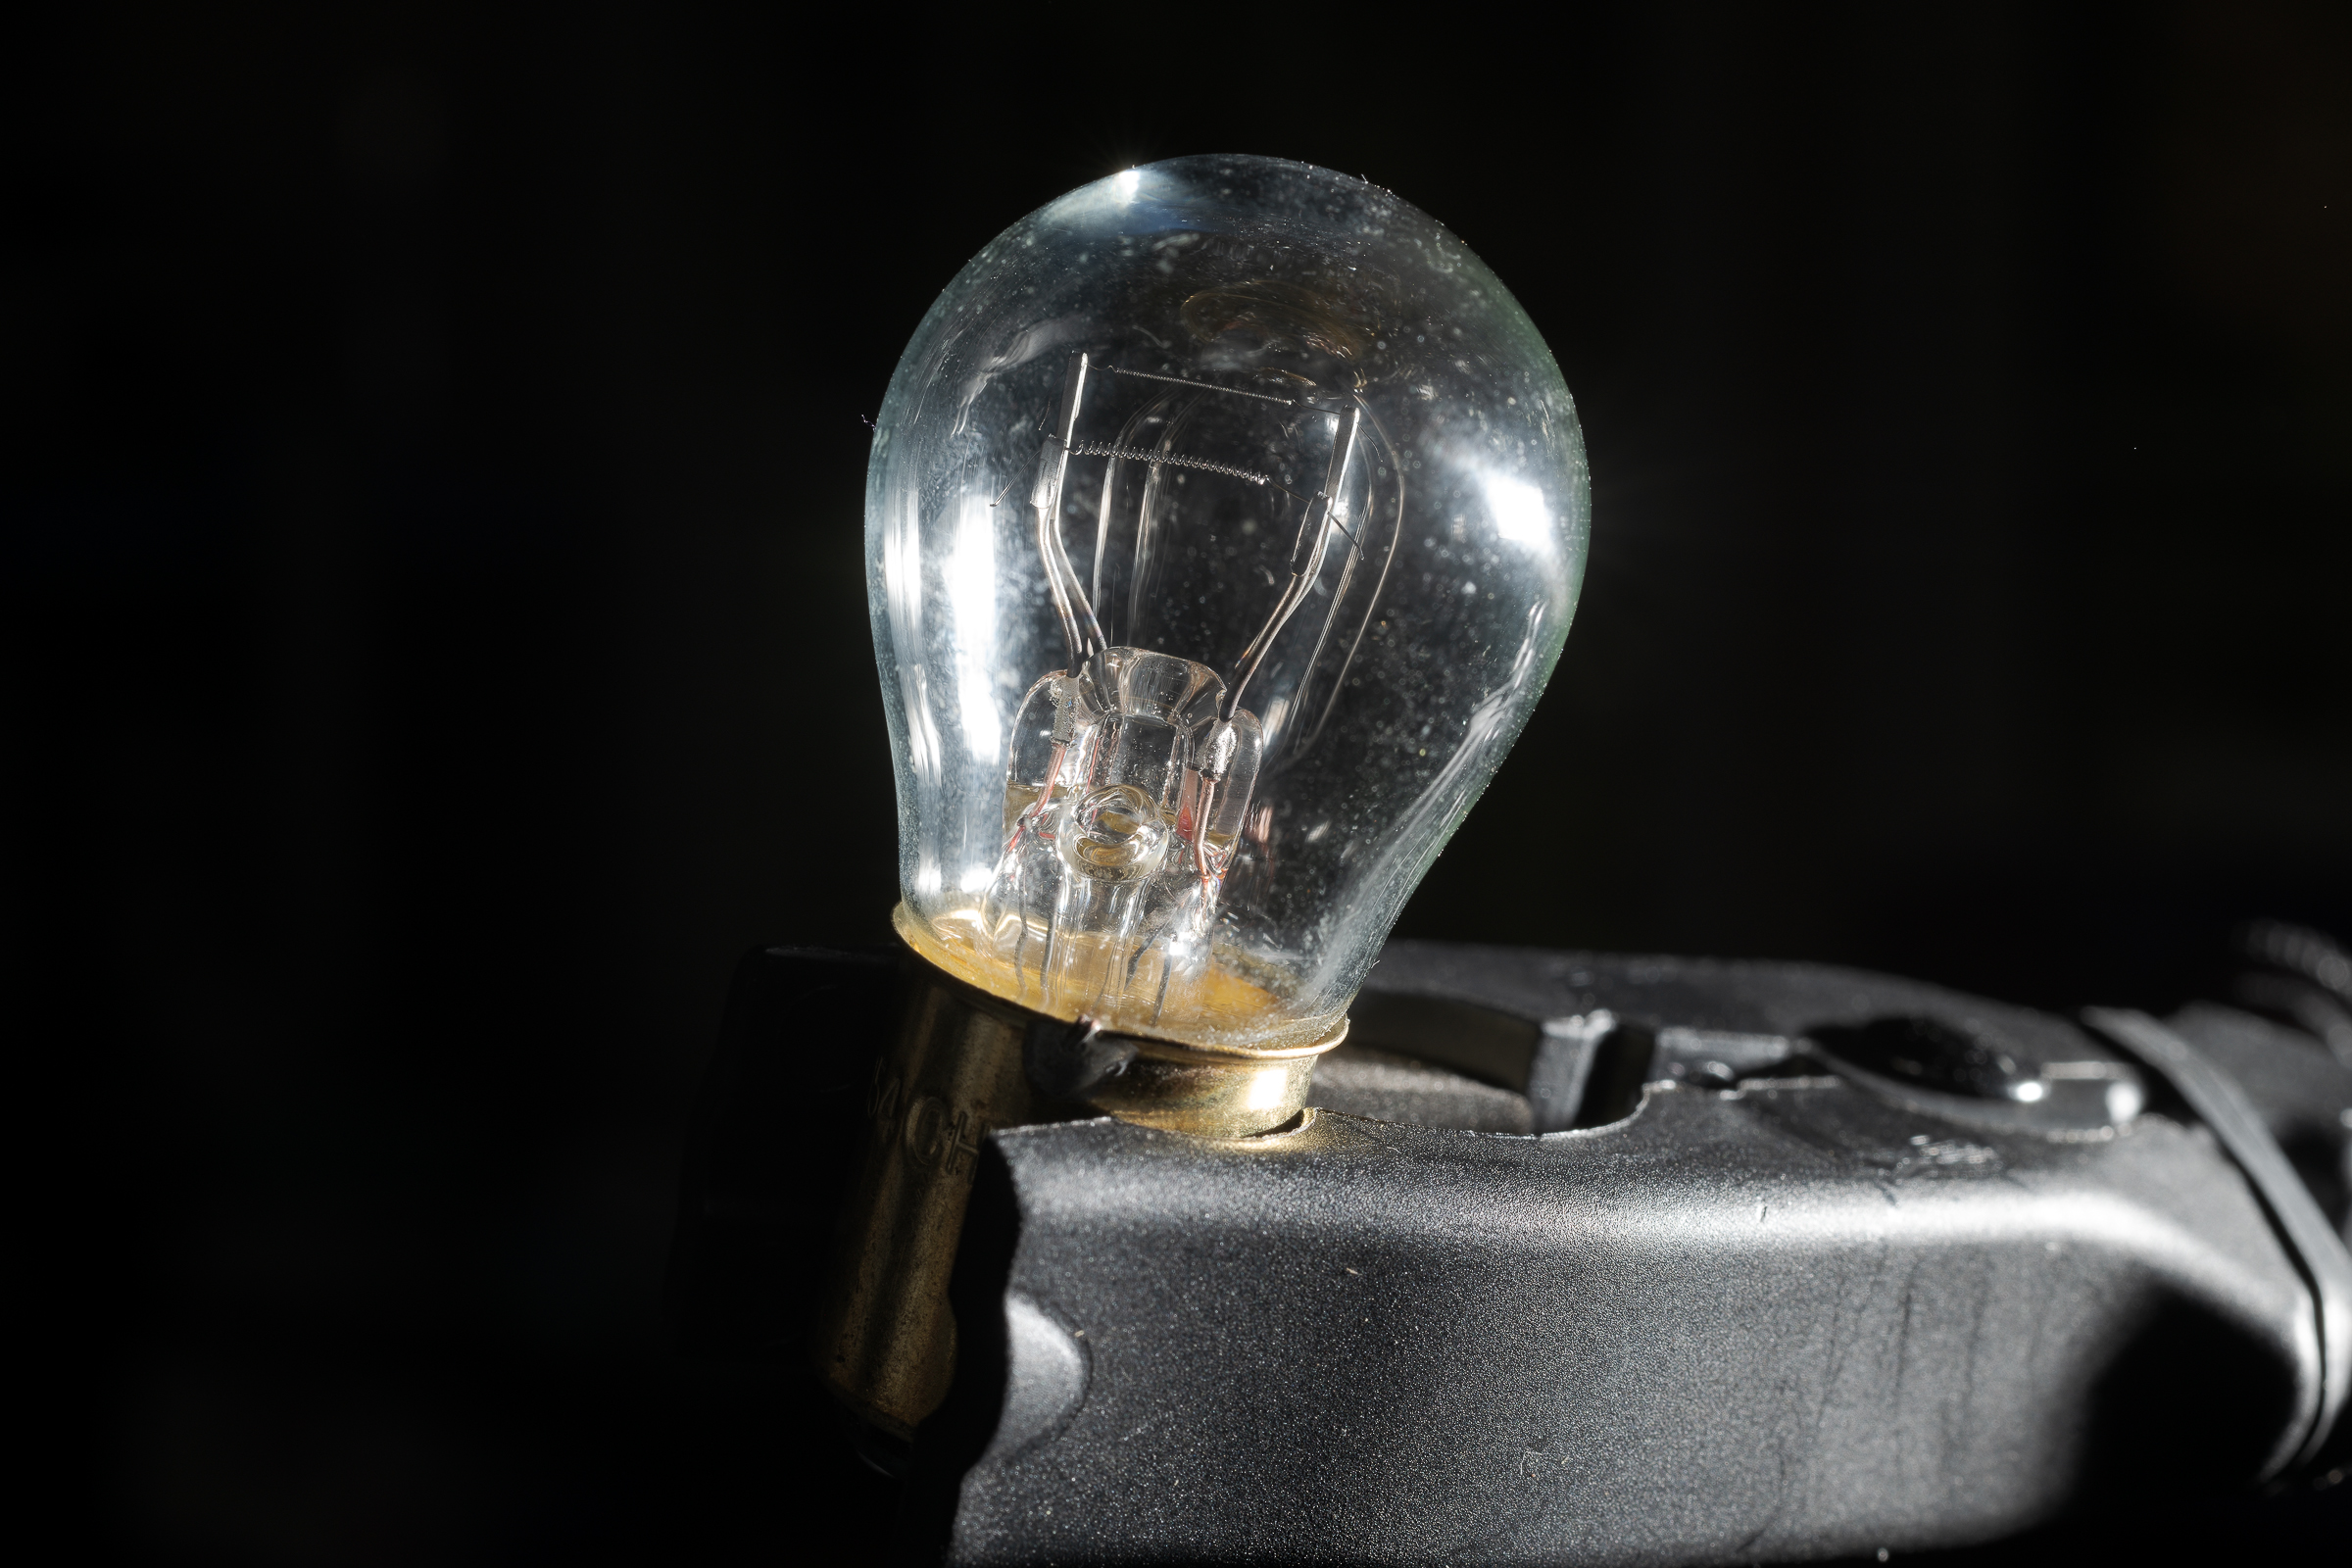
To darken the background, keep the flash setting (1/8 power), the ISO (64), and the aperture (f/14) constant. Then reduce the shutter speed to reduce ambient light. Here, the shutter speed was reduced from 2.0 seconds to 1/250 second.Bulb with flash at 1/8 power. Exposure f/14, 1/250 sec, ISO 64. (Made with ZEISS 50mm macro on Nikon D850 with SB-910.)Now, the ambient exposure is so low that most of the background light won’t register. Keeping a consistent amount of flash light on the bulb keeps the exposure constant on the bulb, but darkens the background almost to black.
Again, while you’d never choose such a background as this, this example shows that you can control the brightness of any background simply by using flash and changing shutter speed.
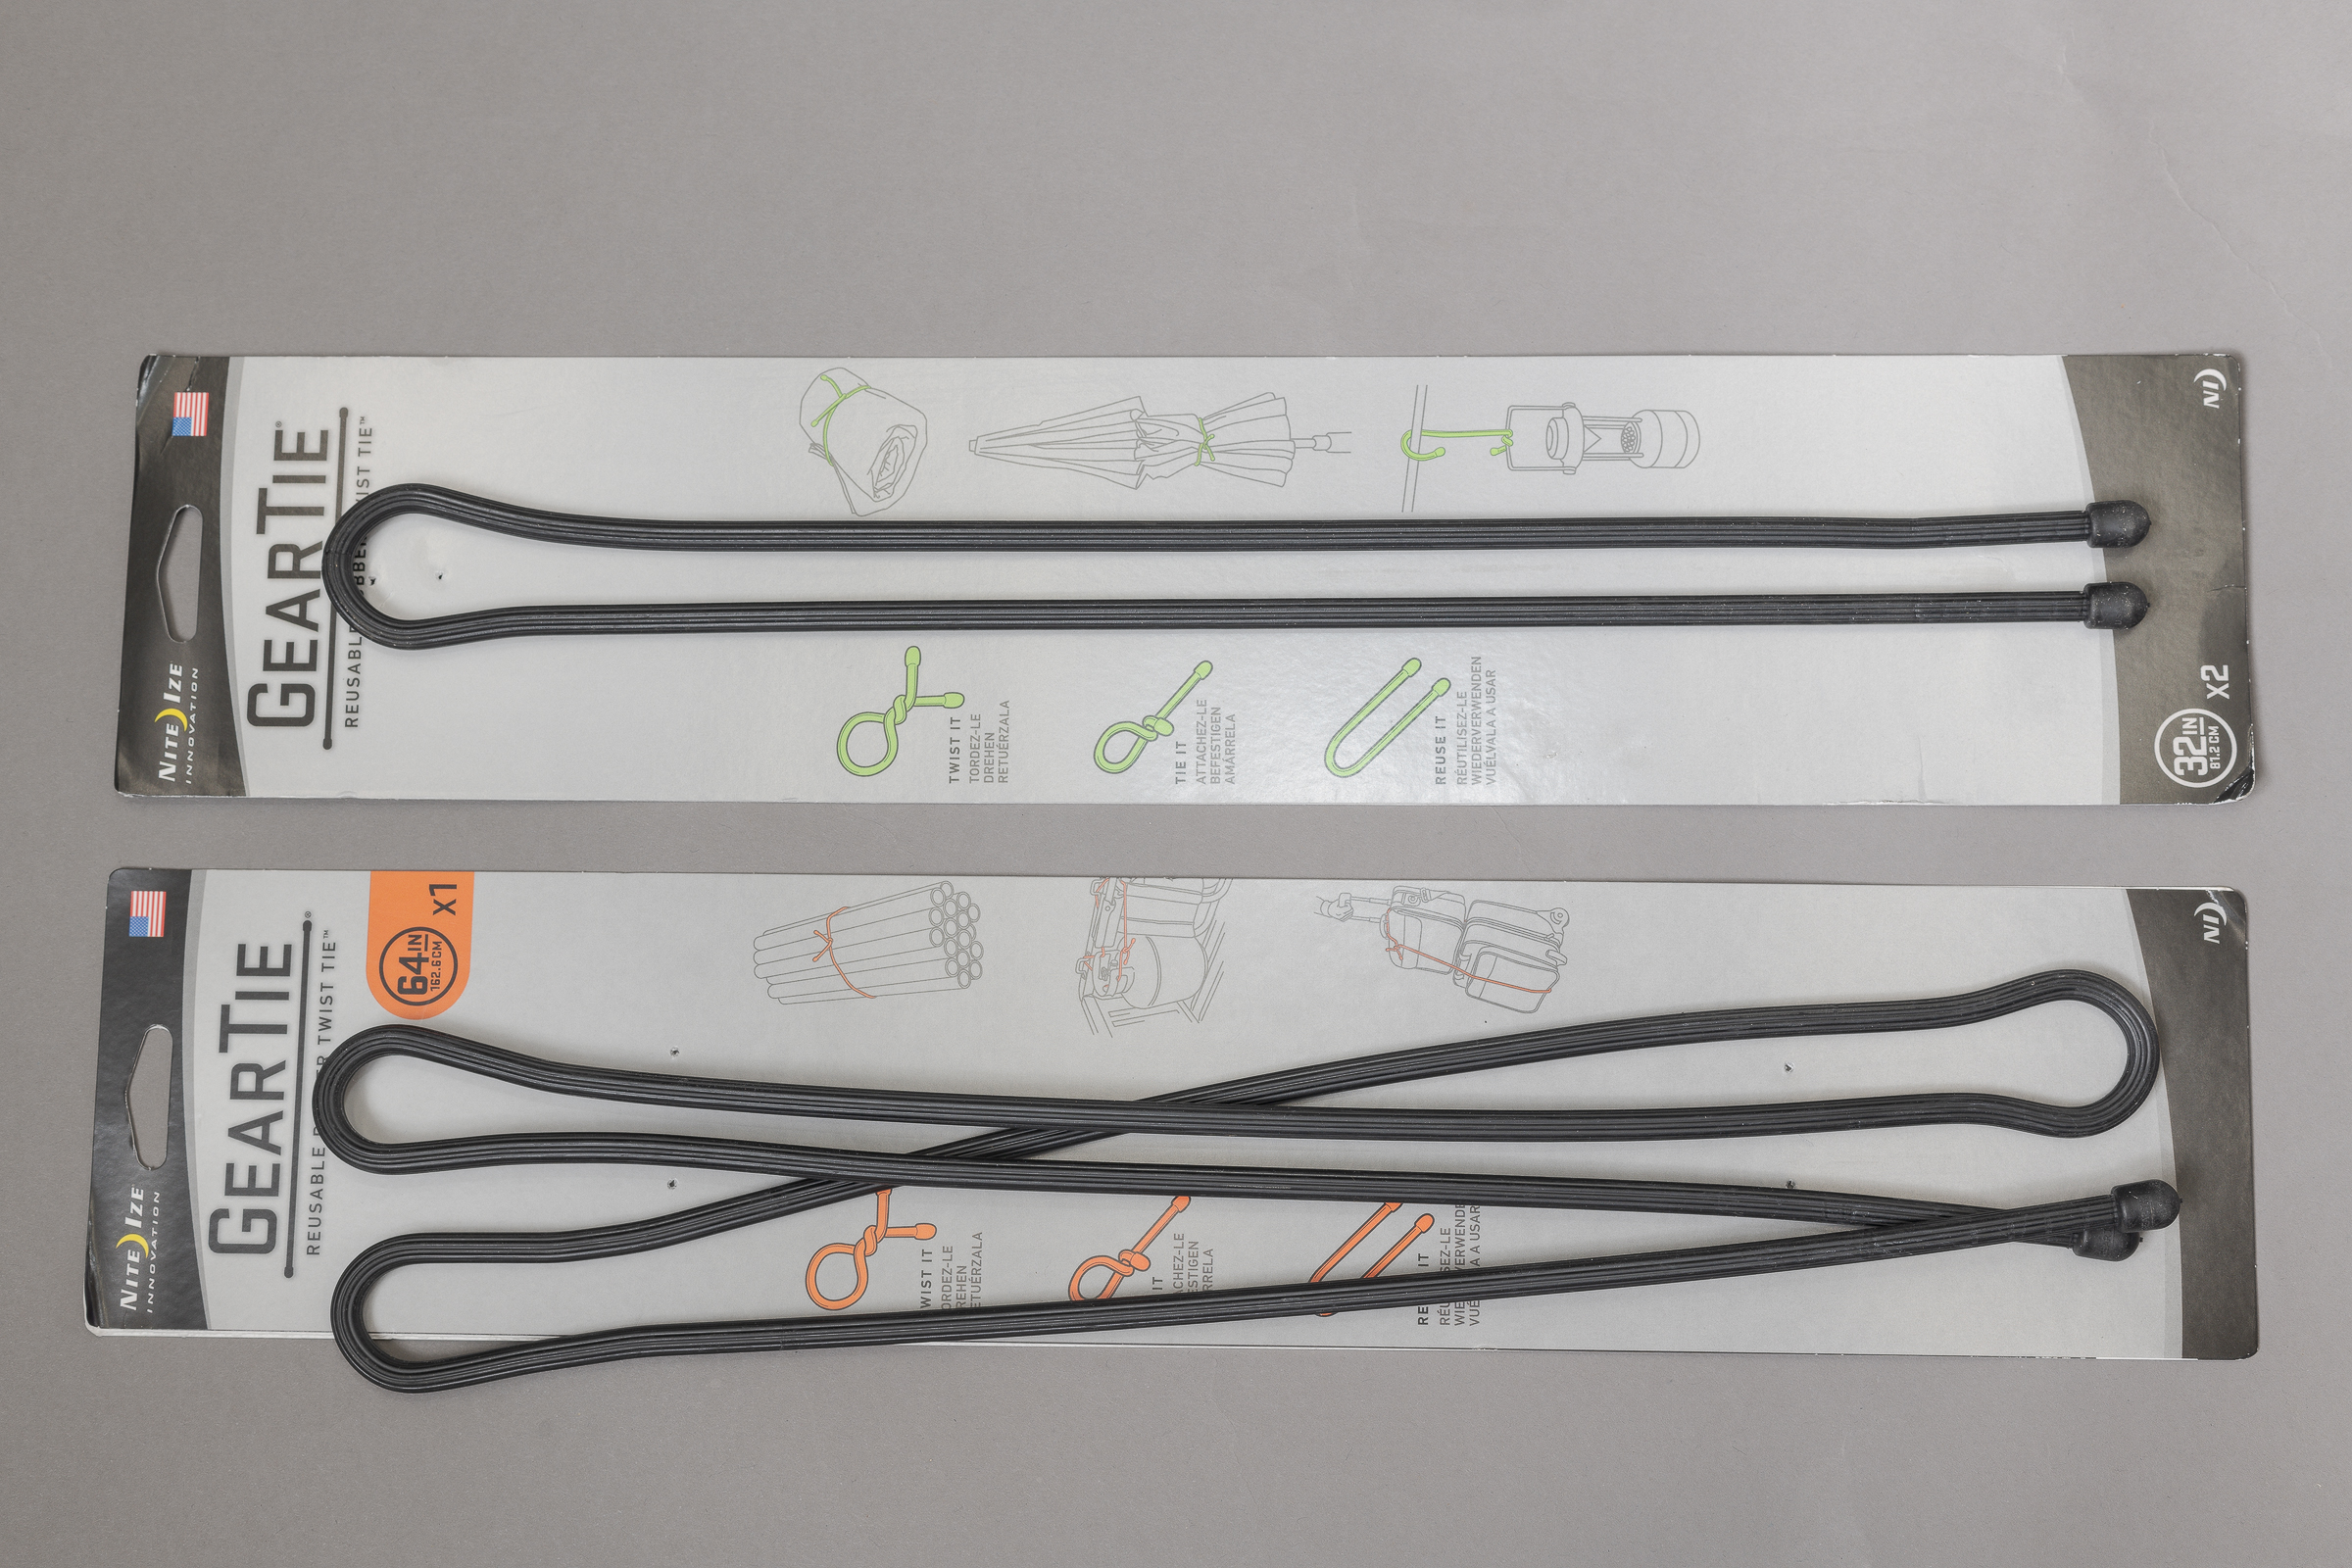
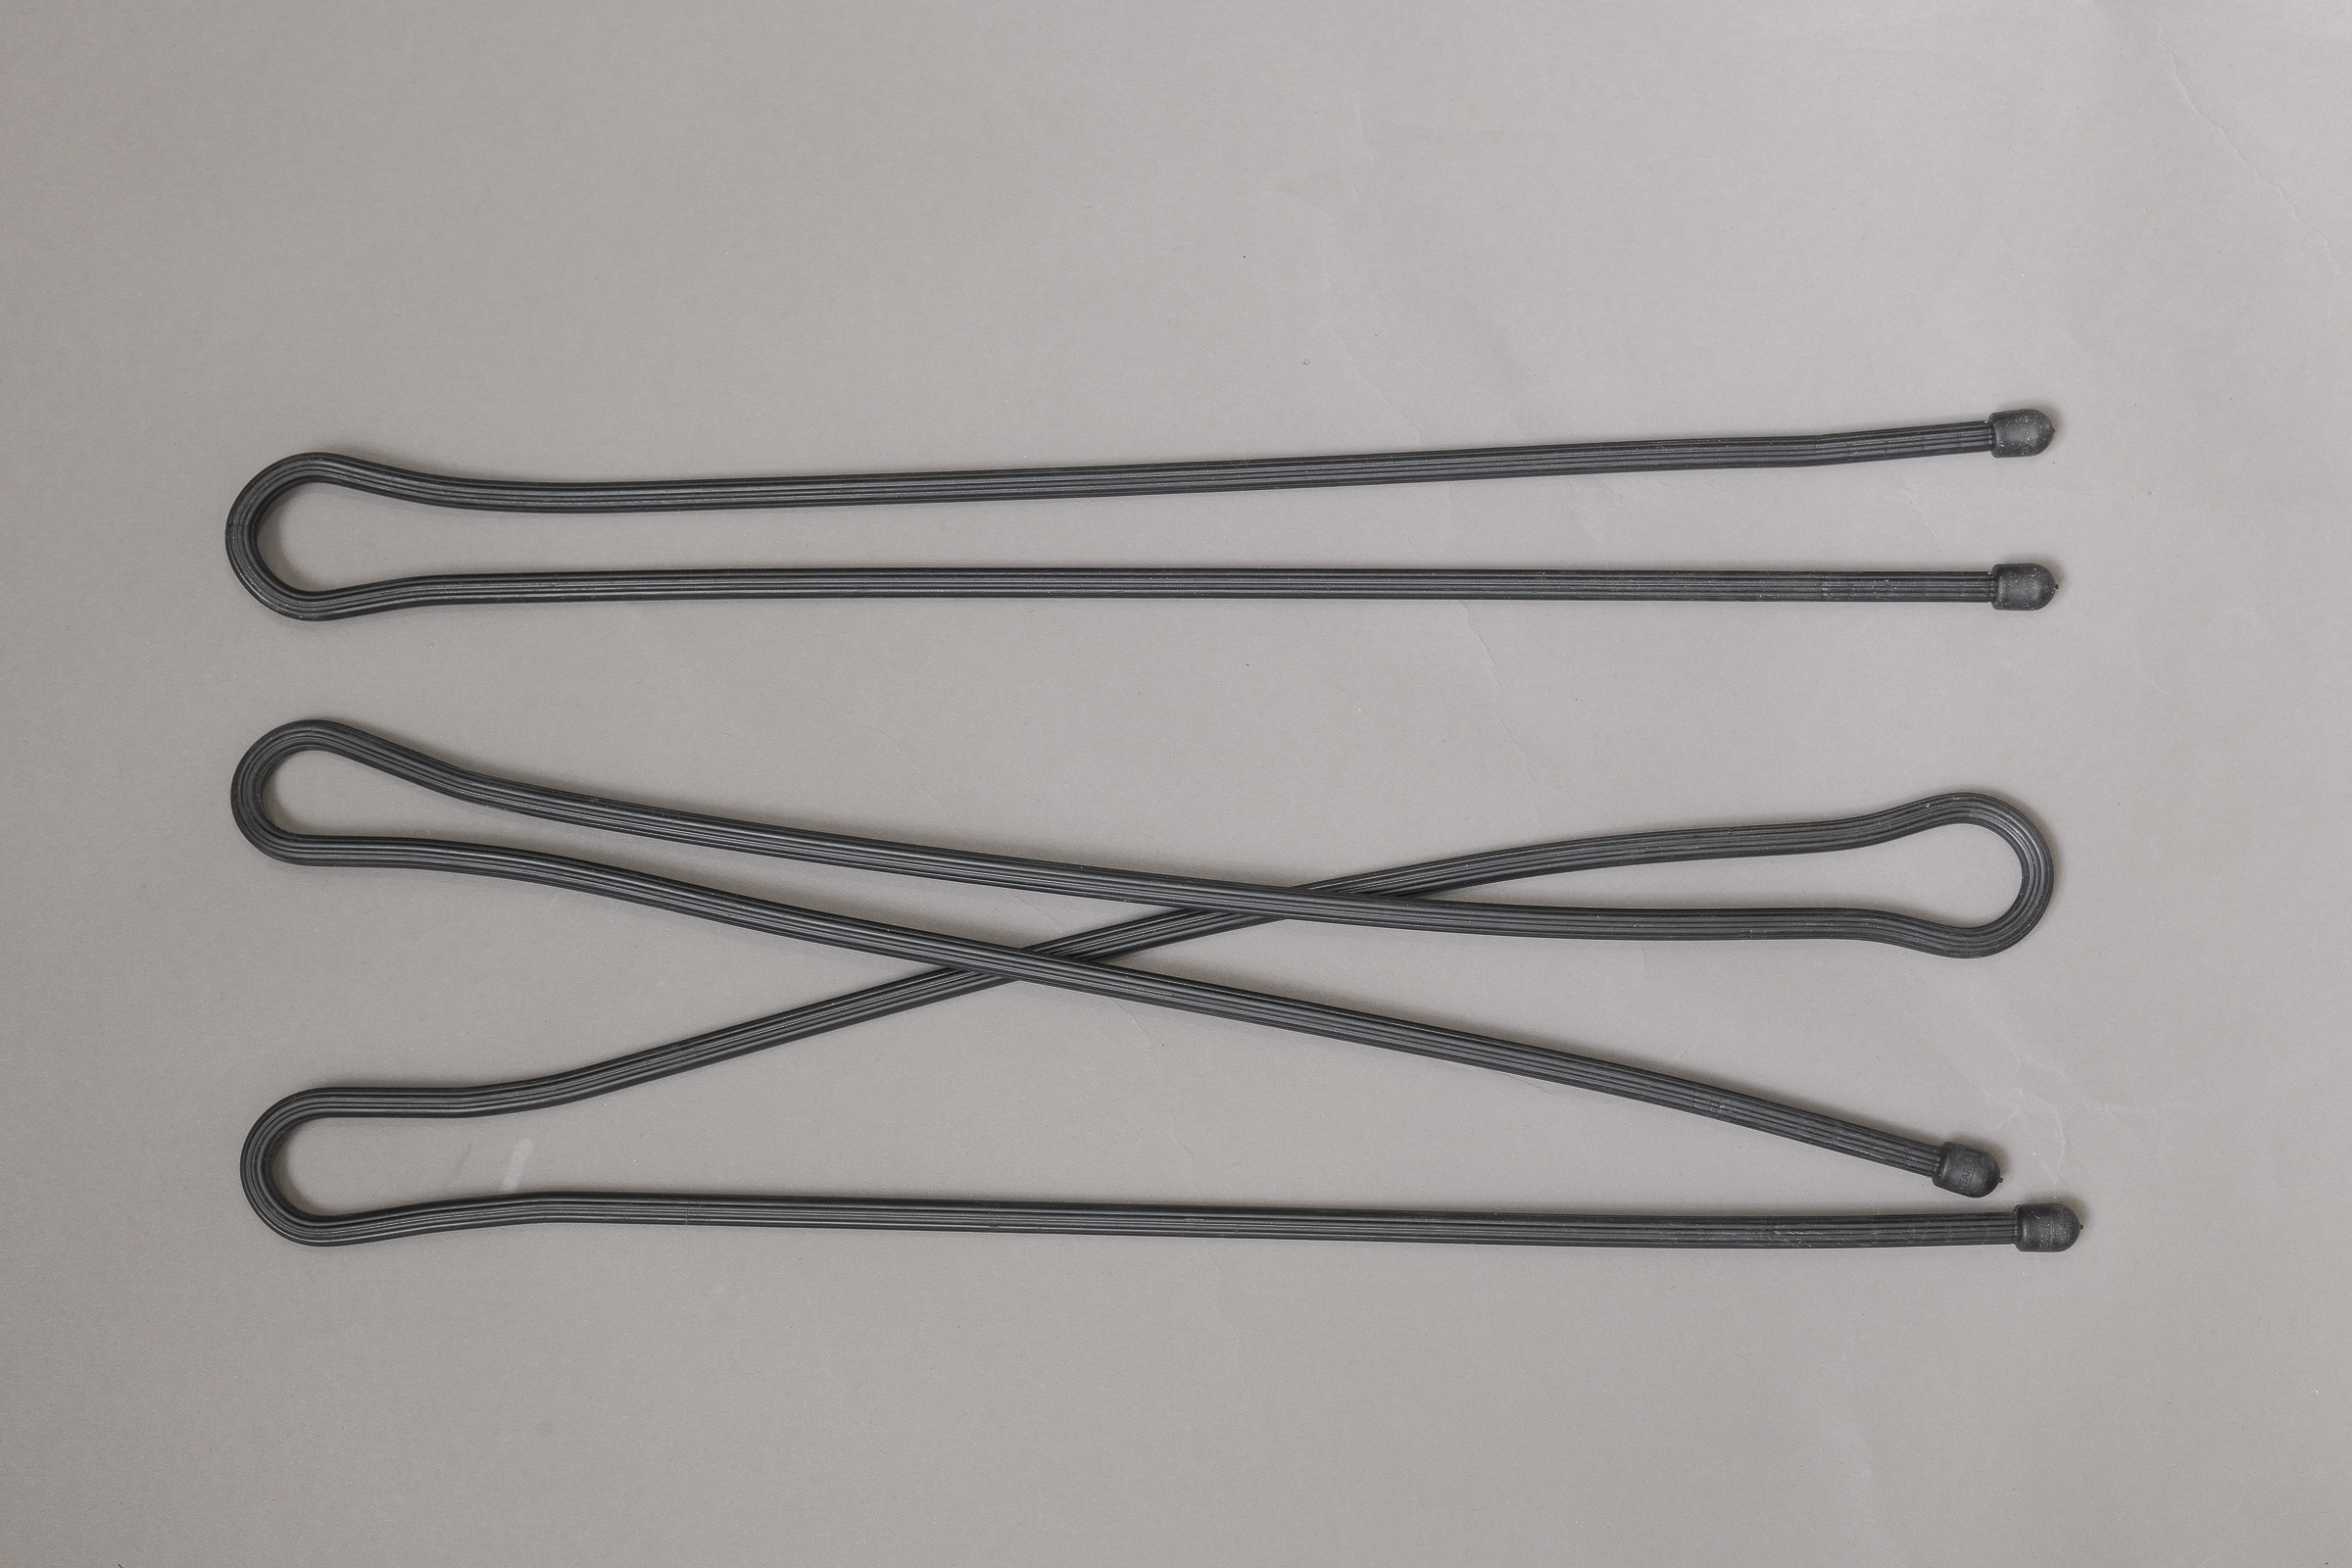
How do you hold loose items in place long enough to photograph them, especially when you’re by yourself? I encounter this with almost every tire failure and vehicle I analyze. I have tried every Velcro strap, bungee cord, string, wire, rope, and tape I can find. Each worked—a little. But I kept searching for a clean, simple, and reusable solution for years. I finally found it at The Home Depot! It’s a reusable rubber tie called Gear Tie by Nite Ize. You can get them at The Home Depot, Amazon, or directly from Nite Ize: Nite Ize Gear Ties (Click on image to enlarge, then click on back arrow to return.)Nite Ize Gear Tie Packaging. (ZEISS 50mm f/2 on Nikon D850.)Gear Ties are available from 3″ through 64″. I’ve found the 32″ and 64″ most useful for securing passenger/light truck and medium/heavy truck tire pieces, respectively.Nite Ize Gear Ties: 32″ Top; 64″ Bottom. (ZEISS 50mm f/2 on Nikon D850.)You can also use them to hold sprung doors, loose bumper covers, and loose pipes or wires in place while you photograph them. Conversely, Gear Ties are also handy for holding wires, trim, etc., out of your photographs.
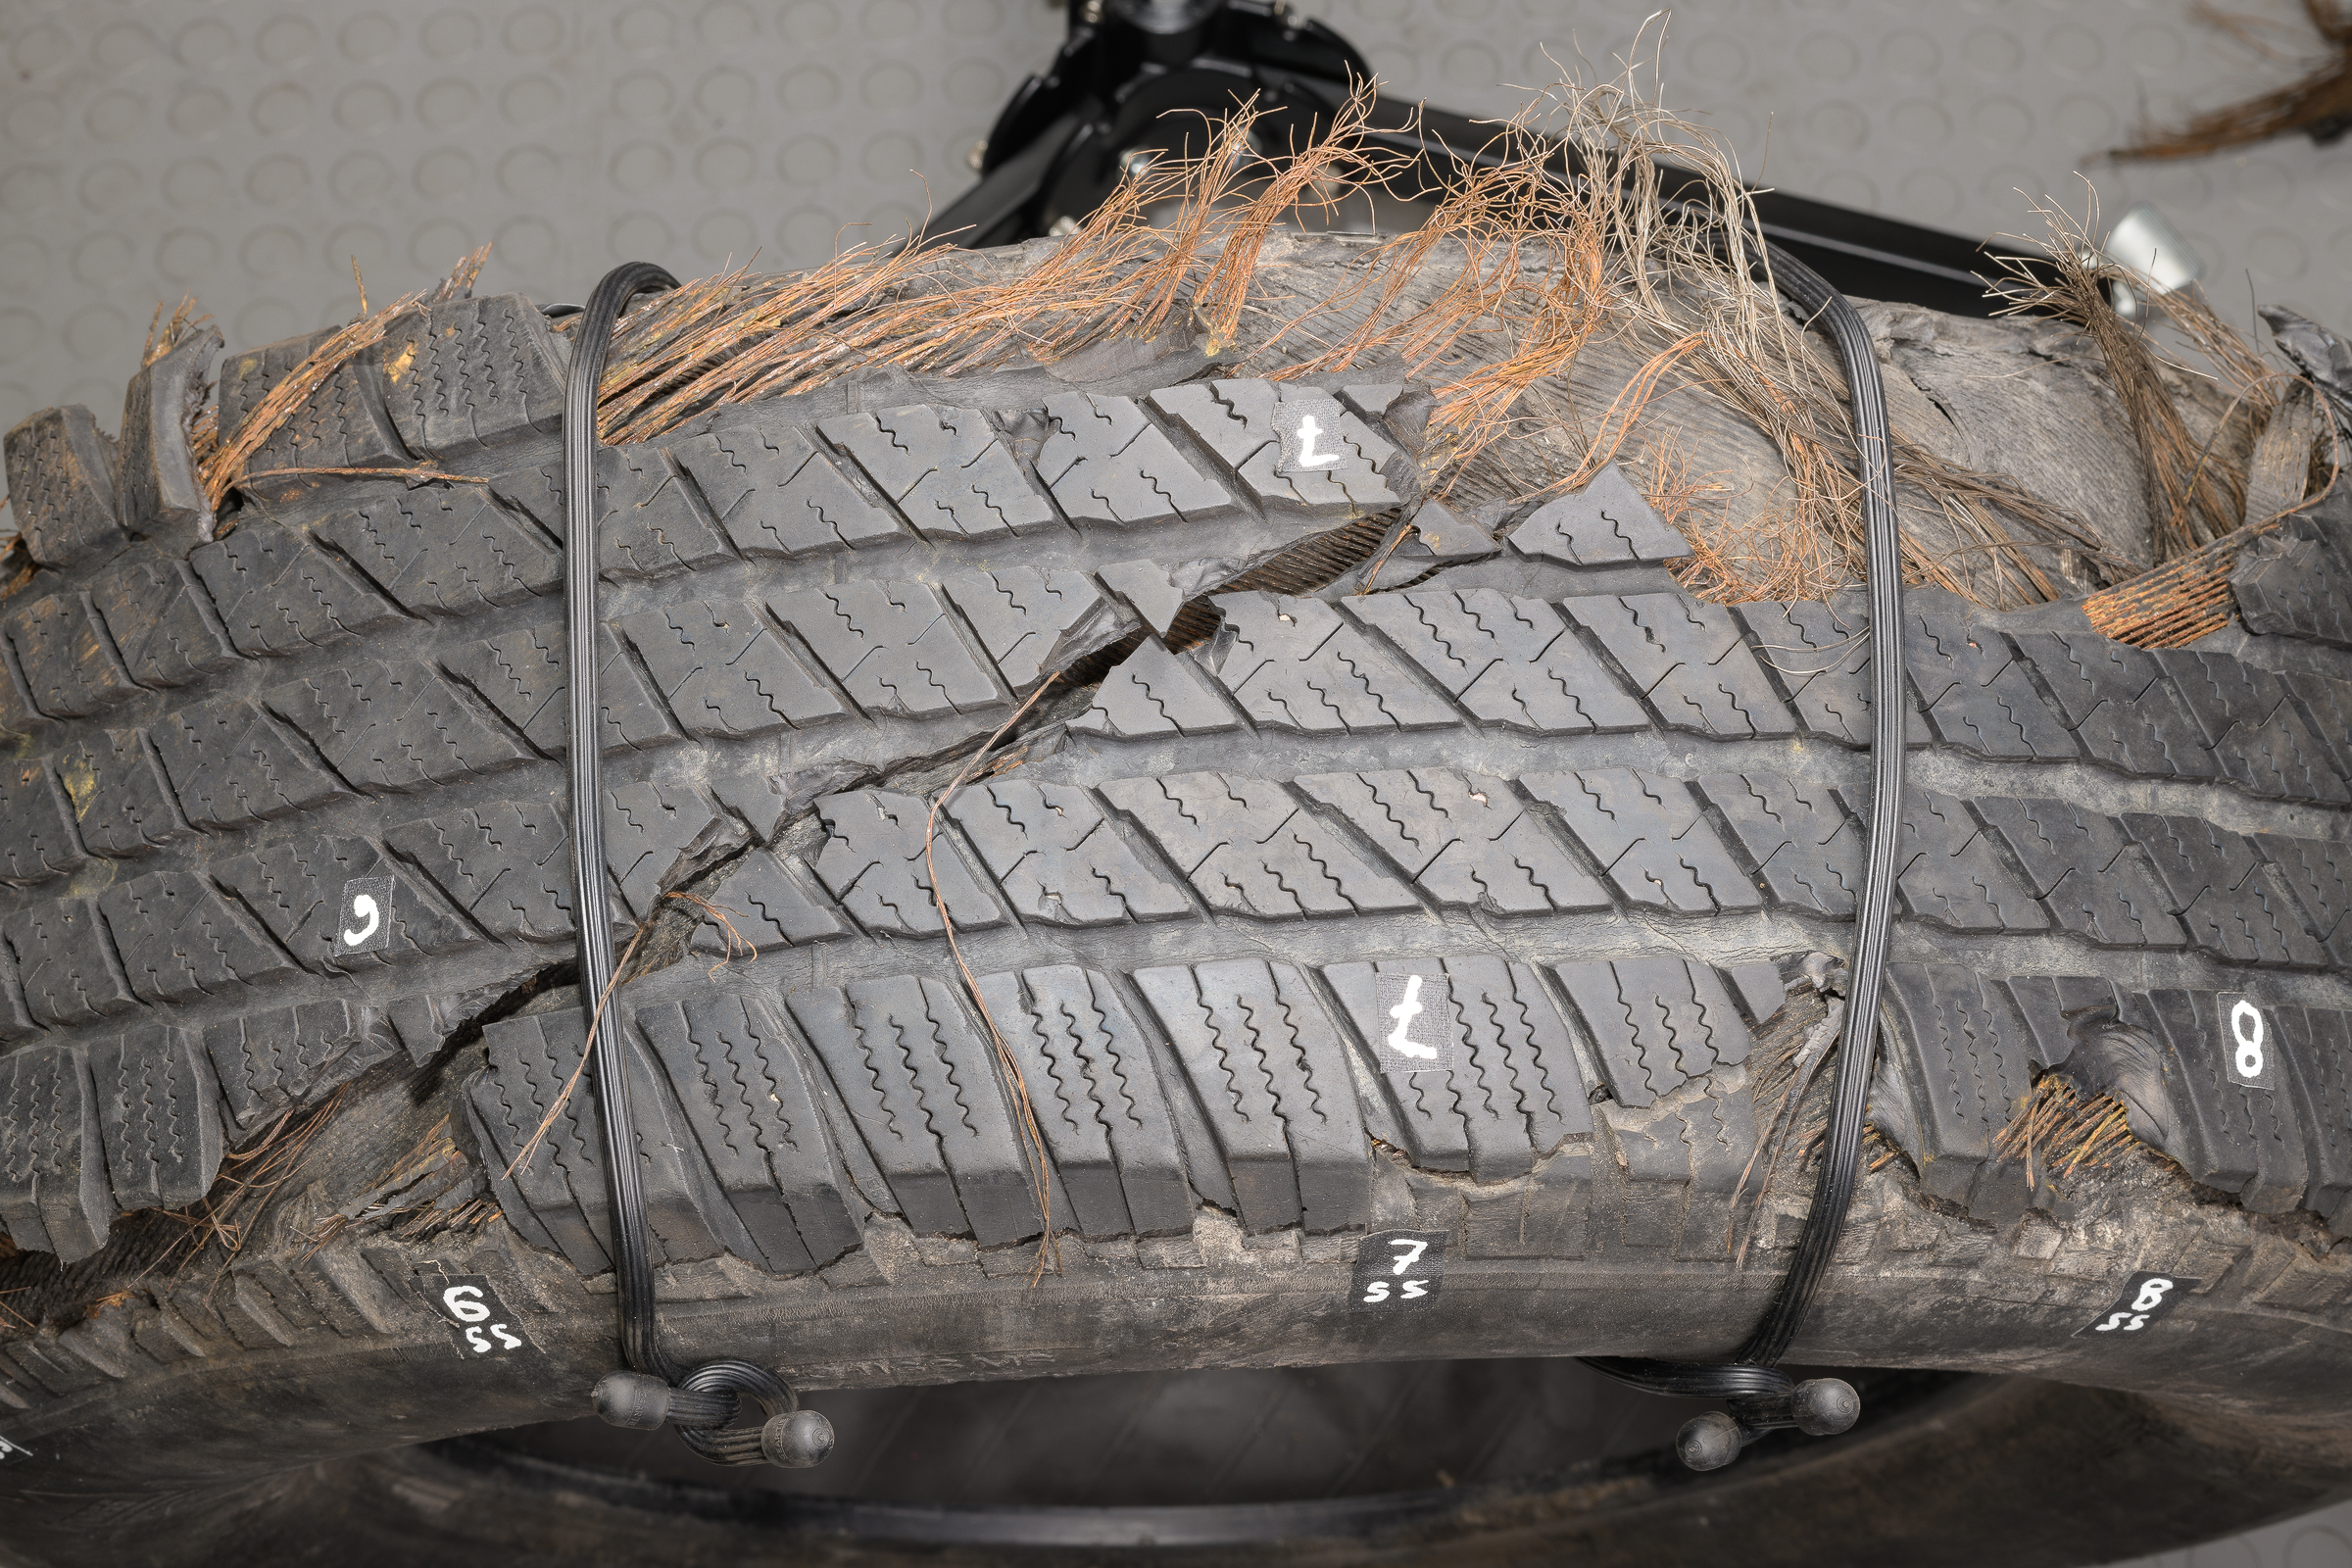
Here’s an example where two 32″ Gear Ties are holding two separated pieces from a passenger tire in place so I can photograph them.Using 32-inch Gear Ties on Tire Pieces .(ZEISS 50mm f/2 on Nikon D850.)I carry sizes from 12″ through 64″ with me. You won’t find more useful “third hands”. Highly recommended.
Photographing through a windshield for a driver’s eye view or for an accident site drive-through usually results in an unwanted color cast in the resulting images, regardless of your white balance (WB) setting. It can be most noticeable in Auto WB. This is due to the tint of the windshield. (Click on the images to enlarge, then click on the back arrow to return to the post.)Auto Sun White Balance with Overcast Skies (ZEISS 50mm f/2 Macro with polarizer on Nikon D850.)If you shoot raw files, you can correct this in your raw processor if there is a neutral-colored item in the scene. But if you’re shooting in JPEG, or if you’re taking a series of images while driving through a scene, you’ll want to get it right in the camera. WB can be difficult to adjust later, especially if there is no neutral tone in your image.
Setting a custom white balance, called Preset white balance on Nikon, varies from camera to camera, but is usually pretty straightforward. On Nikon, you enter the Preset white balance menu, point your camera toward a white or neutral source, and push the WB button. A custom WB is now set until you change it. With Canon, there is an extra step. After entering the custom white balance menu, you take and save a photograph of your neutral source. You then tell the camera to use that photograph for your WB for subsequent images.
If you’re shooting through any glass, your white or neutral source needs to be on the other side of the glass from your camera, and generally in the same light as the scene you’re about to photograph. This can be tricky when you’re by yourself or alongside a busy road.
Both my trucks are white, so I point my Nikon toward their hoods (as long as they’re roughly in the same light as the scene I’m shooting), and press the WB button in PRE mode to save the new preset. Now I have correct colors for my scene. I can then drive down the road, and all the images I capture will have a consistent, correct white balance.Preset WB Off White Hood with Overcast Skies (ZEISS 50mm f/2 Macro with polarizer on Nikon D850.)What if you’re vehicle isn’t white? In a case like the scene shown here, you can set your custom white balance using the road (or a nearby sidewalk), as long as you can fill a good part of the frame with it. You might have to use a telephoto lens or zoom to isolate sections of your neutral source, but that will still give you a good custom WB.
Four more tips:
-1- DON’T DO THIS WHILE YOU’RE DRIVING!!! Like shown in these photos, set your custom WB from the shoulder of the road or even from a nearby parking lot.
-2- If you are using a polarizer, make sure you put the polarizer on and rotate it to get the effect you want before you set your custom WB.
-3- Don’t set your custom WB while you’re standing outside of a vehicle, then get in and start shooting through the windshield. The WB won’t be correct, and you’ll be back to your original problem.
-4- Don’t forget to change your WB after you’re done shooting through your windshield, or your subsequent images will have an undesirable color cast.
Here are examples in full sun:Auto Sun WB in Full Sun (ZEISS 50mm f/2 Macro with polarizer on Nikon D850.)Preset WB in Full Sun (ZEISS 50mm f/2 Macro with polarizer on Nikon D850.)Like everything in photography (and in life, for that matter), it may take a little practice before this becomes second nature. Make sure you practice setting your custom WB through your own vehicle’s windshield before trying it for the first time at an accident site.
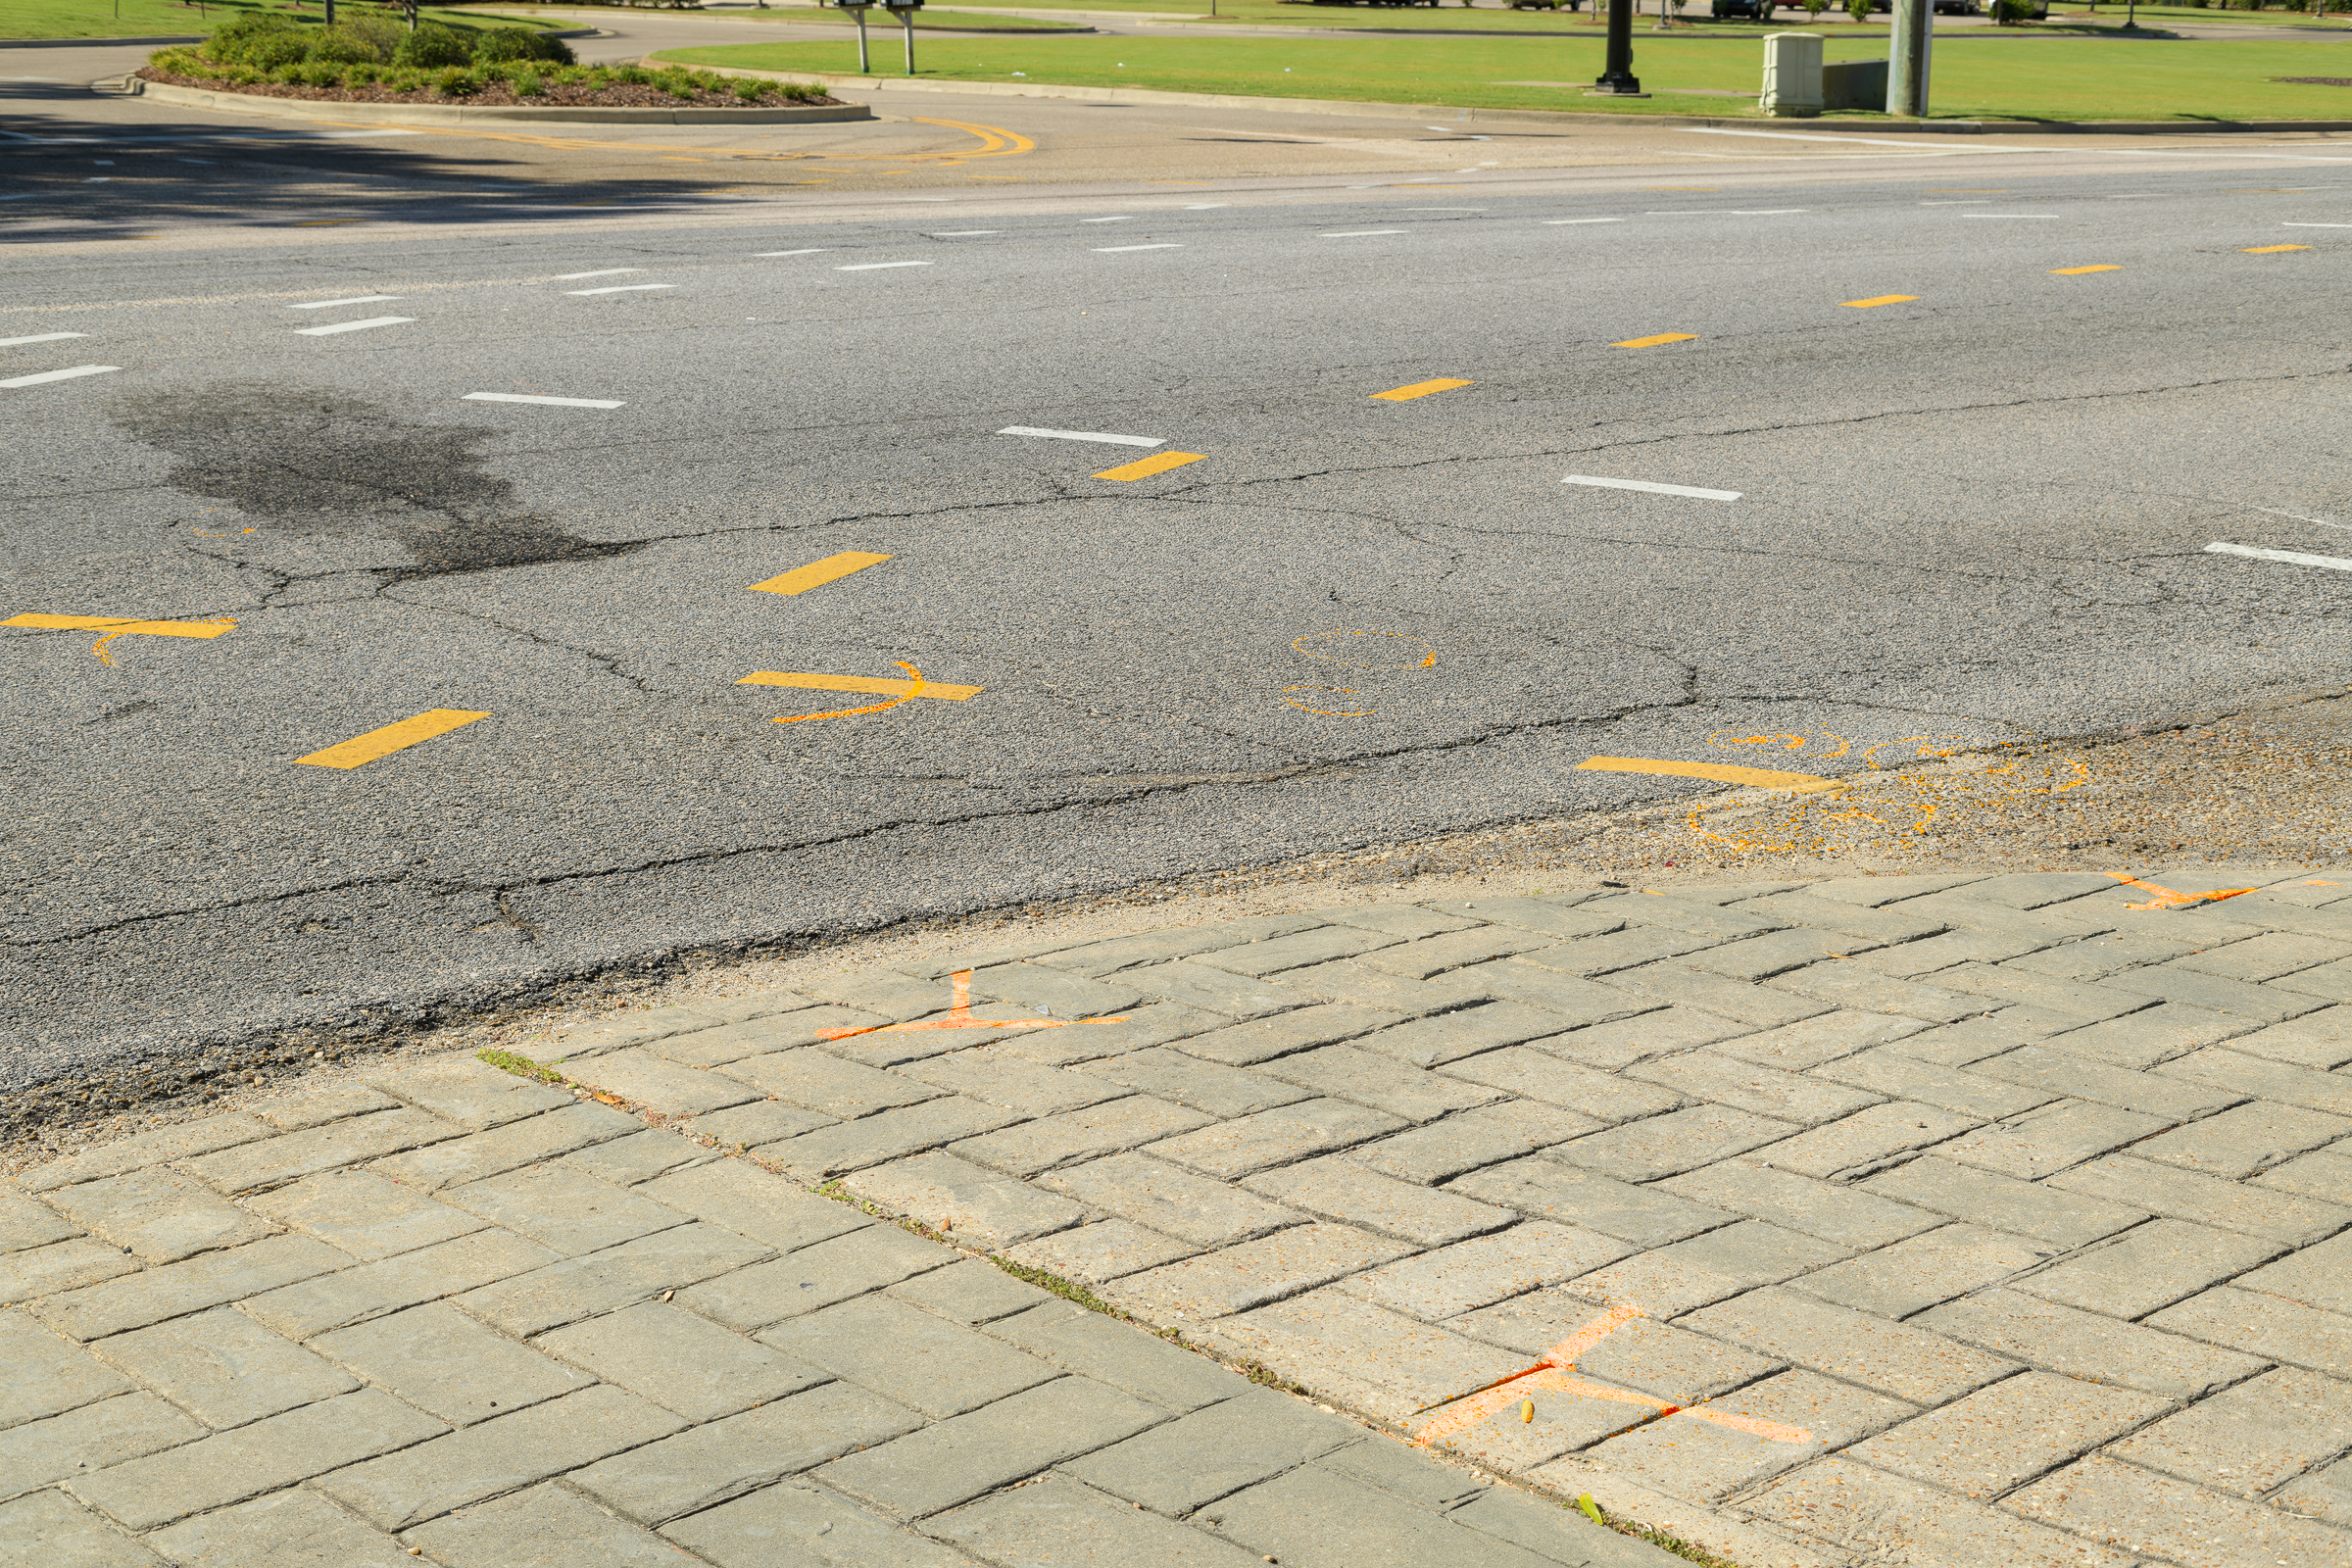
At times, when you get to an accident site, the paint marks made by investigating officers have faded such that they don’t readily show up in photographs. [Click on image to enlarge, then click back arrow to return.]
Police Paint Marks as Found. (ZEISS Milvus 50mm macro on Nikon D850.)
While these can still be documented and measured, it would be helpful to show them more distinctly in your photographs.
You can easily enhance paint marks in Photoshop using a mask on a Hue Saturation layer:
-1- Make a loose selection around the marks with the lasso tool.
-2- Feather the selection.
-3- Select the paint color using the Targeted Adjustment Tool.
-4- Increase saturation until the paint marks are distinct. In this case, I increased the saturation of the red channel to 100%. [Click on image to enlarge, then click back arrow to return.]
Police Paint Marks – Enhanced. (ZEISS Milvus 50mm macro on Nikon D850.)
To ensure I didn’t enhance the yellow lane stripes, I added them to the mask by simply painting out areas I didn’t want enhanced using a feathered black brush.
I only shoot raw images, so I can’t save over my original image. When making adjustments with layers, like these localized saturation enhancements, I save the image with all its layers and masks as a native Photoshop PSD file. That way, I always have the original image I made, and can document that I have only enhanced, and not altered, the photograph.
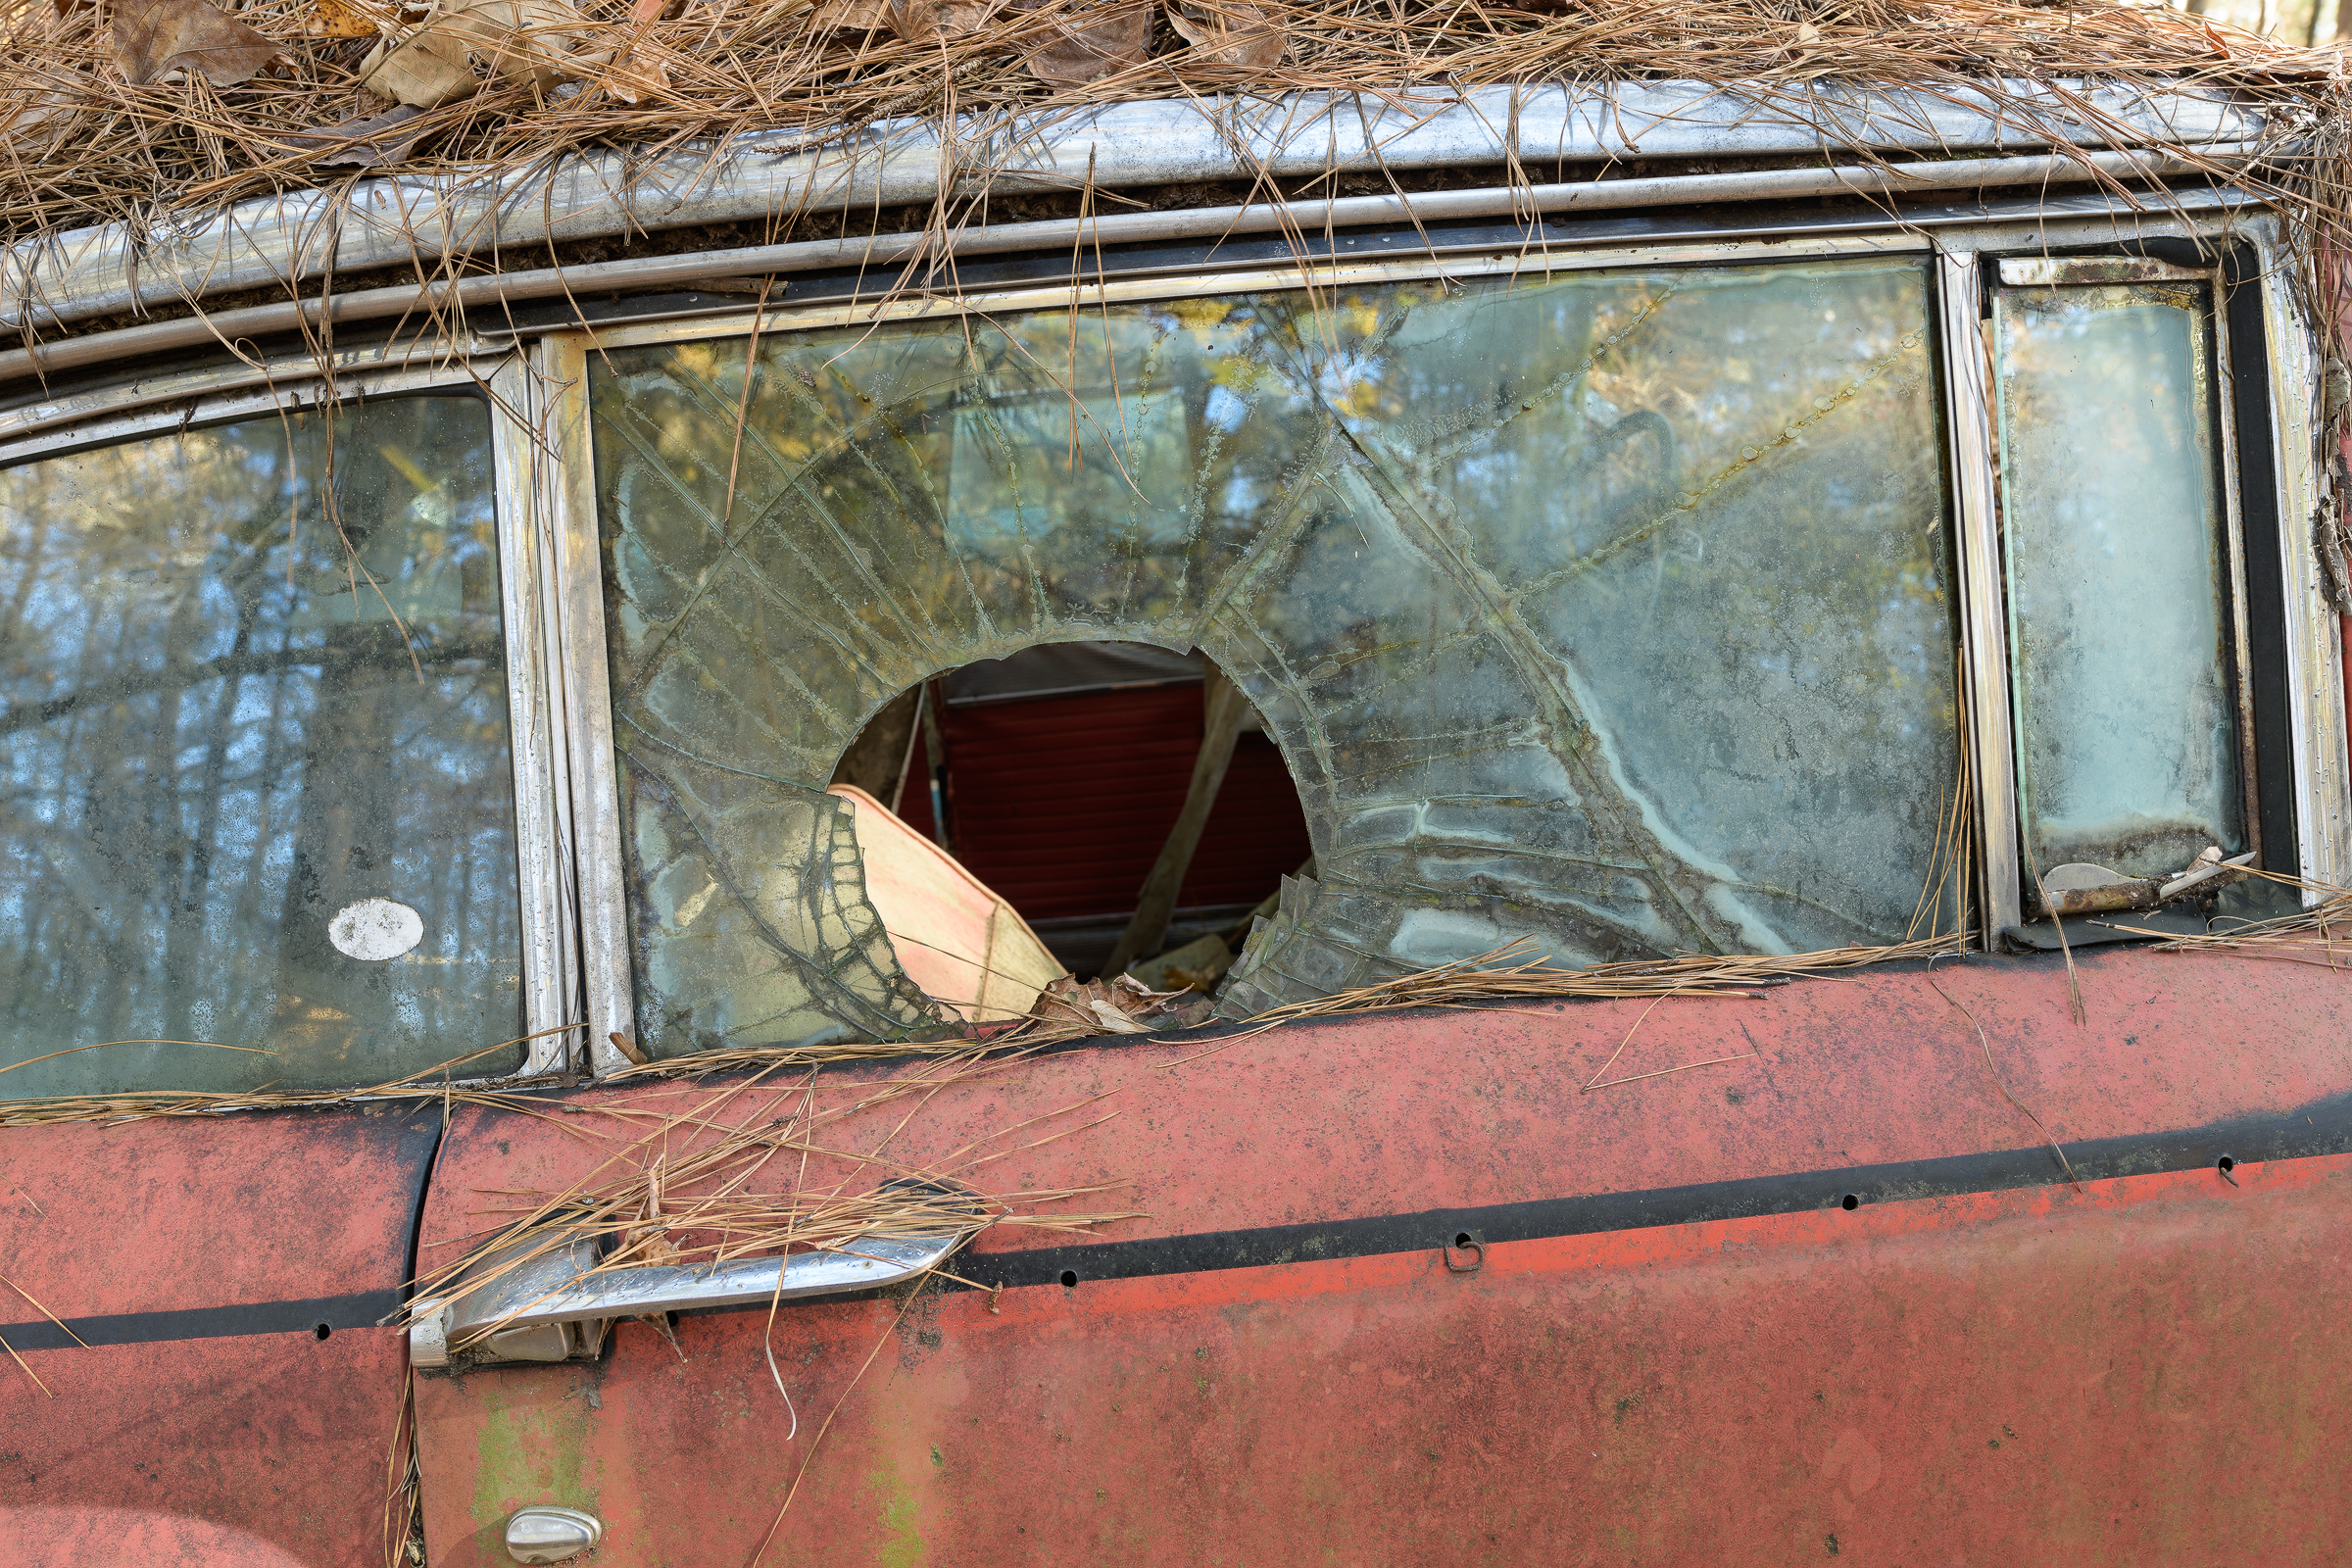
Before tempered or other safety glass was developed, older plate glass-based windows were used on most vehicles. One of the downsides was the dangerous ways the old windows would break during a collision. Instead of shattering into pieces, holes or pieces would break out, resulting in a “glass necklace”, which was hardly a fashion accessory, and could often be lethal.
Here’s an example of a hole punched through the side glass window of an old car in the former junkyard of Old Car City USA (Old Car City USA): (Click to enlarge image, then back arrow to return to post.)No Tempered Glass, at Old Car City USA, White, GA. (ZEISS Milvus 25mm f/1.4 on Nikon D850.)Another reason to be grateful for modern safety standards.
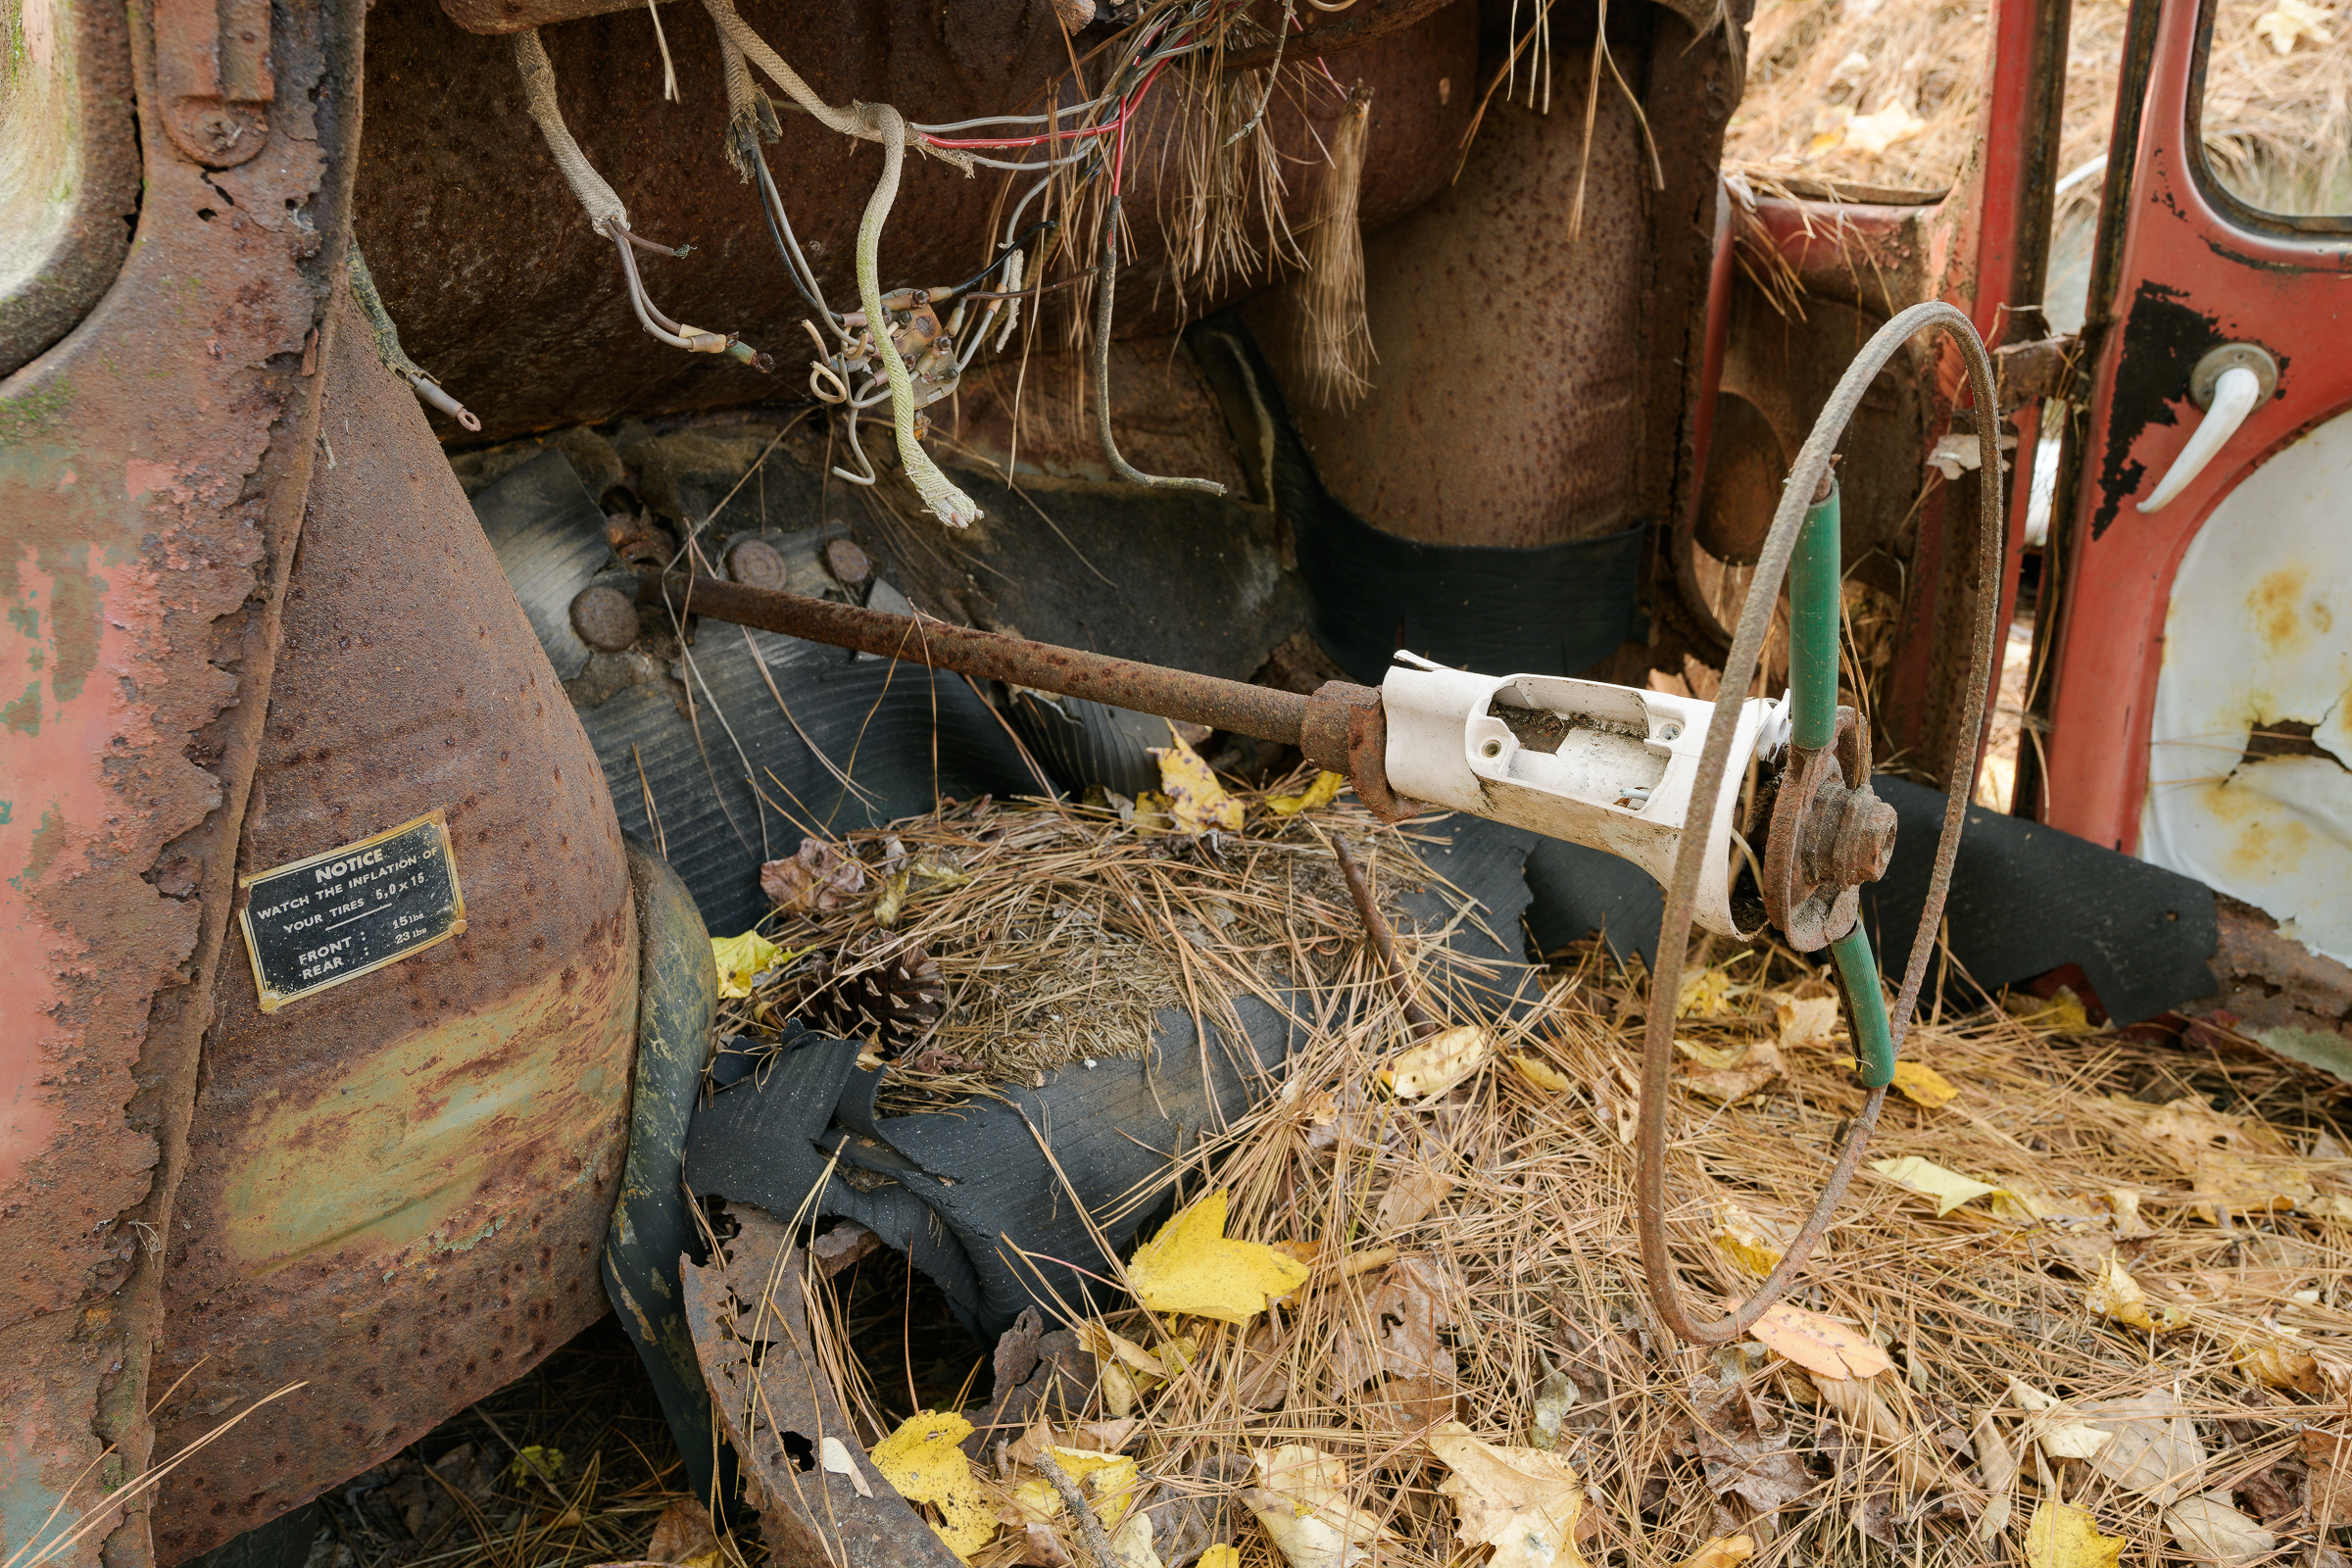
In November 2017, I returned to a photographer’s and car enthusiast’s paradise: Old Car City USA in White, GA: Old Car City USA. It’s a sprawling former junkyard through trees and pine needles with about 4,000 cars and nearly seven miles of trails. They no longer sell parts there, but it now exists as an outdoor museum to old, discarded, sometimes wrecked cars, trucks, and buses. As an automotive engineer who has spent more than 35 years dealing with tires and automotive safety systems, Old Car City USA is a gold mine for experiencing the history of automobiles. As a photographer, Old Car City USA is a never-ending source of vehicle, abstract, and macro detail shots. The ever-changing light through the trees keeps the photography interesting and challenging throughout the day.
We all know about steering columns that collapse and move so they don’t impale the driver. But that wasn’t always the case. Here’s an example of a steering wheel and steering column that would have pinned the driver in position before impaling him or her as the column was driven rearward in a frontal collision. (Click on image to enlarge, then on back arrow to return to post.)Steering Column Spear at Old Car City USA, White, GA. (ZEISS Milvus 25mm f/1.4 on Nikon D850.)Thank goodness for the current designs!
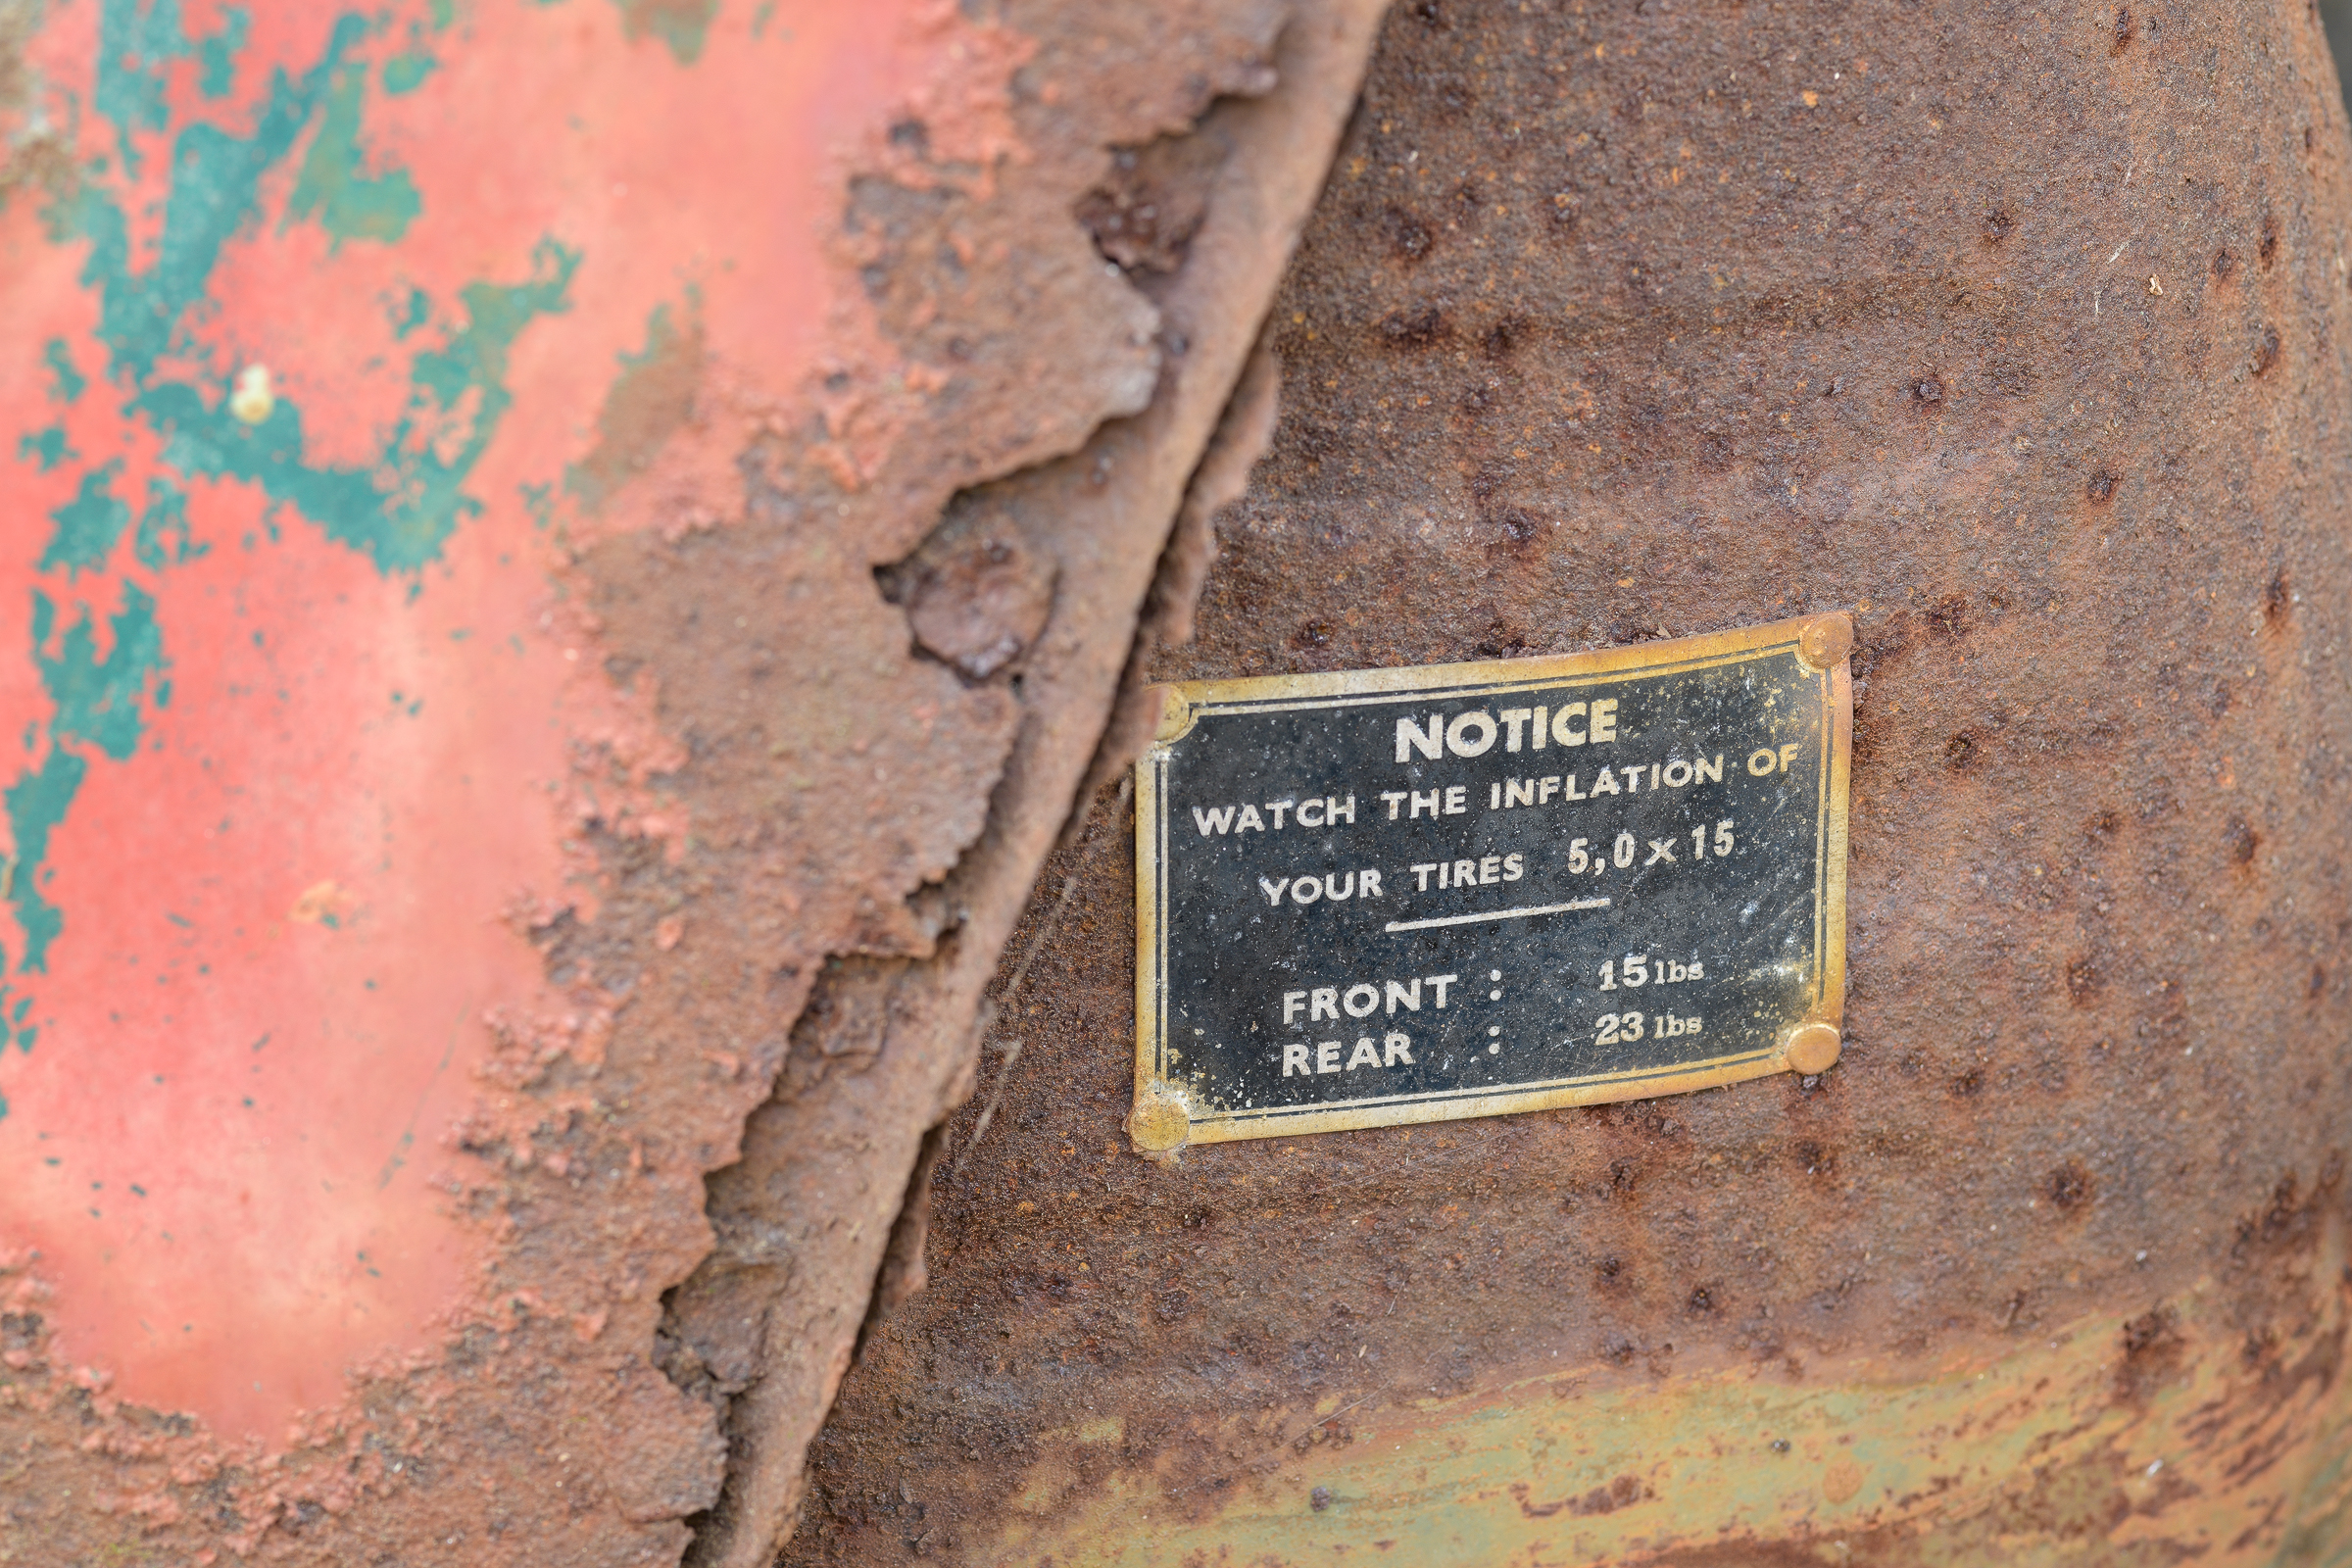
This photo also shows a tire inflation plate for 5.0×15 tires showing recommended air pressures of 15 psi front and 23 psi rear. Even for those old bias tires, those pressures seem unbelievably low compared to what we see today. Here is that plate more closely. (Click to enlarge, back arrow to return.)Tire Pressure Plate at Old Car City USA. (ZEISS Milvus 100mm f/2 macro on Nikon D850.)
When I travel for a work or a personal photography trip, I either drive my Toyota 4Runner TRD Pro or rent an SUV so I can easily access my gear in the field. Years ago, my friend and mentor Bruce Dale suggested a cheap, easy way to keep prying eyes from cargo and luggage in the back. It’s a black flat bed sheet. I bought two of them at Walmart; one for my 4Runner and one to keep packed in my travel bag. They’ve become the black sheets of my family. (Sorry, couldn’t resist.) (Click to enlarge, then back arrow to return.)Cover your gear.If I’m going to be parking any distance from the inspection site, I try not to keep valuables in my vehicle, if possible. But I’ll still cover even extra jackets, water, snacks, or empty camera bags or luggage. I find the black sheet most useful when going to and from my shooting or working location, at airports, restaurants, and hotels, and when stopping at any store or gas station. It’s cheap, simple deterrence. I even use it day-to-day when I’m at home.
That is the question you’ll have to answer before making each vehicle, product, or component photograph.
To minimize noise and maximize dynamic range for any image, use the camera’s minimum ISO (it’s ISO 64 on my Nikon D850). For most tire, product, and vehicle component photos, you’ll also want to optimize depth of field (DOF). That requires stopping down the aperture to somewhere between f/11 and f/16. (Stopping down to f/22 or smaller will give you more DOF, but may result in softening due to diffraction.)
Exposure consists of aperture, shutter speed, and ISO. With minimum ISO and a small aperture already chosen, that leaves only shutter speed. The shutter speed will depend on how much light is available. To get enough light for a proper exposure, you can use all ambient light, flash only, or a combination of ambient and flash (often called fill flash).
Flash allows you to add the light you need to get a proper exposure, while maintaining a reasonable shutter speed. This is particularly important if you are handholding the camera. Way too many photographs are blurry because the shutter speed was too low. This can be true even with the image stabilization built into many cameras or lenses. Image stabilization helps some, but many times, component or even vehicle photos have to be made where light is insufficient for handholding.
For tires and other vehicle components, getting enough light to handhold a camera usually requires the use of flash. The alternative is putting the camera on a tripod to keep it steady during a long shutter speed.
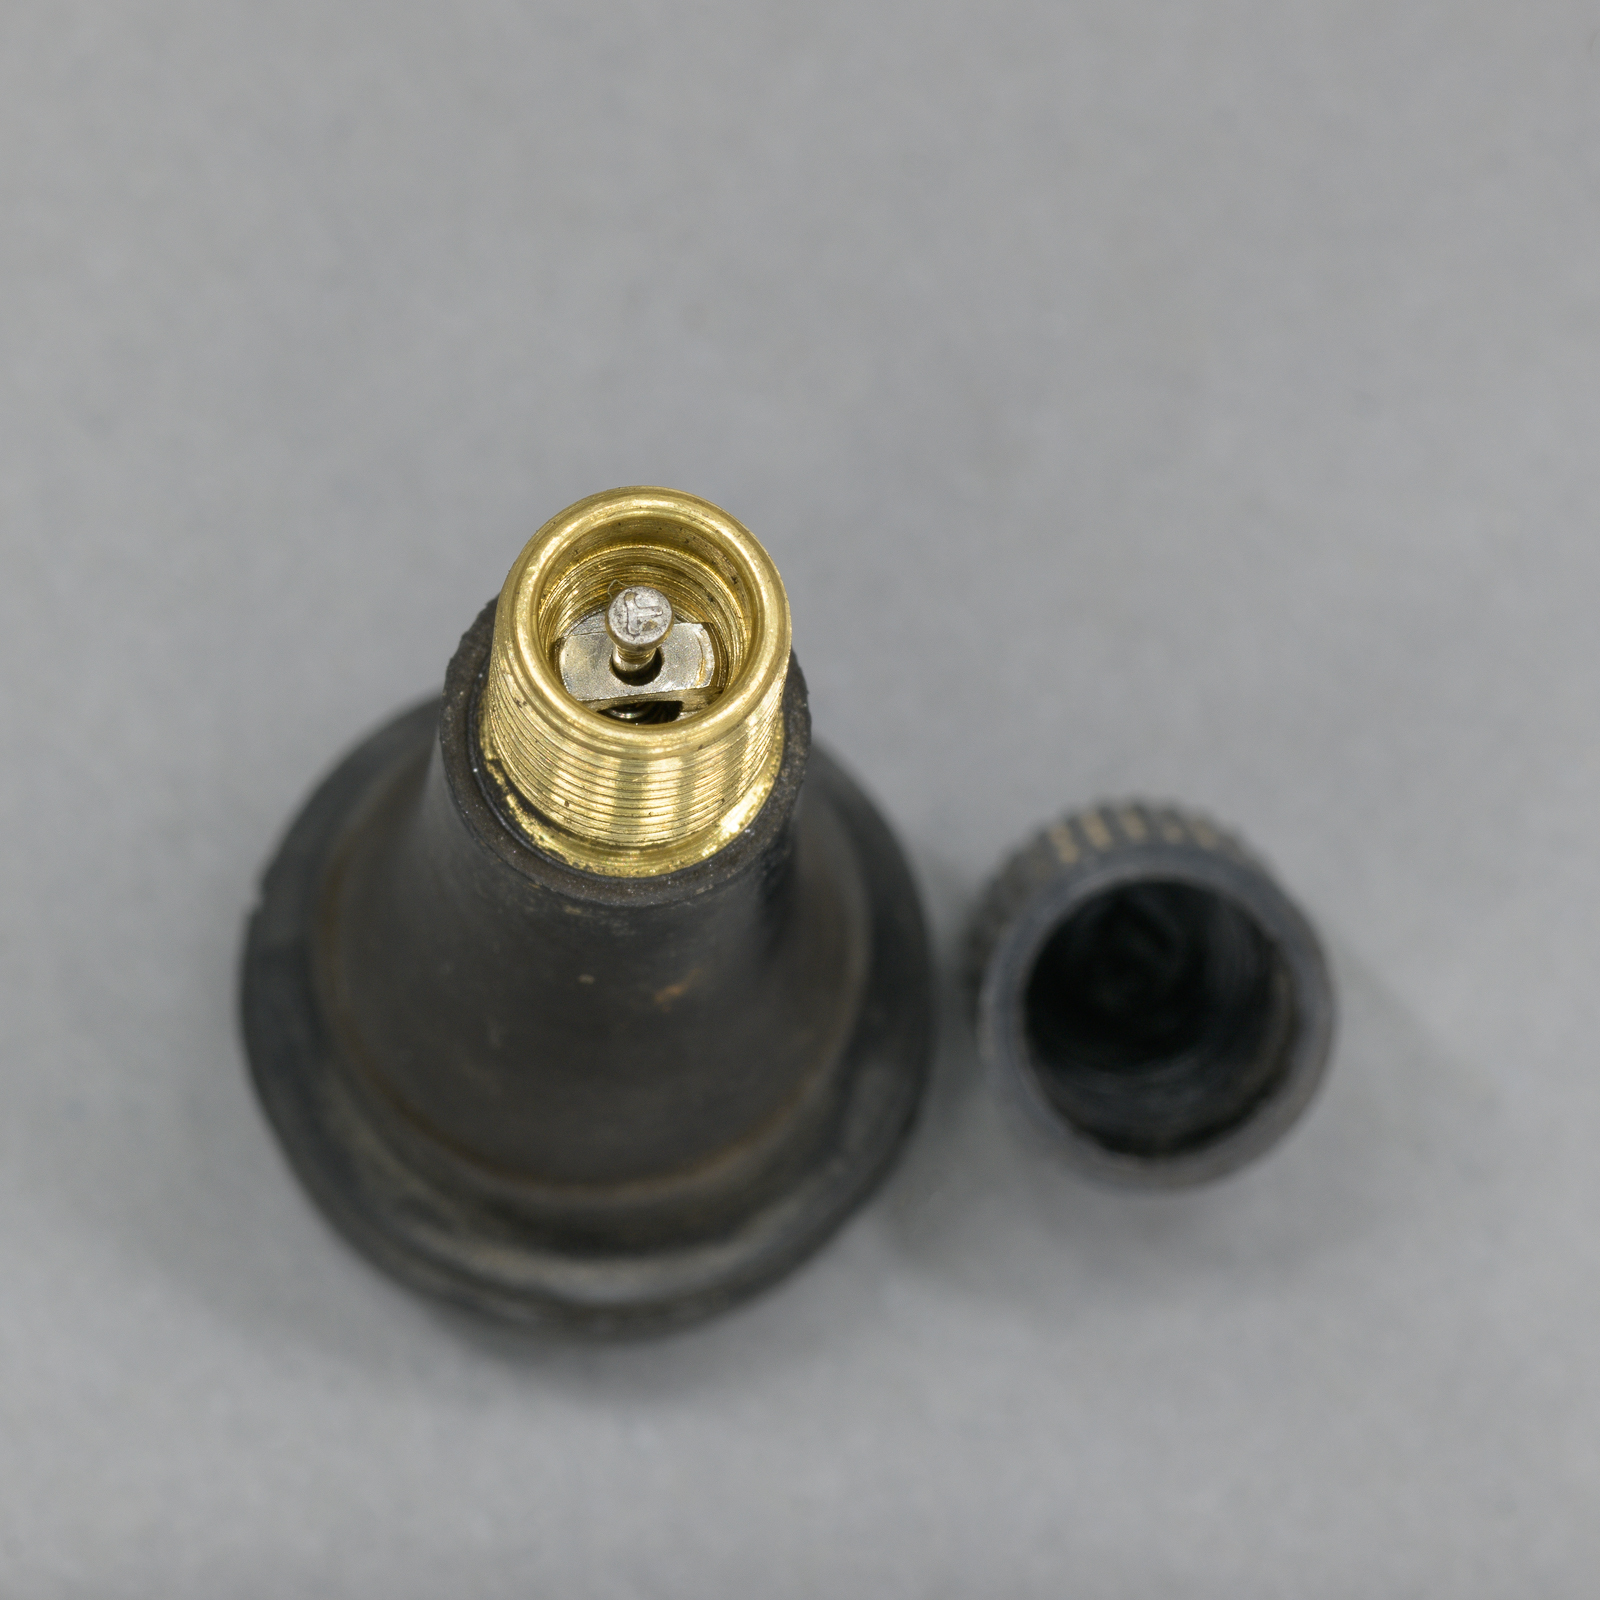
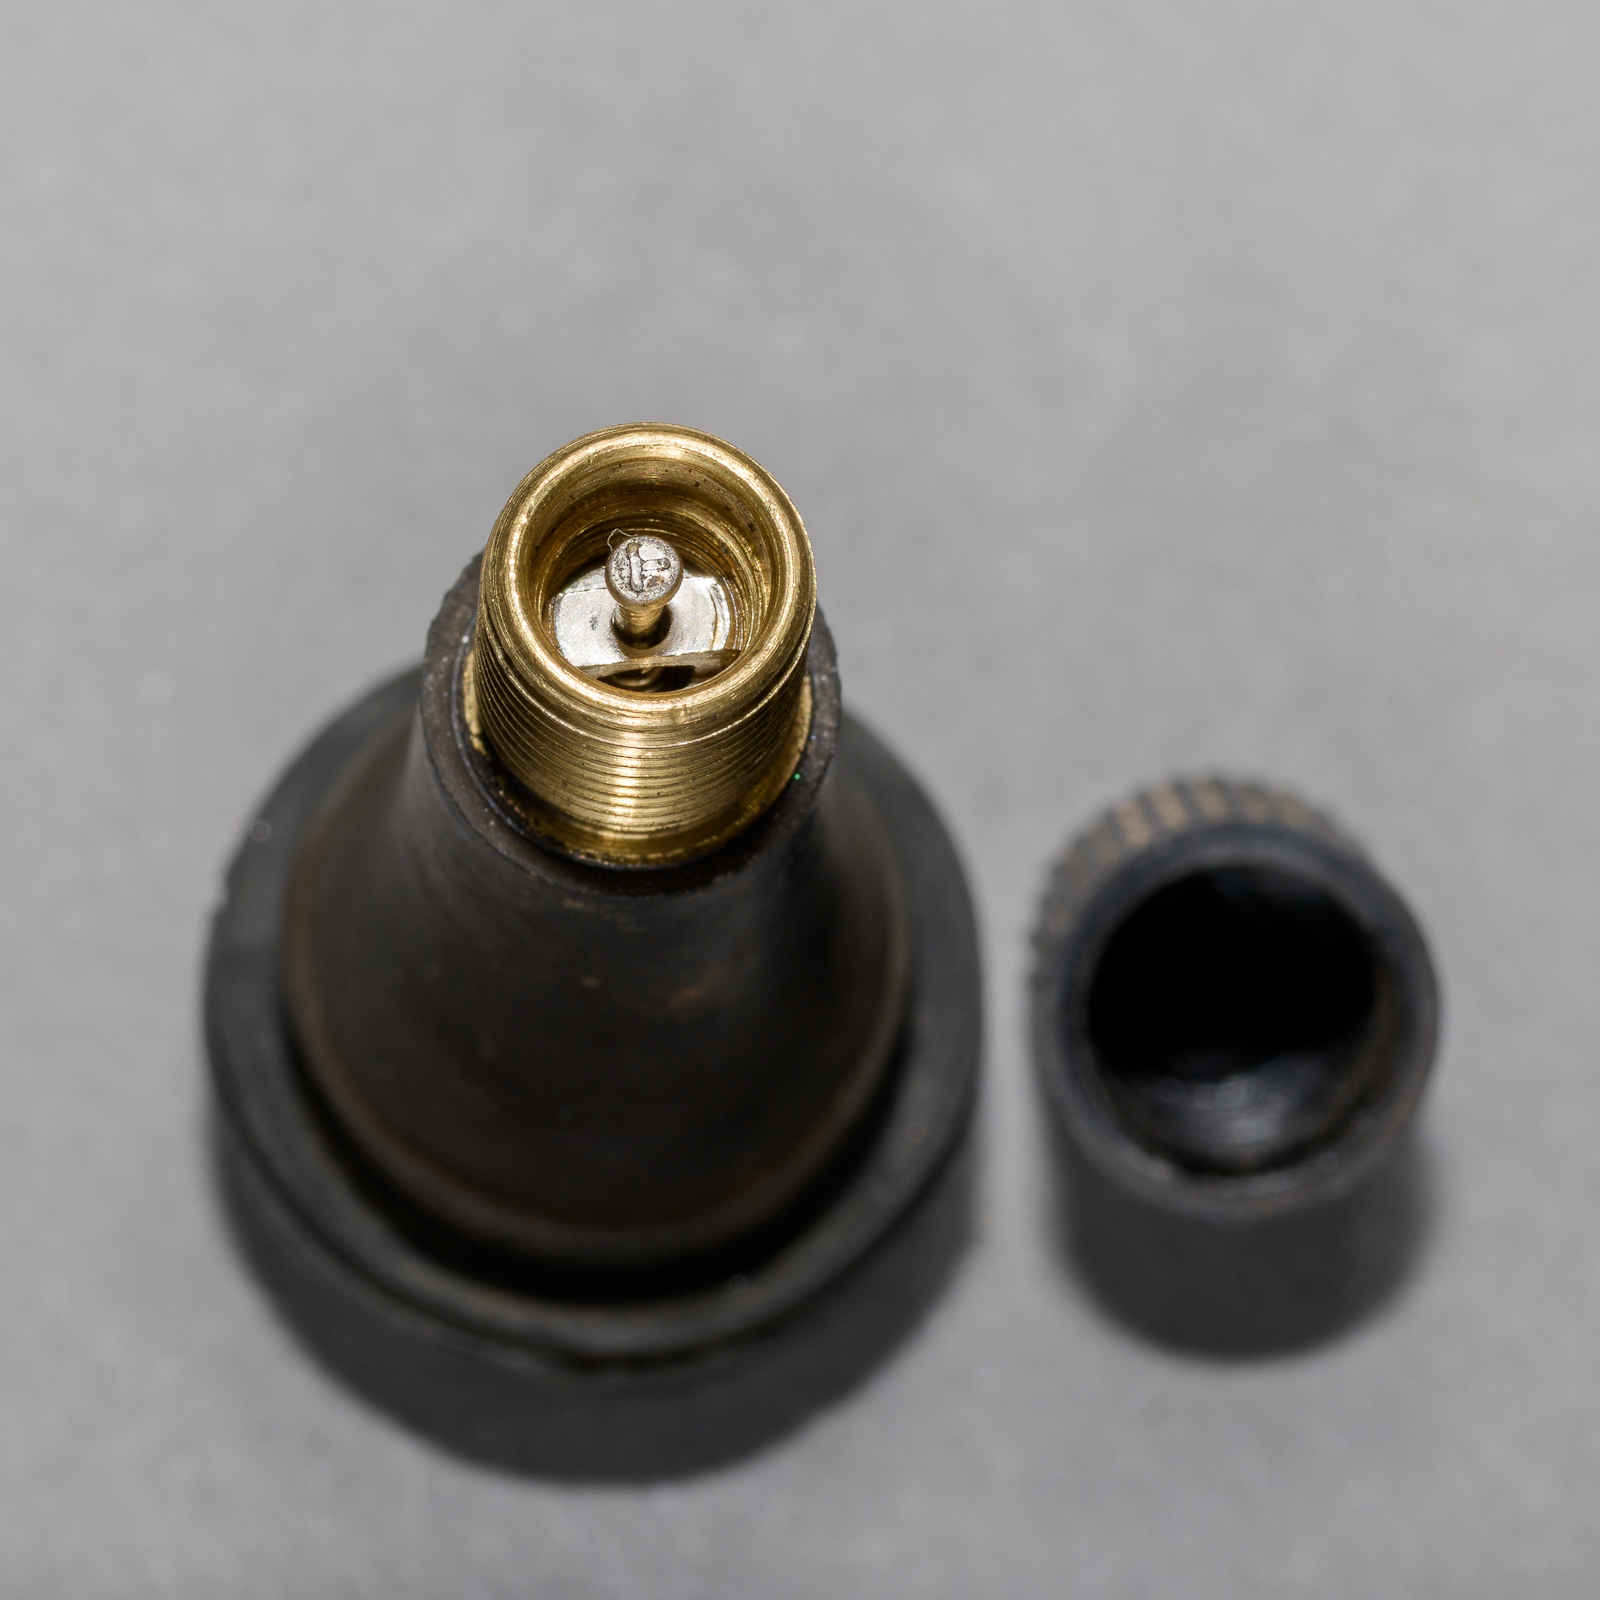
You can get the same overall exposure using a long shutter speed with ambient light only, using a combination of ambient light and flash, or using 100 percent flash. But the resulting image will look different. (Click on image to enlarge, then click on back arrow to return.)Valve Stem Ambient Light (No Flash). Exposure: f/16, 2.5 sec, ISO 64. (ZEISS 100 mm f/2 macro lens on Nikon D850.)Valve Stem with Flash. Exposure: f/16, 1/60 sec, ISO 64. (ZEISS 100 mm f/2 macro lens on Nikon D850.)In my studio lab, I have so many bright white LED shop lights some have said it looks like an operating room. Even with all that apparent light, I still either have to use flash or a very long shutter speed to properly expose an image.
Above are two images of a rubber valve stem. They were both made using my incredibly sharp ZEISS Milvus 100mm macro lens mounted on my Nikon D850, which was mounted on my rolling studio stand. I focused the ZEISS manual focus lens using Live View at 100 percent.
Both images were made at ISO 64 at an aperture of f/16. The image without the flash required a shutter speed of 2.5 seconds, which was obviously not handholdable. With an image completely illuminated by flash, the shutter speed doesn’t contribute to the exposure. (Shutter speed does contribute if the image is a combination of ambient and flash.) In the flash image below, the shutter speed was 1/60 second.
Both images are properly exposed, but they look very different. The image with flash has more contrast, which gives more of a three-dimensional appearance, where the ambient (no flash) image has more even light. When sharp and properly exposed, there’s no right or wrong to flash versus ambient light, but be aware there can be a profound difference between them.
In March 2016, friends and colleagues Wes Grimes (http://cea-az.com/), Greg Wilcoxson (http://www.wilcoxsonconsulting-llc.com/), and I conducted a series of heavy truck acceleration tests using tractors with automated manual transmissions (AMTs) in full auto mode. In auto mode, the transmission chose all shift points without input from the driver.
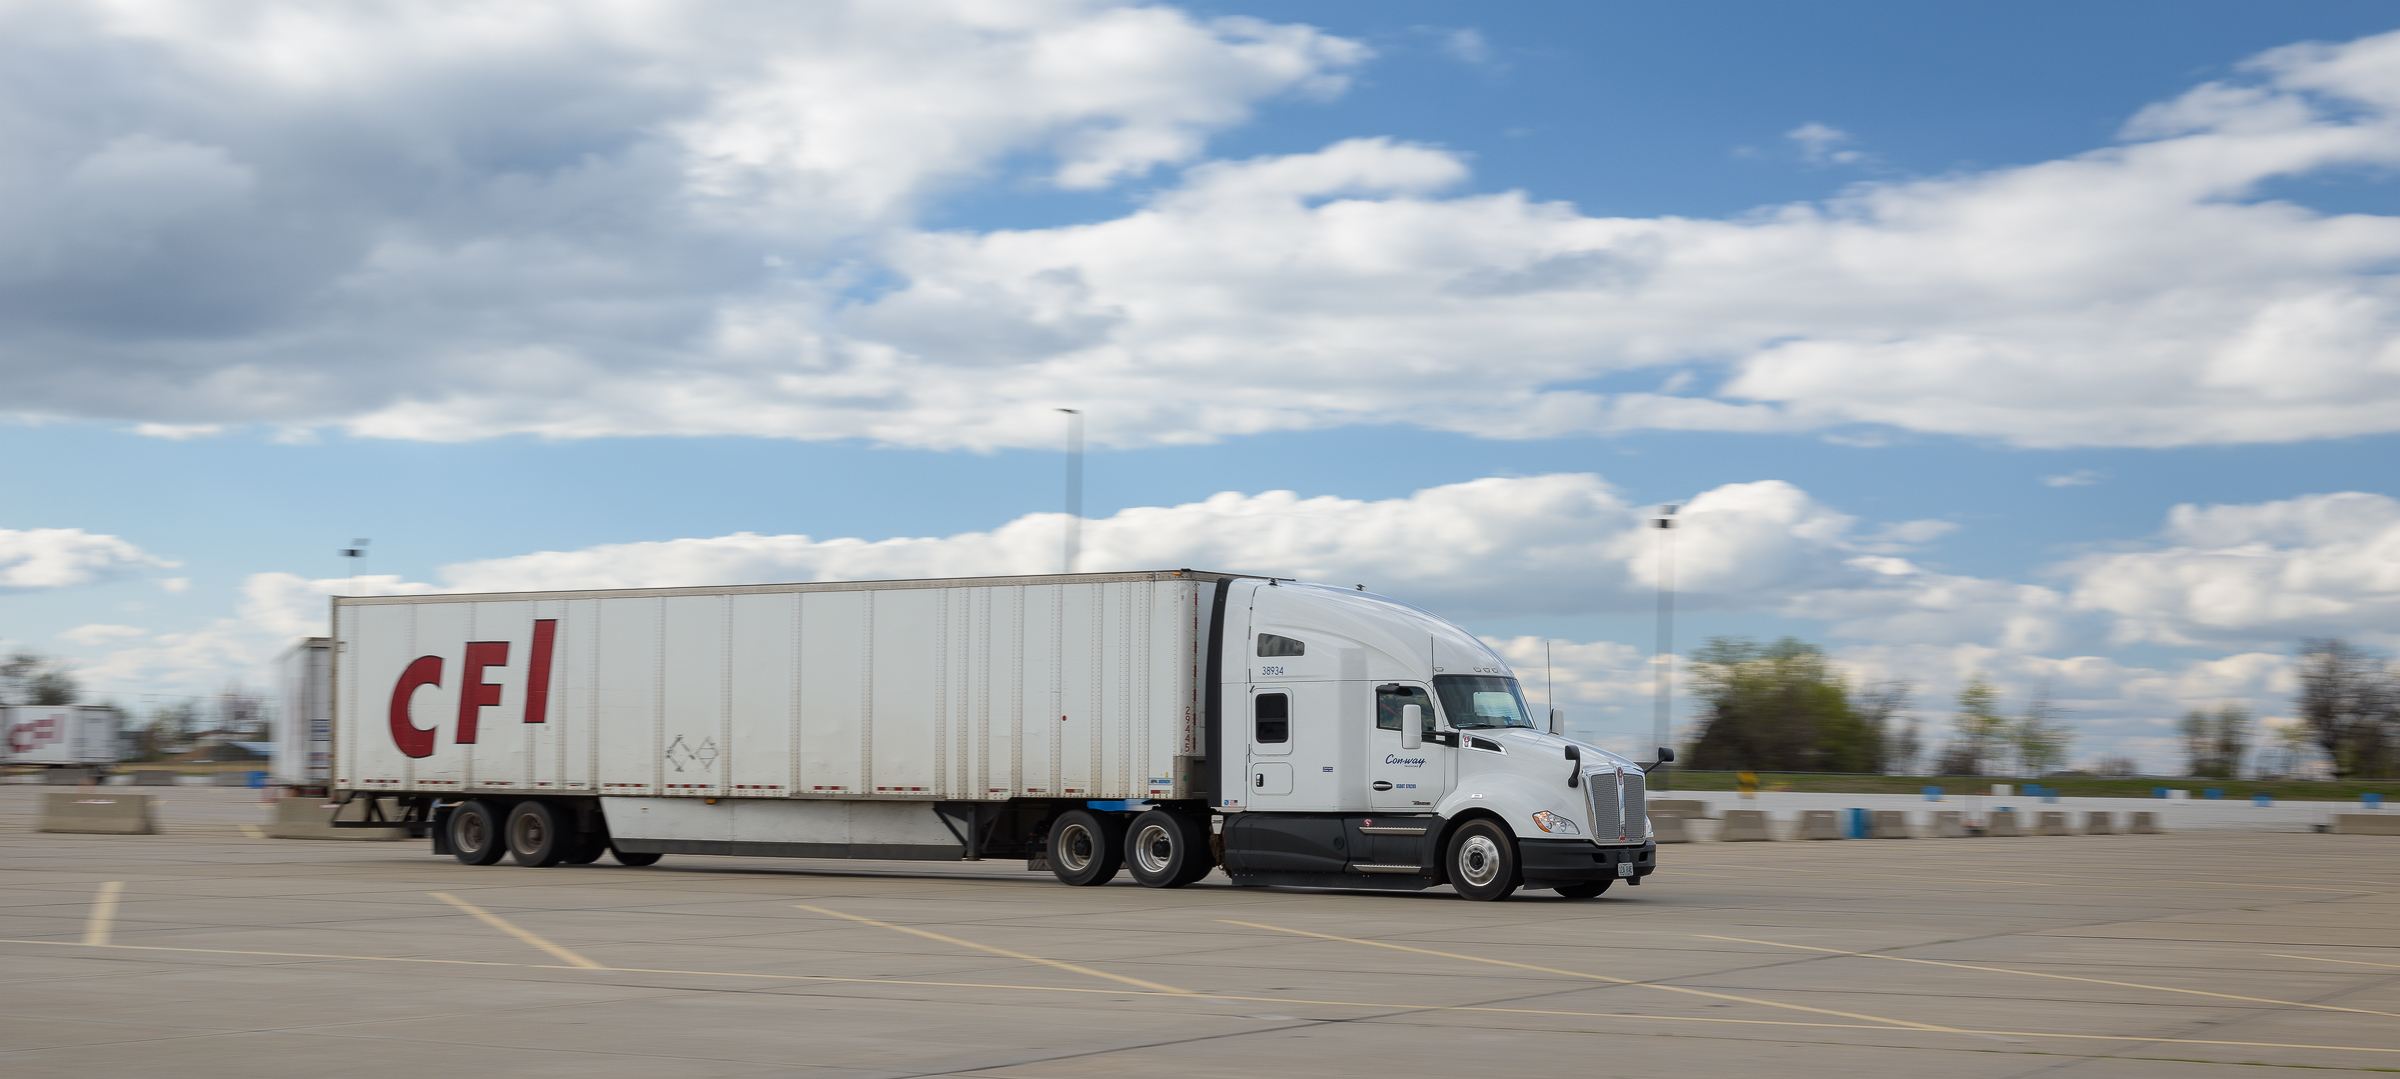
These were straight-line acceleration tests from a stop using two different truck tractors and two different test drivers. For each truck and driver combination, we ran tests with empty, partially loaded, and fully loaded van semitrailers. The drivers were asked to do half of the runs at what they felt was a “normal” acceleration. The other half of the test runs were at full throttle acceleration. There was a slight slope along the 300-foot test distance, so runs were made in both upslope and downslope directions. Our tests showed the slope, load, and throttle position all influenced when the transmission chose to shift. (Click on image to enlarge, then click on back arrow to return.)Panning during Kenworth Acceleration Test (ZEISS 50 mm f/2 macro lens on Nikon D810.)Technical papers describing the results of both test series have now completed the peer review process and have been published by SAE. We presented these papers at SAE’s World Congress Experience WCX 17 in Detroit on Wednesday, April 5, 2017. SAE has these paper available through these links:
Special thanks to Contract Freighters, Inc. (CFI) and XPO Logistics for the generous use of their tractors, trailers, loads, scales, facilities, and test drivers at their facility in Joplin, MO.
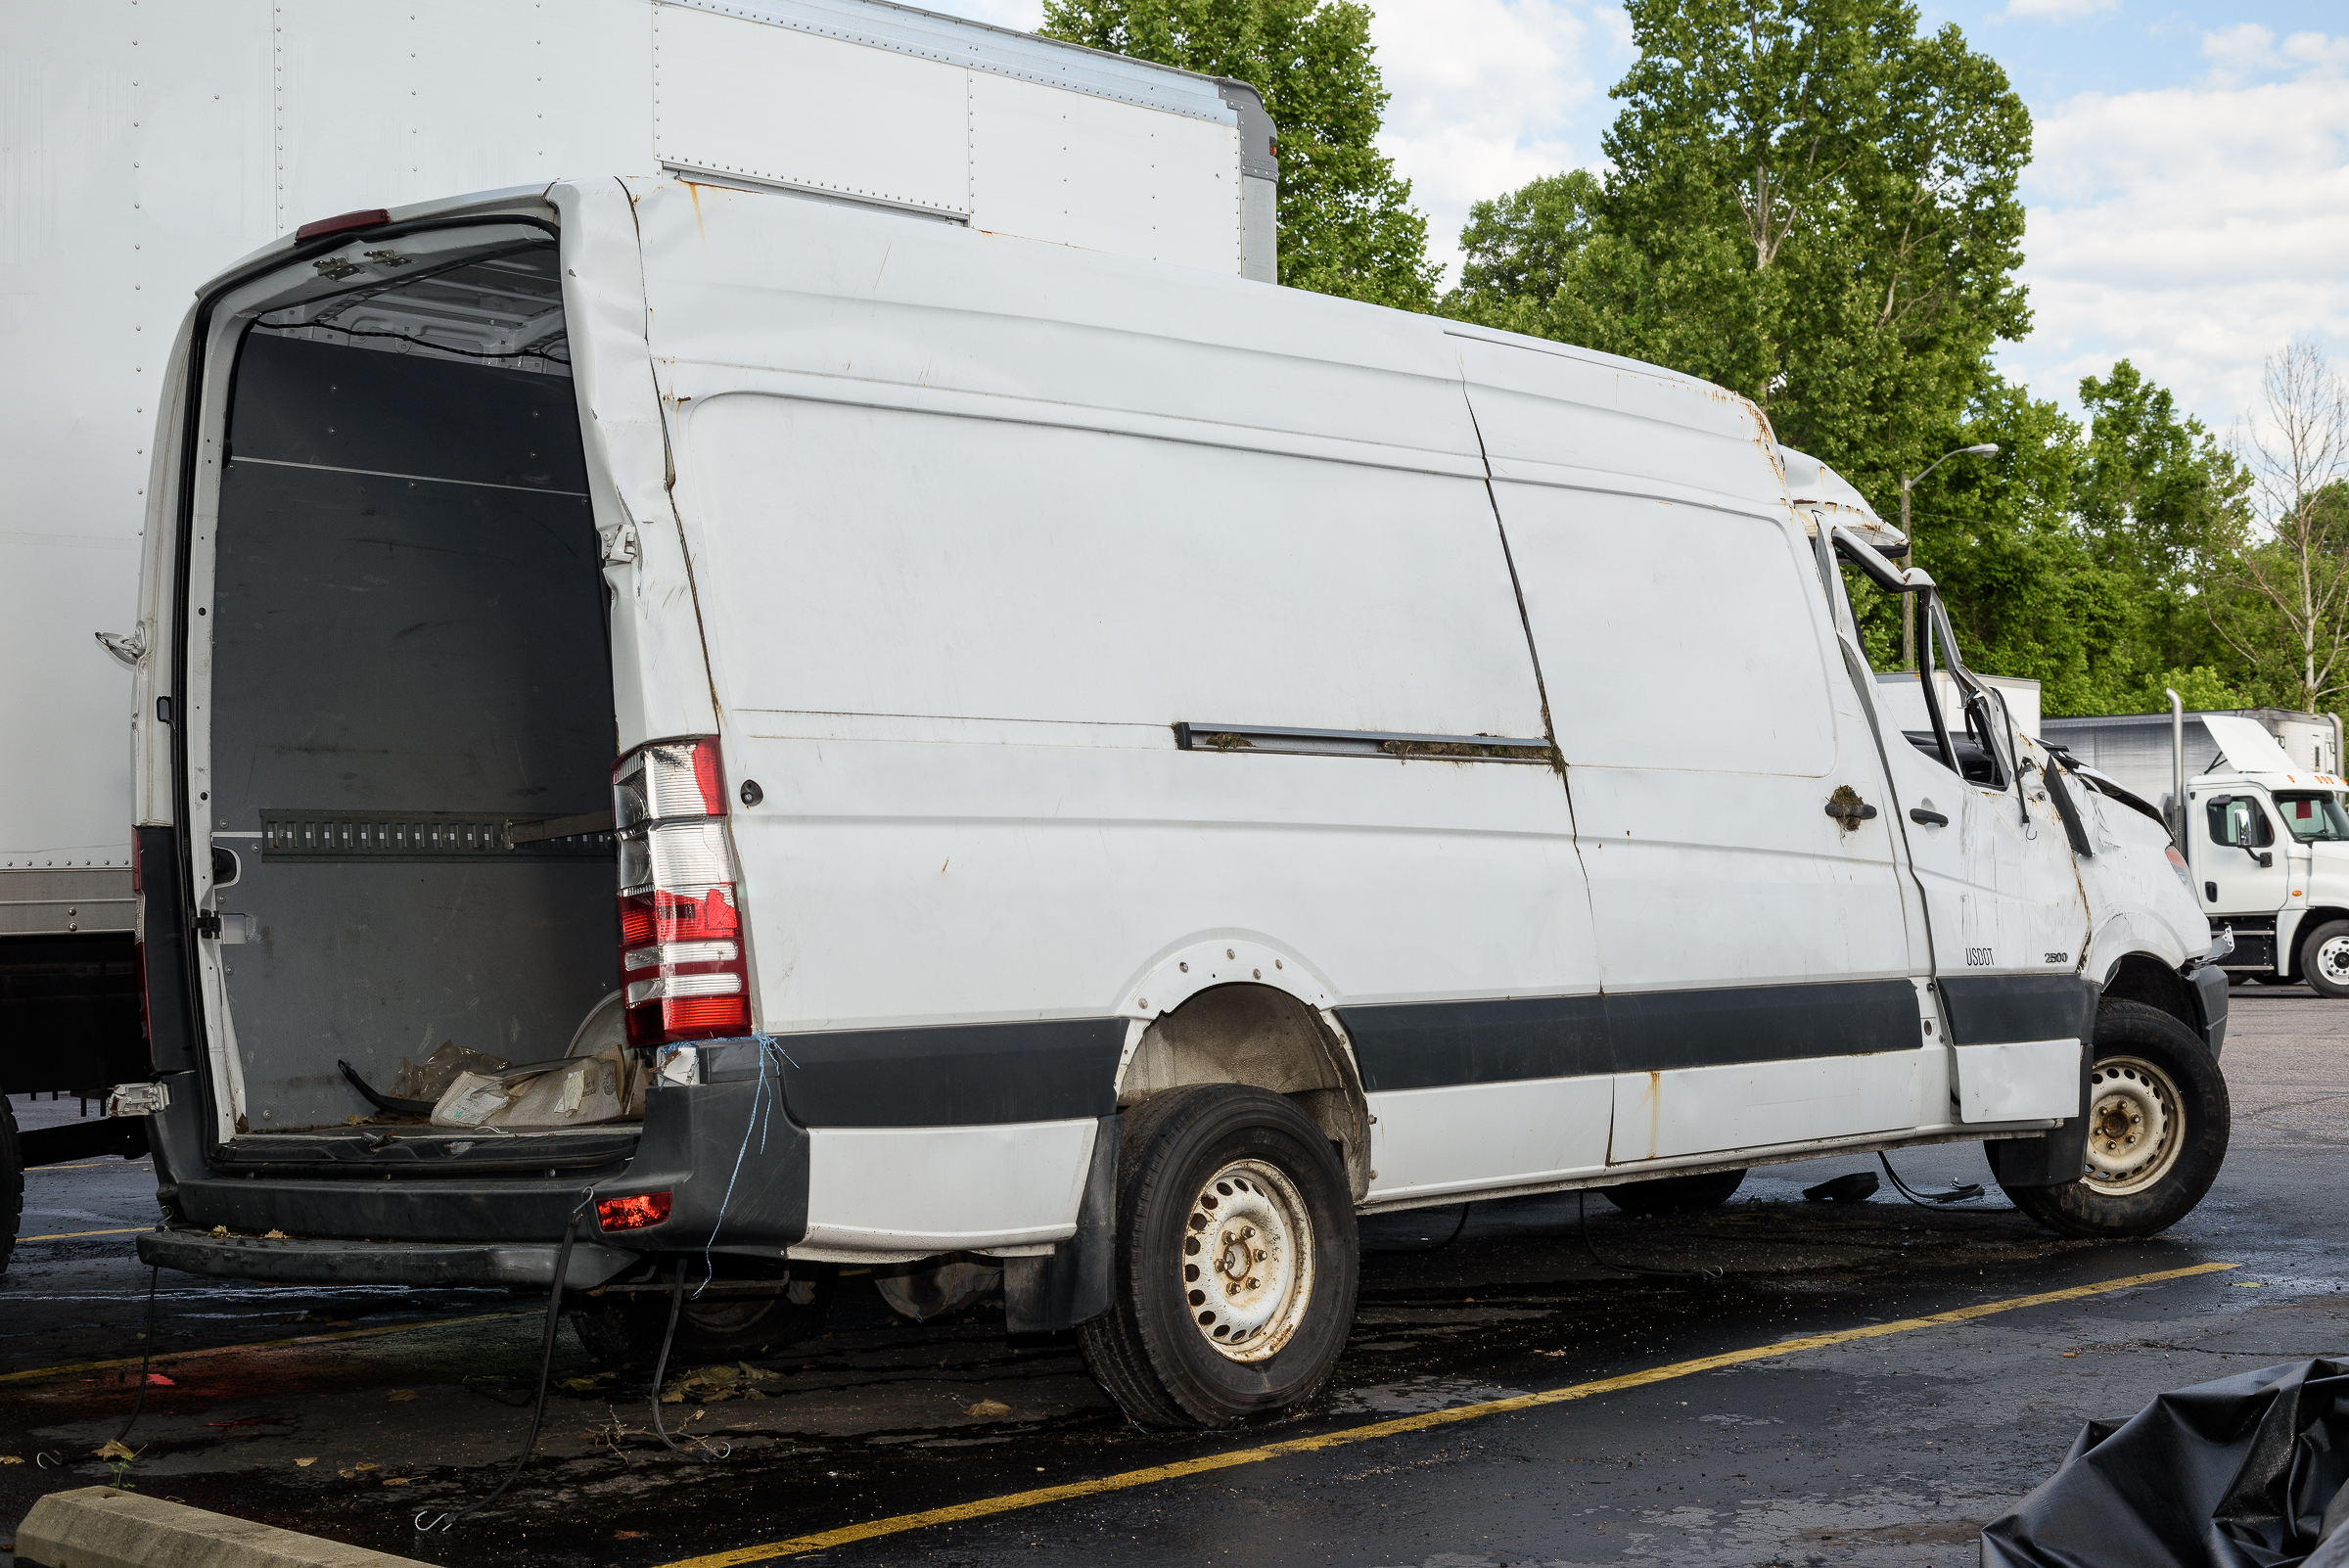
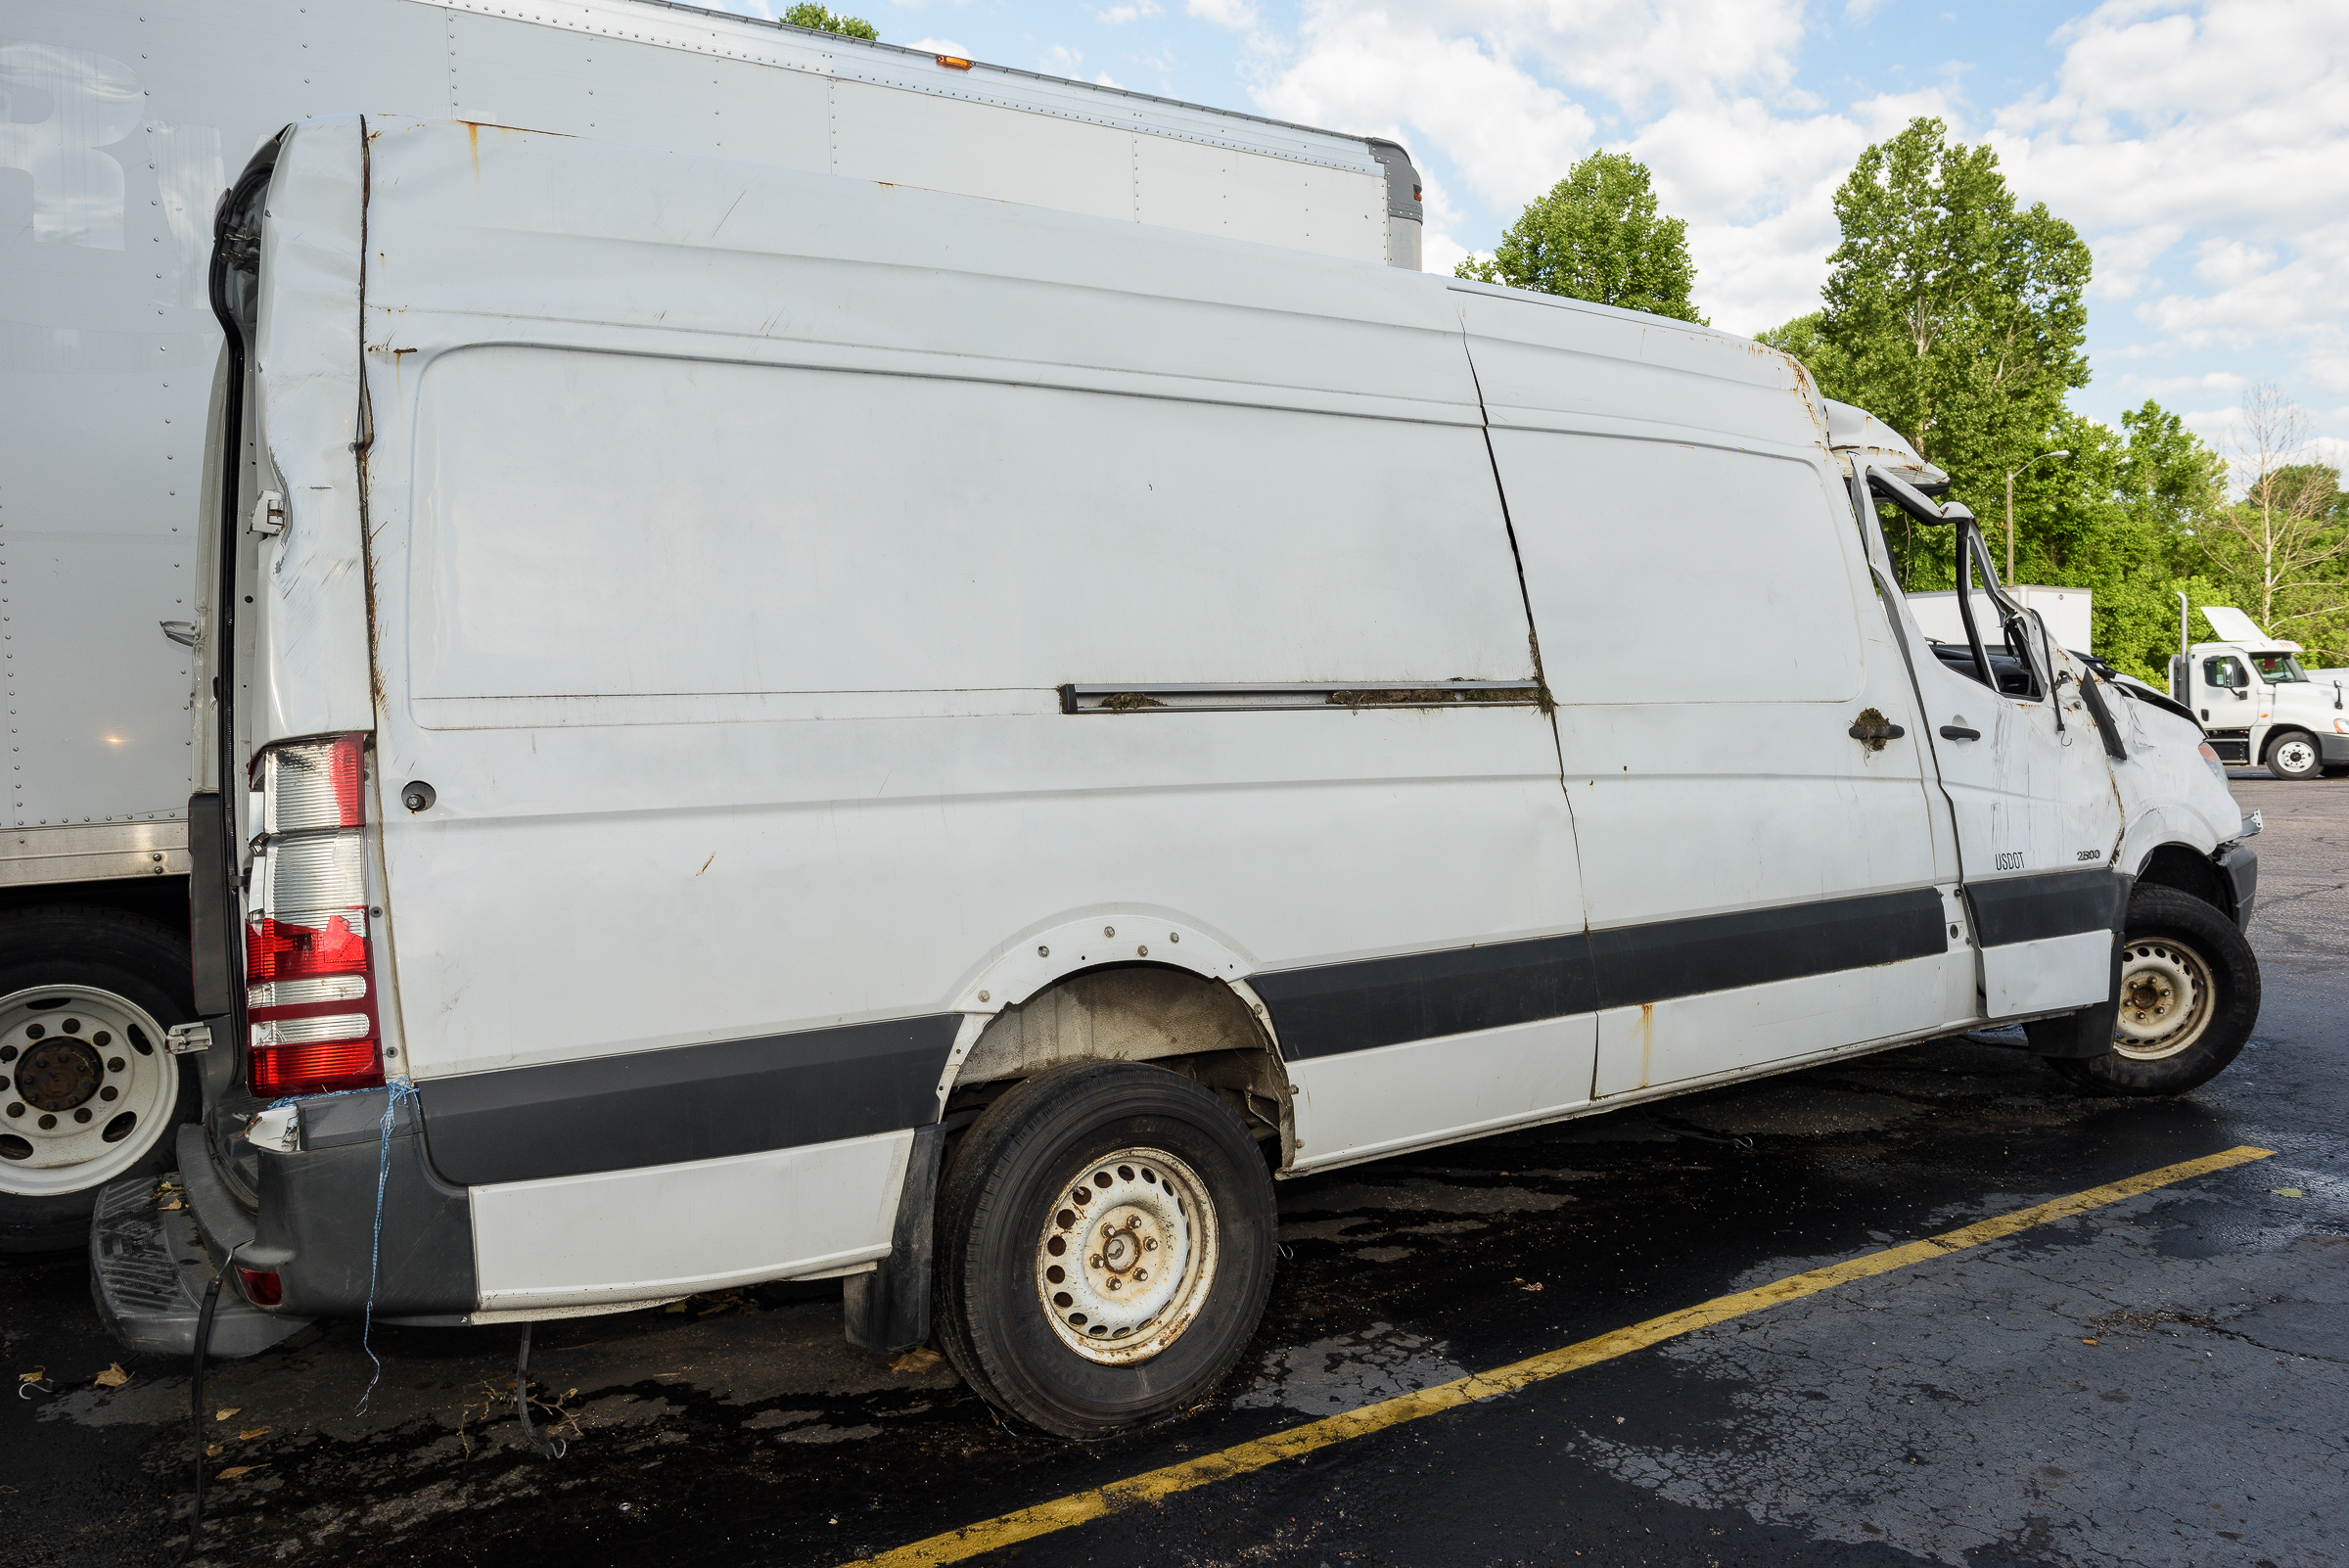
Often, a vehicle we need to photograph will be crammed in between other vehicles or in a small garage or storage area. I’ve encountered the same problem when trying to photograph a whole tire in a small conference room. A wide angle lens then becomes necessary to capture an overall photo in a single frame. But doing so will inevitably cause the vehicle or tire to appear distorted. (Click on image to enlarge, then click on back arrow to return.)Van with Normal 50 mm Lens. (ZEISS 50 mm f/2 macro lens on Nikon D810.)Van with Wide Angle Lens. (ZEISS 25 mm f/2 lens on Nikon D810.)These two images show the same van, but the top one was made with a ZEISS 50 mm lens, while the bottom one was with a ZEISS 25 mm lens. To fill the frame with the van, I made the photo with the 25 mm lens much closer to the van than with the 50 mm lens. The photograph made with the 25 mm lens looks like the van was the long wheelbase version while the 50 mm photo looks like it had the short wheelbase. This closer distance to the subject caused the wide angle lens to stretch the appearance of the van.
The best solution is to try to capture as much of the subject as possible with a lens as close to a 50 mm “normal” lens as possible. This might entail getting a higher vantage point, or shooting between obstacles. When that’s not possible, take the wide angle shot, then normal lens shots of parts of your subject.
Other effects of using wide, telephoto, and normal focal lengths for vehicles, accident sites, and for tires will be discussed in future posts.